If you want your Ring Video Doorbell 3 to work without the hassle of constantly charging it, hardwiring it is the best solution. Hardwiring keeps your doorbell powered all the time, so you never miss a visitor or important alert.
But how exactly do you hardwire your Ring Video Doorbell 3 safely and correctly? In this guide, you’ll find simple, clear steps that anyone can follow. By the end, you’ll have a reliable, always-on doorbell that keeps your home secure without extra effort from you.
Let’s get started and make your Ring Video Doorbell 3 work smarter for you!
Tools And Materials Needed
Hardwiring your Ring Video Doorbell 3 requires specific tools and materials. Having everything ready ensures a smooth installation. It prevents delays and frustration during the process.
This list covers all the essentials. Each item plays a key role in safely connecting your doorbell to power.
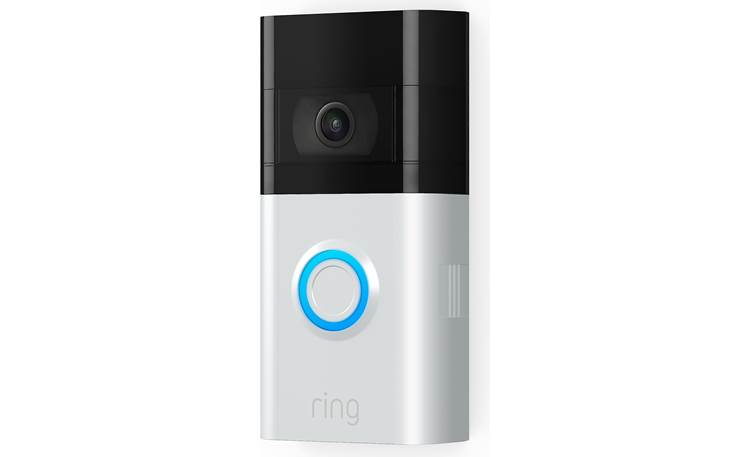
Ring Video Doorbell 3
The main device for this project. Make sure you have the Ring Video Doorbell 3 box ready before starting.
Power Drill
A power drill helps create holes for mounting the doorbell. It speeds up the installation and ensures strong placement.
Drill Bits
Use drill bits sized for your wall type and mounting screws. This prevents damage and ensures a tight fit.
Screwdriver
A screwdriver is necessary to tighten screws. Both Phillips and flat-head types may be needed.
Wire Stripper
Wire strippers remove insulation from the doorbell wires. They expose the bare wire needed for connection.
Voltage Tester
A voltage tester confirms if the power is off before you touch wires. It keeps you safe from electric shock.
Mounting Screws And Anchors
Use the screws and anchors supplied with the Ring doorbell. They hold the device firmly on your wall.
Electrical Tape
Electrical tape secures wire connections. It prevents exposure and protects against shorts or moisture.
Ladder
A ladder helps reach the doorbell mounting location safely. Choose one stable enough for your height.
Safety Gear
Wear safety glasses and gloves for protection. They guard against debris and accidental wire contact.

Credit: www.ebay.com
Safety Precautions
Turn off power before starting to avoid electric shock. Use insulated tools and follow the wiring instructions carefully. Double-check connections to keep your Ring Video Doorbell 3 safe and working well.
Turn Off Power At The Circuit Breaker
Always switch off the power before starting any electrical work. This step prevents electric shocks and injuries. Locate the correct circuit breaker and turn it off. Use a voltage tester to confirm no power is present at the wires.
Use Insulated Tools
Choose tools with insulated handles to avoid accidental shocks. These tools protect you from live wires. Keep your hands dry and avoid touching metal parts during installation.
Wear Safety Gear
Wear safety glasses to protect your eyes from debris. Gloves help protect your hands from sharp edges. Use sturdy shoes to prevent slips or falls during installation.
Check Wiring Compatibility
Verify that your doorbell wiring matches Ring Video Doorbell 3 requirements. Incorrect wiring can cause damage or poor performance. Consult the manual or a professional if unsure.
Work In Dry Conditions
Never install the doorbell in wet or damp weather. Water increases the risk of electric shock. Wait for dry weather or use a covered area to work safely.
Locate Existing Doorbell Wiring
Locating your existing doorbell wiring is the first step to hardwiring your Ring Video Doorbell 3. Finding these wires ensures a smooth installation and reliable power supply. Most homes have low-voltage wires behind the original doorbell button. These wires connect to your home’s chime and transformer.
Knowing where these wires are helps avoid damage during installation. It also makes the setup safer and faster. You will need to access the doorbell button and possibly the doorbell chime inside your house. Both places hide the wiring needed for your Ring doorbell.
Check The Current Doorbell Button
Start by looking at your existing doorbell button outside your door. Remove it carefully using a screwdriver. Look for two thin wires attached to the back of the button. These wires carry power from your home’s electrical system.
Note the color and position of each wire. This helps connect them correctly to your Ring doorbell later. If no wires are visible, the button may have a wireless setup instead.
Locate The Doorbell Chime Inside Your Home
Find the doorbell chime inside your house, usually near the front door or in a hallway. Remove the cover to see the wiring inside. This box connects the doorbell button to your home’s transformer and power supply.
Look for wires labeled with letters such as “TRANS,” “FRONT,” or “DORM.” These labels help identify the right wires for your Ring doorbell. Make sure to turn off power at the breaker before touching any wires.
Trace The Wiring To The Transformer
The transformer lowers your home’s voltage for the doorbell system. It is often located near the main electrical panel, in a basement, or a utility room. Follow the wires from the chime to find the transformer.
The transformer is usually a small box attached to an electrical junction box. It changes your home’s 120V power to a safer 16-24V for your doorbell. Knowing its location helps check voltage and safety during installation.
Credit: www.crutchfield.com
Turn Off Power Supply
Turning off the power supply is the first and most important step before hardwiring your Ring Video Doorbell 3. It keeps you safe from electrical shocks and prevents damage to your device. Always take this step seriously to avoid accidents and ensure smooth installation.
Power usually comes from the doorbell transformer or the circuit breaker. You need to find the right switch and turn it off completely. Double-check that the power is off by pressing the doorbell button. The light should not come on.
Locate The Circuit Breaker
Find your home’s circuit breaker panel. It is often in the basement, garage, or utility room. Look for the switch that controls the doorbell or outdoor lights. This switch controls the power supply for the doorbell wiring.
Switch Off The Power
Flip the identified breaker switch to the off position. This stops electricity flow to the doorbell wires. Ensure no power is running through the wires before you start working.
Confirm Power Is Off
Press the doorbell button to check. No light or sound means power is off. Use a voltage tester on the wires for extra safety. Only proceed when you are sure there is no electricity.
Remove Old Doorbell
Removing the old doorbell is the first step to hardwire your Ring Video Doorbell 3. It clears the way for the new device. Handle the process with care to avoid damage or injury.
Turn off the power at the breaker box before starting. This stops any electrical shock. Safety first.
Gather Your Tools
Get a screwdriver, voltage tester, and pliers ready. These tools will help remove the old doorbell safely and smoothly.
Unscrew The Old Doorbell
Use the screwdriver to remove screws holding the old doorbell. Keep the screws if you plan to reuse them.
Disconnect The Wires
Gently pull the doorbell away from the wall. Use the voltage tester again to confirm no current flows. Then, loosen the wire screws and disconnect the wires.
Remove The Mounting Bracket
Unscrew the mounting bracket if the old doorbell has one. This bracket can be reused for your Ring Doorbell.
Credit: www.vicentetorns.com
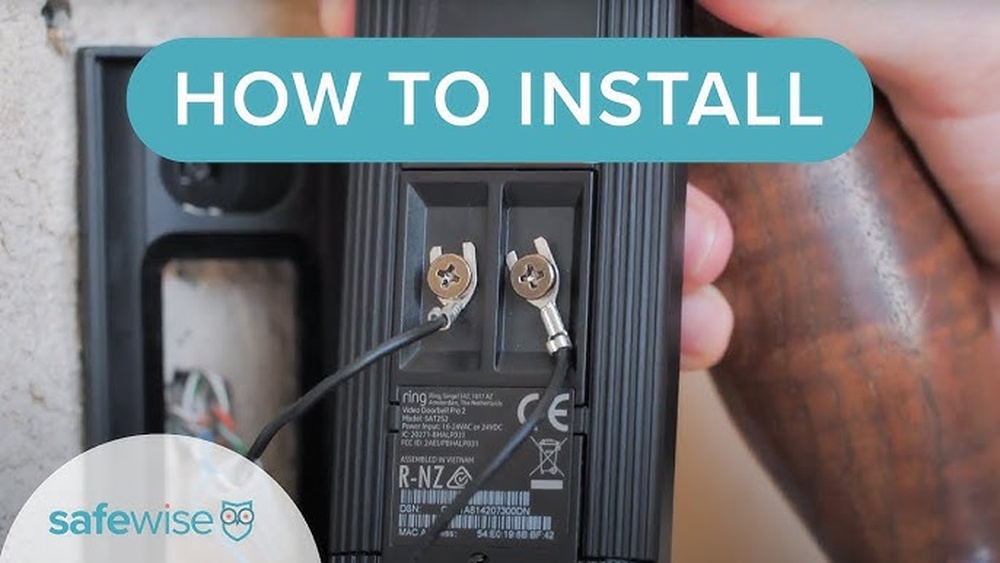
Connect Ring Doorbell Wires
Connecting the Ring Video Doorbell 3 wires is a key step in hardwiring your device. This process powers your doorbell directly from your home’s electrical system. It ensures your doorbell stays charged without needing frequent battery replacements.
Before starting, switch off the power at the breaker box. This keeps you safe during the wiring process. Next, identify the existing doorbell wires in your wall. These wires will connect to the Ring Doorbell 3.
Locate Existing Doorbell Wires
Find the wires behind your old doorbell or inside your wall. Usually, two wires are visible. They are thin and may be attached to a chime box. Use a voltage tester to confirm the wires are not live.
Prepare The Wires For Connection
Strip about half an inch of insulation from each wire end. This exposes the metal for a solid connection. Twist the wire strands tightly to avoid loose ends. Make sure the wires are clean and free of corrosion.
Attach Wires To Ring Doorbell Terminals
Connect one wire to each terminal on the back of the Ring Doorbell 3. It does not matter which wire goes to which terminal. Use a screwdriver to tighten the terminal screws securely. Ensure the wires do not touch each other to avoid short circuits.
Secure And Test The Connection
Once connected, gently push the wires back into the wall. Mount the Ring Doorbell onto its bracket. Turn the power back on at the breaker. Check if the doorbell lights up and functions correctly.
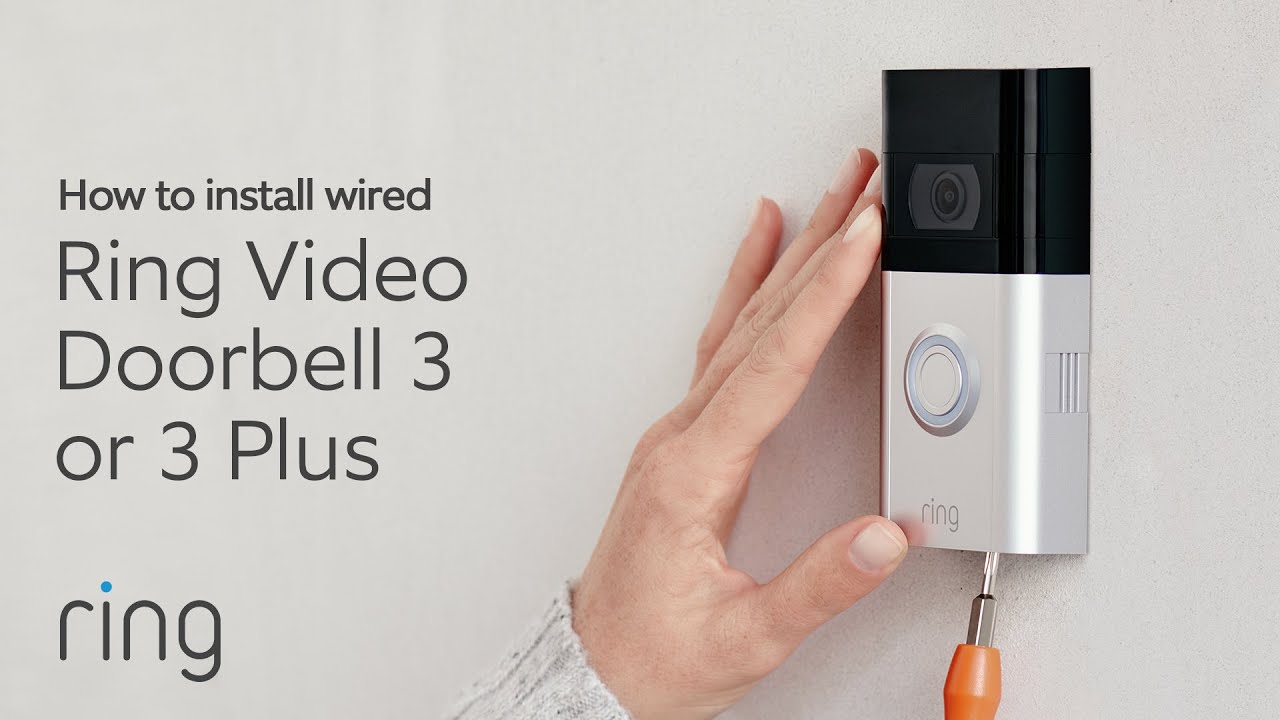
Mount The Ring Doorbell
Mounting the Ring Video Doorbell 3 is a key step in setting up your device. It must be secure and at the right height. This ensures clear video and good motion detection. Follow these simple steps to mount your doorbell properly.
Choose The Best Location
Select a spot near your front door. The height should be about 48 inches from the ground. This height captures faces well. Avoid places with direct sunlight or too much shade. Make sure the Wi-Fi signal is strong there.
Mark The Drill Points
Hold the mounting bracket against the wall. Use a pencil to mark where the screws will go. Check that the bracket is level. This keeps your doorbell straight and neat. Double-check the marks before drilling.
Drill Holes And Insert Anchors
Drill holes at the marked points. Use the right drill bit size. Insert wall anchors if you mount on drywall or brick. Anchors give extra support. They prevent the screws from loosening over time.
Attach The Mounting Bracket
Use the screws to fix the bracket to the wall. Tighten the screws firmly but not too hard. The bracket should feel solid and not move. Proper attachment keeps the doorbell safe from theft or falling.
Secure The Ring Doorbell
Align the doorbell with the bracket. Slide or snap it into place. You may hear a click when it locks. Check if it fits snugly. The doorbell should not wiggle or fall off.
Restore Power And Test
After hardwiring your Ring Video Doorbell 3, restoring power is the next step. This process lets your device start working again. Testing ensures the doorbell functions properly and connects to your network.
Restoring power must be done carefully. Double-check your wiring before turning on the breaker or power switch. This helps avoid any damage or electrical issues.
Turn On The Power Source
Go to your circuit breaker or fuse box. Switch the breaker back on or replace the fuse. This action restores electricity to your doorbell.
Wait a few seconds for the device to power up. The doorbell light should turn on, showing it has power.
Check Doorbell Light And Sound
Look at the light on your Ring doorbell. It should glow steady or pulse softly. Listen for the chime or sound when pressing the button.
If you hear the chime and see the light, your doorbell gets power correctly. No light or sound means a wiring or power problem.
Test The Video And App Connection
Open the Ring app on your smartphone. Check if the live video feed appears clearly. Test the two-way audio to talk through the doorbell.
Ensure the doorbell connects without delay or error. A smooth connection means your hardwire setup works well.
Troubleshooting Tips
Troubleshooting your Ring Video Doorbell 3 can help fix common issues fast. Problems during hardwiring often come from simple mistakes. This guide offers clear tips to solve those problems. Follow each step carefully for the best results.
Check Your Wiring Connections
Loose or wrong wiring stops your doorbell from working. Turn off power before checking wires. Make sure wires connect firmly to the screws. Match the wires to the correct terminals. Tighten screws if needed. Secure connections prevent power loss.
Verify Your Transformer Voltage
The transformer must supply correct voltage. Ring Video Doorbell 3 needs 16-24 volts AC. Use a multimeter to measure voltage. Low or high voltage causes issues. Replace the transformer if voltage is outside range.
Reset The Doorbell Device
Resetting can fix software glitches. Press and hold the setup button for 20 seconds. Release and wait for the light to blink. This resets device settings. Reconnect your doorbell to the app afterward.
Test Your Wi-fi Signal Strength
Weak Wi-Fi causes video and notification problems. Move closer to the router to test. Use your phone to check signal near the doorbell. Consider a Wi-Fi extender for better coverage. Strong Wi-Fi ensures smooth operation.
Inspect The Doorbell’s Battery Level
Battery must have enough charge during setup. Check battery percentage in the Ring app. Charge the battery fully if low. A low battery can stop the doorbell from working properly.
Frequently Asked Questions
How Do I Hardwire Ring Video Doorbell 3 Safely?
To hardwire Ring Doorbell 3 safely, turn off power at the breaker. Use existing doorbell wires with correct voltage. Follow manufacturer instructions carefully to avoid electrical hazards. Confirm connections are secure before restoring power to ensure safe operation.
What Tools Are Needed To Hardwire Ring Doorbell 3?
You need a screwdriver, wire stripper, drill, and voltage tester. These tools help remove the old doorbell, prepare wires, and install the Ring Doorbell securely. A ladder may also be necessary for doorbell placement.
Can I Use Existing Doorbell Wires For Ring 3 Hardwiring?
Yes, Ring Video Doorbell 3 supports most existing doorbell wires. Ensure wires provide 16-24 volts AC and are in good condition. Using existing wiring simplifies installation and maintains continuous power for the device.
How Long Does It Take To Hardwire Ring Video Doorbell 3?
Hardwiring the Ring Doorbell 3 typically takes 20 to 40 minutes. This depends on your wiring condition and installation experience. Proper setup ensures reliable power and device performance.
Conclusion
Hardwiring your Ring Video Doorbell 3 keeps it powered all the time. It ensures your doorbell works without battery worries. Follow each step carefully for a safe setup. Use the right tools and stay cautious near wires. A steady power source helps your doorbell record and alert you.
This small effort improves your home security. Enjoy clear video and quick notifications every day. Stay safe and connected with your hardwired Ring doorbell.