Are your LED string lights suddenly not working? Before you toss them out or buy new ones, there’s a simple fix you can try yourself—replacing the fuse.
Knowing how to replace the fuse in your LED string lights can save you time, money, and frustration. You’ll discover easy step-by-step instructions that anyone can follow, even if you’ve never done it before. Keep reading, and you’ll have your lights shining bright again in no time.
Tools Needed
Replacing the fuse in LED string lights needs a few simple tools. Having the right tools makes the job easy and safe. You do not need many items, just the basics.
Gathering these tools before you start saves time. It helps you work without stopping to find things. Keep everything close at hand for smooth work.
Multimeter Or Test Light
A multimeter or test light checks if the fuse is blown. This tool shows if electricity flows through the fuse. It helps avoid guessing and saves time.
Replacement Fuse
Use the correct replacement fuse for your LED string lights. Check the fuse rating on the old fuse or in the manual. Using the wrong fuse can cause damage or be unsafe.
Small Screwdriver
A small screwdriver helps open the fuse holder. Usually, a flathead or Phillips screwdriver fits. It lets you access the fuse without breaking the light casing.
Tweezers Or Needle-nose Pliers
Tweezers or needle-nose pliers help remove and place the fuse carefully. They give a good grip on small parts. This prevents damage to the fuse or wires.
Clean Cloth
A clean cloth wipes dust and dirt from the fuse holder. Keeping the area clean helps the fuse fit well. It also ensures good contact for electricity.
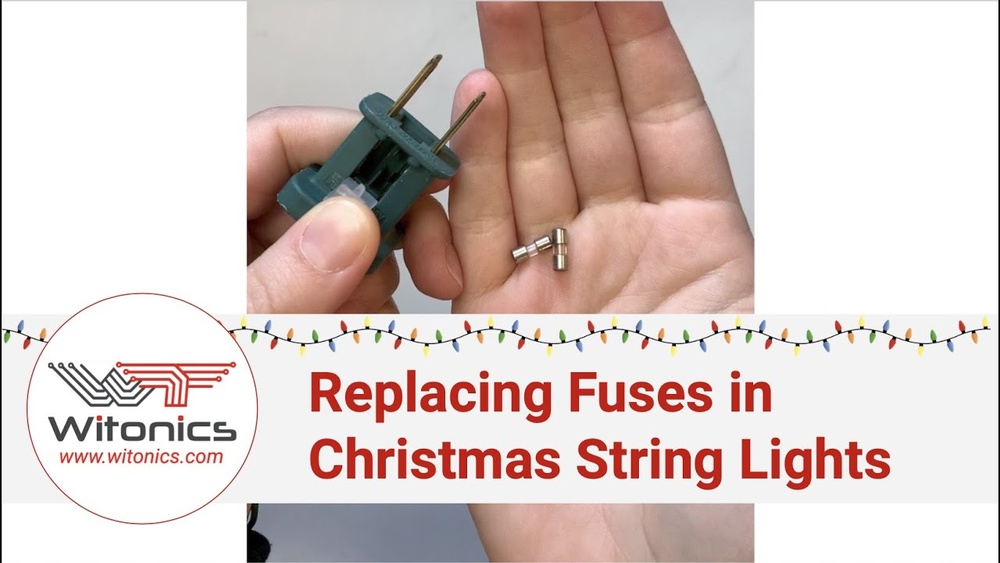
Credit: www.christmas-light-source.com
Identify The Fuse Location
Start by finding the fuse holder on the plug or battery pack of your LED string lights. It usually looks like a small, removable cover. Open it carefully to access the fuse inside for replacement.
Check The Plug Or Power Adapter
The fuse in LED string lights is often inside the plug or power adapter. Look closely at the plug for a small compartment or cover. This cover usually snaps open or slides out. It protects the fuse and keeps it safe from damage. Finding this cover is the first step to access the fuse.
Look For A Small Sliding Door Or Tab
Many plugs have a tiny sliding door or tab near the prongs. This part is easy to miss. Gently slide or lift it using your fingernail. Inside, you will see the fuse. This design allows quick access for replacement without tools. Take care not to force it to avoid breaking the plug.
Inspect The Fuse Holder Inside The Plug
Once the cover opens, you will see a small glass or ceramic tube. This tube is the fuse. It may look like a tiny light bulb or a thin stick. The fuse holder keeps the fuse in place and connects it to the circuit. Check the fuse for any visible damage, such as black marks or broken wire inside.
Remove The Fuse Holder
The fuse holder is a small part that protects your LED string lights. It keeps the lights safe by stopping too much electricity from flowing. Removing the fuse holder is the first step to replace a blown fuse. It is a simple process anyone can do with care.
Before starting, unplug the lights. This keeps you safe from electric shock. Find the fuse holder along the power cord. It usually looks like a small plastic box or cylinder. Sometimes it has a cover that snaps open or screws off.
Locate The Fuse Holder
Look closely at the cord near the plug. The fuse holder sits there. It might have a label or symbol showing it holds a fuse. If you cannot find it, check the user manual. It will show the exact location.
Open The Fuse Holder Cover
Use your fingers or a small tool to open the cover. Some covers snap open with light pressure. Others need a tiny screwdriver to unscrew them. Be gentle to avoid breaking the holder.
Remove The Old Fuse
Inside the holder, you will see the fuse. It is a small glass or plastic tube with metal ends. Carefully pull it out. If it is stuck, use tweezers or pliers. Check the fuse for signs of damage or burn marks.
Check The Fuse Type
Checking the fuse type is the first step to replace a fuse in LED string lights. Different lights use different fuses. Using the wrong fuse can cause damage or fail to fix the problem.
Learn how to identify the fuse type before you buy a replacement. This saves time and keeps your lights safe.
Locate The Fuse Holder
Find the fuse holder on the plug or near the power source. It often looks like a small compartment or sliding door. Open it carefully to see the fuse inside.
Read The Fuse Label
Look closely at the fuse for numbers or letters. These show the fuse’s size and rating. Common ratings include 3A or 5A, which means the maximum current the fuse handles.
Match The Fuse Size
Fuses come in different sizes, like 5x20mm or 3AG. Check the length and diameter of your fuse. Match your new fuse to these measurements exactly.
There are fast-blow and slow-blow fuses. Fast-blow fuses break quickly during a surge. Slow-blow fuses allow brief surges without breaking. Use the same type as the original fuse.
Buy The Correct Replacement Fuse
Buying the correct replacement fuse for LED string lights is crucial. A wrong fuse can cause damage or stop the lights from working. Fuses have specific ratings and sizes. Choosing the right one ensures safety and proper function.
Check The Fuse Rating
The fuse rating shows how much current it can handle. Look at the old fuse or the string light’s manual. Match the new fuse’s rating exactly. Using a fuse with a lower rating may blow it too soon. A higher rating can be unsafe.
Identify The Fuse Size
Fuses come in different shapes and sizes. The most common ones for LED string lights are glass tube or blade types. Measure the old fuse or check the packaging. The new fuse should fit snugly in the holder. A wrong size fuse won’t work properly.
Buy From Trusted Sources
Purchase fuses from reliable stores or online shops. Cheap or unknown brands may sell poor-quality fuses. A bad fuse can fail quickly or cause electrical issues. Quality fuses last longer and protect your lights better.
Keep Spare Fuses Handy
It helps to have extra fuses at home. LED string lights may need a fuse change during the season. Having spares saves time and frustration. Store them in a dry, safe place away from children.
Credit: www.homedepot.com
Replace The Old Fuse
Replacing the old fuse in LED string lights is a simple fix that restores their glow. A blown fuse stops the lights from working. Swapping it out can bring your lights back to life quickly. This step is important for safety and proper function.
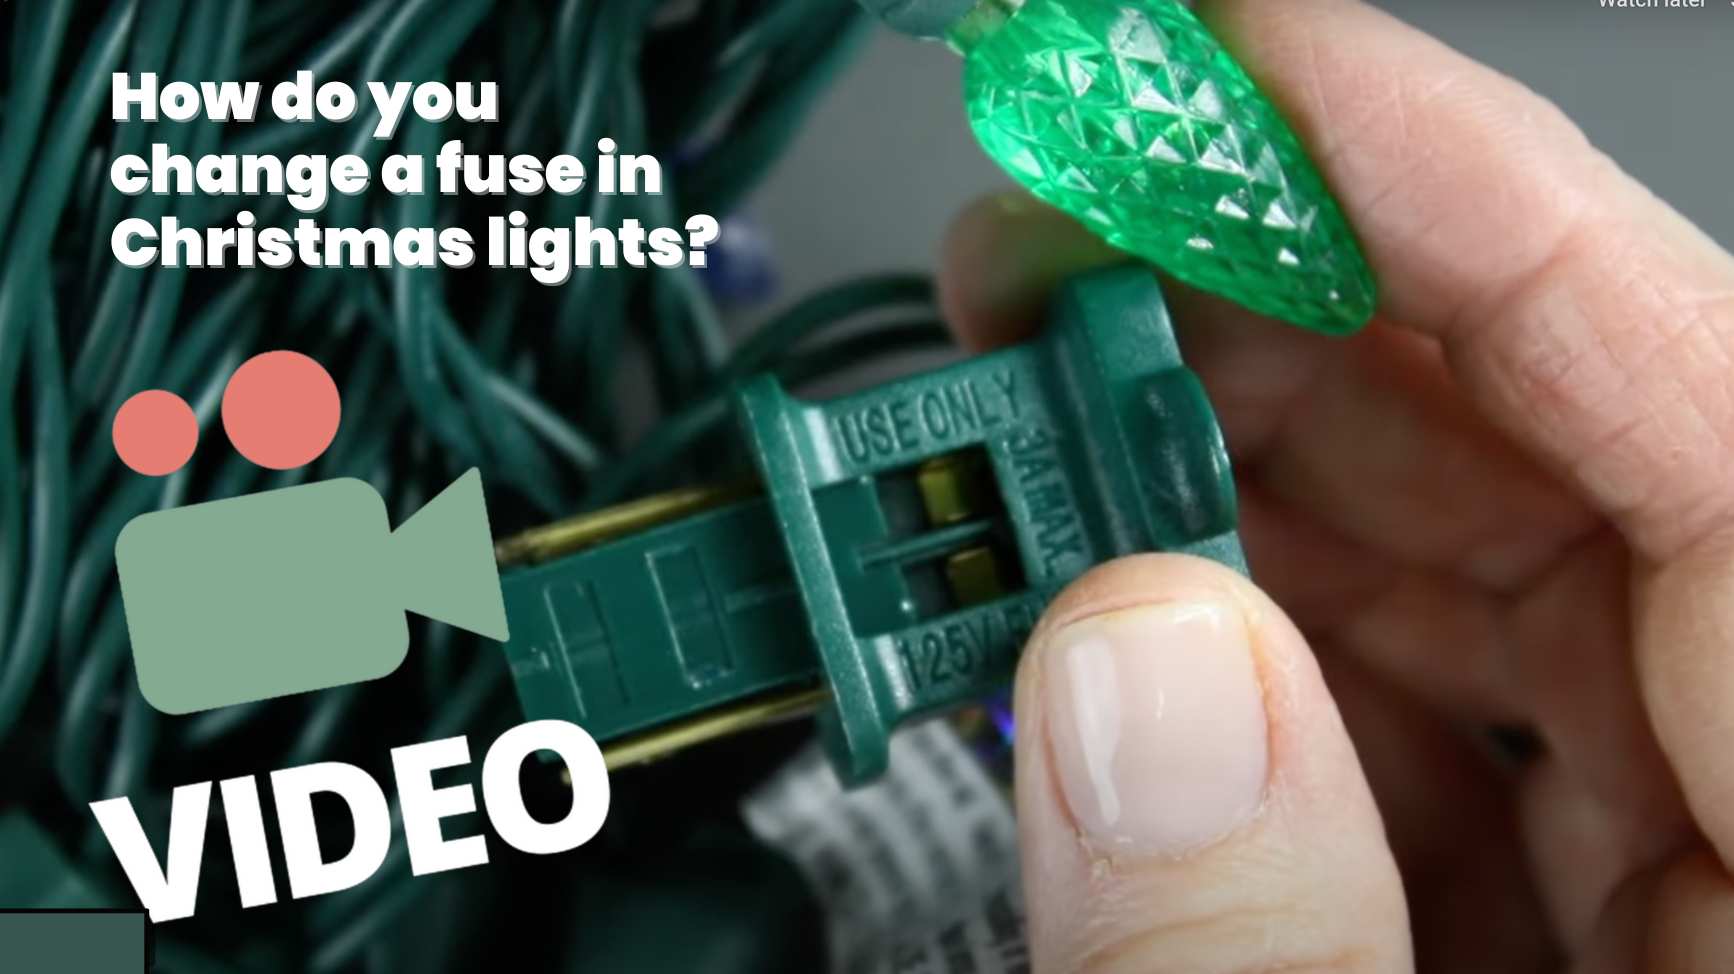
Locate The Fuse Holder
Find the fuse holder near the plug of your LED string lights. It is usually a small compartment with a sliding cover. Open it carefully to avoid damaging the wires or the holder itself.
Remove The Old Fuse
Take out the old fuse by gently pulling it from the holder. Use your fingers or a small tool if needed. Check the fuse for any signs of damage like a broken wire inside.
Choose The Correct Replacement Fuse
Match the new fuse with the old one’s size and rating. This information is printed on the fuse body or in the product manual. Using the wrong fuse can cause safety issues or damage the lights.
Insert The New Fuse
Place the new fuse into the fuse holder carefully. Make sure it fits snugly and is secure. Close the fuse holder cover firmly to protect the fuse and keep it in place.
Plug in the lights to check if they work after replacing the fuse. The lights should turn on without flickering or dimming. If they don’t, recheck the fuse placement or try a different fuse.
Test The Led String Lights
Testing your LED string lights after replacing a fuse is very important. It helps make sure the lights work properly and are safe to use. This step checks if the fuse replacement fixed the problem or if there is another issue.
Testing also prevents damage to the lights or power source. Follow these simple steps to test your LED string lights correctly.
Prepare Your Led String Lights For Testing
Find a flat, dry surface to lay out the lights. Make sure the plug and wiring are dry and clean. Check the lights for any visible damage before plugging them in.
Plug In The Led String Lights
Connect the lights to a working power outlet. Watch closely as you plug them in. If the lights turn on and glow evenly, the fuse replacement worked well.
Check For Flickering Or Dim Lights
Look for any flickering bulbs or areas that are dim. Flickering may mean a loose bulb or a wiring issue. Dim lights could mean the fuse or bulbs need another check.
Test The String Lights Outdoors If Needed
Some LED string lights only work outdoors. Test them in the place you plan to use them. Make sure they turn on and stay steady in that environment.

Credit: www.youtube.com
Safety Tips
Replacing a fuse in LED string lights needs care. Safety is very important to avoid shocks or fire. Follow simple safety tips before starting the repair. These tips help protect you and your home.
Turn Off Power Source
Always unplug the LED string lights before replacing the fuse. Do not work with live electricity. This prevents electric shock and injury.
Use The Correct Replacement Fuse
Check the fuse rating on the string lights. Use a fuse with the same voltage and amperage. Wrong fuses can cause damage or fire.
Work In A Dry Area
Keep the work area dry and clean. Water and electricity are a dangerous mix. Avoid replacing fuses in wet or humid places.
Handle Fuse With Care
Use gentle hands to remove and insert the fuse. Avoid breaking the fuse or damaging the holder. Broken parts can cause poor connections.
Inspect The String Lights
Look for damaged wires or bulbs before replacing the fuse. Fix any visible damage first. This helps prevent repeated fuse blows.
Frequently Asked Questions
How Do I Know If The Fuse In Led String Lights Is Blown?
Check if the lights fail to turn on or flicker. Inspect the fuse visually for any signs of damage or discoloration. Use a multimeter to test for continuity. A blown fuse will show no continuity, confirming it needs replacement.
What Type Of Fuse Is Used In Led String Lights?
Most LED string lights use a 3-amp or 5-amp glass fuse. Check the light’s packaging or manual for the exact fuse rating. Using the wrong fuse can cause damage or create a fire hazard. Always replace with the recommended fuse type.
How Can I Safely Replace The Fuse In Led String Lights?
Unplug the lights before replacing the fuse. Locate the fuse holder, usually near the plug. Open the holder carefully with a small screwdriver. Remove the old fuse and insert the new one matching the correct rating. Close the holder securely before testing the lights.
Can I Use Any Fuse As A Replacement For Led String Lights?
No, always use a fuse matching the original specifications. Using a higher-rated fuse can cause electrical damage. A lower-rated fuse may blow frequently, causing inconvenience. Refer to the product manual or fuse markings to find the correct replacement.
Conclusion
Replacing a fuse in LED string lights keeps them working safely. Always turn off the power before you start. Use the right fuse type to avoid damage. Check the lights carefully to find the fuse location. Handle the fuse gently to prevent breaking it.
After replacement, test the lights to ensure they work well. Taking these steps saves money and time. Now, you can enjoy bright, safe LED lights again. Simple fixes like this help you keep your lights shining.