Are you tired of constantly opening your garage door just to let your pet in and out? Installing a pet door in your garage door can make life so much easier for both you and your furry friend.
Imagine giving your pet the freedom to come and go whenever they want, without you having to lift a finger. In this guide, you’ll discover simple, step-by-step instructions to install a pet door quickly and safely. Whether you’re handy or a total beginner, by the end of this article, you’ll have all the tools and tips you need to create a perfect pet entrance right in your garage door.
Ready to make your pet’s life better and save yourself time? Let’s dive in!
Credit: www.liftingitalia.com
Choosing The Right Pet Door
Choosing the right pet door is key to a smooth installation in your garage door. The perfect door offers comfort and security for your pet. It also fits well and lasts long. This section helps you pick the best pet door with simple tips.
Types Of Pet Doors
There are several pet door types. Manual doors need you to open and close them. Automatic doors open with sensors when your pet approaches. Wall-mounted doors fit in walls near the garage. Sliding door inserts work with sliding garage doors. Pick a type that suits your garage style and pet’s habits.
Measuring Your Pet
Measure your pet before buying a door. Measure height from floor to the top of the shoulder. Also, measure width across the shoulders. Add a few inches to these numbers. This gives your pet enough space to move easily. A door too small or large causes problems.
Material Options
Pet doors come in many materials. Plastic doors are lightweight and affordable. Metal doors offer more strength and durability. Look for weatherproof materials to keep your garage insulated. Choose a material that matches your garage door and climate.

Credit: www.arloren.com
Tools And Materials Needed
Installing a pet door in your garage door is a practical project. It lets your pet go outside easily. To do it right, gather all the right tools and materials first. This saves time and helps avoid mistakes. Knowing what you need helps the job go smoothly.
Essential Tools
You will need a drill for making holes. A jigsaw helps cut the door precisely. Screwdrivers are necessary for securing the pet door. A tape measure ensures accurate placement. A pencil is useful for marking spots. A level keeps the door straight. Sandpaper smooths rough edges after cutting.
Safety Equipment
Wear safety goggles to protect your eyes. Use gloves to keep your hands safe. Ear protection reduces noise from power tools. A dust mask stops you from breathing in dust. Proper safety gear makes the work safer and easier.
Additional Supplies
Have screws that fit your pet door. Weather stripping keeps out drafts and water. A sealant prevents leaks around the door edges. A drop cloth protects the floor from dust and debris. Tape helps hold the door in place temporarily.
Preparing The Garage Door
Preparing the garage door is the first step to install a pet door correctly. It ensures a smooth and safe installation process. Taking time to prepare helps avoid mistakes and damage.
Preparation includes choosing the right spot, marking the area to cut, and checking if the door can support the pet door. Each step is important for a perfect fit.
Selecting The Installation Spot
Pick a spot on the garage door that your pet can easily reach. Consider the pet’s size and walking path. Avoid areas with door hinges or panels that move. Choose a flat and sturdy part for better support.
Marking The Cut Area
Use a pencil to mark the exact size of the pet door on the garage door. Double-check measurements before marking. Make the outline clear and straight. This helps to cut accurately and avoid errors.
Checking Door Compatibility
Check the garage door material. Most pet doors fit wood, metal, or fiberglass doors. Confirm the door thickness matches the pet door’s requirements. Check for insulation or wiring inside the door. Avoid cutting where wires run through.
Cutting The Opening
Cutting the opening for your pet door in the garage door is a key step. This part needs care and precision. A clean cut helps the pet door fit well and work smoothly. Take your time to measure and mark the spot clearly before cutting. Safety is important, so wear protective gear like gloves and goggles.
Using The Right Saw
Choose a saw that fits the material of your garage door. For metal doors, a jigsaw with a metal blade works best. For wooden doors, a circular saw or jigsaw is fine. Make sure the saw blade is sharp. A dull blade can cause rough cuts and damage the door.
Cutting Techniques
Start cutting slowly along the marked lines. Follow the outline carefully to keep the shape accurate. Keep your hand steady and avoid rushing. Use clamps to hold the door steady if needed. Pause occasionally to check the progress. This prevents mistakes and keeps the cut clean.
Smoothing Edges
After cutting, the edges may be rough or sharp. Use sandpaper or a file to smooth the edges. This step helps prevent injuries to your pet and damage to the door. Smooth edges also improve the fit of the pet door. Take your time to make the edges even and safe.
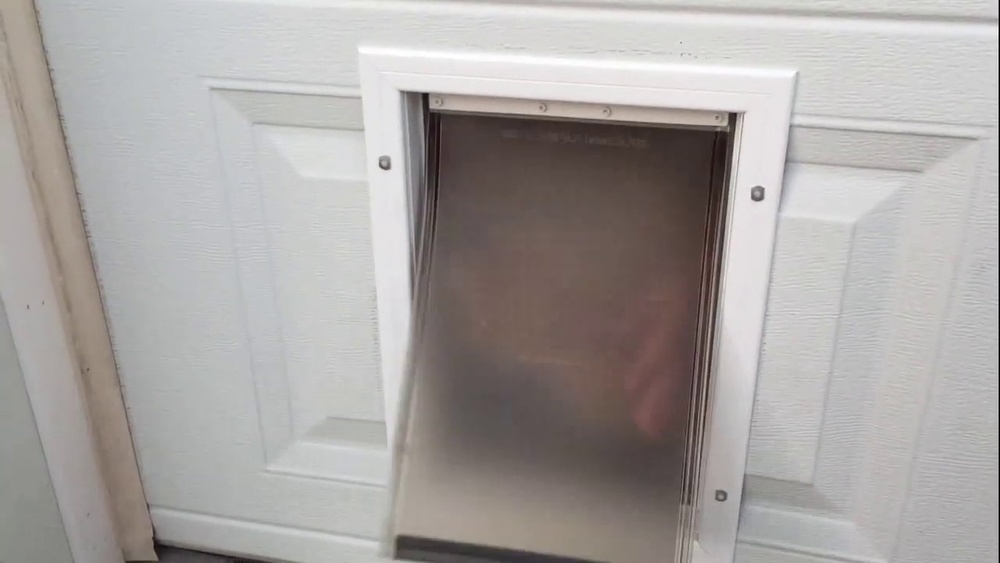
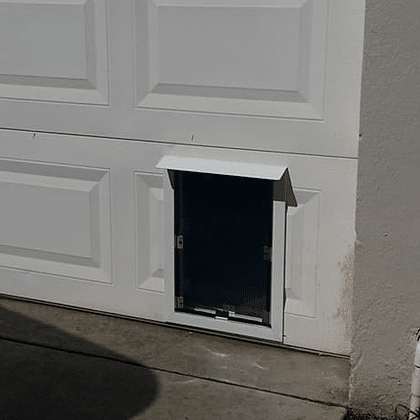
Installing The Pet Door Frame
Installing the pet door frame in your garage door is a key step. This frame holds the pet door securely. It also creates a clean, finished look. Proper installation ensures your pet can come and go freely. It also keeps out drafts and rain. Follow these steps for the best results.
Fitting The Frame
Start by placing the pet door frame into the cutout. Make sure it fits snugly without gaps. Check the alignment with the garage door edges. Adjust the frame until it sits evenly. Hold it firmly so it does not move during the next steps.
Securing With Screws
Use screws to fasten the frame to the garage door. Choose screws that match the door material. Drill pilot holes before inserting screws. This prevents the door from cracking. Tighten screws evenly to avoid warping the frame. Ensure the frame is stable and does not wiggle.
Sealing For Weatherproofing
Apply weatherproof sealant around the frame edges. This blocks wind, rain, and dust from entering. Use a sealant suitable for outdoor use. Smooth the sealant with a finger or tool for a neat finish. Allow it to dry fully before using the pet door. This step keeps your garage dry and insulated.

Credit: www.loveeconomychurch.org
Testing And Adjustments
After installing the pet door in your garage door, testing and adjustments are important. This step ensures the door works well and your pet can use it safely. Proper testing helps prevent problems later.
Make sure the pet door opens and closes smoothly. Watch your pet try it a few times to see if they are comfortable. Small changes might be needed to fit your pet’s size and behavior.
Checking Door Operation
Open and close the garage door several times. Check if the pet door moves freely without sticking. Look for any gaps where cold air or pests could enter. Tighten screws or adjust the frame if needed. The pet door should seal well and not block the main door’s function.
Training Your Pet
Show your pet how to use the new door. Use treats or toys to encourage them to go through. Be patient and give praise. Start with the door open, then close it partially. Repeat until your pet feels confident. Training helps avoid accidents and stress.
Troubleshooting Common Issues
If the pet door sticks or does not close fully, check the hinges and seals. Clean any dirt or debris that could block movement. If your pet refuses to use the door, try different rewards or slow steps. Make sure the opening size fits your pet well. Adjust or replace parts if problems persist.
Maintenance Tips
Keeping your pet door in the garage door in good shape saves time and money. Regular care helps the door work smoothly and lasts longer. Here are some easy steps to maintain your pet door.
Cleaning The Pet Door
Dust and dirt build up around the pet door. Use a soft cloth to wipe the frame and flap. Mild soap and water work well for cleaning. Avoid harsh chemicals that can damage the door material.
Clean both sides of the flap to keep it flexible. Dirt can cause the flap to stick or tear. Check the edges for buildup and remove any debris.
Inspecting For Wear
Look closely at the flap and frame for cracks or holes. Small tears can get bigger over time. Replace worn parts to keep your pet safe and secure. Check the hinges and fasteners for rust or looseness.
Make sure the flap swings freely without resistance. Tighten screws or bolts if needed. A loose pet door can let cold air or pests inside.
Seasonal Care
Weather changes affect your pet door’s condition. In cold months, check for drafts around the edges. Use weather stripping or insulation to block cold air. In hot weather, ensure the flap does not warp from heat.
Clear snow or leaves away from the door area. This prevents damage and keeps the flap moving smoothly. Seasonal checks keep your pet door safe year-round.
Frequently Asked Questions
How Do I Measure For A Pet Door In Garage Door?
Measure your pet’s height and width accurately. Check your garage door’s thickness and material. Use these measurements to choose the right pet door size and fit.
What Tools Are Needed To Install A Pet Door?
You’ll need a drill, jigsaw, screwdriver, measuring tape, and safety gear. These tools help cut and secure the pet door properly.
Can I Install A Pet Door In Any Garage Door?
Most garage doors allow pet door installation. Check your door material and structure for compatibility. Some metal or insulated doors may require special tools or expert help.
How To Ensure The Pet Door Is Weatherproof?
Use sealing strips or weatherproof kits around the pet door edges. This prevents drafts, rain, and pests from entering your garage.
Conclusion
Installing a pet door in your garage door can bring great convenience. It lets your pet go in and out freely. The process is simple if you follow each step carefully. Choose the right door size for your pet’s comfort.
Use the right tools to ensure a neat fit. Take your time to measure and cut accurately. A well-installed pet door improves your pet’s happiness and safety. Enjoy the new freedom it offers your furry friend every day.