Imagine starting your day with a mirror that does more than just show your reflection. What if your mirror could display the weather, news, calendar events, or even control your smart home?
Building a touchscreen smart mirror might sound complicated, but with the right steps, you can create one yourself. In this guide, you’ll discover simple, clear instructions that make the process easy and fun. Ready to turn your ordinary mirror into a smart assistant that fits perfectly into your daily routine?
Keep reading, and you’ll be amazed at how quickly you can bring this cool tech into your home.
Credit: www.youtube.com
Materials And Tools
Building a touchscreen smart mirror needs specific materials and tools. Gathering these items first makes the project smooth and fun. Each part plays an important role in the mirror’s function and look.
Essential Components
The base is a two-way glass or acrylic mirror. It lets you see your reflection and the screen behind it. A touchscreen monitor or tablet acts as the display. It shows apps, time, weather, and more. A computer board, like a Raspberry Pi, runs the software. It connects to the screen and internet. You also need a frame to hold all parts neatly. A power supply keeps everything running. Optional sensors can add voice control or motion detection.
Recommended Tools
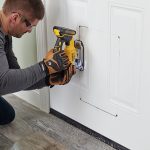
A screwdriver set helps assemble the frame and electronics. A drill may be needed for holes in the frame. A hot glue gun or double-sided tape secures smaller parts. Wire cutters and strippers prepare cables for connections. A multimeter checks electrical connections. A computer or laptop is essential for software setup. Safety gloves protect your hands during work. Measuring tape ensures correct sizing and alignment.

Credit: www.youtube.com
Selecting The Mirror
Selecting the right mirror is the first step in building a touchscreen smart mirror. The mirror affects the display clarity and overall look. Choosing a suitable mirror ensures the touchscreen works well and looks great in your space.
Types Of Smart Mirrors
There are different types of smart mirrors for various needs. Two common options are one-way glass and acrylic mirrors. One-way glass lets the screen shine through clearly. Acrylic mirrors are lighter and safer but might reduce screen brightness. Pick a mirror type based on your budget and use.
Choosing The Right Size
Size matters for both function and style. A bigger mirror shows more screen details but takes more space. A small mirror fits tight spots but limits display area. Measure your space carefully. Choose a size that fits your room and meets your display needs.
Setting Up The Display
Setting up the display is a key step in building a touchscreen smart mirror. The display shows all the useful information and interactive features. Choosing the right screen and adjusting its settings will give you the best experience. This section guides you through these important tasks.
Choosing A Screen
Pick a screen that fits your mirror size. Most builders use LCD or LED monitors. A screen between 15 to 27 inches works well. Choose one with a resolution of at least 1080p for clear images. Touchscreen capability is important for interaction. Resistive or capacitive touchscreens both work fine. Ensure the screen has good brightness to be visible behind the mirror glass. Also, check the power and connection ports. HDMI and USB are common and easy to use.
Configuring Screen Settings
Adjust the screen brightness to avoid glare. Set brightness high enough to read but low enough to save power. Calibrate the touchscreen for accurate touch response. Most operating systems have built-in calibration tools. Adjust the screen orientation if your mirror is vertical. Portrait mode usually works best. Turn off any screen sleep or power-saving modes. This keeps the display on all the time. Lastly, set the screen resolution to match the native display for sharp images.
Integrating Touchscreen Technology
Integrating touchscreen technology is a key step in building a smart mirror. It allows users to interact directly with the mirror’s display. This interaction creates a smooth and modern user experience. Choosing the right touchscreen and setting it up correctly matters a lot.
Touchscreen Options
Several touchscreen types fit smart mirror projects. Capacitive touchscreens respond to finger touches with high accuracy. They support multi-touch gestures for easy navigation. Resistive touchscreens work with any pointer, like a stylus or gloved hand. They tend to cost less but offer lower clarity.
Infrared touchframes sit over the mirror glass. They detect touch by sensing interruptions in an infrared grid. These frames do not affect the mirror’s display quality. Optical touchscreens use cameras to track finger movement. They work well but can be complex to install.
Choose a touchscreen based on budget, ease of installation, and touch accuracy. Capacitive touchscreens suit modern, high-end builds. Infrared frames balance cost and performance. Resistive screens fit budget projects or simple use cases.
Calibrating The Touch Interface
Calibration ensures the touchscreen registers touches correctly. Without it, the pointer may appear off from your finger. Most touchscreens include calibration software. Run this tool after installation for precise touch detection.
Calibration usually asks you to tap specific points on the screen. This process aligns the touch sensor with the display image. Repeat calibration if the mirror’s position changes or after screen replacement.
Test the touch interface thoroughly. Check corners, edges, and center for accuracy. Proper calibration enhances user control and overall smart mirror experience.
Building The Frame
Building the frame is a key step in creating a touchscreen smart mirror. The frame holds all parts together and gives the mirror a clean, finished look. Choosing the right materials and using good assembly methods will make the frame strong and durable. A solid frame also helps the touchscreen work well and look great.
Frame Materials
Wood is a popular choice for the frame. It is easy to cut and shape. Pine or plywood works well and is affordable. Wood also gives a warm, natural look to the mirror.
Metal frames offer more strength and a modern style. Aluminum is light and rust-resistant. Steel is heavier but very durable. Metal frames need special tools to cut and join.
Plastic frames are lightweight and easy to make. Acrylic or PVC sheets can be used. Plastic is less strong but good for simple designs. It also allows more design flexibility.
Assembly Techniques
For wood frames, screws and wood glue provide strong joints. Use clamps to hold pieces while the glue dries. Sand the edges for a smooth finish.
Metal frames require welding or using metal screws and brackets. Welding creates a very strong bond but needs skill and equipment. Brackets and screws are easier for beginners.
Plastic frames can be glued with special plastic adhesives. Heat welding is another method but takes practice. Make sure all joints are tight and secure.
Measure twice and cut once. Check all corners for right angles. A sturdy frame keeps the touchscreen and mirror safe.

Credit: www.raspberrypi.com
Installing The Software
Installing the software is a key step in building your touchscreen smart mirror. This process makes the mirror functional and interactive. You need to choose the right operating system and smart mirror application. The software controls what information appears on the mirror and how you interact with it.
Operating Systems
Choose an operating system that works well with your hardware. Raspberry Pi OS is a popular choice for smart mirrors. It is lightweight and supports many applications. Another option is Ubuntu, which offers more features but needs more power. Windows can work too, but it requires higher system specs. Pick an OS that matches your skill level and hardware capacity.
Smart Mirror Applications
Smart mirror applications display useful info like weather, news, and calendars. MagicMirror² is a widely used open-source app. It is easy to install and customize. You can add modules for different functions. Other apps offer voice control and touch support. Test a few to find one that fits your needs. Make sure the app supports your chosen OS and touchscreen.
Customizing Features
Customizing your touchscreen smart mirror helps make it truly yours. It lets you choose features that fit your daily needs. Personal touches improve both function and fun. This section covers key features to add for a smarter mirror.
Voice Control
Voice control lets you use the mirror hands-free. Speak commands to check the weather or play music. It uses simple voice recognition software. This feature makes the mirror easier to use. It also adds a futuristic feel to your space.
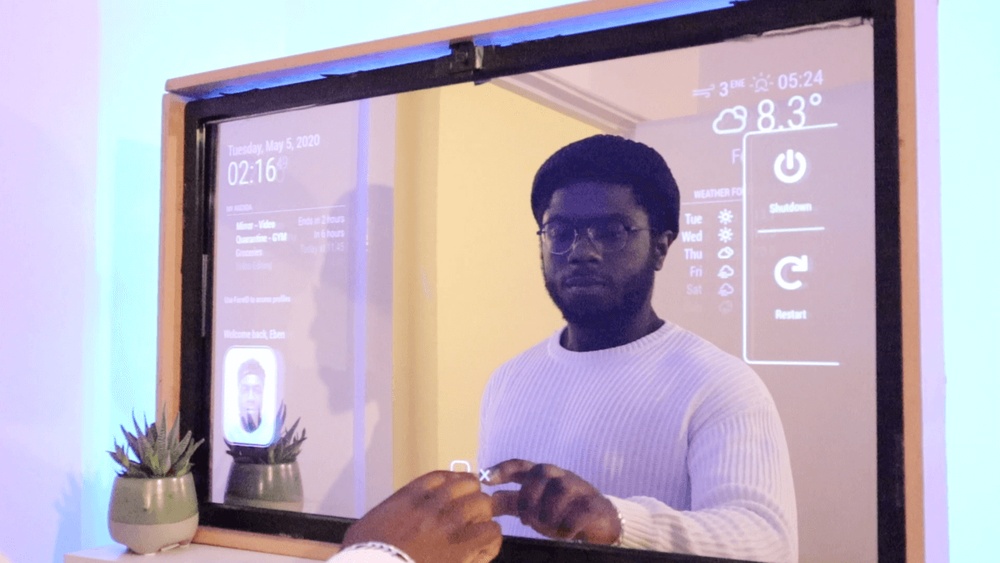
Weather And News Widgets
Weather and news widgets keep you updated at a glance. These small apps show current weather and headlines. You can customize which cities and news sources appear. These widgets keep you informed without extra effort. Perfect for busy mornings or quick updates.
Calendar Integration
Calendar integration helps you track your schedule on the mirror. Sync your phone or online calendar easily. See appointments and reminders as you get ready. This feature helps you stay organized daily. It saves time and reduces missed events.
Power And Connectivity
Power and connectivity are key parts of building a touchscreen smart mirror. Without steady power, the mirror cannot work properly. Strong connectivity lets the mirror access the internet and connect to other devices. These two features keep your smart mirror smart and useful every day.
Power Supply Options
Choose a power source that fits your smart mirror setup. A common option is a wall adapter with a USB or DC plug. It gives steady power to your mirror and touchscreen.
Battery power can work but needs frequent charging. It is good for small mirrors or portable use. Make sure the battery matches the voltage needs of your mirror components.
Some people use power banks for extra mobility. This option adds flexibility but may reduce usage time. Always check the power output and capacity before choosing.
Wi-fi And Bluetooth Setup
Wi-Fi connects your smart mirror to the internet. This lets you stream news, weather, or music. Connect your mirror to a reliable Wi-Fi network with good speed.
Bluetooth links your mirror to other devices. Use it to pair with smartphones or speakers. This setup allows easy control and audio playback.
Make sure your smart mirror’s software supports Wi-Fi and Bluetooth. Keep your devices close to avoid connection drops. Secure your network to protect your personal data.
Final Assembly And Testing
The final assembly and testing phase brings your touchscreen smart mirror to life. This step ensures all parts fit well and work correctly. Careful assembly helps avoid future problems and improves the mirror’s durability.
Take your time and follow each step closely. A well-assembled mirror offers a smooth touch experience and clear display. Testing confirms everything functions as expected before daily use.
Securing Components
Start by placing the touchscreen panel inside the mirror frame. Use small screws or brackets to hold it firmly. Make sure the screen does not move or wobble.
Attach the control board and wiring neatly behind the mirror. Use cable ties to keep wires organized and away from moving parts. Double-check connections to avoid loose cables.
Fix the power supply securely to prevent accidental unplugging. Ensure vents are clear for proper cooling. This prevents overheating and extends the device’s life.
Troubleshooting Tips
If the screen does not respond to touch, check the wiring first. Loose or damaged cables often cause touch issues. Reconnect or replace wires as needed.
Screen flickering can result from power problems. Verify the power source and adapter ratings match the mirror’s needs. Use a different outlet or power supply if needed.
The display may be dim or unclear. Clean the glass surface gently with a soft cloth. Adjust brightness settings through the software for better visibility.
Test all software features before final use. Restart the system to clear minor glitches. Keep the software updated to improve performance and fix bugs.
Maintenance And Upgrades
Maintaining your touchscreen smart mirror keeps it working well and looking great. Regular care extends the life of its screen and software. Upgrades add new functions and improve user experience. Small efforts make a big difference.
Cleaning Tips
Use a soft, lint-free cloth to clean the mirror surface. Avoid harsh chemicals or abrasive materials that can scratch the screen. Lightly dampen the cloth with water or a screen cleaner made for electronics. Wipe gently in circular motions.
Clean the edges and frame carefully to avoid moisture entering the device. Turn off the mirror before cleaning to protect its components. Regular cleaning prevents dust buildup, keeping the touchscreen responsive and clear.
Adding New Features
Upgrade your smart mirror by installing new apps or widgets. Choose lightweight software that fits your mirror’s hardware limits. Add weather updates, news feeds, or calendar sync for more functionality.
Consider hardware upgrades like better speakers or cameras. Replace outdated parts to enhance performance. Regularly check for software updates to fix bugs and improve security.
Frequently Asked Questions
What Materials Are Needed To Build A Smart Mirror?
To build a smart mirror, you need a two-way mirror, a touchscreen display, a computer like Raspberry Pi, sensors, and frame materials. These components work together to create an interactive, reflective surface with smart features.
How Do I Add Touchscreen Functionality To A Smart Mirror?
Touchscreen functionality is added using a touchscreen monitor or overlay. Connect it to the computer inside the mirror, enabling touch input to control smart features seamlessly.
Can I Customize The Smart Mirror’s Software Interface?
Yes, you can customize the smart mirror’s interface using open-source platforms like MagicMirror². This allows you to add widgets, change layouts, and personalize the display to fit your needs.
How Much Does Building A Touchscreen Smart Mirror Cost?
Building a touchscreen smart mirror typically costs between $150 to $400. Costs vary based on materials, touchscreen quality, and additional smart features you include.
Conclusion
Building a touchscreen smart mirror is a fun and rewarding project. You can customize it to fit your needs and style. Start with basic materials and add features step by step. This mirror will help you stay organized and connected every day.
Keep practicing and improving your skills. Soon, you will enjoy your smart mirror’s benefits at home. Give it a try and see the difference it makes!