Are you tired of constantly opening the door for your pet? Imagine giving your furry friend the freedom to go outside whenever they want, without any hassle for you.
Building a pet door sliding panel is easier than you think, and it can save you time and effort every day. In this guide, you’ll discover simple steps to create a durable, safe, and convenient pet door that fits right into your sliding door.
Keep reading, and by the end, you’ll have the confidence to make your home more pet-friendly and enjoy the benefits of hassle-free pet access.
Credit: www.petdoors.com
Choosing The Right Pet Door
Choosing the right pet door is the first step to building a sliding pet door. The right door keeps your pet safe and comfortable. It fits your pet perfectly and matches your home’s style. Understanding the options helps you make a smart choice. Consider your pet’s size, door material, and type of door. These factors affect how well the door works and lasts.
Types Of Pet Doors
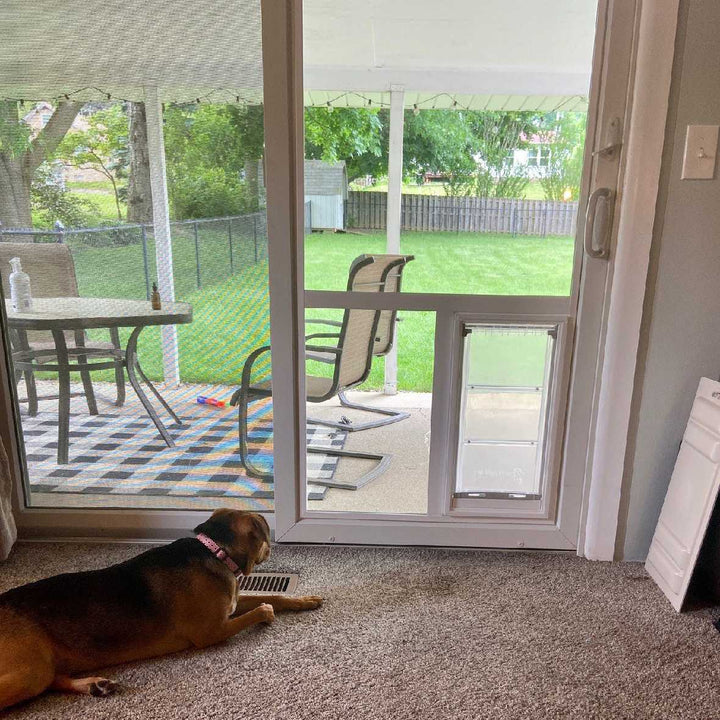
Pet doors come in many styles. Some fit into walls, others into sliding doors or windows. Flap doors are common and easy to use. Electronic doors open only for your pet, using a special collar. This keeps other animals out. Sliding pet doors fit into the track of your sliding door. They slide open and close smoothly. Choose a type that works best for your home and pet’s habits.
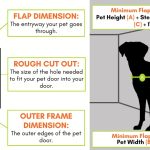
Measuring Your Pet
Measure your pet before buying or building a door. Measure height from the floor to the top of their shoulders. Measure width at the widest part of your pet’s body. Add a few inches for comfort. A door too small will hurt your pet. Too big, and it may let cold air in. Proper size makes your pet happy and safe.
Material Options
Pet doors come in different materials. Plastic doors are light and easy to install. Metal doors are strong and last longer. Look for weatherproof materials to keep your home warm. Clear plastic lets your pet see outside. Some doors have insulated flaps for better energy saving. Choose a material that fits your budget and climate.
Tools And Materials Needed
Building a pet door sliding requires the right tools and materials. Having everything ready makes the project smooth and safe. Prepare a clean workspace and gather the necessary items before you start.
Essential Tools
- Measuring tape for accurate dimensions
- Power drill with drill bits
- Jigsaw or handsaw for cutting
- Screwdriver set for fastening screws
- Level to ensure straight installation
- Pencil for marking measurements
- Sandpaper to smooth edges
Recommended Materials
- Sliding pet door kit or flap
- Wood or plastic frame for support
- Screws and anchors for mounting
- Weatherstripping to seal gaps
- Silicone caulk for waterproofing
- Paint or finish for protection
Safety Gear
- Protective gloves to avoid cuts
- Safety glasses to protect eyes
- Dust mask to prevent inhaling particles
- Ear protection if using loud tools
Preparing The Sliding Door
Preparing the sliding door is the first step in building a pet door. This stage sets the base for a smooth installation process. Careful preparation prevents mistakes and ensures the pet door fits well. Follow the steps below to get your sliding door ready.
Selecting The Installation Spot
Choose a spot on the sliding door that your pet uses often. The height should match your pet’s size for easy access. Avoid areas near the door frame or where the glass is thick. Pick a flat section that allows the door to open and close properly.
Cleaning And Marking
Clean the door surface thoroughly. Remove dirt and grease with mild soap and water. Let it dry completely before marking. Use a pencil to mark where you will cut the pet door. Measure twice to ensure accuracy. Clear and precise marks make cutting easier and safer.
Removing Door Panels
Most sliding doors have removable panels for easy installation. Check your door’s manual to understand how to remove them. Carefully lift or slide out the panel. Keep screws and parts in a safe place. Removing the panel allows better access for cutting and fitting the pet door.
Cutting The Opening
Cutting the opening for your pet door sliding is a key step. It needs careful measuring and clean cuts. This part makes sure your pet door fits well and works smoothly. Take your time and follow safety tips to avoid mistakes.
Marking The Cut Lines
Start by measuring your pet door size. Use a pencil to mark the exact spot on the sliding door. Double-check the measurements before marking. Draw straight lines with a ruler or square tool. Clear lines help you cut accurately and avoid errors.
Using A Jigsaw Safely
Wear safety glasses and gloves before cutting. Secure the sliding door to keep it still. Use a jigsaw with a fine blade for smooth cuts. Follow the marked lines slowly and steadily. Do not rush. Keep your hands away from the blade at all times.
Smoothing Edges
After cutting, the edges may be rough or sharp. Use sandpaper or a file to smooth the edges carefully. This prevents injury to your pet and damage to the door. Clean the area from dust and splinters before fitting the pet door.
Installing The Pet Door Frame
Installing the pet door frame is the key step in building a sliding pet door. A well-installed frame ensures smooth operation and keeps your home safe from drafts. This part needs care and precision. Follow the steps below to fit, secure, and seal the frame correctly.
Fitting The Frame
Start by placing the pet door frame into the cut-out space. Check that it fits snugly without gaps. Use a level to make sure the frame is straight. Adjust it until it sits evenly and flush with the door surface. Proper fitting prevents problems later.
Securing With Screws
Use screws to fasten the frame firmly in place. Choose screws that match the frame material. Drill pilot holes first to avoid splitting the frame. Tighten screws evenly on all sides. This step keeps the frame stable and strong.
Sealing And Insulating
Seal around the frame edges with weatherproof caulk. This stops air leaks and keeps your home energy efficient. Add foam insulation if there are any larger gaps. Smooth the caulk for a clean finish. Proper sealing protects against cold and moisture.
Testing And Adjustments
After building your pet door sliding, testing and adjustments are very important. This step ensures the door works well and your pet uses it easily. Proper testing helps avoid damage and keeps your pet safe. Adjustments may be needed to improve door movement and pet comfort.
Checking Door Movement
Open and close the sliding door several times. Make sure it moves smoothly without sticking. Check if the pet door flap swings freely. Look for any gaps that let cold air or insects inside. Adjust the frame or rollers to fix any problems. The door should slide easily but stay closed when not used.
Training Your Pet
Introduce your pet to the new door slowly. Show them how to push the flap with their nose or paw. Use treats or praise to encourage them. Practice several times a day until your pet feels confident. Be patient; some pets take longer to learn. Training helps your pet use the door safely and independently.
Troubleshooting Common Issues
If the door sticks or is hard to slide, check the track for dirt. Clean the track and lubricate it if needed. If your pet does not use the door, try training again with more rewards. Check the flap size; it should fit your pet comfortably. Fix any loose parts to avoid injury. Small problems can be fixed quickly with these tips.
Maintenance Tips
Maintaining your pet door sliding ensures it works well for years. Small efforts keep the door smooth and safe for your pet. Regular checks prevent bigger problems later. Follow these simple tips to care for your pet door sliding.
Regular Cleaning
Clean the sliding track often to remove dirt and hair. Use a soft cloth and mild soap. Avoid harsh chemicals that can damage the door parts. Keeping the track clear helps the door slide easily. Don’t forget to clean the flap and frame too.
Inspecting For Damage
Check the door for cracks or loose parts every month. Look at the seals to see if they are still tight. Replace any broken parts quickly to stop drafts and keep pets safe. Early repairs save money and keep the door working well.
Seasonal Care
In winter, clear snow and ice from the door area. Lubricate the sliding track with a pet-safe spray to avoid sticking. In summer, watch for warping from heat and fix it fast. Seasonal care keeps the pet door sliding smooth all year.
Credit: www.youtube.com

Credit: www.petdoors.com
Frequently Asked Questions
How Do I Measure For A Pet Door Sliding Installation?
Measure your pet’s height and width first. Then, measure the sliding door panel’s dimensions. Ensure the pet door fits within these measurements for a secure and functional installation.
What Tools Are Needed To Build A Pet Door Sliding?
You’ll need a jigsaw, drill, screwdriver, measuring tape, and safety gear. These tools help cut and secure the pet door accurately in your sliding door.
Can I Install A Pet Door In Any Sliding Door Material?
Most pet doors suit glass or vinyl sliding doors. Check the pet door specifications to confirm compatibility with your door material before installation.
How Do I Ensure The Pet Door Is Secure?
Use strong screws and weatherproof seals. Add a locking mechanism if possible. This prevents drafts and keeps your home safe and insulated.
Conclusion
Building a pet door sliding is simple and useful. It lets your pet go outside anytime. Follow the steps carefully for a strong door. Use the right tools and materials for safety. Check the door often to keep it working well.
Your pet will love the freedom it brings. Enjoy the convenience and comfort it adds to your home. Small effort, big benefits.