Are you staring at your LED string lights, noticing a bulb that’s gone dark? It’s frustrating when your beautiful lights lose their glow, but changing an LED string light bulb is easier than you think.
In this guide, you’ll discover simple steps to fix your lights quickly and safely. Keep reading, and you’ll have your string lights shining bright again in no time. Don’t let a single bulb dim your space—let’s get your lights back to glowing!
Tools Needed
Changing a LED string light bulb is simple with the right tools. Using proper tools makes the task safe and quick. Having everything ready avoids frustration and saves time.
Gather these tools before starting. Each has a specific role in the process.
Replacement Led Bulbs
Choose bulbs that match your string lights. Check size, shape, and voltage. Using the correct bulb ensures proper function.
Soft Cloth Or Gloves
Protect bulbs and your hands from oils and dirt. A soft cloth or gloves prevent damage. They also keep bulbs clean during installation.
Small Screwdriver
Some LED strings have covers or clips. A small screwdriver helps remove these parts. It allows easy access to the bulb socket.
Step Ladder
Use a step ladder to reach high or outdoor lights. It offers stability and safety. Choose a ladder suitable for the height you need.
Multimeter (optional)
A multimeter checks if the bulb or socket works. It helps find electrical issues. This tool is useful for troubleshooting problems.

Credit: westinghouse.com
Safety First
Safety is the top priority before changing an LED string light bulb. Taking the right precautions helps avoid accidents and damage. It protects you from electric shock and prevents fire hazards. Always prepare carefully for a safe bulb replacement process.
Turn Off The Power
Switch off the power at the main source. Unplug the string lights from the socket. Do not work with the lights connected to electricity. This simple step stops electric shock risks.
Use Gloves Or A Cloth
Wear gloves or use a soft cloth while handling bulbs. This prevents cuts from broken glass. It also keeps oils from your skin off the bulb. Clean bulbs last longer and work better.
Check For Damaged Wires
Inspect the string light wires before starting. Look for frayed or exposed parts. Replace or repair damaged wires first. Damaged wires can cause sparks or short circuits.
Work In A Dry Area
Choose a dry place to change bulbs. Avoid wet or damp environments. Water and electricity together can cause serious harm. Keep your work area safe and dry at all times.
Identifying The Bulb Type
Identifying the bulb type is the first step to changing your LED string light bulb. Different bulbs have different shapes and sizes. Knowing the exact type helps you find the right replacement. It also prevents damage to your lights.
Bulb types vary by design and connection style. Some bulbs are built into the string, while others screw in or push in. Recognizing these details makes the process easier and faster.
Check The Shape And Size
Look closely at the bulb’s shape. Common shapes include globe, candle, and mini bulbs. Measure the bulb if possible. Size helps match the new bulb perfectly.
Look For The Base Type
The base is where the bulb connects to the socket. Some bases twist in, like screw bases. Others push in or clip in. Identify the base to avoid buying the wrong bulb.
Read The Label Or Markings
Many bulbs have small numbers or letters printed on them. These codes tell you the bulb type and wattage. Write down these details. They guide you to the correct replacement bulb.
Consider The Voltage And Wattage
LED string lights run on specific voltage levels. Check the bulb for voltage and wattage ratings. Match the new bulb to these ratings to keep your lights safe.
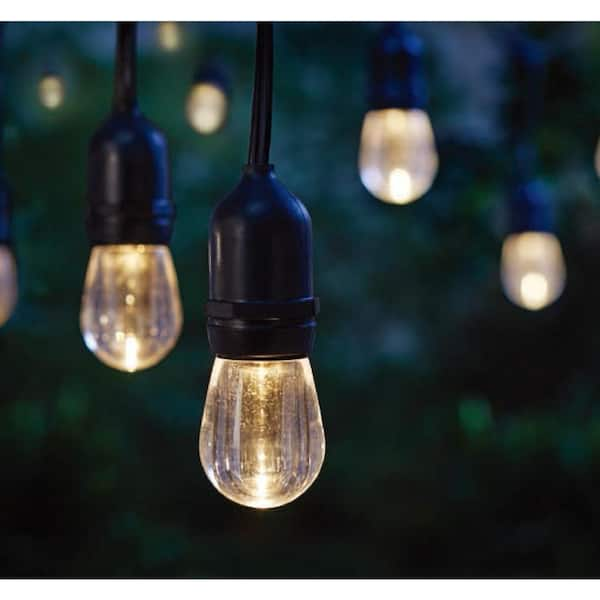
Credit: www.homedepot.com
Removing The Old Bulb
Removing the old bulb from your LED string lights is a simple task. It keeps your lights bright and working well. Follow these steps carefully to avoid damage or injury. Take your time to do it right. Let’s start with unplugging the lights for safety.
Unplug The String Lights
Always unplug the lights before handling bulbs. This stops electric shock or short circuits. Find the plug and pull it out of the socket. Wait a few minutes before touching the bulbs. This lets the lights cool down if they are warm.
Locate The Faulty Bulb
Check the string carefully for the bulb that is not lighting. Look for dim or broken bulbs. Sometimes a bulb looks different from the others. Hold the string up to the light to see clearly. Mark the faulty bulb so you can find it easily.
Gently Extract The Bulb
Hold the base of the bulb, not the glass part. Twist it slowly counterclockwise or pull it straight out, depending on the type. Use gentle force to avoid breaking the bulb or socket. Place the old bulb in a safe spot for disposal. Now you are ready to put in a new bulb.
Choosing A Replacement Bulb
Choosing the right replacement bulb for your LED string lights is important. The wrong bulb can cause poor performance or even damage the lights. This section helps you pick the correct bulb quickly and easily. Understanding key factors saves time and keeps your string lights shining bright.
Match The Size And Voltage
First, check the size of the original bulb. Bulbs come in different shapes and sizes. Use the same size to fit the socket properly. Next, look at the voltage rating. LED string lights usually run on low voltage. Choose a bulb with the same voltage to avoid electrical problems. Using a bulb with the wrong voltage can burn out the lights or cause flickering.
Consider Color And Brightness
The color of the bulb affects the mood of your space. Pick a color that matches your style or event theme. LED bulbs come in warm white, cool white, and many colors. Brightness is also key. A brighter bulb lights up more area, while a dimmer one creates a soft glow. Choose a brightness level that fits your needs and complements other lights on the string.

Credit: westinghouse.com
Installing The New Bulb
Start by unplugging the string lights to ensure safety. Gently twist the old bulb out, then insert the new LED bulb firmly into the socket. Check that the bulb is secure before plugging the lights back in.
Insert The Bulb Properly
Start by holding the new LED bulb gently. Align the bulb’s base with the socket carefully. Do not force it in; the fit should be smooth. Push the bulb straight into the socket until it fits snugly. Make sure the bulb is fully seated to avoid flickering. Proper insertion helps the string light work well.
Secure The Bulb In Place
After inserting, check if the bulb feels loose. Twist the bulb slightly if the socket requires it. Ensure the bulb stays firmly in place without wobbling. A secure bulb prevents damage and keeps the lights shining. Avoid overtightening to protect both bulb and socket.
Testing The String Lights
Testing the string lights is a key step before changing any LED bulbs. It helps find out if the lights are working or if the problem is with the bulb or the entire string. Testing saves time and ensures you only replace what is needed.
Start by plugging in the string lights. Look closely for any lights that do not turn on. This shows which bulbs may need changing. Sometimes, one bad bulb can make the whole string fail.
Visual Inspection Of The String Lights
Check the string carefully for any visible damage. Look for broken wires or loose bulbs. Damaged parts can cause the lights to stop working. Fix these issues before testing the bulbs.
Using A Multimeter To Test Bulbs
A multimeter helps check if each bulb works. Set the multimeter to the continuity mode. Touch the probes to the bulb’s contacts. A beep or light means the bulb is good.
Testing Bulbs With A Replacement Bulb
Swap out the suspected bad bulb with a new one. If the string lights up, the old bulb was faulty. This method is simple and works well for most LED strings.
Checking The Fuse In The Plug
Sometimes the problem is in the fuse, not the bulbs. Open the plug’s fuse compartment carefully. Look for any blown fuses. Replace the fuse with the same type if needed.
Troubleshooting Common Issues
Troubleshooting common issues with LED string lights saves time and frustration. Problems like bulbs not lighting, flickering, or blown fuses often have simple fixes. Understanding these issues helps keep your lights bright and working well. Follow these easy steps to diagnose and fix common problems.
Bulb Not Lighting Up
First, check if the bulb is securely in its socket. Loose bulbs often cause power loss. Replace the bulb with a new one if it still does not light. Sometimes, the bulb itself is faulty. Make sure the power source is working. Test the string light on another outlet to confirm.
Flickering Lights
Flickering usually means a loose connection or damaged wire. Inspect the wiring along the string for breaks or bends. Tighten any loose bulbs by gently pushing them into place. Moisture inside the bulb cover can cause flickering. Dry the lights completely before using them again. Replace bulbs that flicker consistently.
Checking The Fuse
LED string lights often have a small fuse in the plug. A blown fuse stops the lights from working. Open the fuse compartment carefully using a small screwdriver. Remove the fuse and check if the metal wire inside is broken. Replace the fuse with one of the same rating. Keep spare fuses handy for quick swaps.
Maintaining Led String Lights
Maintaining LED string lights helps them last longer and shine brighter. Proper care keeps bulbs safe from damage and dirt. Clean and store the lights carefully to avoid problems.
Regular Cleaning
Dust and dirt can make LED lights dim. Wipe bulbs gently with a soft, dry cloth. Avoid using water or cleaning sprays on the bulbs. Clean the string lights before and after use. This keeps bulbs bright and prevents buildup.
Safe Storage Tips
Store LED string lights in a cool, dry place. Wrap them loosely to avoid tangles and broken bulbs. Use a box or a storage bag to protect from dust. Keep lights away from heavy objects that could crush them. Proper storage makes the lights ready for the next use.
Frequently Asked Questions
How Do I Safely Change A Led String Light Bulb?
First, unplug the string lights from the power source. Use a dry cloth to grip the bulb. Gently twist and pull out the old bulb. Insert a new LED bulb compatible with your string light model. Avoid using excessive force to prevent damage.
What Type Of Bulb Fits Led String Lights?
LED string lights usually use small, low-voltage bulbs. Check your string light’s specifications or manual for the exact bulb type. Common types include T5 or G4 LED bulbs. Using the correct bulb ensures safety and optimal light performance.
Can I Replace Led Bulbs With Any Led Bulb?
No, always use bulbs that match your string light’s voltage and size. Incorrect bulbs can cause malfunction or damage. Refer to the manufacturer’s guidelines to find suitable replacements. Using the right bulb extends your lights’ lifespan.
How Often Should Led String Light Bulbs Be Replaced?
LED bulbs last longer than traditional bulbs, often up to 25,000 hours. Replace bulbs only when they burn out or flicker. Regular inspection helps spot faulty bulbs early. Proper maintenance ensures continuous, bright lighting.
Conclusion
Changing an LED string light bulb is simple and quick. Always turn off the power first. Gently remove the old bulb and replace it with the right size. Check that the new bulb fits securely. Test the lights before hanging them back.
Regular care helps your string lights last longer. Now, your lights will shine bright again. Keep these steps handy for easy bulb changes. Bright, safe, and easy—just how it should be.