Are you tired of your pet wandering into rooms where they shouldn’t be? A pet gate is the perfect solution to keep your furry friend safe and your home protected.
But buying one can get expensive. What if you could make a cheap pet gate yourself, without spending a fortune? In this guide, you’ll discover easy, budget-friendly steps to create a sturdy gate that fits your space and style. By the end, you’ll have a custom pet gate that works just right—and you’ll feel great about saving money.
Ready to get started? Let’s dive in!

Credit: kdfoundation.org
Choosing Materials
Choosing the right materials is key to making a cheap pet gate. The materials affect cost, strength, and safety. Picking affordable and durable supplies keeps your project budget-friendly and long-lasting.
Think about the size of your pet and the gate’s location. Lightweight materials suit small pets. Heavy-duty materials work better for larger pets or busy areas.
Affordable Options
Wood is a popular cheap material. Pine or plywood sheets are easy to find and cut. PVC pipes offer a lightweight, low-cost choice. Metal wire or mesh can also be affordable and safe for pets.
Reuse old materials. Old doors, baby gates, or wooden crates save money. They add a creative touch and reduce waste.
Durability Considerations
Durability matters to keep your pet safe. Wood should be smooth and splinter-free. Treat wood with non-toxic paint or sealant to protect it. PVC pipes resist moisture but can crack under pressure.
Metal parts last long but may rust. Choose coated metal to avoid rust. Secure all joints tightly to prevent gaps and loose parts.
Where To Buy Supplies
Local hardware stores offer many affordable materials. Check the scrap or clearance section for deals. Craft stores often have small supplies like hooks and hinges.
Online marketplaces provide wide choices and prices. Read reviews to ensure good quality. Thrift shops and garage sales can have hidden gems for cheap materials.
Measuring Your Space
Measuring your space is the first step to making a cheap pet gate that fits well. Accurate measurements ensure the gate will block your pet safely. Take your time and measure carefully. Small mistakes can make the gate too loose or too tight.
Finding The Right Dimensions
Measure the width of the opening where you want the gate. Use a tape measure to get the exact distance from one side to the other. Measure at the top, middle, and bottom to check for any changes in width. Use the smallest measurement to make sure the gate fits well.
Next, measure the height you want the gate to be. The gate should be tall enough to stop your pet from jumping over it. Add a few extra inches to the height for safety. Write down all your measurements before buying materials.
Tools You’ll Need
You will need a tape measure for accurate readings. A pencil and paper help to write down your numbers. A level can check if the space is straight. A step stool or ladder might help to reach high places. Having these tools ready makes measuring easier and faster.
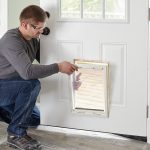
Building The Frame
Building the frame is the first step to making a cheap pet gate. A strong frame holds the gate firm and safe. Use simple materials to save money. Follow clear steps to get the right shape and size. This part makes the rest of the project easier.
Cutting Materials To Size
Start by measuring the space where the gate will go. Use a tape measure for exact numbers. Mark the wood or metal pieces clearly before cutting. Cut the materials with a saw or cutter carefully. Make sure each piece is straight and fits the space. Keep all pieces even to avoid gaps in the gate.
Assembling The Frame
Put the cut pieces together on a flat surface. Use nails or screws to join the corners tightly. Check that the frame forms a perfect rectangle or square. Make sure the corners are right angles using a carpenter’s square. Tighten all joints for strong support. Sand down rough edges for safety and a clean look.

Credit: www.youtube.com
Adding Safety Features
Adding safety features to your cheap pet gate keeps your pet secure. It helps prevent injuries and accidents. A safe gate protects your pet and your home. Focus on two main safety areas: smooth edges and secure fastening. These features make your gate reliable and sturdy.
Smooth Edges And Finishing
Sharp edges can hurt your pet. Sand all wood or metal surfaces carefully. Use fine-grit sandpaper to smooth rough spots. Check corners and joints for sharp points. Cover any remaining sharp spots with soft tape or rubber guards. Smooth edges prevent scratches and cuts. A well-finished gate looks better and lasts longer.
Secure Fastening Methods
Loose gates can fall or open unexpectedly. Use strong screws or bolts to hold the gate firmly. Avoid flimsy nails or weak hooks. Test the gate by pushing and pulling gently. Tighten any loose parts before use. Secure fastening keeps the gate stable. It stops your pet from escaping or getting hurt.
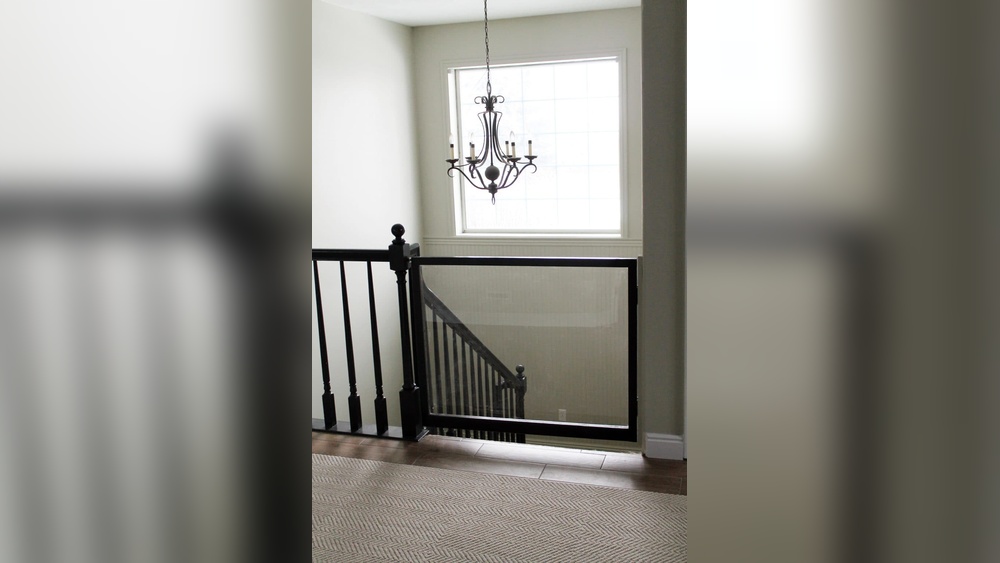
Installing The Gate
Installing a cheap pet gate is simple and quick. This step ensures your pet stays safe. Proper installation also keeps the gate sturdy and reliable. Follow these tips to set up your gate correctly.
Mounting Options
Choose a mounting method that fits your space. Pressure-mounted gates fit between walls without tools. Use tension rods to hold the gate firm. For wood or drywall, screws offer strong support. Pick mounts that do not damage your walls. Each option depends on your door frame or hallway size.
Testing For Stability
Check the gate’s strength after installation. Push gently to see if it moves. The gate should not wobble or tilt. Test with your pet’s weight or a similar force. Tighten mounts or adjust pressure for better hold. A stable gate keeps pets safe and avoids accidents.
Customizing Your Gate
Customizing your pet gate makes it fit your home and your pet’s needs. It changes a simple gate into something special and useful. Small touches help your gate look nicer and work better. These ideas keep your gate cheap but stylish and practical.
Painting And Decorating
Painting your gate adds color and protects the wood. Choose colors that match your room or your pet’s personality. Use non-toxic paint to keep pets safe. Simple patterns like stripes or dots make the gate fun. You can also use stencils for shapes or paw prints. Let the paint dry well before use.
Adding Functional Accessories
Accessories make your gate easier to use and safer. Attach hooks to hold leashes or toys. Add a small basket for treats or cleaning wipes. Use soft padding on edges to stop scratches. Install a latch that your pet cannot open. These extras keep the area tidy and safe for pets and family.
Maintaining Your Gate
Maintaining your cheap pet gate helps it last longer and stay safe. Small efforts keep the gate working well. This saves money and avoids accidents with your pet. Regular care ensures the gate stays strong and reliable.
Regular Checks
Look over the gate at least once a week. Check for loose screws or parts that move too much. See if the latch closes tightly every time. Make sure the gate fits well in the doorway. Spot any cracks or damage early to fix fast.
Simple Repairs
Tighten loose screws with a screwdriver. Replace small broken parts with cheap materials. Use wood glue for small cracks or splits. Sand rough edges to prevent pet injury. Fix latches that don’t close properly right away.

Credit: www.youtube.com
Frequently Asked Questions
How Can I Make A Cheap Pet Gate At Home?
You can make a cheap pet gate using wood, PVC pipes, or repurposed materials. Measure your doorway first. Cut materials to size, then assemble with screws or zip ties. Add hinges or tension rods for easy installation. This DIY method saves money and customizes to your space.
What Materials Are Best For A Budget-friendly Pet Gate?
Affordable materials include plywood, PVC pipes, and repurposed baby gates. These options are lightweight, easy to cut, and sturdy enough to block pets. Using recycled items also reduces costs. Choose materials based on your pet’s size and gate location for durability and safety.
How Do I Ensure My Diy Pet Gate Is Safe?
Secure all edges by sanding rough surfaces to prevent injury. Use non-toxic paint or sealant for pets’ health. Ensure the gate is tall and strong enough to prevent pets from jumping over or knocking it down. Test stability before regular use.
Can I Customize A Cheap Pet Gate For Different Door Sizes?
Yes, DIY gates are easily adjustable to fit any doorway. Measure the width and height accurately before building. Use modular materials like PVC or slats for flexibility. Customization ensures a perfect fit and enhances safety for your pet.
Conclusion
Making a cheap pet gate can save money and keep pets safe. Use materials you already have to cut costs. Simple steps and basic tools work well for this project. A homemade gate fits your space and style perfectly. It also gives you a sense of pride and fun.
Try building one yourself and enjoy the results. Your pet will thank you for a safe and cozy space.