
Are you looking for a creative way to add charm and personality to your home? Decorating a burlap ruffle wreath is an easy and fun project that can instantly brighten any door or wall.
Imagine a beautiful, textured wreath that reflects your style and welcomes guests with warmth. In this guide, you’ll discover simple steps and clever ideas to decorate your burlap ruffle wreath like a pro. By the end, you’ll have a stunning piece that makes your space feel truly yours.
Ready to transform your wreath into a unique work of art? Let’s get started!
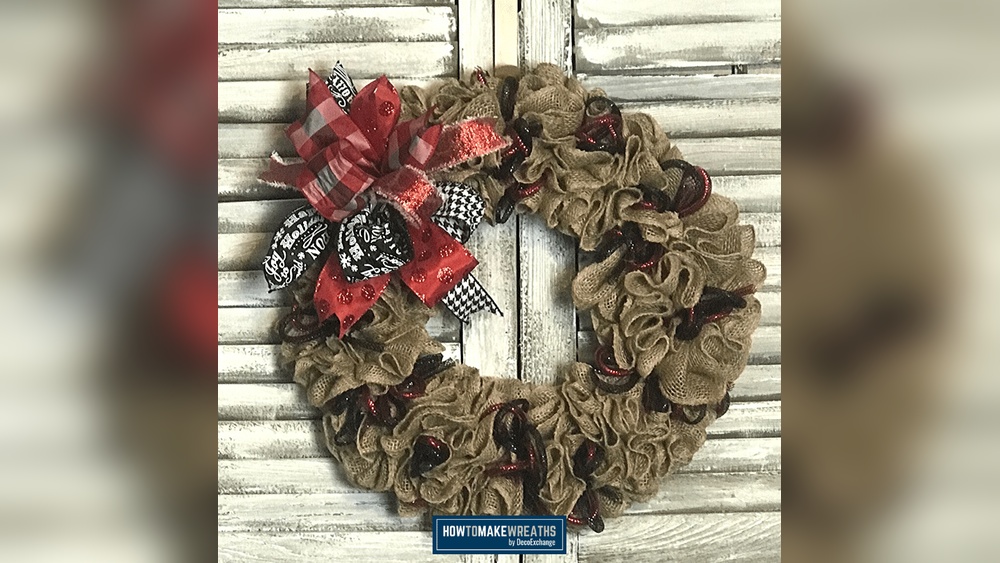
Credit: howtomakewreaths.com
Choosing Burlap For Your Wreath
Choosing burlap for your wreath is an important step. It sets the base for the whole look. Burlap comes in different types and colors. Picking the right one helps your wreath stand out. It also makes your crafting easier and more fun.
Focus on the fabric’s feel and strength. Some burlap is soft, some rough. Some colors are bright, some are natural. Knowing these details helps you get the perfect wreath.
Types Of Burlap Fabrics
Burlap fabrics vary by weave and material. Traditional burlap is made from jute. It has a coarse, natural texture. Some burlap is softer and finer. This comes from different fibers or tighter weaves.
Poly burlap is an option too. It looks like jute but is smoother. It lasts longer outside. Choose the type based on where you will hang your wreath.
Selecting The Right Color And Texture
Burlap comes in many colors. Natural brown is classic and rustic. White burlap gives a clean, fresh look. Colored burlap adds a fun or seasonal touch.
Texture matters for style. Rough burlap gives a rugged feel. Soft burlap creates a delicate look. Match texture to your wreath’s theme. This makes your decoration more attractive.
Tools And Materials Needed
Before starting your burlap ruffle wreath, gather all necessary tools and materials. Having everything ready makes the crafting process smooth and fun. This list covers both must-have supplies and optional decorations. Choose items that fit your style and the look you want.
Essential Craft Supplies
- Burlap ribbon – wide and sturdy for ruffles
- Wire wreath frame – round and strong
- Floral wire – thin and flexible for securing burlap
- Wire cutters – to trim the floral wire
- Scissors – to cut burlap ribbon cleanly
- Hot glue gun and glue sticks – for attaching decorations
- Measuring tape – to measure ribbon length
Optional Decorative Elements
- Artificial flowers – add color and texture
- Ribbon bows – enhance the wreath’s style
- Seasonal accents – like pine cones or small pumpkins
- Letter blocks or signs – for personalized messages
- Small ornaments – to match holiday themes
- Greenery sprigs – create a natural look
Preparing The Burlap Ruffles
Preparing the burlap ruffles is the first step in crafting a beautiful wreath. It sets the foundation for a neat and full look. Take time to get this step right. Proper preparation makes your wreath look professional and lasts longer.
Work in a clean space with good light. This helps you see the details clearly. Keep your tools ready for smooth cutting and shaping.
Cutting Techniques
Start with quality burlap fabric. Use sharp scissors to cut clean edges. Cut strips about 3 to 4 inches wide. Keep the length between 10 and 12 inches for easy handling. Cut slowly to avoid fraying. Trim any loose threads for a tidy look.
Use a ruler or measuring tape for even strips. Straight cuts ensure consistent ruffles. Avoid jagged edges; they make ruffles uneven. If you want a rustic look, slightly fray edges by pulling a few threads gently.
Creating Consistent Ruffles
Gather the burlap strips to form ruffles. Hold one end and pinch the fabric at regular intervals. Use your fingers to fold the burlap evenly. Keep ruffle sizes similar for a balanced wreath.
Secure ruffles with a needle and thread or hot glue. Stitching is stronger and lasts longer. Glue works faster but may need touch-ups later. Test a few ruffles to find your preferred method.
Arrange ruffles side by side. Overlap slightly to avoid gaps. Consistent ruffles give the wreath a full, fluffy appearance. Take breaks to check your progress and adjust as needed.
Credit: www.etsy.com
Assembling The Wreath Base
Assembling the wreath base is the first step in creating a beautiful burlap ruffle wreath. This step sets the foundation for your design. A strong base ensures your wreath looks full and lasts long. Take time to prepare it carefully. The right base makes decorating easier and more enjoyable.
Choosing A Wreath Form
Select a wreath form that fits your desired size and style. Wire forms are popular and easy to work with. Foam forms also work well for burlap wreaths. Consider the thickness of the form to support the burlap ruffles. Choose a size that fits your door or wall space. A sturdy form helps keep the wreath shape steady.
Attaching The Burlap Ruffles
Adding Decorative Accents
Adding decorative accents to your burlap ruffle wreath brings it to life. These accents create a unique look. They make your wreath stand out. Choose accents that match your style and season. Simple touches can turn a plain wreath into a charming decoration.
Incorporating Flowers And Greenery
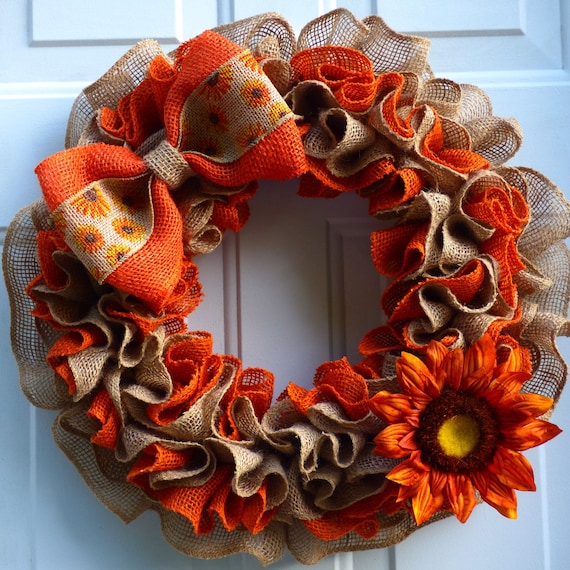
Fresh or artificial flowers add color and texture. Soft, pastel flowers create a gentle look. Bright flowers bring energy and cheer. Greenery adds a natural, earthy feel. Use leaves, small branches, or vines. Attach flowers and greenery with floral wire or hot glue. Place them evenly around the wreath or cluster in one spot for balance.
Using Ribbons And Bows
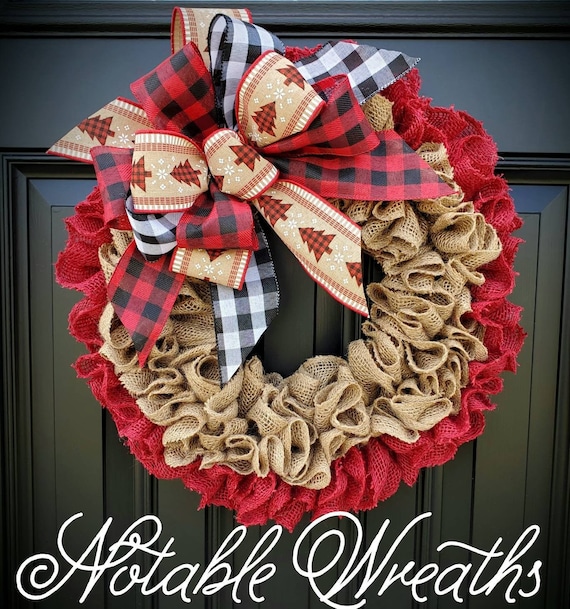
Ribbons add softness and movement to the wreath. Choose ribbons in colors that match your theme. Satin, burlap, or lace ribbons work well. Tie simple bows or make large, fluffy ones. Wrap ribbon around the wreath for extra detail. Secure with glue or wire to keep ribbons in place. Ribbons help create a polished, finished look.
Adding Seasonal Touches
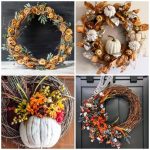
Seasonal accents make your wreath timely and festive. Use pinecones, berries, or small ornaments for winter. Add mini pumpkins, leaves, or acorns for fall. For spring, try pastel eggs or small bird nests. Summer calls for shells or bright fruit shapes. Change accents with the seasons to keep your wreath fresh and inviting.
Hanging And Display Tips
Hanging and displaying your burlap ruffle wreath adds the final touch. It shows off your craft and style. Proper placement keeps the wreath safe and looking great longer. Follow simple tips to make your wreath a beautiful part of your decor.
Choosing The Right Spot
Pick a place with good light but no direct sun. Sunlight can fade the burlap color fast. Avoid spots near heat or moisture, like vents or bathrooms. These can damage the wreath over time. Front doors, walls, or above mantels work well. Make sure the spot fits the wreath size. It should be easy to see and admire.
Securing Your Wreath Safely
Use strong hooks or nails that hold the wreath’s weight. For doors, consider wreath hangers that don’t damage paint. Ribbon loops or wire can help secure the wreath. Tie them tightly but gently to avoid tearing the burlap. Check the wreath regularly to keep it in place. This prevents it from falling and getting damaged.
Care And Maintenance
Taking care of your burlap ruffle wreath keeps it looking fresh and beautiful. Proper care helps the wreath last longer and stay vibrant. Simple steps can protect it from dust, dirt, and damage.
Cleaning Your Burlap Wreath
Dust the wreath gently using a soft brush or cloth. Avoid soaking the burlap with water. Spot clean stains with a damp cloth and mild soap. Let it air dry completely to prevent mold. Do not use harsh chemicals or bleach.
Storage Suggestions
Store the wreath in a cool, dry place away from sunlight. Use a large box or plastic container to keep its shape. Avoid placing heavy items on top to prevent crushing. Cover it with a cloth or plastic bag to protect from dust. Proper storage keeps the wreath ready for the next season.
Credit: www.etsy.com
Creative Variations
Creative variations give your burlap ruffle wreath a fresh, personal touch. Simple changes can make your wreath stand out. Try different themes or mix materials for a unique style. These ideas help your wreath fit any season or event. Your decoration will feel special and eye-catching.
Themed Burlap Wreath Ideas
Themes bring personality to your burlap wreath. Use seasonal colors like orange and brown for fall. Add small pumpkins or autumn leaves for effect. For winter, combine white burlap with red ribbons. Attach pinecones or faux snow for a cozy look. Spring wreaths can have pastel ribbons and silk flowers. Summer wreaths shine with bright colors and seashells. Pick a theme that matches your space or mood.
Mixing Materials For Unique Looks
Combine burlap with other textures for a bold look. Use lace or burlap together for rustic charm. Add burlap ribbons with burlap flowers for depth. Twine or jute can wrap the wreath base for contrast. Natural elements like dried flowers or berries add interest. Wooden letters or signs personalize your wreath. Mix materials to create a style that feels new and fresh.
Frequently Asked Questions
What Materials Are Needed For A Burlap Ruffle Wreath?
You need burlap ribbon, a wire wreath frame, floral wire, scissors, and hot glue. Optional decorations include flowers or signs. These materials help create a sturdy and beautiful burlap ruffle wreath.
How Do You Create Ruffles In Burlap For Wreaths?
To create ruffles, fold the burlap ribbon in small pleats. Secure each pleat with floral wire or hot glue on the wreath frame. This technique gives the wreath its signature textured look.
Can I Add Decorations To A Burlap Ruffle Wreath?
Yes, adding decorations like faux flowers, berries, or wooden signs enhances the wreath. Attach them with hot glue or wire for a personalized touch that complements your style.
How Long Does It Take To Make A Burlap Ruffle Wreath?
Making a burlap ruffle wreath usually takes 1 to 2 hours. The time depends on your experience and the wreath’s size. Patience ensures neat ruffles and a polished final look.
Conclusion
Decorating a burlap ruffle wreath is fun and simple. Choose colors and accents that match your style. Add flowers, ribbons, or seasonal items for a personal touch. Hang it on your door or wall to brighten any space. Small changes make a big difference in your home decor.
Enjoy crafting and showing off your beautiful wreath. Try new ideas and keep your decor fresh and inviting.