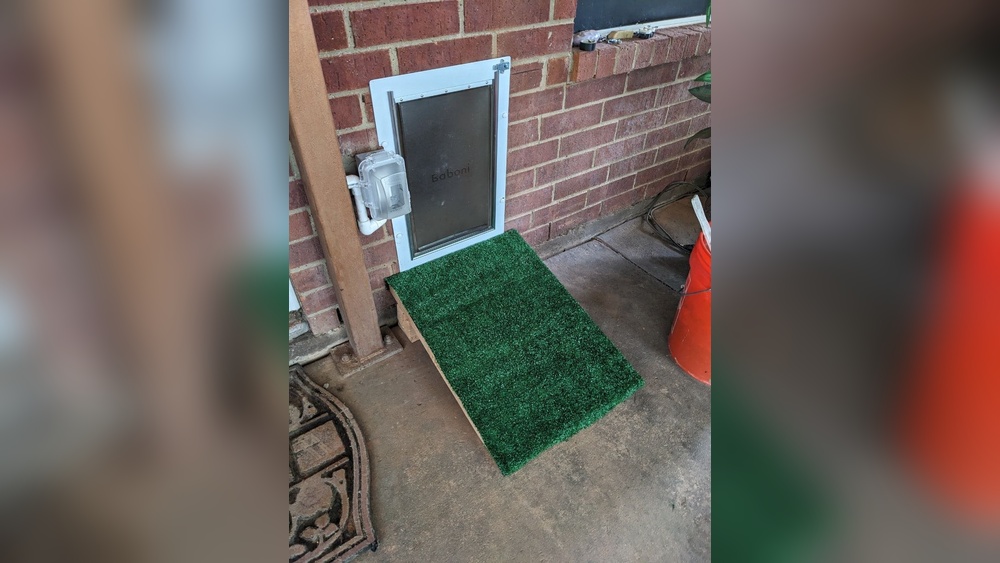
If you have a pet door installed in your brick wall, you know how important it is to keep it properly sealed. Without the right seal, drafts, moisture, and pests can sneak into your home, making your space uncomfortable and even causing damage over time.
You might be wondering how to tackle this tricky task without hiring a professional or spending a fortune. In this guide, you’ll discover simple, effective steps to seal around your pet door in brick, saving you time and money while keeping your home cozy and secure.
Let’s get started and make sure your pet door works perfectly all year round!

Credit: www.petdoors.com
Choosing The Right Pet Door
Choosing the right pet door is key to a secure and efficient installation in a brick wall. The right door fits well, seals properly, and lasts for years. It helps keep drafts, rain, and pests out.
Focus on size and material quality. These two factors ensure your pet door works well and stays strong against weather and wear.
Measuring The Brick Opening
Measure the brick opening carefully before buying a pet door. Use a tape measure to get the width and height. Measure from brick edge to brick edge, not just the hole inside.
Double-check your numbers. A wrong size means gaps or a door that won’t fit. Keep your pet’s size in mind too. The door must be big enough for them to pass easily.
Selecting Materials For Durability
Pick materials that resist weather and wear. Metal frames with rust-resistant finishes work best for brick walls. Plastic parts should be thick and sturdy.
Look for doors with good seals. Rubber or foam seals stop air and water from entering. This protects your home and keeps your pet comfortable.
Credit: securitybosspetdoors.com
Preparing The Brick Surface
Preparing the brick surface is a key step before sealing around a pet door. It helps the sealant stick better and last longer. A clean, sound surface prevents leaks and damage. Take time to get the brick ready. This makes your work easier and more effective.
Cleaning And Removing Debris
Start by removing dirt and dust from the bricks. Use a stiff brush to scrub the area around the pet door. Clear away loose mortar, old sealant, or paint flakes. Rinse with water and let it dry fully. Clean bricks help the sealant bond tightly. Avoid using harsh chemicals that may damage the brick.
Checking For Damage Or Cracks
Inspect the brick surface for cracks or broken mortar. Small cracks can let water inside and cause problems later. Look for crumbling or loose bricks near the pet door. Repair any damage before sealing. Use mortar or filler to patch cracks. Ensure the surface is solid and smooth. This step protects your home and extends the sealant’s life.
Cutting The Opening
Cutting the opening for a pet door in brick requires careful planning and precision. The opening must fit the door snugly to prevent drafts and water leaks. This step involves marking the cut lines clearly and using the right tools safely. Taking time here ensures a clean cut and a secure installation.
Marking The Cut Lines
Start by measuring the pet door’s dimensions accurately. Use a pencil or chalk to mark the outline on the brick. Double-check the measurements to avoid mistakes. Mark the cut lines clearly on all sides. These lines guide your cutting and help keep the opening straight.
Using Proper Tools Safely
Use a masonry drill and saw designed for brickwork. Wear safety goggles and gloves to protect your eyes and hands. Keep the work area clean and free of obstacles. Cut slowly along the marked lines to avoid cracking the brick. Take breaks to reduce tool overheating and maintain control.
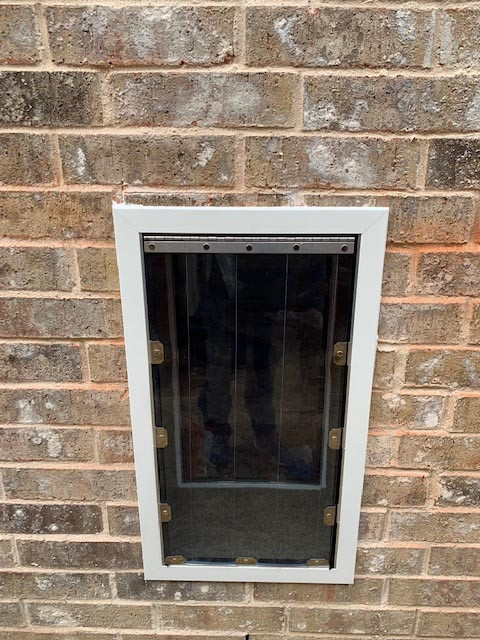
Installing The Pet Door Frame
Installing the pet door frame is a key step when sealing around a pet door brick. The frame holds the door securely and helps keep out drafts and moisture. Proper installation ensures the door works well and lasts long.
Follow each step carefully. Take your time to align and secure the frame. This will make the sealing process easier and more effective.
Aligning The Frame Correctly
Start by placing the frame in the brick opening. Check that it fits snugly without gaps. The frame should sit flush against the brick surface. Use a level tool to make sure it is straight. Adjust the frame until it lines up perfectly. Proper alignment prevents air leaks and water damage.
Securing With Screws And Anchors
Once aligned, secure the frame with screws and anchors. Drill holes through the frame and into the brick. Insert anchors into the holes for a firm grip. Screw the frame tightly but avoid over-tightening. This keeps the frame stable and protects the brick from cracking. Double-check the frame does not move after securing.
Sealing Gaps Around The Door
Sealing gaps around a pet door in a brick wall is important. It stops air leaks and keeps pests out. Proper sealing also improves energy efficiency and protects your home from weather damage. This process needs the right materials and careful application.
Choosing The Right Sealant
Select a sealant that works well with brick and metal. Silicone sealants are flexible and waterproof. They stick well to rough surfaces like brick. Latex caulk is easy to apply and paintable. Foam insulation expands to fill larger gaps. Check the product label for outdoor use. Choose a sealant that can handle temperature changes.
Applying Caulk Or Foam Insulation
Clean the area around the pet door before sealing. Remove dirt and loose debris. Cut the caulk tube tip at an angle. Apply a smooth bead of caulk around the door frame. Use a caulk smoothing tool or finger to press it in. For larger gaps, use expanding foam. Spray the foam carefully to avoid overfilling. Let the sealant dry fully before testing the door.
Finishing Touches
Finishing touches make the pet door installation look clean and work well. This step ensures no gaps let air or water through. It also helps the door open and close smoothly. A neat finish improves your home’s appearance and protects the brick around the door.
Smoothing And Cleaning Sealant
After applying sealant, smooth it with a damp finger or tool. This removes extra sealant and fills small gaps. Wipe away any sealant that sticks to the brick. Clean edges create a tidy look and keep moisture out. Let the sealant dry completely before moving on.
Testing Door Functionality
Check the pet door by opening and closing it several times. Make sure it swings easily without sticking. Look for any gaps around the door frame. Adjust or add sealant if needed to stop air leaks. A well-tested door keeps pets safe and your home comfortable.
Maintenance Tips
Sealing around a pet door in brick needs regular care. This keeps the door tight and safe from weather and pests. Small problems can turn into big ones if ignored. Proper maintenance saves money and effort over time. Here are key tips to keep your pet door sealed well.
Inspecting Seals Regularly
Check the seals around the pet door often. Look for cracks, gaps, or loose edges. These allow air, water, and bugs inside. Use a flashlight to see hidden areas clearly. Feel for drafts by moving your hand near the edges. Early detection helps avoid major repairs later.
Repairing Wear And Tear
Fix any damage to the seals as soon as you find it. Use weatherproof sealant or caulk made for brick surfaces. Remove old sealant before applying new layers. Smooth the new sealant for a tight fit. Replace worn-out weatherstripping if needed. Keep the seal strong to protect your home and pet.

Credit: merrypad.com
Frequently Asked Questions
How Do You Seal Gaps Around A Pet Door Brick?
Use exterior-grade caulk to seal gaps around the pet door. Clean the area first, apply caulk evenly, and smooth it out. This prevents drafts, water leaks, and pests from entering through the gaps.
What Materials Work Best For Sealing Pet Door Bricks?
Silicone or polyurethane caulks are best for sealing around pet door bricks. They are weather-resistant, flexible, and durable. Choose a color matching your brick for a neat finish.
Can Sealing Around A Pet Door Prevent Water Damage?
Yes, sealing around a pet door blocks water infiltration. Proper sealing keeps moisture out, protecting your wall and interior from damage. This extends the lifespan of your brick and pet door.
How Long Does Sealing Around A Pet Door Last?
Sealing typically lasts 5 to 10 years depending on weather exposure. Regularly inspect the sealant for cracks or gaps and reapply as needed to maintain protection.
Conclusion
Sealing around a pet door in brick keeps your home safe and cozy. Use the right materials to stop drafts and water leaks. Check your work carefully to avoid gaps or cracks. Regular maintenance helps the seal last longer. A well-sealed pet door saves energy and protects your walls.
Take your time and follow each step for best results. Your pet and home will both benefit from a proper seal. Simple actions make a big difference in comfort and safety.