If your furry friend struggles to reach the couch or bed, pet stairs can be a game changer. Building your own pet stairs lets you customize the size, style, and comfort to fit your pet’s needs perfectly.
Imagine the relief your pet will feel, and the peace of mind you’ll gain knowing they can move around safely. In this guide, you’ll discover simple, step-by-step instructions to create sturdy, cozy stairs that your pet will love. Ready to make life easier for your pet and yourself?
Let’s get started!

Credit: www.flumidieselbosch.com.br
Choosing The Right Design
Choosing the right design for pet stairs is important. The design affects your pet’s comfort and safety. It also determines how well the stairs fit in your space. Think about your pet’s size, health, and behavior. These details help you decide the best style and build. Follow simple steps to pick a perfect design for your pet.
Assessing Your Pet’s Needs
Start by knowing your pet’s size and age. Small pets need shorter steps. Older pets may need gentle slopes or wider steps. Watch how your pet moves around the house. Notice if they struggle with jumping or climbing. This information guides you in making safe stairs. Consider any health issues like arthritis or joint pain.
Selecting Materials
Pick materials that are sturdy but gentle on paws. Wood is strong and easy to work with. Foam or carpet-covered stairs offer soft steps. Avoid slippery surfaces to prevent accidents. Think about materials that are easy to clean. Choose colors that blend well with your home décor.
Measuring The Space
Measure the area where you want to place the stairs. Check the height from the floor to the furniture or bed. Measure the width and depth available for the stairs. Ensure the stairs fit without blocking walkways. Accurate measurements help create safe and practical stairs. Plan for enough space for your pet to move comfortably.
Gathering Tools And Supplies
Gathering the right tools and supplies is the first step in building pet stairs. Having everything ready saves time and helps the project run smoothly. It also ensures safety and a better final product. This section breaks down the essential tools and materials needed to make pet stairs at home.
Essential Tools
- Measuring tape for accurate dimensions
- Hand saw or power saw for cutting wood
- Drill with bits for making holes
- Screwdriver to fasten screws
- Sandpaper to smooth rough edges
- Hammer for nails and adjustments
- Carpenter’s square to check right angles
- Clamps to hold pieces together while working
Material Checklist
- Wood boards or plywood for steps and frame
- Screws or nails to join parts
- Wood glue for extra strength
- Non-slip tape or carpet for step surfaces
- Paint or wood finish for protection
- Soft padding or fabric for comfort
Cutting And Preparing Materials
Cutting and preparing materials is the first step in building pet stairs. This part requires care and accuracy. Proper preparation ensures the stairs will be safe and sturdy for your pet. Taking time here makes the whole project easier and better.
Measuring And Marking
Start by measuring the wood pieces needed for each stair. Use a tape measure to get exact lengths. Mark the cut lines clearly with a pencil. Double-check each measurement before cutting. Accurate marks help avoid mistakes and wasted materials.
Safe Cutting Techniques
Use a saw that fits your skill level and the wood type. Always wear safety goggles to protect your eyes. Keep your hands away from the blade. Cut slowly and follow the marked lines carefully. Smooth rough edges with sandpaper to prevent splinters.
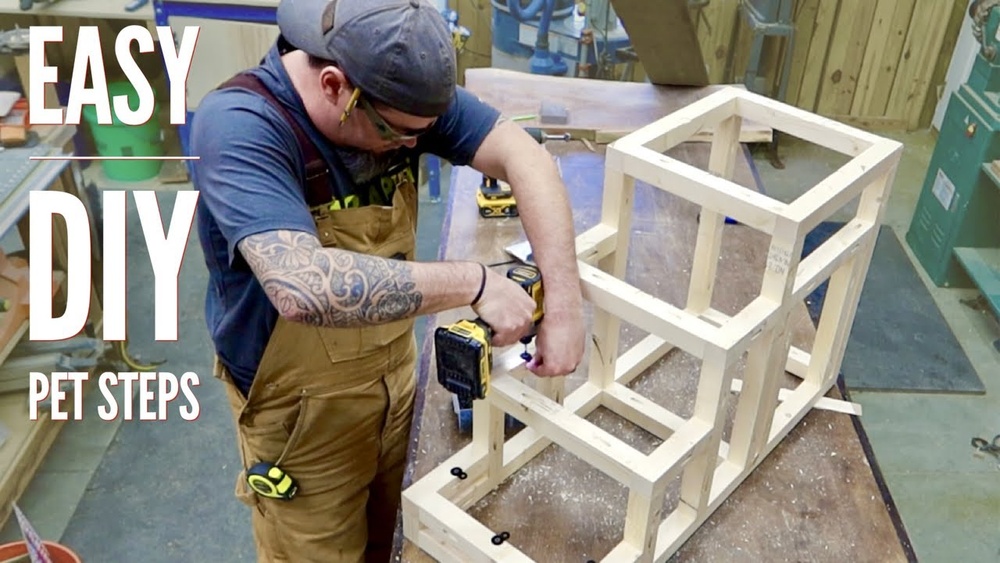
Credit: arloren.com
Assembling The Frame
Assembling the frame is the first step in building sturdy pet stairs. This frame supports the steps and holds everything together. Careful assembly ensures safety and durability for your pet.
Use quality wood or strong materials. Cut pieces to fit your design. Measuring twice avoids mistakes. Arrange parts on a flat surface before joining.
Joining Steps And Supports
Attach each step securely to the supports. Use screws or nails for strong connections. Drill pilot holes to prevent wood from splitting. Check that steps sit evenly and align well.
Supports must be firmly fixed to hold weight. Use brackets or wood glue for extra strength. Keep joints tight to avoid wobbling. Work slowly and test each connection as you go.
Ensuring Stability
Stability is key for safe pet stairs. Add cross braces between supports for extra support. Check the frame on a level surface. Adjust or sand uneven parts to balance the stairs.
Test the frame by pressing down gently. It should not shake or move. Tighten loose screws or reinforce weak spots. A stable frame protects your pet from falls.
Adding Surface And Traction
Adding surface and traction to your pet stairs is important for safety. Pets need a secure grip to climb up and down without slipping. A good surface keeps your pet confident and comfortable. Traction helps prevent injuries and makes the stairs last longer.
Choosing Non-slip Coverings
Select materials that stop slipping easily. Rubber mats and non-slip tapes work well. These materials provide grip and are gentle on your pet’s paws. Look for coverings that are easy to clean and durable. Avoid smooth or shiny surfaces that can cause slips. Choose coverings that fit each step perfectly to avoid tripping.
Attaching Carpet Or Pads
Carpet or pads add soft traction to pet stairs. Use low-pile carpet or special pet pads to reduce slipping. Attach them securely with strong glue or double-sided tape. Make sure the carpet covers the entire step surface. Trim edges to prevent curling or fraying. Check regularly to keep the carpet tight and safe for your pet.
Painting And Finishing Touches
Painting and finishing touches give your pet stairs a polished look. These steps protect the wood and make the stairs safe for your pet. Choose materials carefully. Take your time with each step for the best results.
Selecting Safe Paints
Choose paints that are non-toxic and pet-safe. Avoid paints with strong odors or harmful chemicals. Look for water-based paints made for indoor use. These dry quickly and are safer for your pet.
Pick colors that match your home or your pet’s personality. A smooth finish will make cleaning easier. Test the paint on a small wood piece first. This shows how it looks and dries.
Sanding And Sealing
Sand the wood before painting. Use fine-grit sandpaper to smooth rough edges. This helps the paint stick better. Sanding also removes splinters that could hurt your pet.
After painting, apply a clear sealer. Choose a non-toxic sealer safe for pets. Sealing protects the paint and wood from scratches and moisture. Let each coat dry fully before adding another.
Testing And Adjustments
Testing and adjusting your pet stairs is an important step in the building process. It ensures the stairs are safe and comfortable for your pet. This stage lets you find any problems and fix them before regular use. A well-tested stairway reduces risk of slips or injuries. Focus on stability and step height to make the stairs perfect for your pet.
Checking Stability
Place the stairs on a flat surface. Push gently on different parts to check for movement. The stairs should not wobble or shift. Add non-slip pads under the base if needed. These pads improve grip on smooth floors. Tighten screws or joints that feel loose. A stable stairway feels solid and secure.
Modifying Step Height
Let your pet try the stairs. Watch if they can step easily from one step to the next. If steps are too high, your pet may struggle. Lower the height by trimming the steps or adding risers. Make sure each step is a comfortable height for your pet’s size. Adjust slowly to avoid making steps too small or too large.
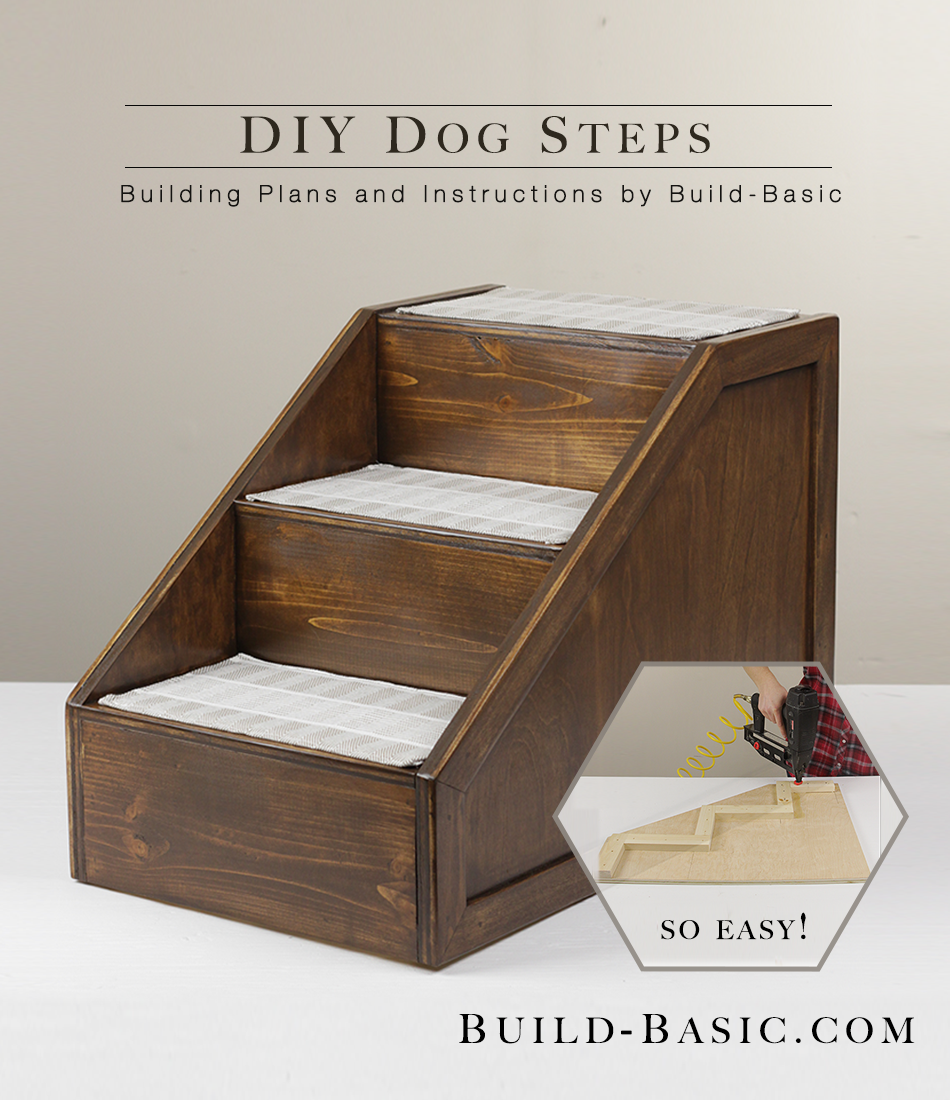
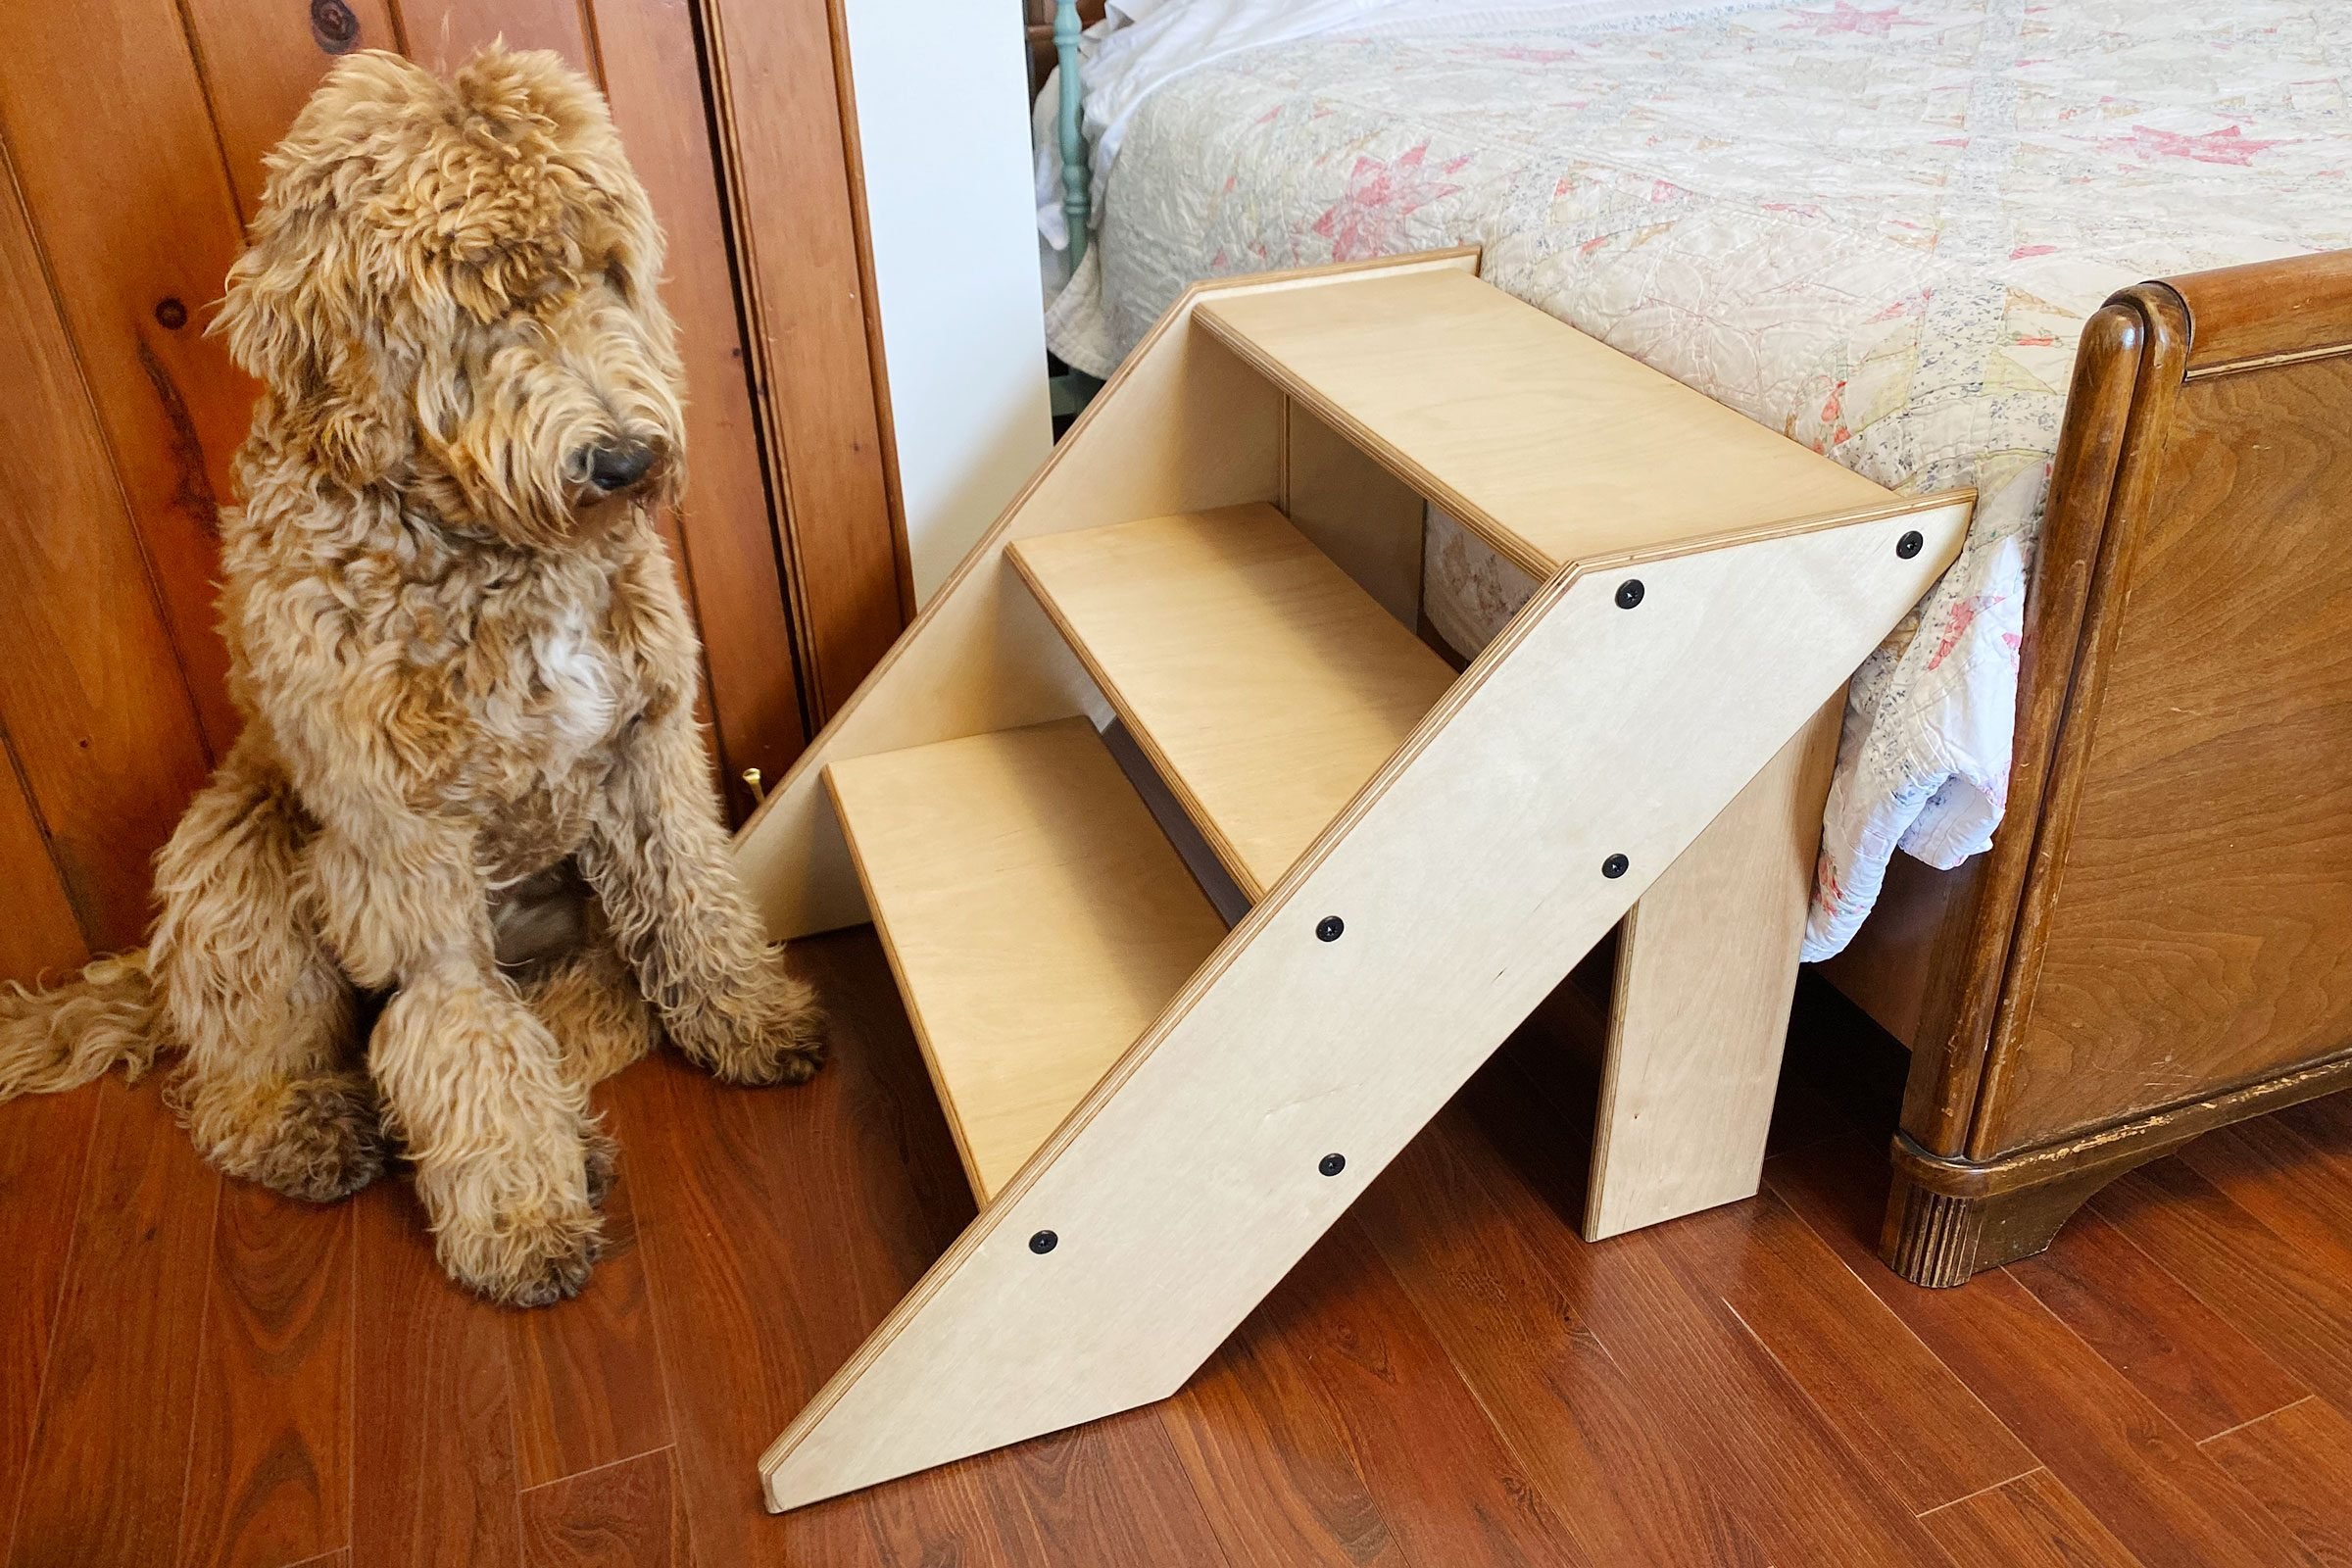
Credit: build-basic.com
Tips For Style And Safety
Building pet stairs requires attention to style and safety. Your pet needs a comfortable and secure way to climb. At the same time, the stairs should match your home’s look. Balancing these two aspects makes the stairs useful and attractive.
Decorative Ideas
Choose colors that match your room’s walls or furniture. Paint the stairs in soft, calming shades to create a cozy feel. Add non-slip rugs or fabric to each step for texture and safety. Use stencils or stickers to add fun patterns without overwhelming the design. Natural wood finishes give a warm, classic look that fits most homes.
Maintaining Durability
Use strong, sturdy wood or plastic for the stairs’ frame. Check that each step supports your pet’s weight safely. Secure all parts with screws, not nails, to avoid loosening over time. Apply a clear sealant to protect wood from scratches and spills. Regularly inspect the stairs for wear and fix any loose parts quickly.
Frequently Asked Questions
What Materials Are Needed To Build Pet Stairs?
You need wood, screws, sandpaper, paint, and non-slip pads. Choose sturdy, pet-safe materials. Measure carefully to fit your pet’s size and space.
How Do I Measure My Pet For Stairs?
Measure your pet’s height and length. Check the step height to match your pet’s leg length. This ensures comfort and safety.
What Tools Are Required To Build Pet Stairs?
Basic tools include a saw, drill, screwdriver, measuring tape, and paintbrush. These help you cut, assemble, and finish the stairs easily.
How Can I Make Pet Stairs Safe And Stable?
Use non-slip pads on each step. Sand all edges smooth to avoid splinters. Ensure the stairs are stable and secure on the floor.
Conclusion
Building pet stairs helps your pet climb safely and comfortably. Using simple materials makes the project easy and affordable. Take your time measuring and cutting for the best fit. Your pet will enjoy the new stairs and use them often.
Small steps can make a big difference in your pet’s life. Try making pet stairs today and see the benefits yourself. It’s a helpful way to support your furry friend’s needs.