Thinking about boosting your home security with a Ring Video Doorbell? You’re about to discover how simple it is to install one yourself.
Imagine always knowing who’s at your door, whether you’re inside or away. This guide will walk you through every step, making the process clear and stress-free. By the end, you’ll have your Ring Doorbell ready to protect your home and give you peace of mind.
Keep reading to find out exactly how to get started.
Choose The Right Doorbell Model
Choosing the right Ring Video Doorbell model is important for a smooth installation. The right model fits your home and meets your needs. Consider power options and compatibility before buying. This helps avoid problems later and saves time.
Battery-powered Vs. Wired Options
Battery-powered models offer easy installation without wires. They work well if you cannot connect to existing doorbell wiring. The battery lasts for months but needs recharging. Wired models connect to your home’s power. They do not require charging and work continuously. Choose based on your home’s setup and your preference.
Compatibility With Your Home
Check if the Ring doorbell works with your doorbell system. Some models need existing doorbell wires for power. Others work standalone with battery power. Also, check your Wi-Fi signal near the door. A strong signal helps the doorbell work well. Verify these details before purchasing to avoid issues.
Gather Necessary Tools
Before installing your Ring Video Doorbell, gather all the necessary tools. Having the right tools ready makes the process smooth and faster. Missing tools can cause delays or poor installation. Prepare your workspace with the tools listed below.
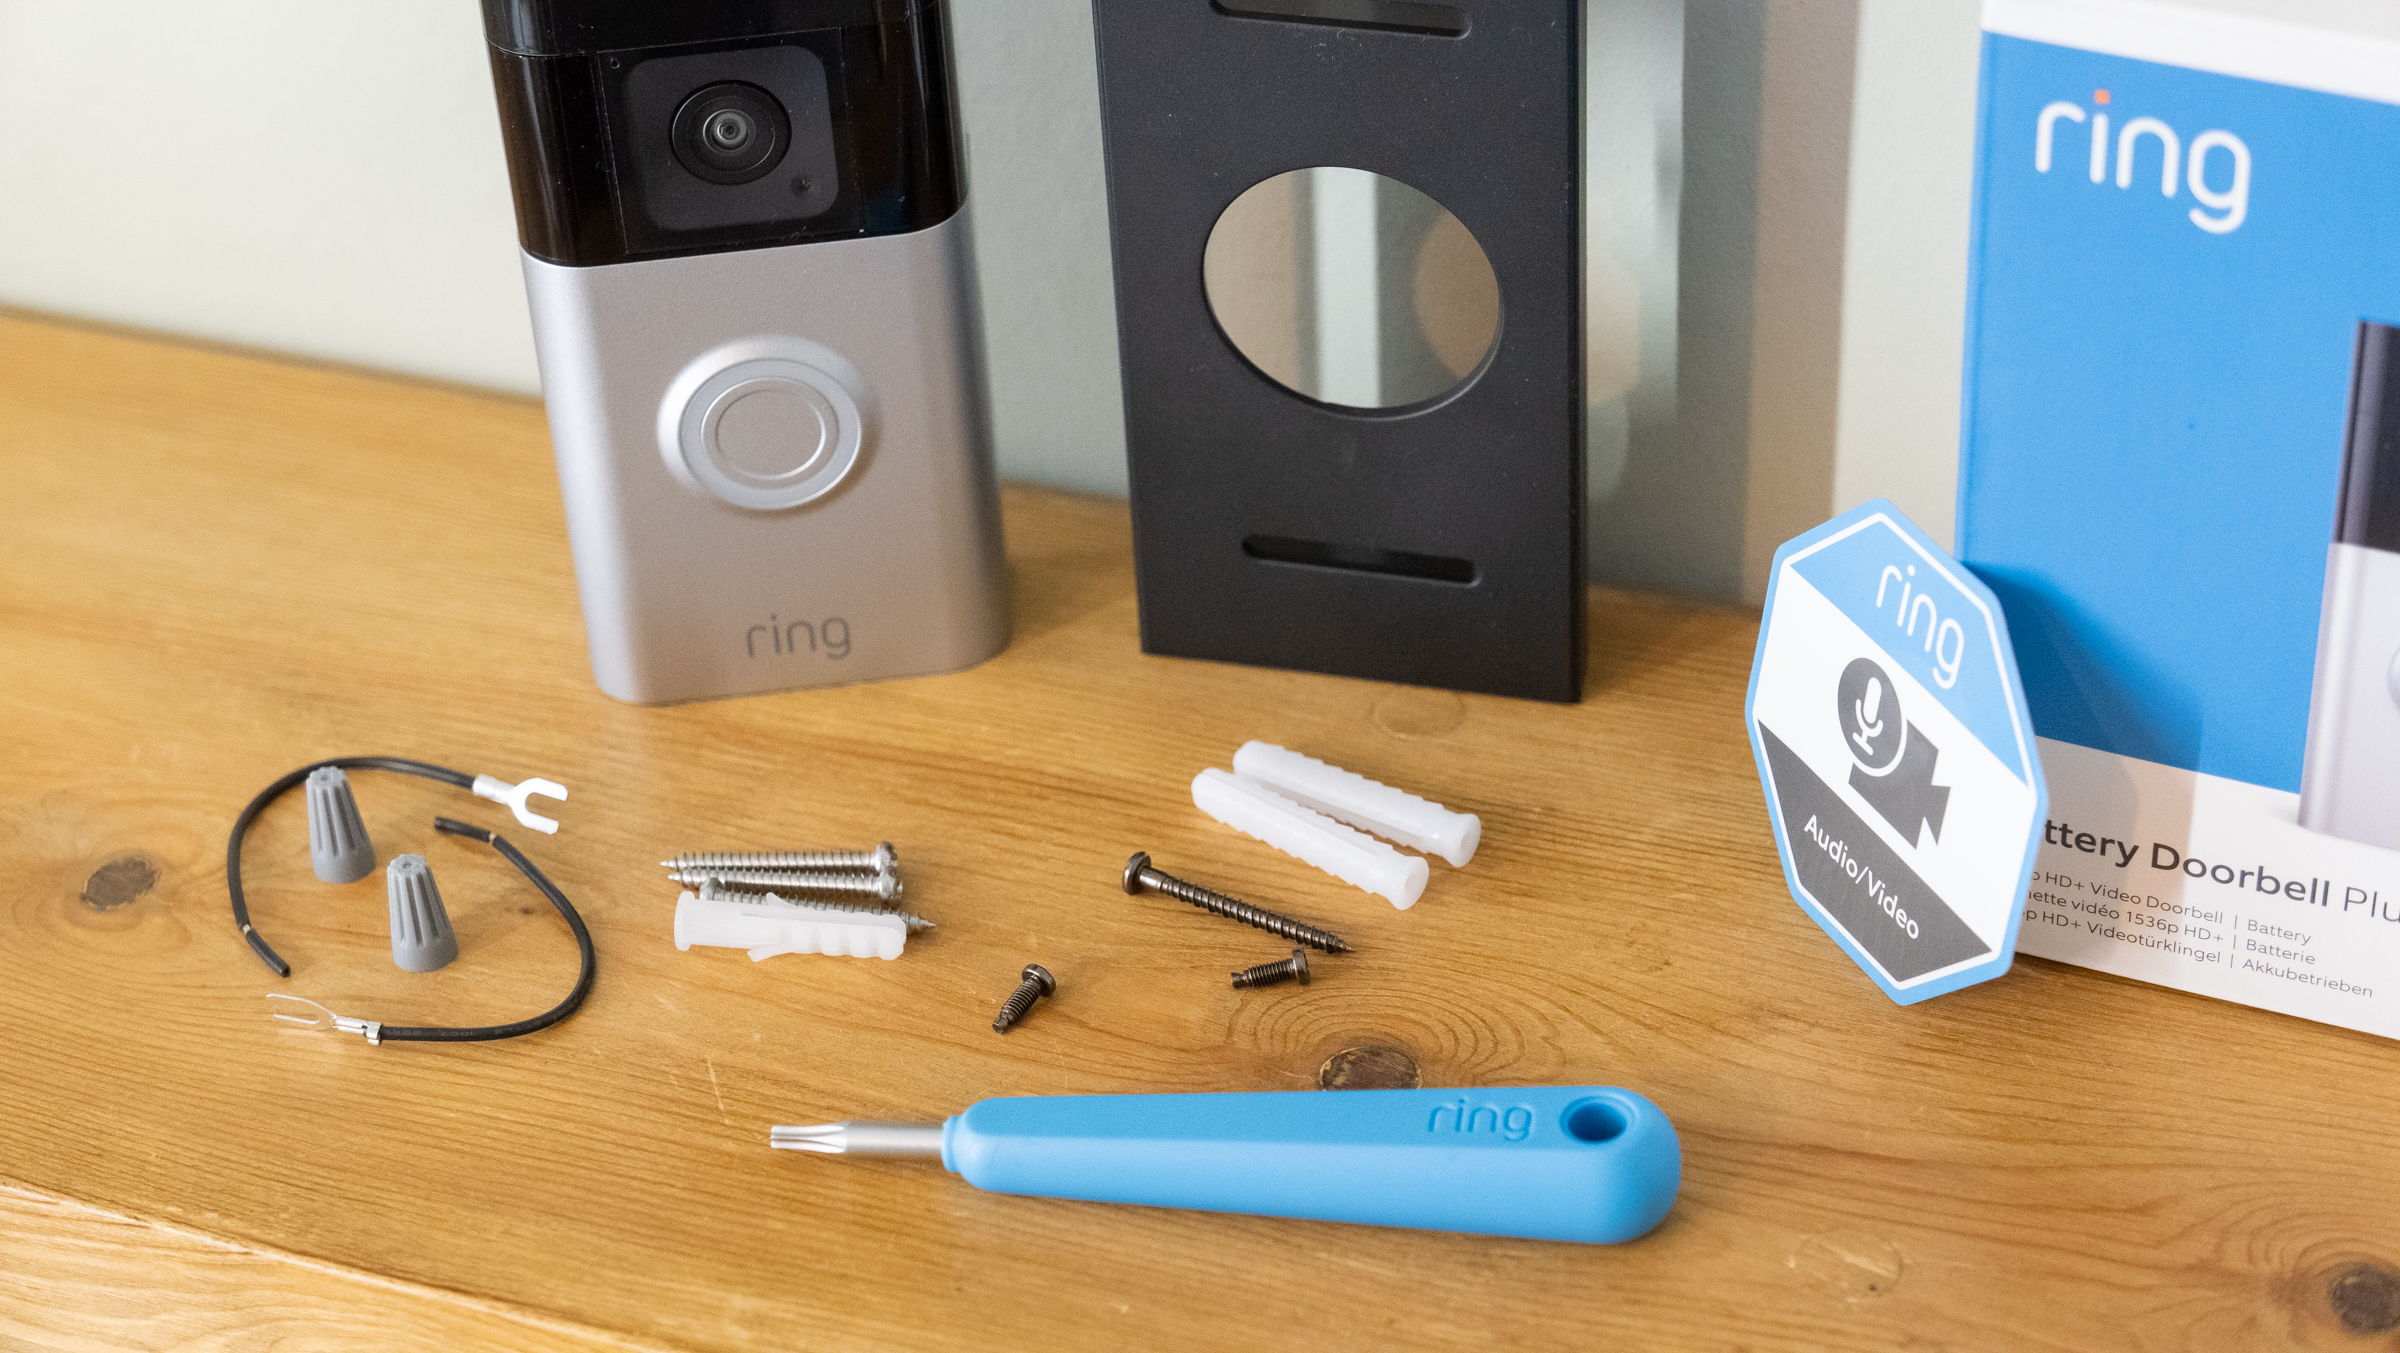
Essential Tools Checklist
- Power drill with bits
- Screwdriver (Phillips and flathead)
- Level tool
- Pencil for marking
- Measuring tape
- Wire stripper (if connecting to existing doorbell wires)
- Safety glasses
Optional Tools For Enhanced Setup
- Stud finder for wall mounting
- Voltage tester for wiring safety
- Anchors and screws for drywall
- Extension cords for power access
- Smartphone with Ring app installed
Charge The Doorbell Battery
Charging the Ring Video Doorbell battery is a key step before installation. A full battery ensures the doorbell works without interruption. Proper charging also extends battery life and keeps your device ready at all times.
Knowing how to charge and check the battery status helps avoid unexpected power loss. This guide explains the best ways to charge and monitor your doorbell battery.
Battery Charging Tips
Remove the battery from the doorbell carefully. Use the included USB charging cable for best results. Connect the cable to a power source like a USB wall adapter or computer. Charge the battery until the indicator light shows it is full. This usually takes 5 to 10 hours. Avoid charging the battery in extreme temperatures. Keep it in a dry, cool place during charging. Regular charging helps maintain battery health over time.
Checking Battery Status
Check the battery level through the Ring app on your phone. Open the app and select your doorbell device. The app shows the current battery percentage. Low battery alerts notify you when charging is needed. You can also press the button on the battery pack. A light will show the remaining charge. Keeping an eye on battery status prevents sudden shutdowns. Charge the battery before it drops below 20% for best performance.
Turn Off Power To Existing Doorbell
Turning off power to your existing doorbell is a crucial first step before installing a Ring Video Doorbell. It helps prevent electric shock and protects your device from damage. Always make sure the power is off before you start any installation.
Safety Precautions
Never touch wires with wet hands. Use insulated tools for safety. Double-check power is off before handling wires. Wear rubber-soled shoes to avoid electric shock. Keep children and pets away from the work area.
Locating The Circuit Breaker
Find your home’s main electrical panel. Look for the breaker labeled “Doorbell” or similar. If unlabeled, turn off breakers one by one. Test the doorbell button to check power status. Use a voltage tester for extra safety.
Remove Old Doorbell
Removing your old doorbell is the first step before installing a Ring Video Doorbell. This process makes space for the new device and ensures proper wiring. Take your time and follow these simple steps carefully.
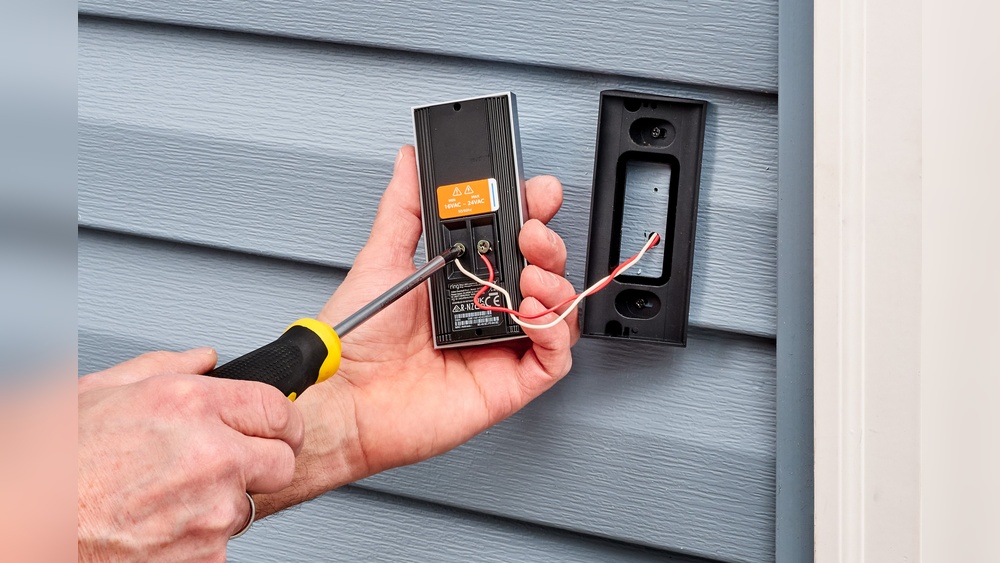
Disconnecting Wires
Start by turning off the power to the doorbell at the circuit breaker. This prevents any electric shock. Use a screwdriver to remove the screws holding the old doorbell in place. Gently pull the doorbell away from the wall to expose the wires.
Note the position of each wire. You can take a photo to remember which wire goes where. Carefully disconnect the wires from the old doorbell by loosening the terminal screws. Avoid letting the wires slip back into the wall.
Preparing The Mounting Area
Check the wall surface where the old doorbell was mounted. Clean the area with a cloth to remove dirt and dust. Fill any holes or cracks with spackle or filler. Smooth the surface and let it dry completely.
This step creates a strong base for your new Ring Video Doorbell. Make sure the area is flat and even. This helps the new device fit securely and work correctly.
Install The Mounting Bracket
Installing the mounting bracket is a key step in setting up your Ring Video Doorbell. This bracket holds the device firmly on your wall or door frame. Proper installation ensures your doorbell works well and stays secure over time.
Focus on placing the bracket in the right spot. Then, fix it tightly using screws. This process is simple and quick with the right tools.
Positioning The Bracket
Choose a spot near your door at about chest height. Make sure the camera has a clear view of your entryway. Avoid places blocked by plants or decorations. Check for a strong Wi-Fi signal in that area. Use the bracket as a guide to mark screw holes on the wall. Keep the bracket level for a neat look.
Securing With Screws
Drill small holes where you marked. Use anchors if you install on drywall or brick. Align the bracket with the holes. Insert the screws and tighten them with a screwdriver. Do not over-tighten to avoid damage. The bracket should feel solid and not wiggle. This keeps your Ring Doorbell safe and steady.
Connect The Wiring
Connecting the wiring is a key step in installing your Ring Video Doorbell. This step links the doorbell to your home’s power supply. Proper wiring ensures the doorbell works without interruptions. Follow these instructions to connect wires safely and correctly.
Attaching Wires To Terminals
Start by turning off the power to your existing doorbell. This keeps you safe during wiring. Locate the two wires coming from your wall. Strip about half an inch of insulation from each wire end. Attach each wire to a terminal on the back of the Ring doorbell. It does not matter which wire goes to which terminal. Tighten the screws to hold wires firmly. Check that wires do not touch each other. Loose or crossed wires can cause problems.
Using Wire Extenders If Needed
Sometimes, wires are too short to reach the doorbell. Use wire extenders to lengthen them safely. Choose extenders with the same gauge as your existing wires. Connect the extender wires to your home’s wires using wire nuts. Then, connect the other end of the extender to the doorbell terminals. Make sure all connections are tight and secure. Cover the connections with electrical tape for extra safety.
Attach The Ring Doorbell
Attaching the Ring Video Doorbell is a simple, important step. It makes sure the device stays in place and works well. This part of the process connects the doorbell to its mounting bracket. Proper attachment also helps the doorbell capture clear video and detect motion properly.
Aligning And Snapping Into Place
First, hold your Ring Doorbell near the mounting bracket. Line up the bottom edge of the doorbell with the bracket. Gently press the doorbell onto the bracket. You will hear a click sound when it snaps in place. This sound means the doorbell is attached correctly. Check if the doorbell feels secure and does not wiggle.
Securing With Security Screws
Next, use the provided security screws to lock the doorbell. These screws prevent theft or accidental removal. Insert the screws into the holes at the bottom of the doorbell. Tighten them with the special screwdriver included in the package. Do not overtighten; just secure them firmly. This step ensures your Ring Doorbell stays safe and stable.
Power On And Test
Powering on your Ring Video Doorbell and testing it is important. This step ensures the device works properly. It helps catch any setup issues early. Follow clear steps to restore power and check video and audio functions.
Restoring Circuit Breaker Power
Find the circuit breaker for your doorbell. Switch it back to the ON position. This restores electricity to the device. Wait a few moments for the doorbell to power up. Watch for lights or sounds signaling power is on. If no signs appear, check the breaker again.
Testing Video And Audio Functions
Open the Ring app on your smartphone. Look for a live video feed from the doorbell. Move in front of the camera to check motion detection. Press the doorbell button to test the chime and notification. Speak near the doorbell to test audio quality. Listen to the speaker and microphone through the app. Make sure video is clear and audio is loud enough.
Credit: www.youtube.com
Set Up The Ring App
Setting up the Ring app is the first step to use your new video doorbell. The app connects your phone to the doorbell. It lets you see who is at your door. It also sends alerts when someone rings the bell or moves outside.
Follow simple steps to get the app ready. You will create an account and link the doorbell to your Wi-Fi. This setup ensures smooth communication between the doorbell and your phone.
Downloading And Creating An Account
Start by downloading the Ring app from your phone’s app store. It is available for both Android and iOS devices. After installation, open the app to begin the setup process.
Create a new account by entering your email and a strong password. The app will ask for some basic details. Verify your email to activate the account. This step is important for security and notifications.
Connecting Doorbell To Wi-fi
Once your account is ready, the app guides you to connect the doorbell to Wi-Fi. Make sure your phone is near the doorbell during this step. Select your home Wi-Fi network and enter the password.
The doorbell will connect to the network and sync with the app. A stable Wi-Fi connection is essential for live video and alerts. Check the signal strength before moving forward.
Customize Settings And Alerts
Customizing your Ring Video Doorbell settings and alerts lets you control how it works. You can make sure you only get alerts that matter. This helps reduce unnecessary notifications. It also improves your home security experience.
Adjusting Motion Sensitivity
Motion sensitivity controls how easily your doorbell detects movement. You can set it high to catch small motions. Or set it low to avoid false alerts from pets or passing cars. Find the right balance to suit your home’s activity. Adjust this setting in the Ring app under motion settings. Test different levels to see what works best for your space.
Setting Notification Preferences
You can choose how and when to receive notifications. Pick alerts for motion, doorbell presses, or both. Decide if you want notifications on your phone, tablet, or other devices. Silence alerts during certain hours to avoid disturbance. Customizing notifications helps you stay informed without feeling overwhelmed. Use the Ring app to select your preferred alert types and schedule quiet times.
Credit: www.techradar.com
Mount Optional Accessories
Mounting optional accessories can enhance your Ring Video Doorbell’s performance and convenience. These accessories help you customize the setup for your needs. Some popular options include chimes, solar panels, and security mounts. They improve functionality and make installation easier.
Adding Chimes Or Solar Panels
Chimes let you hear alerts inside your home. You can plug them into any outlet. They connect easily to your Ring Doorbell. This way, you won’t miss visitors or alerts.
Solar panels keep your doorbell charged. Place the panel in sunlight near the doorbell. It reduces the need to recharge the battery. This is perfect for sunny spots.
Using Security Mounts
Security mounts protect your Ring Doorbell from theft. They make it harder to remove the device. These mounts fit around the doorbell tightly. Installation is simple and adds extra safety.
Choose a security mount that fits your Ring model. It keeps your device secure without blocking the camera or buttons. This accessory helps protect your investment.
Credit: www.younghouselove.com
Frequently Asked Questions
How Do I Prepare My Door For Ring Video Doorbell Installation?
First, check if your door has existing wiring. Turn off power at the breaker. Clean the mounting surface for a secure fit.
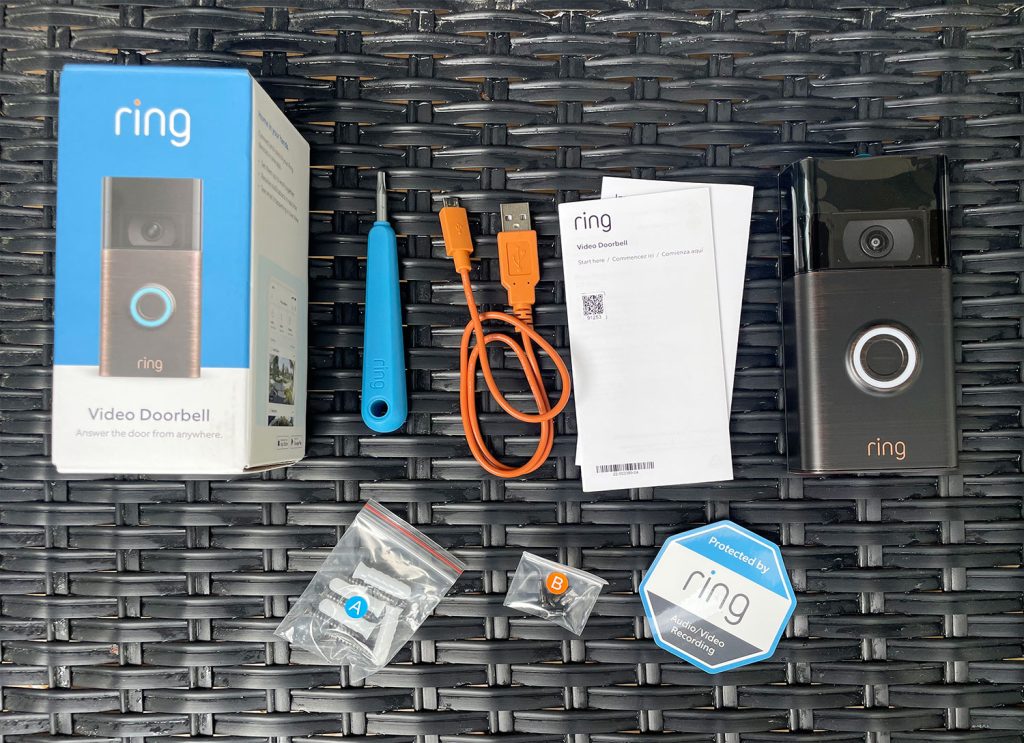
What Tools Do I Need To Install A Ring Video Doorbell?
You need a drill, screwdriver, level, and a pencil. Also, have the mounting screws and anchors provided with the doorbell.
How Do I Connect The Ring Video Doorbell To Wi-fi?
Open the Ring app, follow the in-app setup instructions. Select your Wi-Fi network and enter the password to connect.
Can I Install Ring Video Doorbell Without Existing Doorbell Wiring?
Yes, you can use the Ring Video Doorbell with a rechargeable battery. Just mount it using the included hardware and follow app setup.
Conclusion
Installing a Ring Video Doorbell is simple and quick. Follow the steps carefully for best results. Make sure your Wi-Fi is strong and stable. Test the doorbell after installation to confirm it works well. Regularly check the battery or power source.
Enjoy the extra security and convenience it offers. Protect your home with confidence and ease. Now, you are ready to use your Ring Video Doorbell every day.