Are you tired of your pet wandering into rooms they shouldn’t? A pet gate can keep your furry friend safe and your home organized.
But buying one can be expensive or not fit your space just right. What if you could build your own pet gate, tailored perfectly to your needs? This guide will show you exactly how to DIY a pet gate with simple tools and easy steps.
By the end, you’ll have a custom gate that works for you and your pet—saving money and giving you peace of mind. Ready to get started? Let’s dive in!

Credit: www.youtube.com
Choosing The Right Materials
Choosing the right materials for your DIY pet gate is important. The material affects the gate’s strength and look. It also impacts how safe and long-lasting the gate will be. Pick materials that fit your pet’s size and behavior.
Wood Options For Durability
Wood is a popular choice for pet gates. It looks natural and fits many home styles. Hardwoods like oak and maple last longer and resist damage. Softwoods like pine cost less but may wear faster. Sand and seal wood to protect it from scratches and moisture.
Using Metal For Strength
Metal gates are strong and very secure. Steel and aluminum are common metals used. Steel is heavy and tough, good for large dogs. Aluminum is lighter and resists rust well. Metal gates often have powder coating to prevent rust and wear.
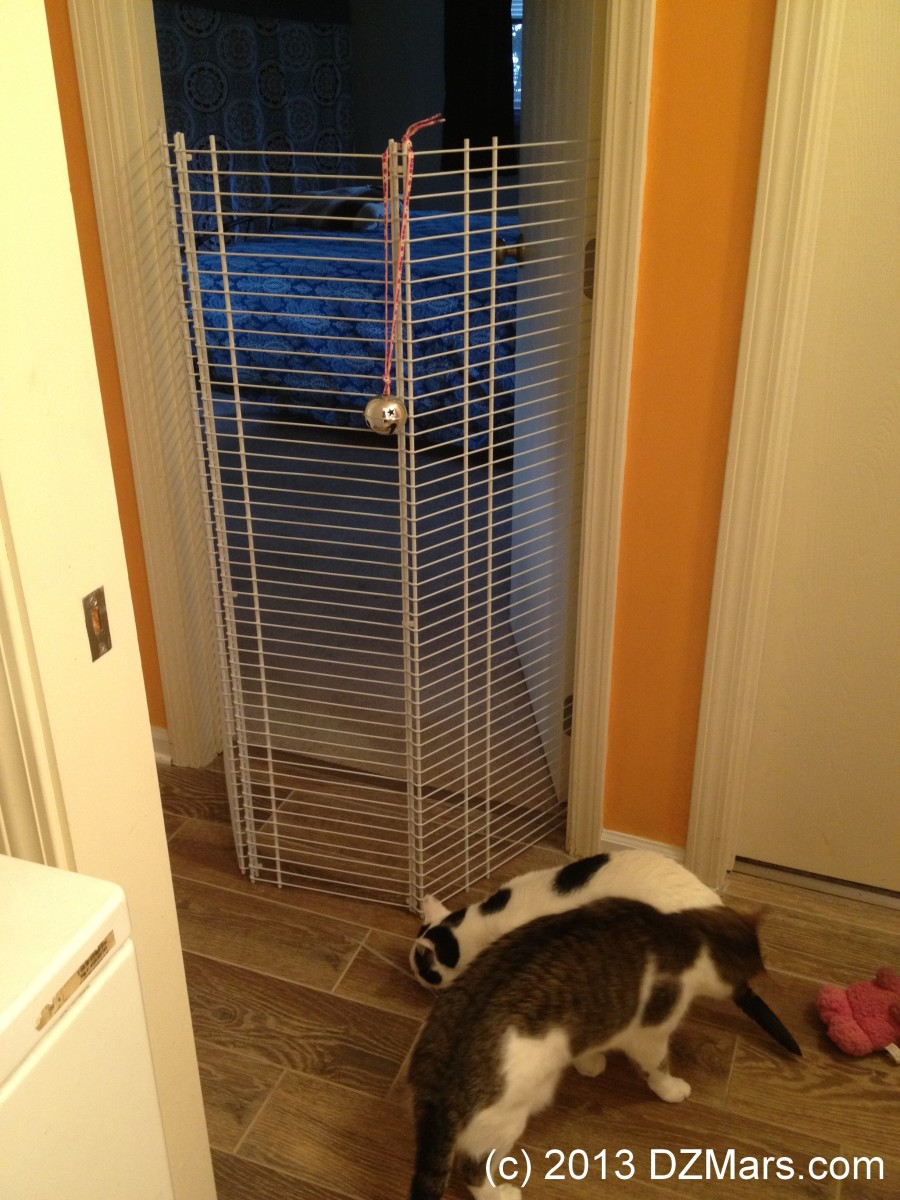
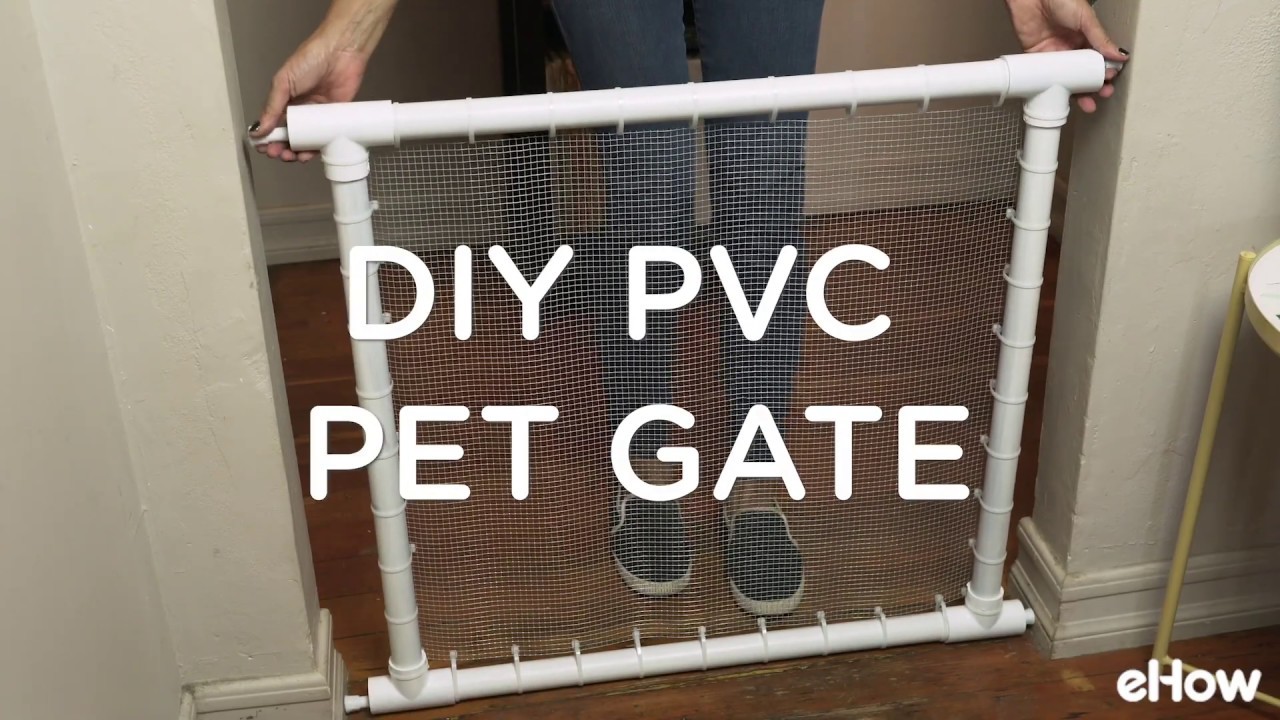
Incorporating Mesh Or Fabric
Mesh or fabric can make the gate lighter and safer. Strong mesh stops small pets from squeezing through. It also lets you see your pet easily. Choose durable fabric with tight weaves for pets that chew or scratch. Mesh panels work well with wooden or metal frames.
Measuring Your Space
Measuring your space is the first step in making a pet gate. Accurate measurements help the gate fit well and work properly. Take your time and measure carefully. This saves effort and money later.
Assessing Doorways And Hallways
Start by measuring the width of the doorway or hallway. Use a tape measure to get exact numbers. Check the height from floor to the frame. Note any uneven walls or floors. These details affect gate choice and installation.
Considering Pet Size And Behavior
Think about your pet’s size before measuring. Small pets need shorter gates than large ones. Watch how your pet moves and jumps. Active pets may need taller, stronger gates. Measure space with your pet’s habits in mind.
Designing Your Gate
Designing your pet gate sets the stage for both function and style. A well-planned gate keeps pets safe and fits your home’s look. Start with clear ideas about space and pet needs. Think about how often you will open the gate and who will use it. This helps you pick the best design.
Choose a design that matches your skill level and tools. Each type of gate has its benefits and fits different spaces. Focus on simple shapes for easy building. Add small touches to make the gate look nice and fit your home’s style.
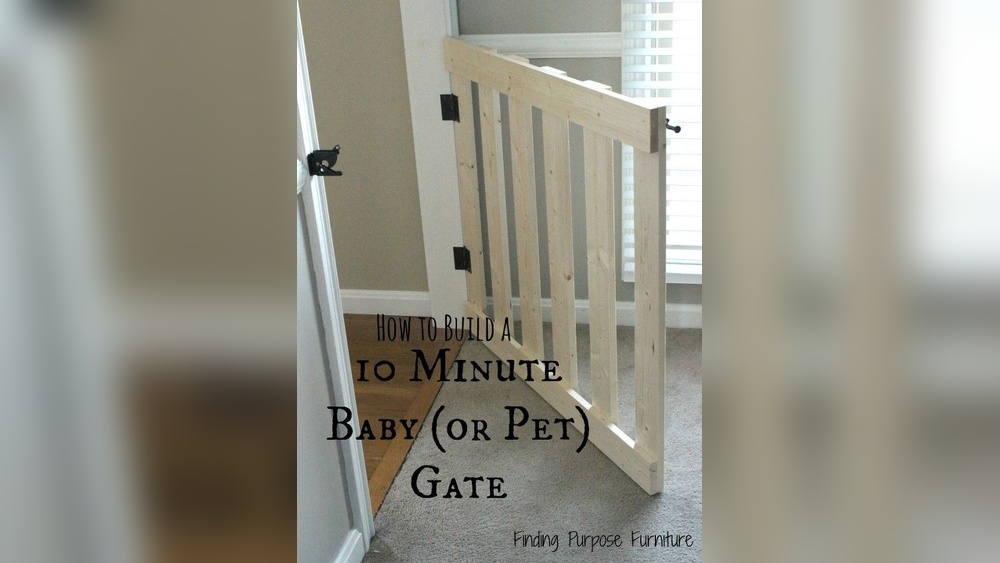
Simple Swinging Gates
Simple swinging gates are easy to build and use. They open like a door on hinges. This design works well for hallways and doorways. Use wood or metal for strength. Make sure the hinges are strong and smooth. Add a latch that your pet cannot open. This gate style saves space and is quick to install.
Sliding And Folding Designs
Sliding gates slide to the side to open. They save space in small rooms. Use a track or rollers for smooth movement. Folding gates fold like an accordion. They are flexible and fit wide openings. Both designs need careful measuring for good fit. Choose materials that slide or fold easily. These gates are good for busy areas.
Adding Decorative Elements
Decorative elements make your gate look special. Paint the gate in colors that match your home. Add simple patterns or shapes with wood cutouts. Use stencils for easy designs. Small decorations can show your style. Keep decorations safe and pet-friendly. Avoid sharp edges or loose parts. A nice gate looks good and works well.
Gathering Tools And Supplies
Starting a DIY pet gate project needs proper preparation. Gathering the right tools and supplies saves time. It also ensures the gate is strong and safe for your pet. Knowing what to collect before you begin helps the process go smoothly.
Essential Tools For Construction
First, get a measuring tape to check the gate space. A saw is needed to cut wood or metal pieces. Use a drill to make holes and fix screws. Screwdrivers help tighten screws securely. Sandpaper smooths rough edges for safety. Hinges allow the gate to open and close easily. A level keeps the gate straight and balanced.
Safety Gear To Use
Wear safety glasses to protect your eyes from dust and debris. Gloves keep your hands safe from splinters and sharp tools. Use ear protection if power tools are loud. A dust mask stops you from breathing in sawdust. Dress in tight clothing to avoid catching on tools or wood. Safety is key to prevent accidents during construction.
Building The Frame
Building the frame is the first important step for a strong pet gate. The frame holds everything together. It must fit the space and be safe for your pet. Use wood or metal, depending on your tools and skills.
Cutting And Assembling Wood Or Metal
Measure the opening where the gate will go. Cut the wood or metal pieces to match these measurements. Use a saw for wood and a metal cutter for metal parts. Make sure each piece is straight and smooth.
Arrange the cut pieces to form a rectangle or square frame. Join the corners using screws or welding. Check that the frame is the right size and shape before fixing it permanently.
Ensuring Stability And Balance
Check the frame for any wobbling or uneven parts. Add extra supports or braces if needed. These help keep the gate steady and safe for your pet.
Test the frame by pressing gently on different sides. It should not move or bend. A solid frame prevents accidents and lasts longer in daily use.
Installing The Gate
Installing a pet gate is a key step for keeping your pet safe. This part needs care to ensure the gate works well and stays strong. Follow these steps to fit the gate properly and avoid problems later.
Mounting Hinges And Latches
Start by fixing the hinges on the gate. Use a drill to make holes for screws. Make sure the hinges are straight and tight. Attach the latch on the side that opens. Check if the latch locks and unlocks smoothly. Adjust it so the gate closes firmly but easily.
Securing The Gate To Walls Or Doorframes
Next, fix the gate frame to the wall or doorframe. Use a level to keep the gate straight. Mark where the screws will go. Drill holes and use strong screws for support. Test the gate by opening and closing it many times. The gate should not wobble or fall.
Finishing Touches
Finishing touches make your DIY pet gate safe and beautiful. They protect the wood and keep your pet from getting hurt. These small steps improve your gate’s look and its durability. Spend time on these details for a lasting result.
Sanding And Painting
Start by sanding the wood to remove rough edges. Use fine-grit sandpaper for a smooth surface. Sand all sides to prevent splinters. Clean off dust with a dry cloth before painting.
Choose paint that is safe for pets and durable. Apply one or two coats evenly. Let each coat dry fully before adding the next. Painting protects the wood from moisture and scratches.
Adding Padding Or Protective Covers
Cover sharp corners and edges with soft padding. Use foam or rubber strips for protection. Attach covers with strong adhesive or small nails. This prevents your pet from getting hurt.
Check that all padding stays in place over time. Replace worn padding to keep safety high. Padding also makes the gate more comfortable to touch.
Credit: congresoscoit.es
Maintaining Your Pet Gate
Maintaining your pet gate is key to keeping your pet safe and your home tidy. A well-kept gate works smoothly and lasts longer. Regular care stops small issues from turning into big problems. This section shows how to care for your DIY pet gate with simple steps.
Regular Safety Checks
Check the gate often for loose screws or parts. Tighten anything that feels wobbly. Look for cracks or broken pieces that could hurt your pet. Test the latch to make sure it locks well. A gate that does not close properly can let pets through.
Watch how your pet uses the gate. Pets that push or bite the gate may cause damage. Fix any damage quickly to keep the gate strong and safe. Regular checks make the gate reliable every day.
Cleaning Tips
Clean the pet gate often to remove dirt and pet hair. Use a soft cloth with mild soap and water. Avoid harsh chemicals that can damage the gate’s surface. Dry the gate well after cleaning to stop rust or mold.
For wooden gates, check for stains or rough spots. Sand and refinish if needed to keep the wood smooth. Clean metal gates to stop rust from forming. A clean gate looks good and works better.
Credit: www.youtube.com
Frequently Asked Questions
What Materials Are Needed To Diy A Pet Gate?
You need wood or metal panels, screws, hinges, a latch, sandpaper, and paint or stain. Choose durable, pet-safe materials for safety and longevity.
How Do I Measure For A Diy Pet Gate?
Measure the width and height of the doorway or opening. Ensure the gate fits snugly but allows easy opening and closing.
Can I Make A Diy Pet Gate Without Tools?
Basic tools like a screwdriver and drill are recommended. However, some gates can be assembled with pre-cut parts and minimal tools.
How To Make A Pet Gate Safe For Puppies?
Smooth all edges, use non-toxic paint, and secure the gate firmly. Avoid small gaps to prevent puppy injuries or escapes.
Conclusion
Building your own pet gate saves money and offers control. You choose the size, style, and materials easily. This project suits many skill levels and homes. A well-made gate keeps pets safe and rooms tidy. Simple tools and steps lead to great results.
Enjoy the pride of creating something useful. Try it today, and see how easy it can be!