Imagine looking into your mirror each morning and seeing more than just your reflection. What if it showed you the weather, your calendar, news headlines, or even your daily reminders?
With a Raspberry Pi 3, you can turn this idea into reality and build your very own smart mirror. This isn’t just a cool gadget—it’s a tool that can make your mornings smoother and your routines smarter. Keep reading, and you’ll discover exactly how to use your Raspberry Pi 3 to create a smart mirror that fits your lifestyle perfectly.
Choosing The Right Raspberry Pi 3 Model
Choosing the right Raspberry Pi 3 model is important for your smart mirror project. Each model has different features. These affect how well your smart mirror will work. Picking the right one saves time and money. It also makes your setup easier.
Some models have better processors or more memory. Others use less power or have extra ports. Knowing these differences helps you find the best fit. Also, the right model supports the software your mirror needs.
Comparing Raspberry Pi 3 Versions
The Raspberry Pi 3 family includes the Model B, Model B+, and others. The Model B has a 1.2 GHz processor and 1 GB RAM. The Model B+ is faster, with a 1.4 GHz processor. It also has better Wi-Fi and Ethernet speeds.
Model B+ offers improved heat management. This helps during long use. Both models support Bluetooth and have similar ports. The choice depends on your budget and performance needs.
For a smart mirror, faster Wi-Fi and better cooling matter. These improve the mirror’s responsiveness and stability. The Model B+ usually works better for this type of project.
Essential Accessories To Get Started
Besides the Raspberry Pi 3, you need some accessories. A microSD card stores your operating system and files. Choose one with at least 16 GB and good speed.
A power supply with 5V and 2.5A output is necessary. This ensures your Pi runs smoothly without power issues. Also, get an HDMI cable to connect the Pi to your mirror display.
A case protects the Raspberry Pi from dust and damage. Cases with good ventilation help prevent overheating. Lastly, a keyboard and mouse help during setup, but you can remove them later.

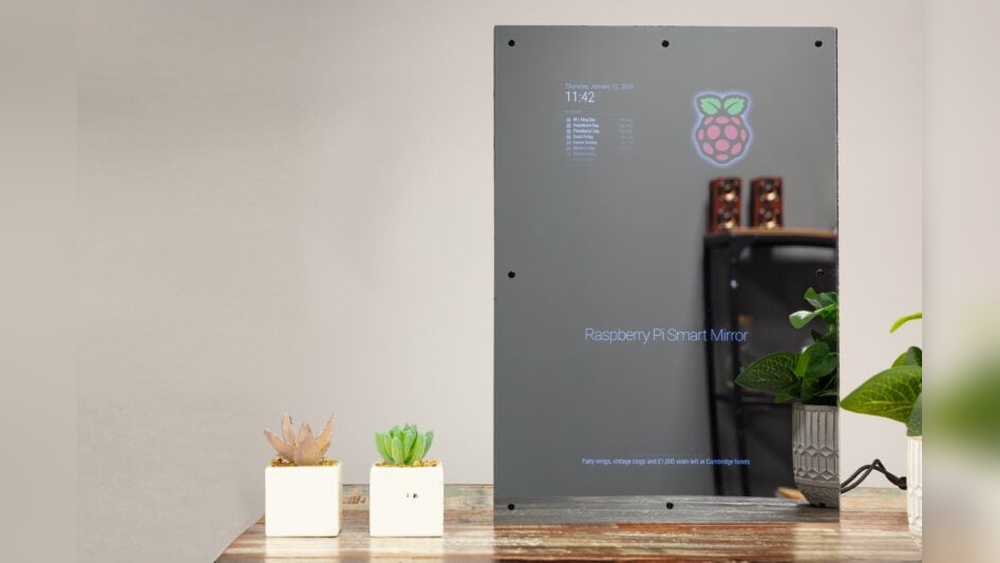
Credit: www.raspberrypi.com
Gathering Materials For The Smart Mirror
Building a smart mirror starts with gathering the right materials. Each part plays a key role in making the mirror work well. Choosing the right pieces can make your project easier and more enjoyable.
Focus on quality and compatibility with the Raspberry Pi 3. This ensures the mirror will display information clearly and respond quickly. Let’s explore the main components you need for your smart mirror.
Selecting The Two-way Mirror
The two-way mirror is the front surface of your smart mirror. It lets you see your reflection and the screen behind it. Choose a mirror that is clear and has good transparency.
Acrylic or glass mirrors both work well. Acrylic is lighter and easier to cut. Glass is more durable but heavier. The size should match your display screen for the best look.
Picking The Display Screen
The display screen shows the information on your smart mirror. A flat, thin LCD screen is ideal. It fits well behind the mirror and shows bright images.
Pick a screen with HDMI input for easy connection to the Raspberry Pi 3. The size should match the mirror for clear visuals. A screen with good resolution improves readability.
Additional Hardware Components
You need more than just a mirror and screen. The Raspberry Pi 3 is the brain of your smart mirror. It runs the software and controls the display.
Include a power supply that matches the Pi’s needs. A frame or case helps hold all parts together. You may also want a motion sensor to detect your presence.
Other useful parts include a USB keyboard and mouse for setup. Cables and connectors link all components. Make sure everything fits well and is safe to use.
Setting Up The Software Environment
Setting up the software environment is the first step to build your smart mirror with Raspberry Pi 3. This process prepares your device to run the MagicMirror² platform smoothly. It involves installing the operating system, connecting to the internet, and installing necessary software. Follow these simple steps to get started.
Installing Raspbian Os
Start by downloading the latest Raspbian OS image from the official Raspberry Pi website. Use software like Balena Etcher to flash the image onto a microSD card. Insert the card into your Raspberry Pi 3 and power it on. The system will boot into Raspbian, ready for setup.
During the first boot, follow the setup wizard to choose your language, time zone, and keyboard layout. This ensures the system matches your preferences. After this, you have a clean and optimized OS to build your smart mirror.
Configuring Network And Updates
Connect your Raspberry Pi to the internet via Wi-Fi or Ethernet. Open the terminal and run sudo apt update to refresh software lists. Next, type sudo apt upgrade -y to install all updates. This step keeps your system secure and stable.
Set your network to connect automatically to avoid connection issues later. This helps the MagicMirror² platform fetch data like weather and news without interruptions.
Installing Magicmirror² Platform
Open the terminal and install Node.js by running curl -sL https://deb.nodesource.com/setup_14.x | sudo -E bash - and then sudo apt install -y nodejs. This is required for MagicMirror² to work.
Clone the MagicMirror² repository with git clone https://github.com/MichMich/MagicMirror. Move into the directory by typing cd MagicMirror. Run npm install to install all dependencies.
Finally, start the MagicMirror² with npm start. Your smart mirror interface will appear, ready to customize and use.
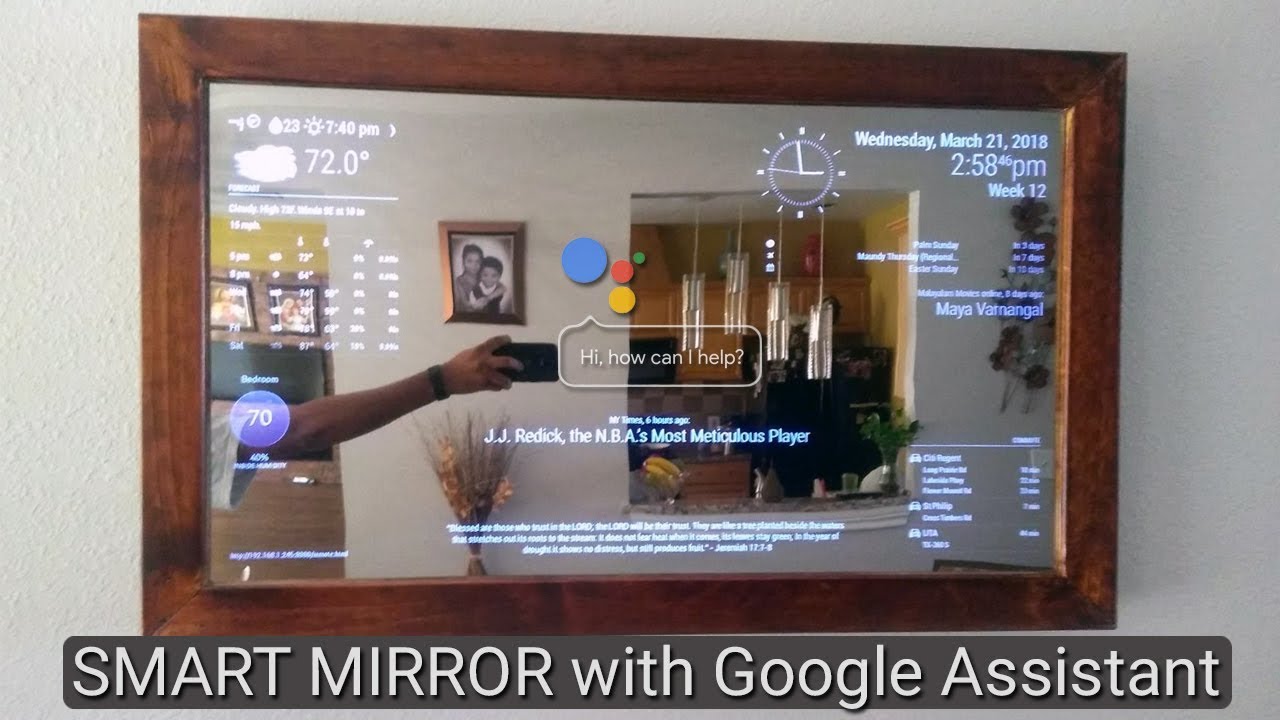
Credit: www.youtube.com
Building The Smart Mirror Frame
Building the smart mirror frame is a key step in your project. The frame holds all parts together and gives a clean look. It must fit the screen and mirror perfectly. Strong and neat construction helps your mirror last longer. Let’s explore how to design, assemble, and manage cables for the frame.
Designing The Frame Dimensions
Start by measuring the screen size. Add extra space for the mirror and frame edges. The frame should be slightly bigger than the screen. Keep the depth shallow but enough to hold parts inside. Plan for mounting holes or stands if needed. Sketch your design on paper before cutting materials.
Assembling The Mirror And Screen
Place the two-way mirror in the frame first. It should cover the screen completely. Next, fix the screen behind the mirror using brackets or tape. Make sure the screen surface is clean and dust-free. Align the screen so the display shows clearly through the mirror. Secure all parts tightly but gently.
Cable Management Tips
Use cable ties or clips to keep wires tidy. Run cables along the frame edges to hide them. Avoid tight bends to prevent damage. Leave some slack near ports for easy connections. Label cables if you use many to avoid confusion later. A neat setup improves both look and function.
Customizing Smart Mirror Modules
Customizing the smart mirror modules lets you make the mirror more useful. You can choose what information shows up. This helps you see what matters most every day. The Raspberry Pi 3 makes this easy with many options.
Adding Weather And News Feeds
Add weather updates to know the daily forecast at a glance. Use simple APIs to get local weather data. News feeds keep you informed with headlines from trusted sources. These modules update automatically, saving your time.
Integrating Calendar And Reminders
Sync your calendar to see upcoming events and appointments. Reminders help you stay on track with daily tasks. Use Google Calendar or other services for easy integration. This keeps your schedule visible and organized.
Voice Control And Ai Features
Voice control lets you interact with the mirror hands-free. You can ask for weather, news, or set reminders by speaking. AI features add smart responses to your questions. This makes the mirror more interactive and helpful.
Optimizing Performance And Power
Optimizing the performance and power of your Raspberry Pi 3 is key for a smooth smart mirror experience. The device must run efficiently without overheating or losing power. This helps your smart mirror stay fast and reliable. Small changes can make a big difference in performance and power use.
Power Supply Best Practices
Choose a power supply that provides at least 2.5 amps at 5 volts. Use a good quality USB cable to avoid power drops. Avoid powering the Pi through weak or damaged cables. Check the power supply rating before starting your project. A stable power source prevents unexpected shutdowns or slowdowns.
Overclocking Raspberry Pi 3
Overclocking boosts the CPU speed for better performance. Increase the clock speed in small steps to avoid crashes. Monitor the system for stability during overclocking. Use the Raspberry Pi configuration tool or edit the config.txt file. Overclocking can improve speed but may cause extra heat.
Cooling Solutions
Heat affects your Raspberry Pi’s speed and lifespan. Use heat sinks on the CPU and other chips to reduce temperature. Add a small fan inside the smart mirror case for airflow. Place the Raspberry Pi away from direct sunlight or heat sources. Cooler devices perform better and last longer.
Troubleshooting Common Issues
Troubleshooting is key when setting up your Raspberry Pi 3 smart mirror. Small issues can block your progress. Knowing how to fix common problems saves time and stress. This guide covers typical challenges and quick fixes.
Display And Resolution Problems
Sometimes, the screen may show a blank or fuzzy image. Check the HDMI cable connection first. Ensure the cable fits tightly in the Raspberry Pi and the monitor.
Adjust the resolution in the Raspberry Pi settings. Use the config.txt file to set the correct screen size. Restart the device after changes to apply them.
Try a different monitor if the issue persists. Faulty hardware may cause display errors. Keep the software updated to avoid compatibility issues.
Network Connectivity Fixes
Smart mirrors rely on internet access for updates and data. If the Pi does not connect, verify the Wi-Fi password. Make sure the network is active and within range.
Restart the router and the Raspberry Pi. This often solves connection drops. Use a wired Ethernet connection for a more stable link.
Check the Pi’s network settings in the terminal. Use commands like ifconfig and ping to test connectivity. Fix IP address conflicts by renewing your IP.
Software Glitches And Updates
Software bugs can cause the smart mirror to freeze or crash. Keep your operating system and apps up to date. Run sudo apt-get update and sudo apt-get upgrade regularly.
Clear cache and temporary files if the system runs slow. Reinstall the smart mirror software if problems continue. Backup your data before making major changes.
Use community forums for help. Many users share fixes for common bugs. Debug logs can reveal errors and help solve issues faster.

Credit: www.instructables.com
Expanding Smart Mirror Functionality
Expanding the functionality of your smart mirror makes it more useful every day. Adding new features lets you customize the mirror to fit your needs. The Raspberry Pi 3 supports many upgrades that enhance the smart mirror’s capabilities.
Adding Sensors And Cameras
Sensors can track room temperature, humidity, and light levels. This data helps the mirror display useful information automatically. Cameras add face recognition for personalized content. They also enable gesture control to interact without touch. These devices connect easily to the Raspberry Pi 3.
Home Automation Integration
Connect your smart mirror to home automation systems. Control lights, thermostats, and security devices from the mirror’s screen. Use voice commands or touch controls for convenience. The Raspberry Pi 3 supports many smart home protocols like MQTT and Zigbee. This creates a central hub for your smart home.
Future Upgrade Paths
Plan upgrades that keep your smart mirror current. Add a microphone for voice assistants or better sound. Upgrade the display to a higher resolution screen. Integrate new software modules for weather, news, or calendar updates. The Raspberry Pi 3’s flexibility supports many future improvements.
Frequently Asked Questions
What Components Are Needed For A Raspberry Pi 3 Smart Mirror?
You need a Raspberry Pi 3, a two-way mirror, an LCD screen, power supply, and frame. Additional sensors and software help enhance functionality.
How Do I Install Smart Mirror Software On Raspberry Pi 3?
Download and install MagicMirror² software via terminal. Follow setup instructions to configure modules for weather, news, and calendar.
Can Raspberry Pi 3 Handle Voice Control For Smart Mirrors?
Yes, Raspberry Pi 3 supports voice assistants like Google Assistant. You need a microphone, speaker, and proper software setup.
What Are Common Uses Of A Raspberry Pi 3 Smart Mirror?
It displays time, weather, news, calendar events, and reminders. It can also show notifications and smart home controls.
Conclusion
Building a smart mirror with Raspberry Pi 3 is simple and fun. You can add useful features like weather updates, news, and calendar events. This project helps you learn about technology step by step. It also saves money compared to buying a ready-made smart mirror.
Experiment with different apps to fit your needs. Keep your code clear and organized for easy updates. Enjoy the process and make your daily routine smarter. Raspberry Pi 3 offers many possibilities for creative projects like this. Start small, and grow your smart mirror over time.