Are you tired of constantly opening and closing the door for your pet? Installing a pet door in your wall can give your furry friend the freedom they deserve while making your life easier.
But you might wonder, “How do I do it without making a mess or damaging my home? ” Don’t worry—you’re in the right place. This guide will walk you through simple steps to install a pet door safely and efficiently.
By the end, you’ll have a convenient pet entrance that fits perfectly and works smoothly. Ready to make your pet’s day—and yours? Let’s get started!

Credit: www.liftingitalia.com
Choose The Right Pet Door
Choosing the right pet door is a key step before installation. A well-fitted door keeps your pet safe and comfortable. It also ensures easy access without damage to your wall. Consider your pet’s size, your wall type, and the door’s features. These factors help pick the best door for your home and pet.
Measure Your Pet
Start by measuring your pet’s height and width. Measure from the floor to the top of the shoulders. Also, measure the widest part of the body. Add a few inches to these numbers for comfort. A door too small will block your pet. Too large may let in cold air or pests.
Select Door Size And Type
Choose a door size that matches your pet’s measurements. Many pet doors come in small, medium, and large sizes. Look for a door with a flap that seals well. Some doors have magnetic or locking flaps for security. Decide if you want a manual or automatic door. Automatic doors open when your pet approaches.
Consider Wall Material
Check what your wall is made of. Drywall, brick, or wood all need different tools and methods. Some pet doors work better with certain wall types. Ensure the door’s frame fits the wall thickness. Some walls may need extra support or insulation around the door. This keeps your home energy efficient and secure.
Gather Tools And Materials
Before installing a pet door in your wall, gathering the right tools and materials is crucial. Having everything ready helps the process go smoothly. It also saves time and avoids mistakes. Prepare all items carefully to ensure a safe and clean installation.
List Essential Tools
Start with a tape measure to mark the door size precisely. Use a pencil for clear outlines on the wall. A drill with various bits will make holes for screws and cutting. A jigsaw or reciprocating saw is necessary to cut the wall opening. Screwdrivers help to fasten the pet door securely. Sandpaper smooths the edges after cutting. A level ensures the door fits straight. Lastly, keep a utility knife handy for trimming any materials.
Prepare Safety Gear
Wear safety glasses to protect your eyes from dust and debris. Use gloves to guard your hands during cutting and drilling. A dust mask stops you from inhaling harmful particles. Ear protection reduces noise from power tools. Dress in long sleeves and pants to shield your skin. Keep a first aid kit nearby for quick treatment of minor injuries. Safety always comes first in any home project.
Pick The Installation Spot
Choosing the right spot to install a pet door in your wall is very important. It affects how well your pet can use the door and how safe it is. The spot must be easy for your pet to reach and should not damage your home’s structure. Follow these simple steps to pick the best place for the pet door.
Check Wall Structure
First, check the wall where you want to install the pet door. Look inside the wall for pipes, wires, or studs. These can block the door or cause damage. Use a stud finder or ask a professional to help. The wall should be thick enough to hold the pet door securely. Avoid walls with electrical wires or water pipes nearby.
Mark Door Placement
Next, mark the exact place for the pet door on the wall. Make sure it is at the right height for your pet. Measure from the floor to your pet’s belly. Use a pencil to draw the door’s outline on the wall. Double-check the measurements to avoid mistakes. Clear marks help you cut the wall cleanly and install the door easily.

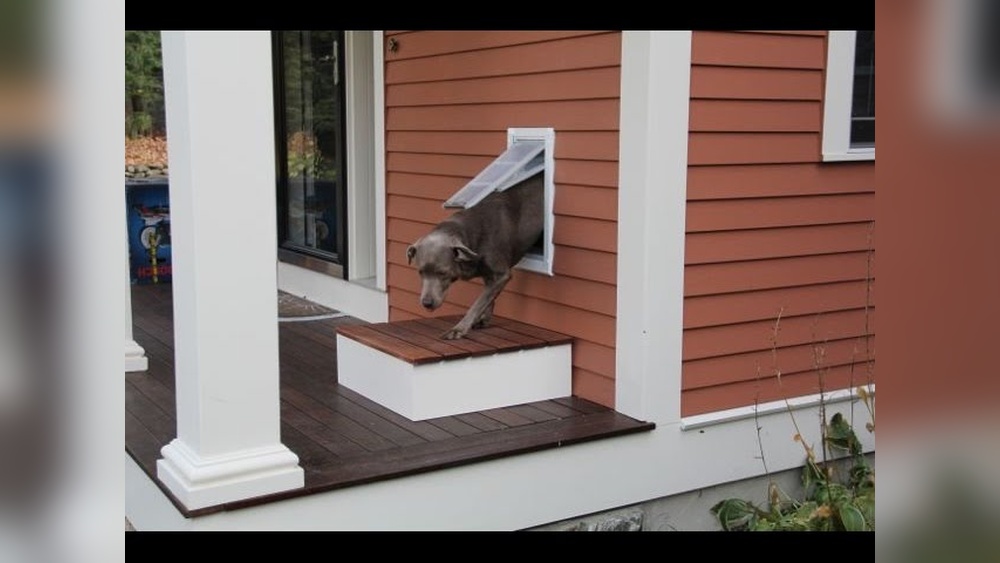
Credit: enduraflap.com
Cut The Wall Opening
Cutting the wall opening is a key step in installing a pet door. It needs care and accuracy to ensure a good fit. This part creates the space where your pet will pass through. Take your time to avoid mistakes that could harm the wall or the pet door.
Proper preparation and tools will make the job easier. Follow the steps carefully to get the best result.
Trace The Template
Start by placing the pet door template on the wall. Hold it steady and use a pencil to trace around it. Make sure the template is level and at the right height for your pet. Double-check the lines before cutting to avoid errors. A clear, accurate outline guides your cutting perfectly.
Use Proper Cutting Tools
Choose the right tools based on your wall type. A drywall saw works well for drywall, while a jigsaw suits wooden walls. Wear safety goggles and gloves for protection. Cut slowly along the traced lines to keep edges neat. Keep the blade straight and steady to avoid uneven cuts. Clean the opening after cutting to prepare for installation.
Install The Pet Door Frame
Installing the pet door frame in the wall is a key step in this project. This frame holds the door securely and helps keep your home insulated. Take your time to fit it properly. A well-installed frame ensures the door works smoothly and lasts longer.
Careful installation also prevents drafts and moisture from entering your home. Follow the steps below to fit the frame and seal it correctly.
Fit The Frame Securely
Place the pet door frame into the wall opening. Check that it fits snugly without gaps. Use screws to fasten the frame to the wall studs. Tighten them evenly to avoid bending the frame. Make sure the frame sits flush against the wall. This helps the door flap open and close easily. Double-check the alignment before fully securing it.
Seal And Insulate Edges
Apply weatherproof sealant around the frame edges. This blocks air leaks and keeps moisture out. Use foam insulation to fill any gaps between the frame and wall. Press it in gently to avoid crushing. Cover the insulation with trim or flashing for a clean finish. Proper sealing improves energy efficiency and keeps your home comfortable.
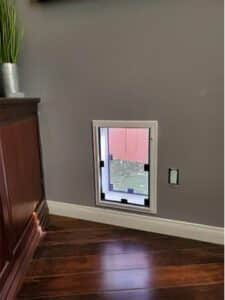
Credit: californiapetdoors.com
Attach The Door Flap
Attaching the door flap is a key step in installing a pet door in your wall. This part lets your pet move freely in and out. It also keeps the weather outside and your home comfortable. Take care to fit the flap tightly and correctly for the best results.
Install Weatherproof Flap
Choose a flap designed to block wind and rain. Align it with the opening in the wall. Use screws or adhesive strips to fix it firmly. Check that the flap covers the entire entrance. This stops drafts and keeps bugs out.
Test Door Movement
Push the flap gently to see how it swings. Make sure it opens easily both ways. Your pet should pass through without trouble. Adjust the flap if it sticks or is too loose. Smooth movement helps your pet use the door often.
Finishing Touches
Finishing touches give your pet door a neat and polished look. These final steps make the installation blend with your wall perfectly. Small details make a big difference in appearance and durability.
Take your time to complete these steps carefully. A clean, well-finished pet door adds value and comfort to your home.
Paint Or Cover Trim
Paint the trim to match your wall color. Use primer first for better paint grip. Let the paint dry fully before touching it.
If you prefer, use decorative trim covers. These covers hide any gaps or rough edges. They also protect the door frame from damage.
Clean Up Work Area
Remove all dust, wood chips, and debris from the site. Use a vacuum or broom for thorough cleaning. Wipe down surfaces to remove any dirt.
Check the pet door for smooth operation. Clean the flap and frame as needed. This keeps your pet door looking fresh and working well.
Maintain Your Pet Door
Maintaining your pet door helps keep it working well for years. A clean and well-checked door protects your home and makes your pet happy. Small care steps prevent big problems and extra costs later.
Regular Cleaning Tips
Clean the pet door often to remove dirt and dust. Use a soft cloth and mild soap with water. Wipe the flap and frame gently to avoid damage. Dry the door completely to stop rust or mold. Check the flap moves freely and does not stick.
Inspect For Damage
Look closely at the pet door for cracks or holes. Check the frame for loose screws or parts. Make sure the flap seals well to keep out cold air. Fix small problems quickly to avoid bigger repairs. Replace worn parts if needed to keep the door safe.
Frequently Asked Questions
How Do I Choose The Right Pet Door Size?
Measure your pet’s height and width accurately. Choose a door slightly larger for easy access. Proper sizing ensures your pet’s comfort and safety.
Can I Install A Pet Door In A Brick Wall?
Yes, but it requires special tools like a masonry saw. Professional installation is recommended for durability and safety.
What Tools Do I Need To Install A Pet Door In A Wall?
You’ll need a drill, saw, measuring tape, level, and screwdriver. Safety gear like goggles and gloves is also essential.
How Do I Weatherproof A Pet Door Installation?
Use weather stripping and sealant around the frame. This prevents drafts and water leaks, keeping your home insulated and dry.
Conclusion
Installing a pet door in your wall can make life easier for both you and your pet. The steps are clear and simple to follow. Take your time to measure and cut carefully. Use the right tools for a secure fit.
Your pet will enjoy more freedom and comfort. You can enjoy peace of mind knowing your pet stays safe. A well-installed pet door adds convenience to your home. Give your pet the gift of easy access today.