Are you tired of your pet roaming into rooms they shouldn’t? A freestanding pet gate can be the perfect solution to keep your furry friend safe and your space tidy.
But buying one can be expensive or might not fit your home’s style. What if you could build your own? In this guide, you’ll discover simple steps to create a sturdy, attractive pet gate that suits your needs perfectly. Keep reading to learn how you can protect your home and give your pet a safe space—all with your own hands.
Materials Needed
Gathering the right materials is the first step to build a strong, freestanding pet gate. Good materials make the project easier and the gate safer for your pet. This section lists everything needed to start your build.
Choosing The Right Wood
Select wood that is sturdy and smooth. Pine and cedar work well and are easy to cut. Avoid soft woods that can break easily. Make sure the wood is untreated to keep your pet safe.
Essential Tools
You need a saw to cut the wood to size. A drill helps to make holes for screws. Sandpaper smooths rough edges to prevent splinters. A tape measure is useful for accurate cuts. A screwdriver tightens the screws securely.
Additional Supplies
Get wood screws that fit your wood thickness. Hinges help parts of the gate open and close smoothly. Safety locks keep the gate closed firmly. Paint or sealant protects the wood from moisture and wear. Use non-toxic finishes safe for pets.

Credit: 100things2do.ca
Designing Your Gate
Designing your freestanding pet gate is the first step to a safe and stylish barrier. Thoughtful design ensures the gate fits well and looks good in your home. Careful planning helps keep your pet secure and comfortable. Consider space, style, and size before starting to build.
Measuring The Space
Measure the width of the area where the gate will stand. Use a tape measure to get exact numbers. Measure from floor to the height you want the gate to reach. Write down all measurements to avoid mistakes later. Precise measuring keeps the gate stable and effective.
Selecting The Gate Style
Choose a style that matches your home decor. Options include wooden, metal, or plastic gates. Think about how easy the gate is to move or store. Pick a style that suits your pet’s size and behavior. A good style balances function and looks.
Planning Gate Dimensions
Decide the gate’s height and width based on your pet’s size. Make sure the gate is tall enough to stop jumping pets. The width should fit the space but allow some room for stability. Plan for a gate that is strong yet lightweight. Proper dimensions help create a safe, usable gate.
Cutting The Wood
Cutting the wood is a key step in building a freestanding pet gate. It shapes the pieces that will hold your gate together. Accurate cuts ensure your gate fits well and looks neat. Take your time and prepare your workspace before starting. Safety and precision matter most in this phase.
Marking Measurements
Begin by measuring the wood carefully. Use a tape measure for exact length and width. Mark the cutting lines clearly with a pencil. Double-check each mark before cutting. Mark all pieces needed for the gate frame and panels. Clear marks help avoid mistakes and save wood.
Safe Cutting Techniques
Wear safety goggles and gloves before cutting. Use a stable surface to place the wood firmly. Choose the right saw for straight, clean cuts. Cut slowly along the marked lines for control. Keep fingers away from the blade at all times. Smooth rough edges with sandpaper after cutting to prevent splinters.
Assembling The Frame
Assembling the frame is the first step in making a freestanding pet gate. This frame will hold the gate together and keep it strong. You will need wood pieces cut to size. Each piece fits together like a puzzle. Careful assembly makes a sturdy and safe gate for your pet.
Joining The Pieces
Start by laying out all wood pieces on a flat surface. Match the corners and edges that fit together. Use wood glue on the ends to hold the pieces temporarily. Press the wood pieces firmly so they stick well. Check that all corners form right angles. This ensures the frame is square and balanced.
Securing With Screws
Once the glue dries, use screws to secure the frame. Drill pilot holes first to avoid splitting the wood. Insert screws into each joint to lock the pieces in place. Tighten screws evenly on both sides for stability. The screws make the frame strong enough to hold the gate upright. Double-check all joints for firmness before moving on.
Adding Support Features
Adding support features to your freestanding pet gate is essential for safety and durability. These features help the gate stand firm and prevent it from tipping over. Without proper support, the gate may wobble or fall, risking your pet’s safety.
Support features like crossbars and feet increase stability. They distribute weight evenly and strengthen the frame. This step ensures the gate stays in place even if your pet pushes against it.
Installing Crossbars
Crossbars provide extra strength across the gate’s frame. Attach one or two horizontal bars between the vertical supports. Use screws or strong nails to secure them tightly.
Place the crossbars near the top and bottom for best support. These bars prevent the frame from bending or twisting. Choose sturdy wood or metal for long-lasting support.
Attaching Feet For Stability
Feet help the gate stand upright on the floor. Cut two wide pieces of wood for the base. Attach these pieces perpendicular to the frame bottom.
Secure the feet with screws so they don’t shift. Wider feet improve balance and prevent tipping. Add rubber pads under the feet to stop slipping on smooth floors.

Credit: www.youtube.com
Finishing Touches
Finishing touches are important for your freestanding pet gate. They make the gate safe and look great. Small details protect your pet and help the gate last longer. Take time to smooth and protect every part of the gate.
Sanding Edges
Start by sanding all edges of the gate. Use fine sandpaper for a smooth finish. Sand corners and sides until no rough spots remain. This step stops splinters and sharp edges that can hurt your pet. Wipe away dust with a clean cloth before moving on.
Applying Paint Or Sealant
Choose paint or sealant made for wood surfaces. Paint adds color and protects against moisture. Sealant keeps the wood safe from water and dirt. Apply evenly with a brush or roller. Let the first coat dry completely, then add a second coat. This keeps your gate strong and looking fresh.
Testing And Placement
Testing and placement are key steps in making a freestanding pet gate safe and useful. This stage ensures the gate works well and protects your pet. Careful checks help avoid accidents and keep the gate steady. Proper placement helps control your pet’s space without harm.
Ensuring Stability
Check the gate on different floors or surfaces. Make sure it does not wobble or move easily. Press gently on the gate to test strength. If it shifts, add weight or adjust the base. Strong support stops the gate from tipping over. Use rubber pads under the legs for better grip. Stability keeps pets safe and prevents damage.
Positioning For Safety
Place the gate where it blocks pets from unsafe areas. Avoid spots near stairs or sharp objects. Keep it away from cords or small gaps pets can get stuck in. Make sure the gate is easy to open for adults but hard for pets. Position the gate in a well-lit area. Clear space on both sides for smooth use. Correct placement protects pets and makes daily life easier.
Maintenance Tips
Maintaining your freestanding pet gate keeps it safe and durable. Regular care helps avoid big problems later. Simple steps can keep the gate working well for years.
Regular Inspections
Check the gate often for loose parts or damage. Look at hinges, locks, and the frame closely. Early spotting of issues stops accidents. Make inspections part of your weekly routine.
Repairing Wear And Tear
Fix small cracks or scratches quickly. Tighten screws and bolts that feel loose. Replace broken parts to keep the gate strong. Use tools and materials that match the original gate.
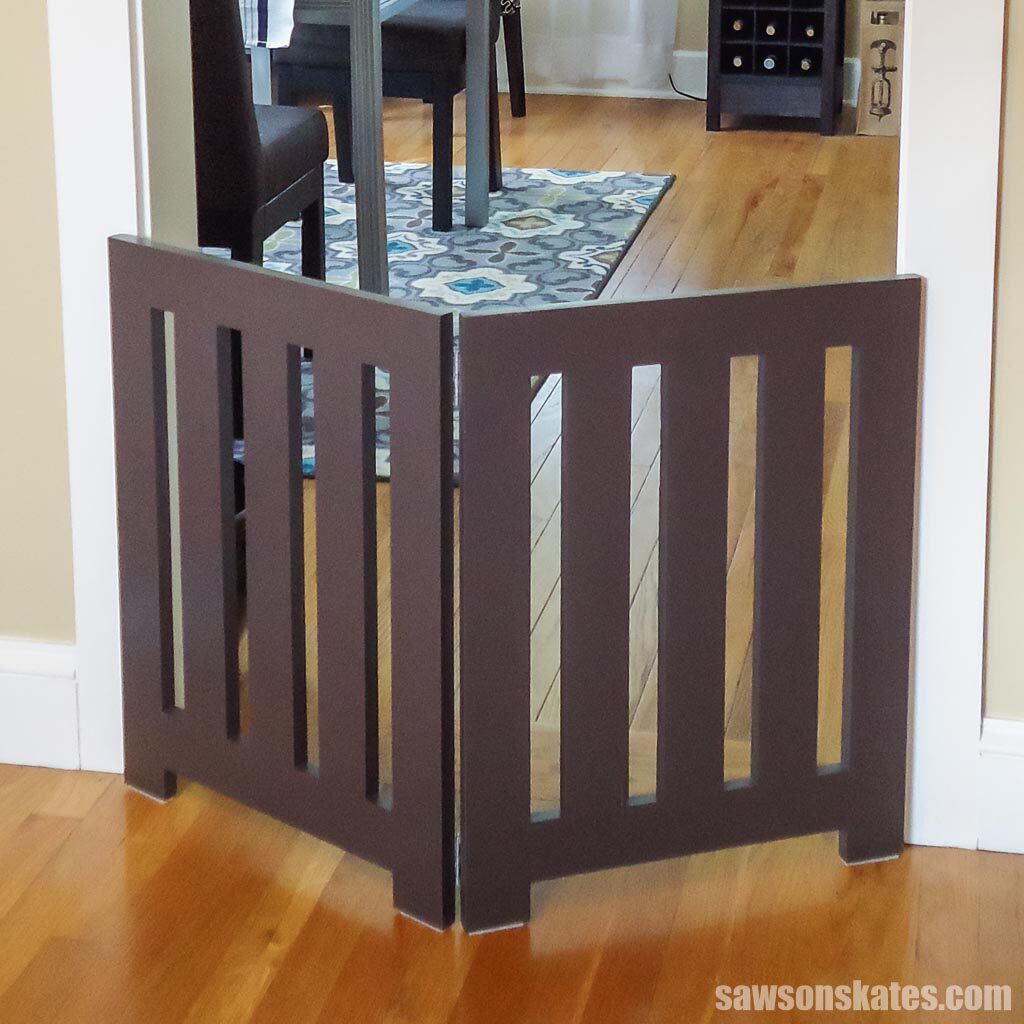
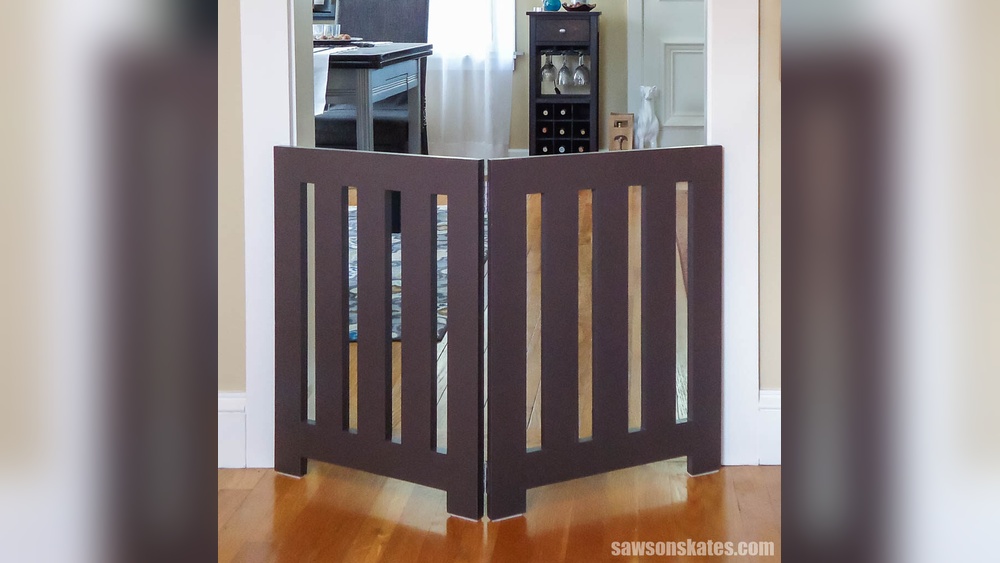
Credit: sawsonskates.com
Frequently Asked Questions
What Materials Are Needed For A Freestanding Pet Gate?
You need wood or metal panels, hinges, screws, a latch, and paint or finish. Tools include a saw, drill, measuring tape, and screwdriver. Choose sturdy materials to ensure safety and durability for your pet gate.
How Do I Measure Space For A Freestanding Pet Gate?
Measure the width of the area where you want to place the gate. Also, note the height to prevent pets from jumping over. Accurate measurements help create a properly fitting and effective freestanding pet gate.
Can I Make A Freestanding Gate Without Drilling Walls?
Yes, freestanding pet gates do not require wall drilling. They stand independently using a sturdy base or frame. This design protects your walls and allows easy gate relocation.
How To Ensure The Pet Gate Is Stable And Secure?
Use a wide base and heavy materials to prevent tipping. Tighten all screws and hinges firmly. Adding rubber pads under the base can improve floor grip and gate stability.
Conclusion
Building a freestanding pet gate can keep pets safe and areas secure. Use simple tools and materials for easy construction. Follow steps carefully to make a sturdy and reliable gate. Adjust the size to fit your space perfectly. Enjoy the peace of mind that comes with control.
Your pet stays safe without blocking your home’s style. This project saves money compared to buying ready-made gates. Try making one yourself and see the results. Simple, useful, and effective—just what you need.