Are you ready to upgrade your home security without the hassle of a complete rewiring? Installing the Ring Video Doorbell Pro using your existing doorbell wiring can save you time and effort while giving you smart, real-time alerts right at your fingertips.
In this guide, you’ll discover simple, step-by-step instructions that anyone can follow, even if you’re not a tech expert. By the end, you’ll have a powerful video doorbell up and running, making your home safer and more connected. Keep reading to find out exactly how to make this easy upgrade happen today.

Credit: www.youtube.com
Check Compatibility
Before installing your Ring Video Doorbell Pro, checking compatibility with your current doorbell system is essential. This step ensures smooth installation and proper function. Avoid surprises by confirming key components match the requirements.
Verify Existing Doorbell System
Start by identifying your current doorbell type. Most homes use a wired system with a mechanical or digital chime. Check if your existing doorbell has two wires connected to the button. Ring Video Doorbell Pro works with wired systems only. Wireless or battery-powered doorbells may not be compatible. Confirm your doorbell chime works with a 16-24V AC power supply. This detail is crucial for the Ring device to operate correctly.
Confirm Transformer Requirements
The transformer powers your doorbell system. It converts high voltage from your home to a lower voltage for the doorbell. Ring Video Doorbell Pro needs a transformer rated between 16 and 24 volts AC and 30 to 40 VA. Locate your transformer, often near the main electrical panel or inside a utility closet. Check the label for voltage and VA ratings. If your transformer does not meet these specs, replace it before installation. Using the correct transformer prevents damage and ensures reliable performance.
Gather Necessary Tools
Before installing your Ring Video Doorbell Pro, gather all the tools needed. Having the right tools makes the process smoother and safer. It saves time and avoids frustration. Prepare everything in one place for easy access during installation.
List Of Required Tools
- Electric drill with bits
- Flathead screwdriver
- Phillips screwdriver
- Voltage tester
- Wire stripper
- Level tool
- Measuring tape
- Safety gloves
- Ladder (if needed)
Safety Precautions
Turn off power at the circuit breaker before starting. Use a voltage tester to confirm power is off. Wear safety gloves to protect your hands. Use a sturdy ladder if you need to reach high places. Keep children and pets away from the work area. Work in a dry environment to avoid shocks. Follow all instructions in the Ring Doorbell manual carefully.
Power Off The Doorbell Circuit
Powering off the doorbell circuit is the first step in installing your Ring Video Doorbell Pro. It keeps you safe from electric shock. It also protects the device from damage. Take your time with this step. Safety is the priority.
Locate The Circuit Breaker
Start by finding your home’s circuit breaker panel. It is usually in the basement, garage, or utility room. Look for labels on the panel door. These labels show which switches control different parts of your home. Find the one for the doorbell or front door. If no label exists, you may need to turn off the main breaker. This cuts power to the entire house.
Ensure Power Is Off
Flip the circuit breaker switch to the off position. Confirm the power is off by pressing your existing doorbell button. The doorbell should not ring. Use a voltage tester on the doorbell wires for extra safety. No voltage means it is safe to work. Never skip this step. It protects you and your Ring Video Doorbell Pro during installation.
Remove Existing Doorbell
Removing your existing doorbell is the first step to install the Ring Video Doorbell Pro. This process prepares your door for the new device and ensures a smooth installation. Take your time to remove the old parts carefully. Avoid damaging the wires or the wall. Safety is important throughout the process.
Detach Doorbell Button
Start by unscrewing the doorbell button from the wall. Use a screwdriver to remove the screws holding the button in place. Keep the screws safe; you may need them later. Gently pull the doorbell button away from the wall. Do not force it. Check for any clips or connectors and release them carefully.
Disconnect Wires Safely
Next, disconnect the wires attached to the old doorbell. Turn off the power at the circuit breaker before touching the wires. Use a voltage tester to confirm the power is off. Loosen the wire screws or connectors holding the wires. Carefully detach each wire without bending or breaking them. Cover the wire ends with electrical tape to prevent shocks or shorts.
Install Ring Video Doorbell Pro
Installing the Ring Video Doorbell Pro is a straightforward process. This guide helps you set it up using your existing doorbell wiring. Follow the steps carefully to ensure a secure and functional installation.
Mount The Bracket
Start by removing your old doorbell. Use the included screws to fix the mounting bracket. Position it near your door at eye level. Use a level tool to keep the bracket straight. Tighten the screws firmly to hold the bracket in place.
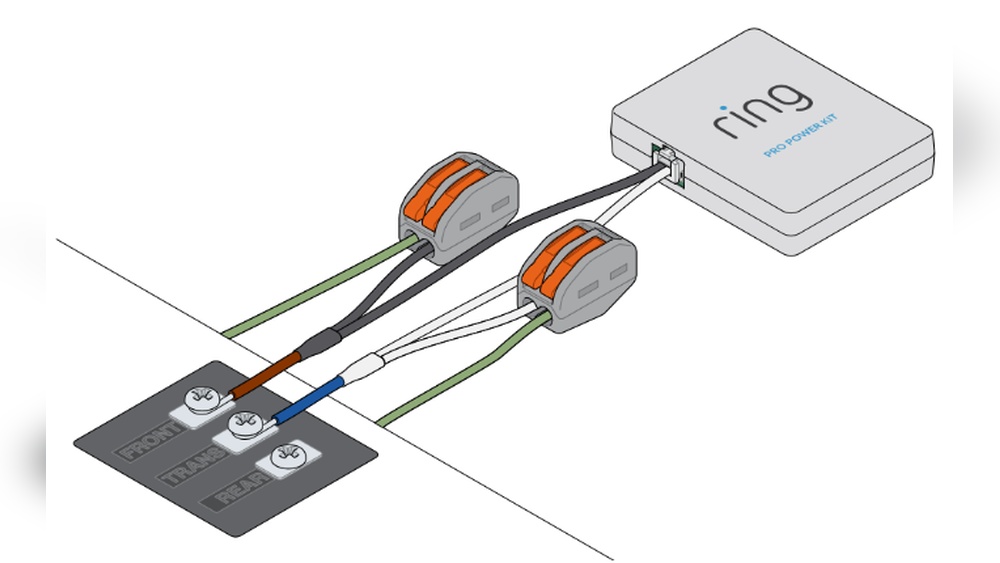
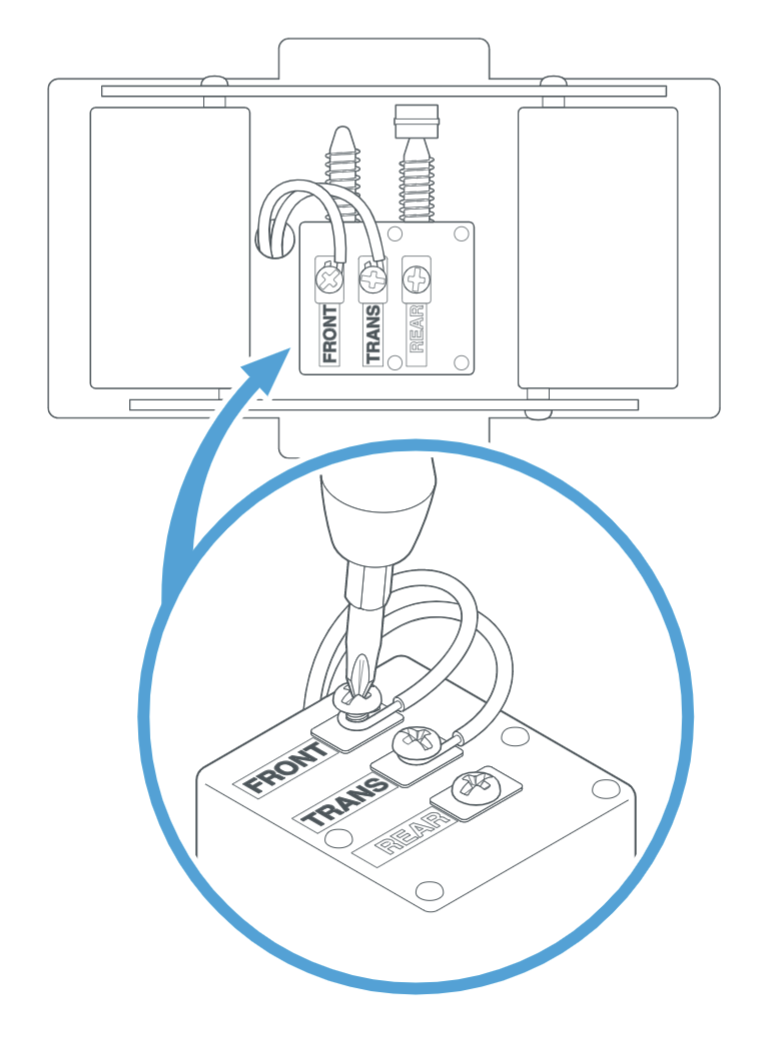
Connect Wires To Terminals
Locate the two wires from your existing doorbell system. Attach each wire to the terminals on the back of the Ring bracket. It does not matter which wire goes to which terminal. Tighten the terminal screws to secure the wires. Make sure no wire strands are loose or touching.
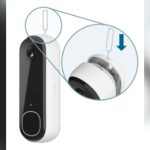
Attach The Doorbell Unit
Align the Ring Video Doorbell Pro with the mounted bracket. Press it firmly against the bracket until it clicks into place. Use the provided security screws to lock the doorbell to the bracket. This prevents theft and keeps the unit stable. Finally, test the doorbell to confirm it works with your existing chime system.
Restore Power And Test
After wiring your Ring Video Doorbell Pro, restoring power is essential. It powers the device and lets you check if everything works well. Testing confirms the installation is correct and the doorbell functions properly.
Turn On Circuit Breaker
Go to your home’s electrical panel. Find the circuit breaker for your doorbell. Flip the switch back to the ON position. This restores power to the doorbell wiring. Make sure the breaker stays in place and does not trip again.
Check Doorbell Functionality
Press the doorbell button to test it. Listen for the chime inside your home. Watch the Ring app on your phone. It should show the doorbell is active and online. Check the video feed and motion alerts. If all works, your installation is complete and successful.
Set Up Ring App
Setting up the Ring app is the next step after installing your Ring Video Doorbell Pro. The app helps you control and monitor your doorbell from anywhere. It guides you through connecting your device and adjusting settings to suit your needs.
Follow each step carefully for a smooth setup.
Download And Install App
Go to the App Store or Google Play on your smartphone. Search for the “Ring” app. Download and install the app. Open it and create a new account. Use a valid email and a strong password. This account links your doorbell to your phone.
Connect Doorbell To Wi-fi
Open the Ring app and tap “Set Up a Device.” Choose “Doorbells” and follow the prompts. The app will ask you to connect to your home Wi-Fi. Enter your Wi-Fi name and password carefully. Your doorbell needs a strong Wi-Fi signal for best performance.
Customize Settings
After connection, explore the settings in the app. Adjust motion sensitivity to avoid false alerts. Set up notifications to get alerts on your phone. You can also customize privacy zones to block areas from recording. These settings help make the doorbell work best for your home.
Credit: www.ortholight.ch
Troubleshooting Tips
Troubleshooting your Ring Video Doorbell Pro ensures smooth operation after installation. Small problems can stop the device from working correctly. Knowing how to fix common issues saves time and stress.
Common Installation Issues
One frequent problem is the doorbell not turning on. This often means power is not connected properly. Check the wires and connections carefully. Loose wiring can stop the device from getting power.
Another issue is poor Wi-Fi connection. The doorbell needs a strong signal to work well. Try moving your router closer or use a Wi-Fi extender. Also, confirm your network name and password are correct in the Ring app.
Sometimes the doorbell button may not ring the existing chime. This happens if the chime kit is incompatible. Verify your chime is compatible with Ring Video Doorbell Pro before installation. You can check this in the Ring support guide.
When To Seek Professional Help
If you find exposed or damaged wires, stop and call an electrician. Handling electrical wiring can be dangerous without proper knowledge. Professionals ensure safe and correct installation.
When the doorbell still does not work after troubleshooting, expert help is a good choice. Technicians can find hidden problems and fix them quickly. This avoids damage to your device or home wiring.
Hiring a professional also saves time for those unsure about electrical work. It provides peace of mind knowing the installation is done right.
Credit: vicentetorns.com
Frequently Asked Questions
How Do I Connect Ring Video Doorbell Pro To Existing Chime?
To connect, first turn off power to your doorbell. Then, remove the old doorbell and connect Ring’s wires to the existing terminals. Finally, attach the Ring Pro and restore power. Ensure your chime kit is compatible for seamless integration.
Can I Use My Old Doorbell Wiring With Ring Pro?
Yes, Ring Video Doorbell Pro supports most existing doorbell wiring, typically 16-24 volts AC. Confirm your wiring’s voltage before installation. Using existing wires makes setup easier and keeps your current chime functioning with the Ring doorbell.
What Tools Are Needed For Ring Pro Installation?
You’ll need a screwdriver, drill, voltage tester, and wire stripper. These help safely remove the old doorbell and connect wiring. Having these tools ready ensures a smooth installation process and protects your electrical system.
Does Ring Video Doorbell Pro Require Professional Installation?
No, you can install Ring Pro yourself using step-by-step instructions. However, if uncomfortable with electrical work, hiring a professional ensures safety and proper setup. DIY installation saves money and allows quick setup with existing doorbell wiring.
Conclusion
Installing the Ring Video Doorbell Pro with your current doorbell is simple. Follow the steps carefully for the best results. Make sure to turn off the power before starting. Test the doorbell after installation to confirm it works. Enjoy better security and easy access to your front door.
This upgrade helps you stay safe and connected at home. Take your time, and the process will be smooth. A smart doorbell makes your home more welcoming and secure.