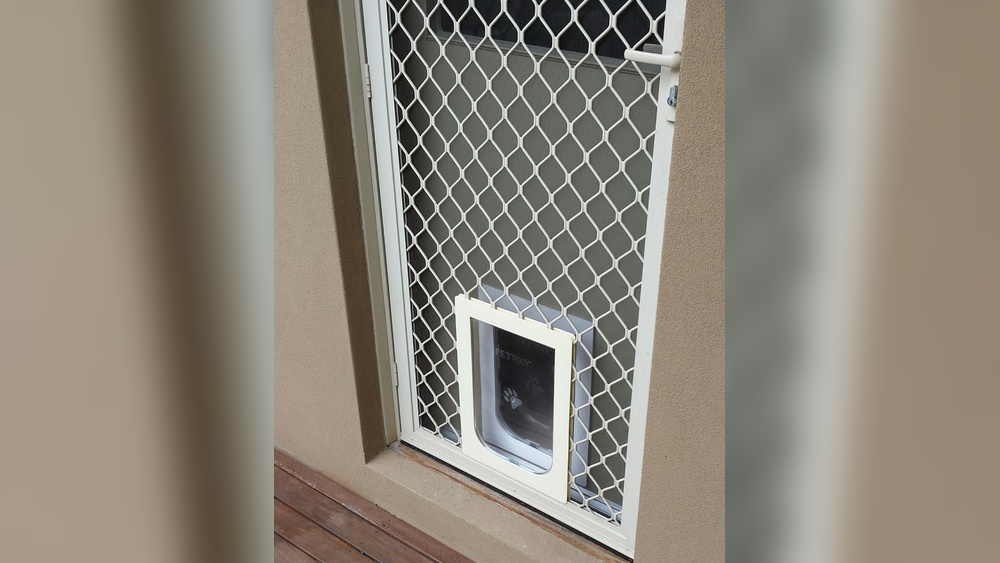

If you want to give your furry friend easy access to the outdoors without letting bugs or debris inside, installing a pet screen doggy door is the perfect solution. Imagine your dog happily coming and going whenever they please, while you enjoy peace of mind knowing your home stays secure and clean.
In this guide, you’ll learn exactly how to install a pet screen doggy door step-by-step—no special tools or skills needed. By the end, you’ll have a hassle-free setup that both you and your pet will love. Let’s get started!
Choosing The Right Doggy Door
Choosing the right doggy door is an important step. It ensures your pet moves freely and stays safe. The perfect door fits your pet’s size and suits your home’s style. This section guides you through key points to pick the best pet screen doggy door.
Types Of Pet Screen Doors
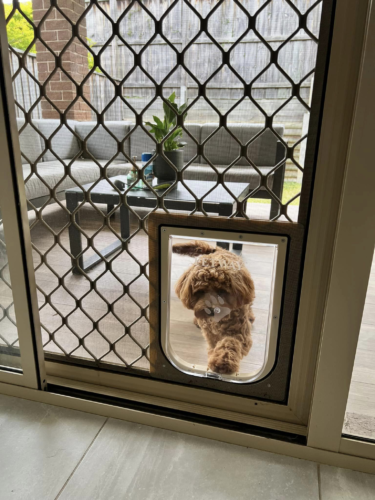
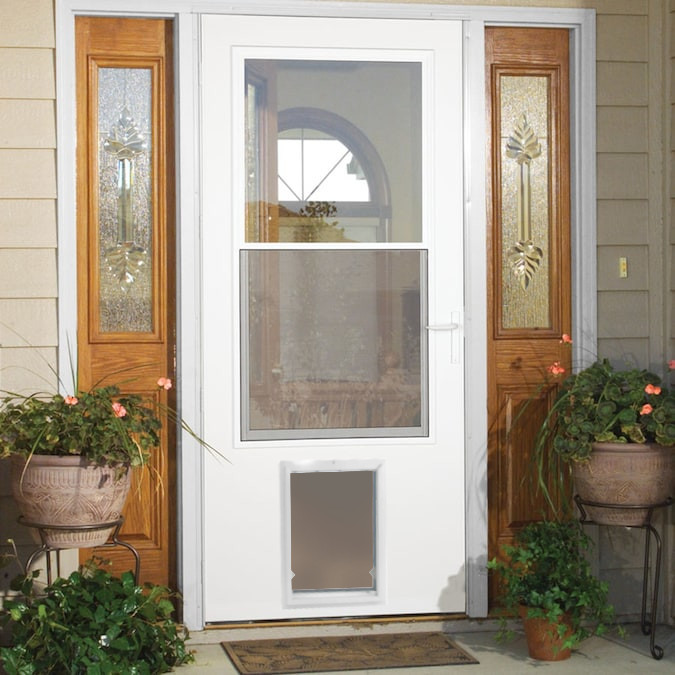
There are several types of pet screen doors. Sliding panel doors fit into sliding door tracks. They slide open when your pet pushes. Hinged flap doors open like a regular door. Magnetic flaps close automatically after use. Choose a type that works with your door style and pet’s habits.
Measuring Your Pet
Measure your pet’s height and width carefully. Measure from the ground to the top of the shoulders. Also, measure the widest part of the body. Add a few inches for comfort and ease of movement. A door too small can hurt your pet or block access. A door too large may let in bugs and drafts.
Material And Durability Considerations
Choose materials that last long and suit your climate. Plastic doors are light and easy to install. Metal doors offer more strength and security. Look for weather-resistant options to prevent damage. Strong flaps resist tearing and keep bugs out. Durable materials save money and protect your pet.
Credit: www.liftingitalia.com
Tools And Materials Needed
Before installing a pet screen doggy door, gather all the necessary tools and materials. Having everything ready saves time and makes the process easier. This list covers the basic tools, extra supplies, and safety gear needed for a smooth installation.
Essential Tools
Start with a cordless drill for making holes quickly. A screwdriver helps to secure screws tightly. Use a tape measure to get accurate door dimensions. A pencil is needed for marking where to cut. A jigsaw or handsaw works well to cut the screen or door frame. A level ensures the door stays straight during installation.
Additional Supplies
Keep extra screws handy for firm attachment. Weather stripping helps seal gaps around the door. Use sandpaper to smooth any rough edges after cutting. Caulk or sealant prevents air and water leaks. A utility knife is useful for trimming screen material or plastic parts.
Safety Gear
Protect your eyes with safety goggles to avoid dust or debris. Wear gloves to keep your hands safe from sharp edges. A dust mask helps prevent inhaling particles while cutting. Make sure to use ear protection if using loud power tools.
Preparing The Screen Door
Preparing the screen door is a key step before installing a pet screen doggy door. This step helps ensure the doggy door fits perfectly and works well. Proper preparation saves time and avoids damage to your door or new pet door.
Removing The Existing Screen
Start by taking out the current screen from the door frame. Use a flat tool to lift the screen spline carefully. Pull the screen out slowly to avoid tearing it. Set the screen aside if you want to reuse it or replace it with a new one.
Marking The Cutout Area
Place the pet door template on the screen frame. Align it properly with the door frame edges. Use a pencil to trace the outline of the pet door. Draw clear, visible lines for easy cutting. This step helps you cut the right size hole.
Double Checking Measurements
Measure the marked area twice. Check height and width against the pet door size. Confirm the pet door will fit through the hole perfectly. Double checking prevents mistakes and ensures a smooth installation. Accuracy is important for a secure fit.
Cutting And Installing The Frame
Cutting and installing the frame is a key step in adding a pet screen doggy door. This process creates the perfect opening for your furry friend. Accuracy and care are important to make sure the door fits well and works smoothly.
Start by measuring the area on your screen door where the doggy door will go. Mark the exact size of the opening. This helps keep the cut clean and precise. Proper cutting prevents damage to the screen and frame.
Cutting The Screen Material
Use a sharp utility knife to cut the screen material. Cut along the marks you made carefully. Avoid tearing the screen edges. Smooth cuts help the frame attach better and keep the screen strong.
Remove the cut-out screen piece gently. Keep the edges neat for easier frame installation. Take your time to avoid mistakes or uneven cuts.
Attaching The Doggy Door Frame
Place the doggy door frame into the cut opening. Align it so that it fits flush against the screen door. Check both sides to ensure the door swings freely.
Press the frame firmly to hold it in place. The frame should cover all rough edges of the cut screen. This step protects the screen and gives a clean look.
Securing With Screws And Fasteners
Use screws or fasteners provided with the doggy door kit. Attach the frame securely to the screen door. Tighten screws evenly to avoid warping the frame.
Check the door for smooth operation after securing. Make sure it opens and closes without obstruction. Proper fastening keeps the doggy door safe and durable.
Sealing And Testing
Sealing and testing your pet screen doggy door is important for comfort and safety. Proper sealing keeps bugs, wind, and rain out. Testing ensures the door works well for your pet.
Adding Weatherstripping
Apply weatherstripping around the edges of the doggy door frame. This stops drafts and prevents water from entering. Choose soft, flexible weatherstripping that fits tightly. Press it firmly to create a good seal. Check for any gaps and fill them.
Ensuring Proper Closure
Check the flap of the doggy door. It should close fully and easily. Adjust the magnets or seals if the flap stays open. The flap must snap shut after your pet passes through. This keeps your home secure and energy efficient.
Testing With Your Pet
Encourage your pet to use the new door several times. Watch how they push or pull the flap. Make sure it swings smoothly without sticking. Notice if your pet seems comfortable using it. Adjust the door if your pet struggles to use it well.

Credit: www.excelcare24.co.uk
Maintenance Tips
Maintaining your pet screen doggy door keeps it working well for a long time. Regular care stops problems and saves money on repairs. Small steps in maintenance can make a big difference in its durability.
Regular Cleaning
Clean the screen and frame often. Use a soft brush or cloth to remove dirt. Avoid harsh chemicals that can damage the screen material. A clean door helps your pet see outside clearly. It also prevents dust buildup that can cause wear.
Inspecting For Wear And Tear
Check the door edges and screen for holes or tears. Look at the hinges and locks for rust or looseness. Notice any parts that feel weak or broken. Early fixing stops bigger damage and keeps your pet safe.
Troubleshooting Common Issues
If the door sticks or does not close fully, check for dirt or debris. Tighten any loose screws or parts. Replace worn-out seals to keep bugs out. Test the flap to ensure it moves smoothly and quietly. These fixes keep the door working well every day.
Credit: www.esseg.eu
Frequently Asked Questions
What Tools Are Needed To Install A Pet Screen Doggy Door?
You need a measuring tape, screwdriver, drill, pencil, and the doggy door kit. These tools help ensure precise installation and a secure fit.
How Do I Measure For The Perfect Doggy Door Size?
Measure your pet’s shoulder height and width. Add a few inches for comfortable movement. This ensures the door fits your pet well.
Can I Install A Pet Screen Doggy Door Myself?
Yes, with basic DIY skills, you can install it. Follow the manufacturer’s instructions carefully for a safe and effective installation.
How Do I Maintain A Pet Screen Doggy Door?
Regularly clean the screen and check the flap for damage. Lubricate hinges if needed to keep the door functioning smoothly.
Conclusion
Installing a pet screen doggy door makes life easier for you and your pet. You control when your pet goes outside. The steps are simple and clear. Take your time and follow each part carefully. This project does not need special skills.
Your pet will enjoy the freedom to come and go. You save energy by not opening the door all the time. A pet screen door keeps bugs out too. Enjoy a happy, healthy pet with this easy upgrade.