Are you looking to customize your LED string lights but don’t know where to start? Learning how to splice LED string lights can open up endless possibilities for your home or event lighting.
Imagine creating the perfect length, fixing a broken section, or even combining different sets seamlessly. In this guide, you’ll discover simple, step-by-step instructions that anyone can follow—no special skills needed. Keep reading, and you’ll gain the confidence to transform your lights exactly how you want them.
Credit: www.armacostlighting.com
Tools And Materials Needed
Splicing LED string lights needs the right tools and materials. Having everything ready saves time and avoids mistakes. This section covers what you need before starting your project.
Essential Tools
You need a few basic tools for splicing LED string lights. Wire cutters help trim wires cleanly. A wire stripper removes insulation without damage. Soldering tools join wires firmly and securely. Heat shrink tubing protects connections from moisture. A multimeter checks for proper electrical flow and safety.
Choosing The Right Led String Lights
Pick LED string lights that match your project’s needs. Check voltage and wattage for compatibility. Look for flexible wires to ease splicing. Waterproof or outdoor-rated lights last longer outside. Avoid cheap sets with thin wires that break easily. Choose lights with clear instructions for best results.
Additional Supplies
Other supplies make splicing easier and safer. Electrical tape insulates exposed wires. Soldering flux improves wire connections. Small clamps hold wires steady while working. A heat gun shrinks tubing quickly and evenly. Gloves protect hands from burns and cuts. Keep all supplies organized for smooth work.
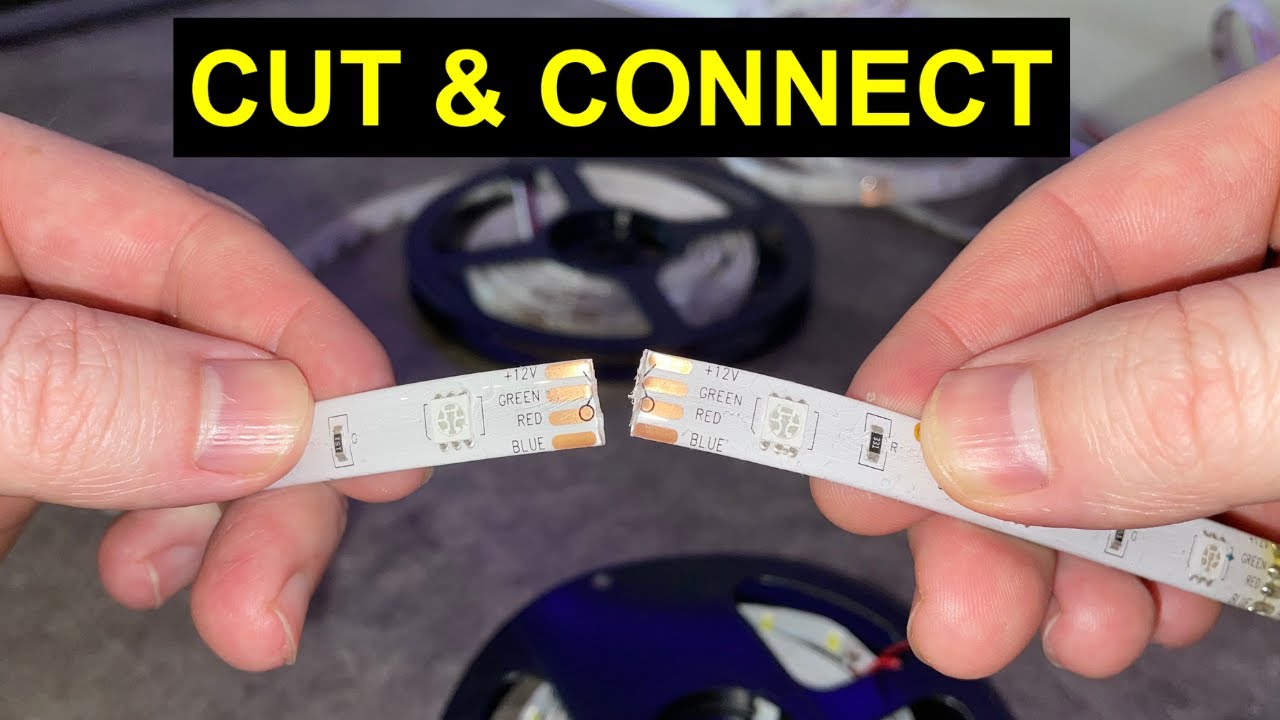
Credit: www.youtube.com
Preparing The Lights For Splicing
Preparing LED string lights for splicing is a key step. It sets the stage for a clean, safe connection. Proper preparation saves time and prevents damage.
Follow these steps to get your lights ready. Focus on safety, finding the right cut points, and handling wires carefully.
Safety Precautions
Always unplug the lights before starting work. Avoid working near water or wet surfaces. Wear gloves to protect your hands from sharp wire ends. Use insulated tools to reduce the risk of electric shock. Work in a well-lit area to see clearly. Double-check that no power runs through the wires.
Identifying The Cut Points
Look for marked spots or gaps in the wire insulation. These are often small notches or printed lines. Cut only at these points to avoid damaging the circuit. Use sharp scissors or wire cutters for a clean cut. Avoid cutting through bulbs or connectors. Make sure the cut edges are smooth and even.
Stripping The Wires
Use a wire stripper or a sharp blade to remove the outer insulation. Strip about half an inch of insulation from each wire end. Be careful not to nick or cut the wire strands. Twist the exposed wire strands gently to keep them together. This makes connecting easier and more secure. Check that no insulation remains on the wire tips.
Step-by-step Splicing Process
Splicing LED string lights lets you fix or extend your lighting setup. This process involves connecting wires safely and securely. Follow these clear steps to get a strong, lasting connection. Each step is important for good performance and safety.
Aligning The Wires
First, strip about half an inch of insulation from each wire end. Use wire strippers to avoid damage. Match the wires by color or type. Place the wires side by side, making sure they align perfectly. This step helps avoid short circuits and ensures proper current flow.
Twisting And Connecting
Hold the aligned wires tightly. Twist the wire ends together clockwise until they are tight. Make sure the wires are twisted evenly. This creates a good mechanical connection. The wires should hold firmly without slipping apart.
Soldering For Durability
Heat your soldering iron and apply solder to the twisted wires. The solder should flow evenly around the wires. This step strengthens the connection and improves conductivity. Avoid cold solder joints by heating the wires properly before soldering.
Insulating The Connection
Cover the soldered area with electrical tape or heat shrink tubing. This prevents short circuits and water damage. Wrap the tape tightly or shrink the tubing with heat. Proper insulation keeps the splice safe and extends the life of your lights.
Testing Your Spliced Lights
Testing your spliced LED string lights is an important step. It ensures your work is safe and the lights function well. This process helps catch mistakes early. You avoid damage and save time. Let’s explore how to test your lights properly.
Powering On Safely
Before plugging in, check all connections. Make sure wires are secure and insulated. Use a power source with the correct voltage. Turn on the power switch slowly. Watch the lights closely for any flicker or sparks. If anything seems wrong, turn off power immediately. Safety is the top priority during testing.
Troubleshooting Common Issues
Some lights may not turn on after splicing. Check for loose wires or bad connections first. Inspect the wire for any cuts or damage. Test the power source with a multimeter to confirm it works. Replace faulty bulbs or sections if needed. Sometimes, reversing wire connections can fix the issue. Take time to test each step carefully. Fixing problems early prevents bigger issues later.
Tips For Neat And Long-lasting Splices
Splicing LED string lights requires care and attention. A neat splice looks professional and works well for a long time. Poor splices may cause flickering or break the lights. Follow simple tips for strong, clean connections that last through seasons.
Small steps can make a big difference. Protecting the wires and organizing them helps keep the lights safe and tidy. This section shares three key tips to improve your splicing skills.
Using Heat Shrink Tubing
Heat shrink tubing wraps around the splice to protect it. Slide the tubing over the wires before connecting them. After splicing, move the tubing to cover the bare wires. Use a heat source to shrink the tubing tightly around the connection. This seals the splice and stops it from breaking or shorting out.
Avoiding Moisture Damage
Water and moisture can ruin LED lights quickly. Seal the spliced area well to keep moisture out. Use waterproof connectors or seal the splice with silicone gel. Avoid splicing in places where water collects. Dry spots help wires last longer and prevent rust or shorts.
Organizing Excess Wire
Keep extra wire neat to avoid tangles and damage. Coil the spare wire gently and secure it with twist ties or cable clips. Avoid tight bends that can break wires inside. A tidy setup makes repairs easier and the lights look better.

Credit: www.youtube.com
Alternative Splicing Methods
Splicing LED string lights can be done in various ways. Alternative splicing methods offer simple and effective solutions. These methods help connect or repair lights without complex tools.
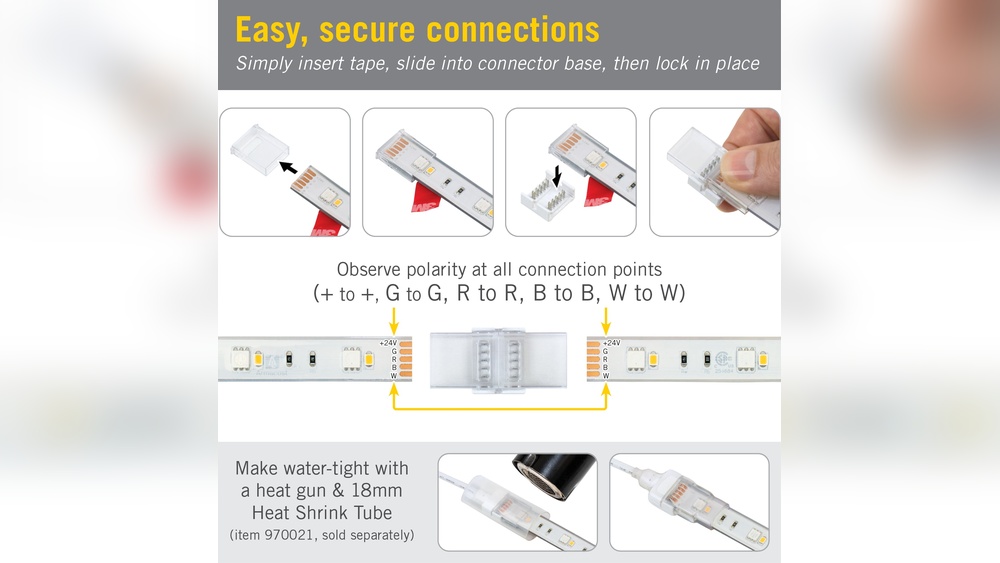
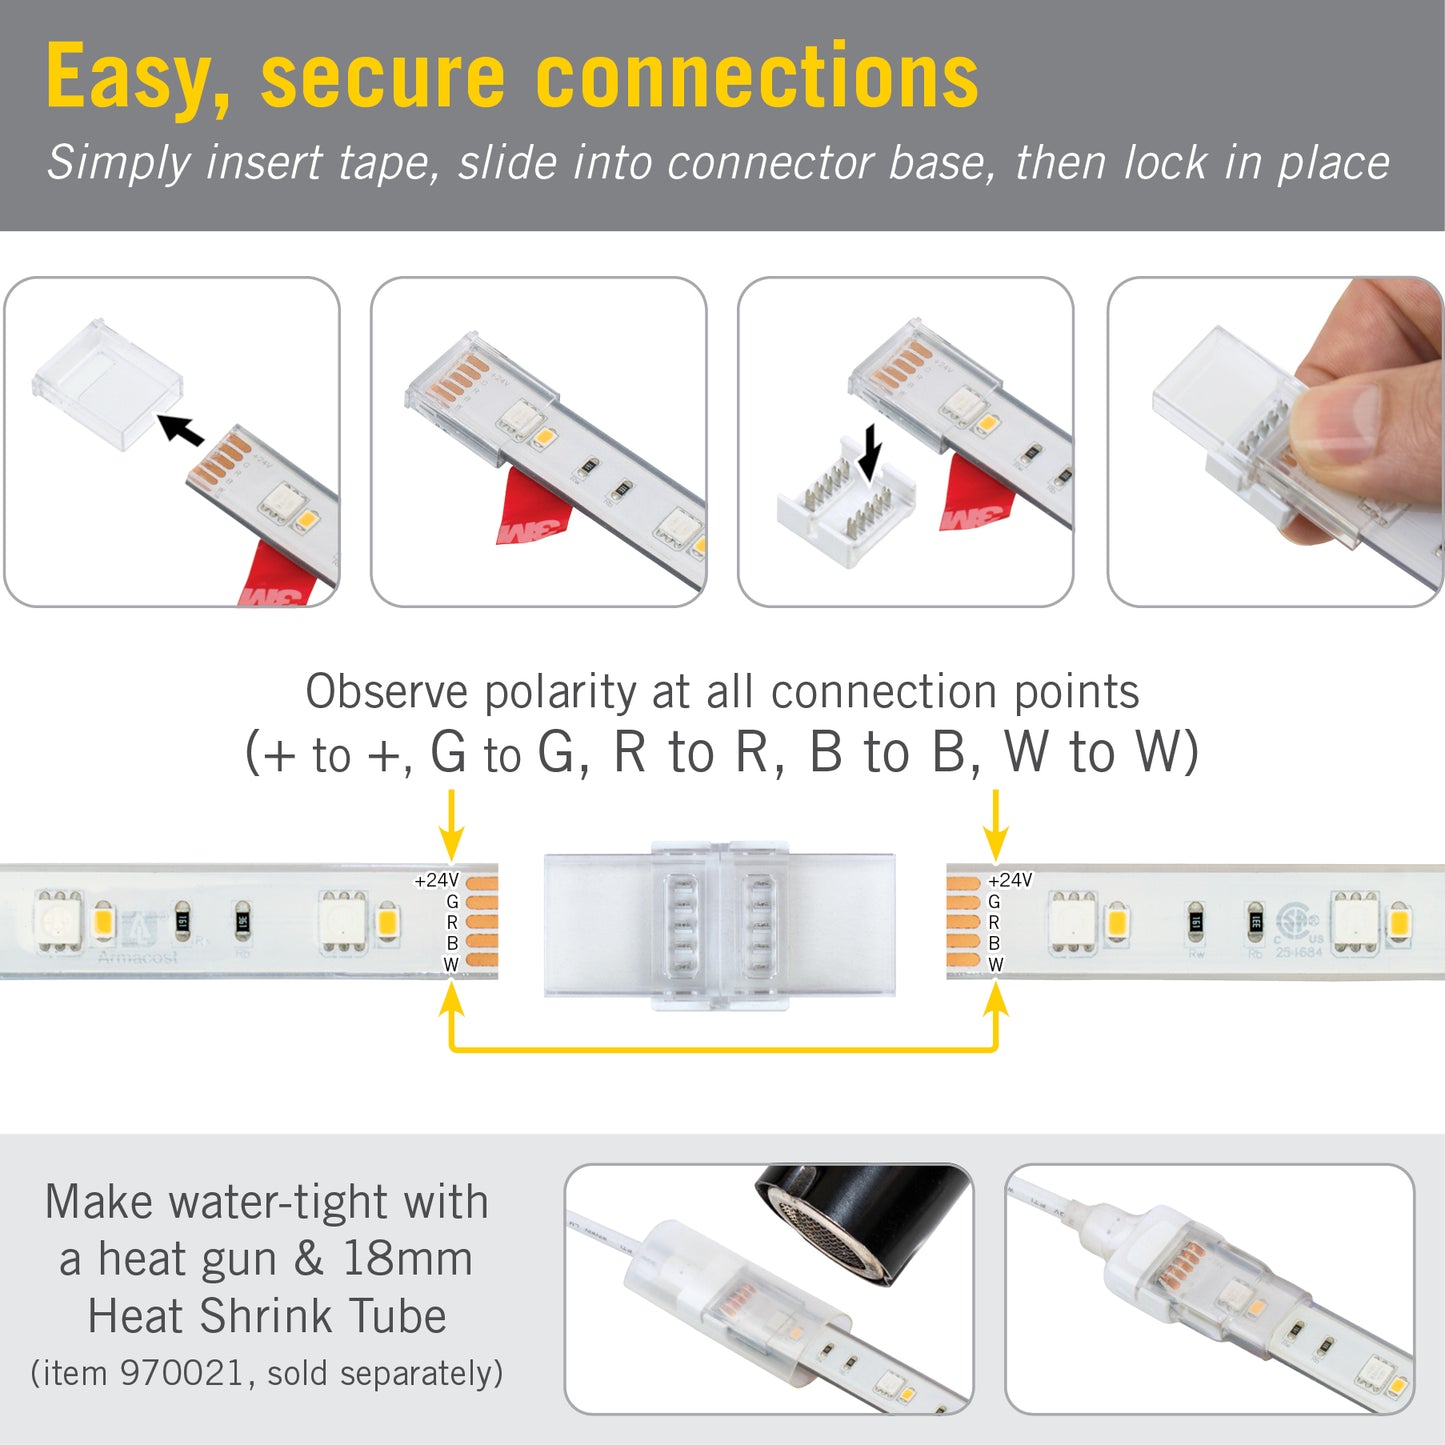
Using Connectors
Connectors are small devices that join LED wires quickly. They come in different shapes and sizes to fit various string lights. Using connectors requires no soldering or special skills. Just strip the wire ends, insert them into the connector, and lock it. Connectors provide a strong and safe connection. They also make it easy to replace or extend light strings.
Crimping Techniques
Crimping uses metal sleeves or terminals to join wires tightly. This method offers a durable and weatherproof connection. First, strip the wire ends and place them inside the crimp sleeve. Use a crimping tool to press and secure the sleeve firmly. Crimped joints resist pulling and bending well. This technique works best for outdoor LED string lights. It ensures good electrical contact and long-lasting performance.
Frequently Asked Questions
How Do You Safely Splice Led String Lights?
To safely splice LED string lights, first unplug them. Use wire strippers to expose wires. Twist matching wires together and solder or use wire connectors. Insulate the connection with heat shrink tubing or electrical tape to prevent short circuits and ensure durability.
What Tools Are Needed To Splice Led String Lights?
You need wire strippers, wire cutters, soldering iron or wire connectors, and heat shrink tubing or electrical tape. These tools help expose wires, connect them securely, and insulate the splice for safe use and long-lasting performance.
Can I Splice Led String Lights Without Soldering?
Yes, you can splice LED string lights without soldering by using wire connectors. Twist the exposed wires together and secure them with connectors. Then, insulate the splice with electrical tape or heat shrink tubing for safety and durability.
How To Maintain Led String Lights After Splicing?
After splicing, keep the splice dry and insulated. Regularly check connections for wear or damage. Avoid bending wires sharply near the splice. Proper maintenance ensures longer lifespan and prevents electrical issues.
Conclusion
Splicing LED string lights is easier than you think. With the right tools and steps, you can do it yourself. Take your time to connect wires safely and securely. Test your lights before final use to avoid issues. This skill helps fix or customize lights at home.
Enjoy bright, beautiful lights for any occasion. Keep practicing to improve your technique. Simple and fun!