Is your towel rack wobbling or falling off your drywall? It’s frustrating when something as simple as a towel rack won’t stay put.
But don’t worry—you don’t need to call a handyman or spend a fortune. You can fix it yourself with a few easy steps. In this guide, you’ll learn exactly how to repair a towel rack on drywall so it’s strong and secure again.
Keep reading, and you’ll have your bathroom back in shape in no time.
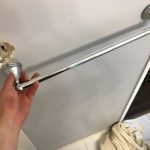
Credit: www.youtube.com
Tools And Materials Needed
Repairing a towel rack on drywall requires the right tools and materials. These items help fix the rack securely and safely. Using proper tools makes the work easier and faster.
Gathering everything before starting saves time and prevents interruptions. This section lists all the essentials needed for the repair.
Tools Needed
- Drill with screwdriver bits
- Stud finder
- Measuring tape
- Level
- Hammer
- Utility knife
- Phillips screwdriver
- Safety goggles
Materials Required
- Wall anchors or toggle bolts
- Screws matching the towel rack
- Spackle or wall filler
- Sandpaper
- Paint matching the wall color
- Replacement mounting brackets (if needed)
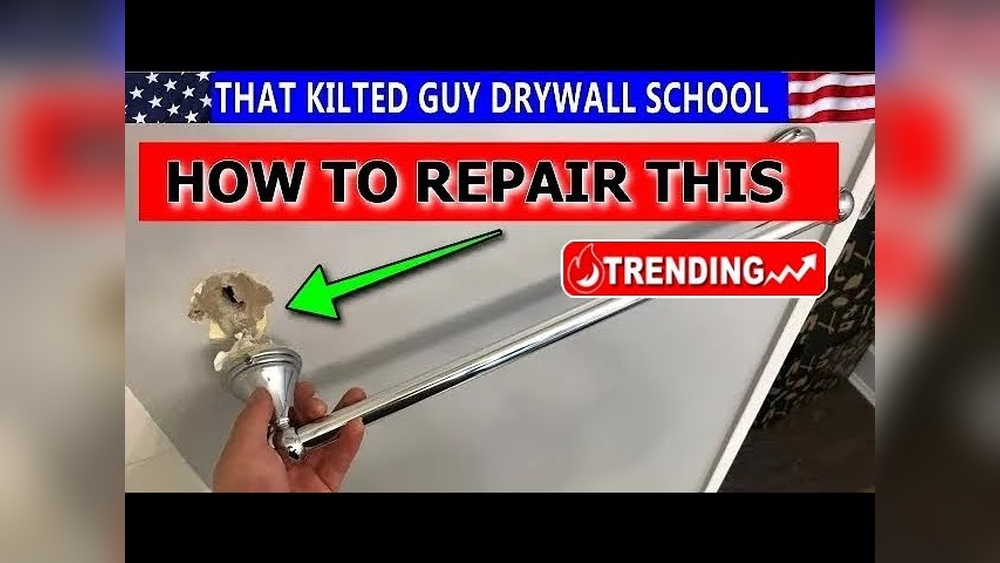
Assessing The Damage
Start by checking the wall for cracks or holes where the towel rack was attached. Notice if the drywall is soft or crumbling. This helps decide the best repair steps.
Check The Wall Surface
Start by examining the drywall around the towel rack. Look for cracks, holes, or crumbling areas. Small holes might only need patching. Large damage may require more repair work. Pay attention to any soft spots on the wall. Soft drywall means it may have water damage or mold. This affects how you fix the rack.
Inspect The Towel Rack Mounts
Remove the towel rack carefully. Check the mounts or brackets behind it. See if the screws are loose or missing. Look for damaged drywall where the mounts attach. Loose mounts can cause the rack to fall again. Damaged drywall may not hold new screws well. Note the size and type of screws used.
Assess Structural Damage
Look deeper for signs of structural damage. Press gently around the area to feel for weakness. Large holes or crumbled drywall reduce wall strength. Check if the wall studs are exposed or damaged. Damaged studs need repair before mounting the rack again. This step prevents future towel rack problems.
Removing The Broken Towel Rack
Removing a broken towel rack from drywall is the first step to a clean repair. This task requires care to avoid damaging the wall. Take your time and follow simple steps to remove the rack safely.
Gather The Right Tools
Start by collecting tools needed for removal. A screwdriver, pliers, and a putty knife are essential. Having these ready makes the process easier and faster.
Unscrew The Towel Rack
Use the screwdriver to remove all screws holding the rack. Turn screws counterclockwise until they come out. Keep the screws in a safe place for reuse or disposal.
Carefully Pry Off The Mounting Brackets
Slide the putty knife behind the brackets. Gently pry them away from the wall. Avoid applying too much force to prevent drywall damage.
Remove Anchors And Wall Plugs
Check the holes for plastic anchors or plugs. Use pliers to pull them out slowly. If stuck, twist while pulling to loosen them.
Clean The Wall Surface
Clear any leftover debris or adhesive on the wall. Use a damp cloth to wipe the area clean. This prepares the wall for patching or new installation.
Preparing The Drywall Surface
Preparing the drywall surface is a key step in fixing a towel rack. A smooth, clean surface helps the rack hold tight. This step stops the rack from coming loose again. Taking time here makes the repair last longer.
Cleaning The Drywall
Remove dust and dirt from the wall. Use a dry cloth or a soft brush. Dirt can stop glue or anchors from sticking well. Clean walls create a strong base for repair.
Removing Loose Drywall Pieces
Check the wall for loose or broken drywall. Gently scrape off any crumbling parts. Loose pieces weaken the surface. Clearing them out helps the repair stay firm.
Filling Holes And Cracks
Use drywall compound to fill holes and cracks. Apply it with a putty knife. Smooth the surface to make it even. Let the compound dry fully before the next step.
Sanding The Surface
Sand the dried compound with fine sandpaper. Sand until the wall feels smooth. This helps paint or anchors stick better. Wipe away dust after sanding.
Choosing The Right Anchors
Choosing the right anchors is important for fixing a towel rack on drywall. Drywall is soft and weak alone. It cannot hold heavy weight or stress well. Proper anchors help spread the load. This keeps the rack stable and safe.
Anchors come in many types. Each type fits different needs. Some anchors work better for light loads. Others support heavier racks. Picking the correct anchor prevents damage to the wall.
Plastic Expansion Anchors
These anchors are simple and common. They work well for light items. You drill a hole, push the anchor inside, then screw. The plastic expands to hold tight. Good choice for small towel racks.
Toggle Bolts
Toggle bolts are strong and reliable. They have wings that open behind the drywall. This spreads the weight over a larger area. Best for heavier towel racks. They need a bigger hole but hold firm.
Molly Bolts
Molly bolts are metal anchors that expand inside the wall. They create a strong grip. Suitable for medium weight racks. Installation takes more steps but they hold well.
Self-drilling Drywall Anchors
These anchors do not need a pre-drilled hole. They screw directly into drywall. Easy to install and good for light to medium weight. They provide decent support and save time.
Installing The New Towel Rack
Installing the new towel rack on drywall requires careful steps to ensure it is secure. Proper installation prevents the rack from falling or damaging the wall. Follow these steps to attach your new towel rack safely and correctly.
Marking Drill Points
Hold the towel rack against the wall at the desired height. Use a pencil to mark the screw holes through the rack’s mounting brackets. Double-check that the marks are level. Level marks keep the rack straight and balanced.
Drilling Holes
Choose a drill bit that matches the size of your wall anchors. Drill holes at the marked points gently. Avoid drilling too deep or wide. Clean any dust out of the holes before moving on. Proper holes help the anchors hold firmly.
Securing The Rack
Insert wall anchors into the drilled holes. Press them until flush with the wall surface. Align the towel rack holes with the anchors. Screw the rack into place using a screwdriver. Tighten screws enough to hold the rack steady. Check that the rack is secure and does not move.
Finishing Touches
Finishing touches make a big difference in towel rack repairs on drywall. They hide any signs of damage and bring a clean look. Proper finishing helps the wall look smooth and neat. It also protects the repaired area from future wear. Let’s explore the key steps for the best finish.
Filling Holes And Cracks
Start by filling all holes and cracks around the towel rack. Use a good-quality spackling compound for this job. Apply it with a putty knife, pressing into holes firmly. Smooth the surface as much as possible to reduce sanding later. Let the filler dry completely before moving on to the next step. This step prevents moisture and dirt from entering the wall.
Sanding And Painting
After the filler is dry, sand the area lightly with fine-grit sandpaper. Sand until the surface feels smooth and even. Clean off dust with a damp cloth before painting. Choose paint that matches your wall color for a seamless look. Apply one or two coats of paint using a brush or roller. Allow each coat to dry fully before adding the next. This step hides repairs and restores the wall’s original appearance.

Credit: diy.stackexchange.com
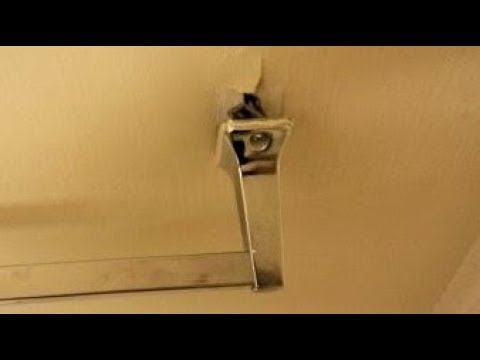
Maintenance Tips
Maintaining a towel rack on drywall helps keep it strong and safe. Small fixes today stop big problems tomorrow. Simple care can extend the life of your rack. Follow these easy tips to keep your towel rack steady and secure.
Inspect The Rack Regularly
Check your towel rack every few weeks. Look for loose screws or wobbly parts. Tighten any loose screws with a screwdriver. Early checks prevent the rack from falling.
Use Proper Weight Limits
Do not hang heavy items on the rack. Towels and light clothes are okay. Heavy loads pull screws out of drywall. This can cause damage and need repairs.
Keep Drywall Around Rack Dry
Water weakens drywall and loosens screws. Wipe off water or moisture near the rack. Use a fan or open window to dry the area. Dry drywall holds screws firmly.
Clean The Rack Gently
Use a soft cloth to clean the rack. Avoid harsh cleaners that damage the finish. Clean dirt and dust often to prevent rust. A clean rack looks good longer.
Replace Damaged Anchors Promptly
Check anchors inside the wall if the rack feels loose. Replace damaged or cracked anchors quickly. Use anchors made for drywall for best hold. Strong anchors keep the rack stable.

Credit: www.wallshark.com
Frequently Asked Questions
How Do You Fix A Towel Rack That Is Loose On Drywall?
To fix a loose towel rack, remove it carefully, locate the drywall anchors, and replace damaged anchors. Use new anchors suitable for drywall. Reattach the rack securely, ensuring it holds firmly without wobbling.
What Tools Are Needed To Repair A Towel Rack On Drywall?
You need a screwdriver, drill, drywall anchors, screws, and a level. A putty knife and spackle may be helpful for patching holes. These tools ensure a secure and professional repair.
Can I Repair A Towel Rack Without Removing Drywall?
Yes, if the anchors are intact, tighten screws or replace anchors without drywall removal. For damaged drywall, patching may be necessary. Use proper anchors to ensure stability without full drywall replacement.
How To Prevent Towel Racks From Pulling Out Of Drywall?
Install towel racks using heavy-duty drywall anchors or mount into studs. Avoid overtightening screws, which can damage drywall. Regularly check and tighten screws to maintain a secure hold.
Conclusion
Fixing a towel rack on drywall is simple with the right steps. Use proper anchors to keep it steady and secure. Check the wall for damage before starting any repairs. Tighten screws carefully to avoid stripping. Taking your time helps prevent future problems.
A well-fixed towel rack keeps your bathroom neat and safe. Now, you can enjoy a sturdy rack without stress or extra costs. Give your bathroom a small upgrade that lasts.