Have you ever wished your mirror could do more than just show your reflection? Imagine starting your day with a mirror that tells you the weather, shows your calendar, or even plays your favorite music—all while you get ready.
Building a smart mirror might sound complicated, but with the right steps, you can create one yourself. In this guide, you’ll discover how to turn a regular mirror into a powerful, interactive tool that makes your daily routine smarter and easier.
Ready to impress yourself and your guests? Let’s dive in and build your very own smart mirror.
Choosing The Right Mirror
Choosing the right mirror is key to building a smart mirror. It affects the look, function, and quality of your project. Picking the perfect mirror helps your smart features shine clearly. It also fits well in your space and style.
Types Of Mirrors
Two main types of mirrors work well for smart mirrors. First, the two-way mirror. It lets light pass through from behind. This way, your screen shows through the mirror surface. Second, acrylic mirrors. They are lighter and safer but can scratch easily. Glass mirrors give the best reflection and durability. Choose the type based on your budget and use.
Selecting Mirror Size
Size matters for smart mirrors. A bigger mirror shows more information and looks grand. Smaller mirrors fit tight spaces and save costs. Measure your wall or area carefully before buying. Match the size with your screen for clear display. Avoid mirrors that are too thick or heavy.
Considerations For Frame Design
The frame holds your mirror and adds style. Simple frames suit modern, minimal designs. Ornate frames fit classic or vintage looks. Pick materials like wood, metal, or plastic. Make sure the frame supports your mirror’s weight. Also, leave space for cables and sensors behind the frame.

Credit: www.youtube.com
Gathering Essential Materials
Building a smart mirror starts with gathering the right materials. Each part plays a key role. Choosing quality components ensures your mirror works well and lasts long.
Display Options
The display is the heart of your smart mirror. You can use an old monitor or a tablet screen. LCD screens are popular because they show clear images. OLED screens are brighter but cost more. Pick a size that fits your mirror frame. Make sure the display supports the right resolution.
Microcontrollers And Computers
A microcontroller or small computer runs the smart mirror software. Raspberry Pi is a common choice. It is affordable and easy to use. Arduino boards work too, but need extra parts for display. Choose a device with enough power to handle apps and updates. Check if it supports Wi-Fi for smart features.
Power Supplies And Cables
Power keeps your smart mirror running all day. Use a reliable power supply that matches your display and computer. USB cables work well for Raspberry Pi. HDMI cables connect the display to the computer. Use good quality cables to avoid connection problems. Keep cables neat to fit inside the mirror frame.
Additional Components
Extra parts improve your smart mirror’s features. A two-way mirror film lets you see the display behind glass. Sensors can track light or motion. Speakers add sound for alerts or music. A frame holds everything together and protects components. Small fans help cool the electronics if needed.
Setting Up The Display
Setting up the display is a key step in building a smart mirror. The display shows all the useful information and interacts with you. This part requires care and precision to make sure everything works well and looks great.
Preparing The Screen
Choose a screen with good resolution and size. A tablet or small monitor works well for most smart mirrors. Remove any unnecessary casing to make the screen slim. Clean the screen surface to avoid dust and fingerprints. Check the screen’s brightness and contrast to suit your room lighting.
Installing The Two-way Mirror
The two-way mirror lets you see the display and your reflection. Cut the mirror to the same size as the screen. Handle the mirror carefully to avoid scratches or cracks. Place the mirror over the screen, shiny side facing out. Use strong tape or glue to keep the mirror steady.
Mounting The Display Behind The Mirror
Build a frame to hold the screen and mirror tightly together. Make sure the frame fits the mirror size exactly. Attach the display behind the mirror using brackets or adhesive strips. Leave space for cables to connect the screen to power and control devices. Test the setup by turning on the screen and checking the view through the mirror.
Configuring The Software
Configuring the software is a key step in building your smart mirror. This step brings your device to life. It controls what you see and how you interact with the mirror. Setting up the right software makes your smart mirror useful and fun.
Choosing An Operating System
Select an operating system that works well with your hardware. Popular choices include Raspberry Pi OS, Ubuntu, or even Windows IoT. The OS should support the smart mirror software smoothly. Choose one that is easy to update and maintain.
Installing Smart Mirror Software
After picking the OS, install the smart mirror software. Many builders use open-source platforms like MagicMirror². The installation usually involves downloading files and running simple commands. Follow clear instructions to avoid errors during setup.
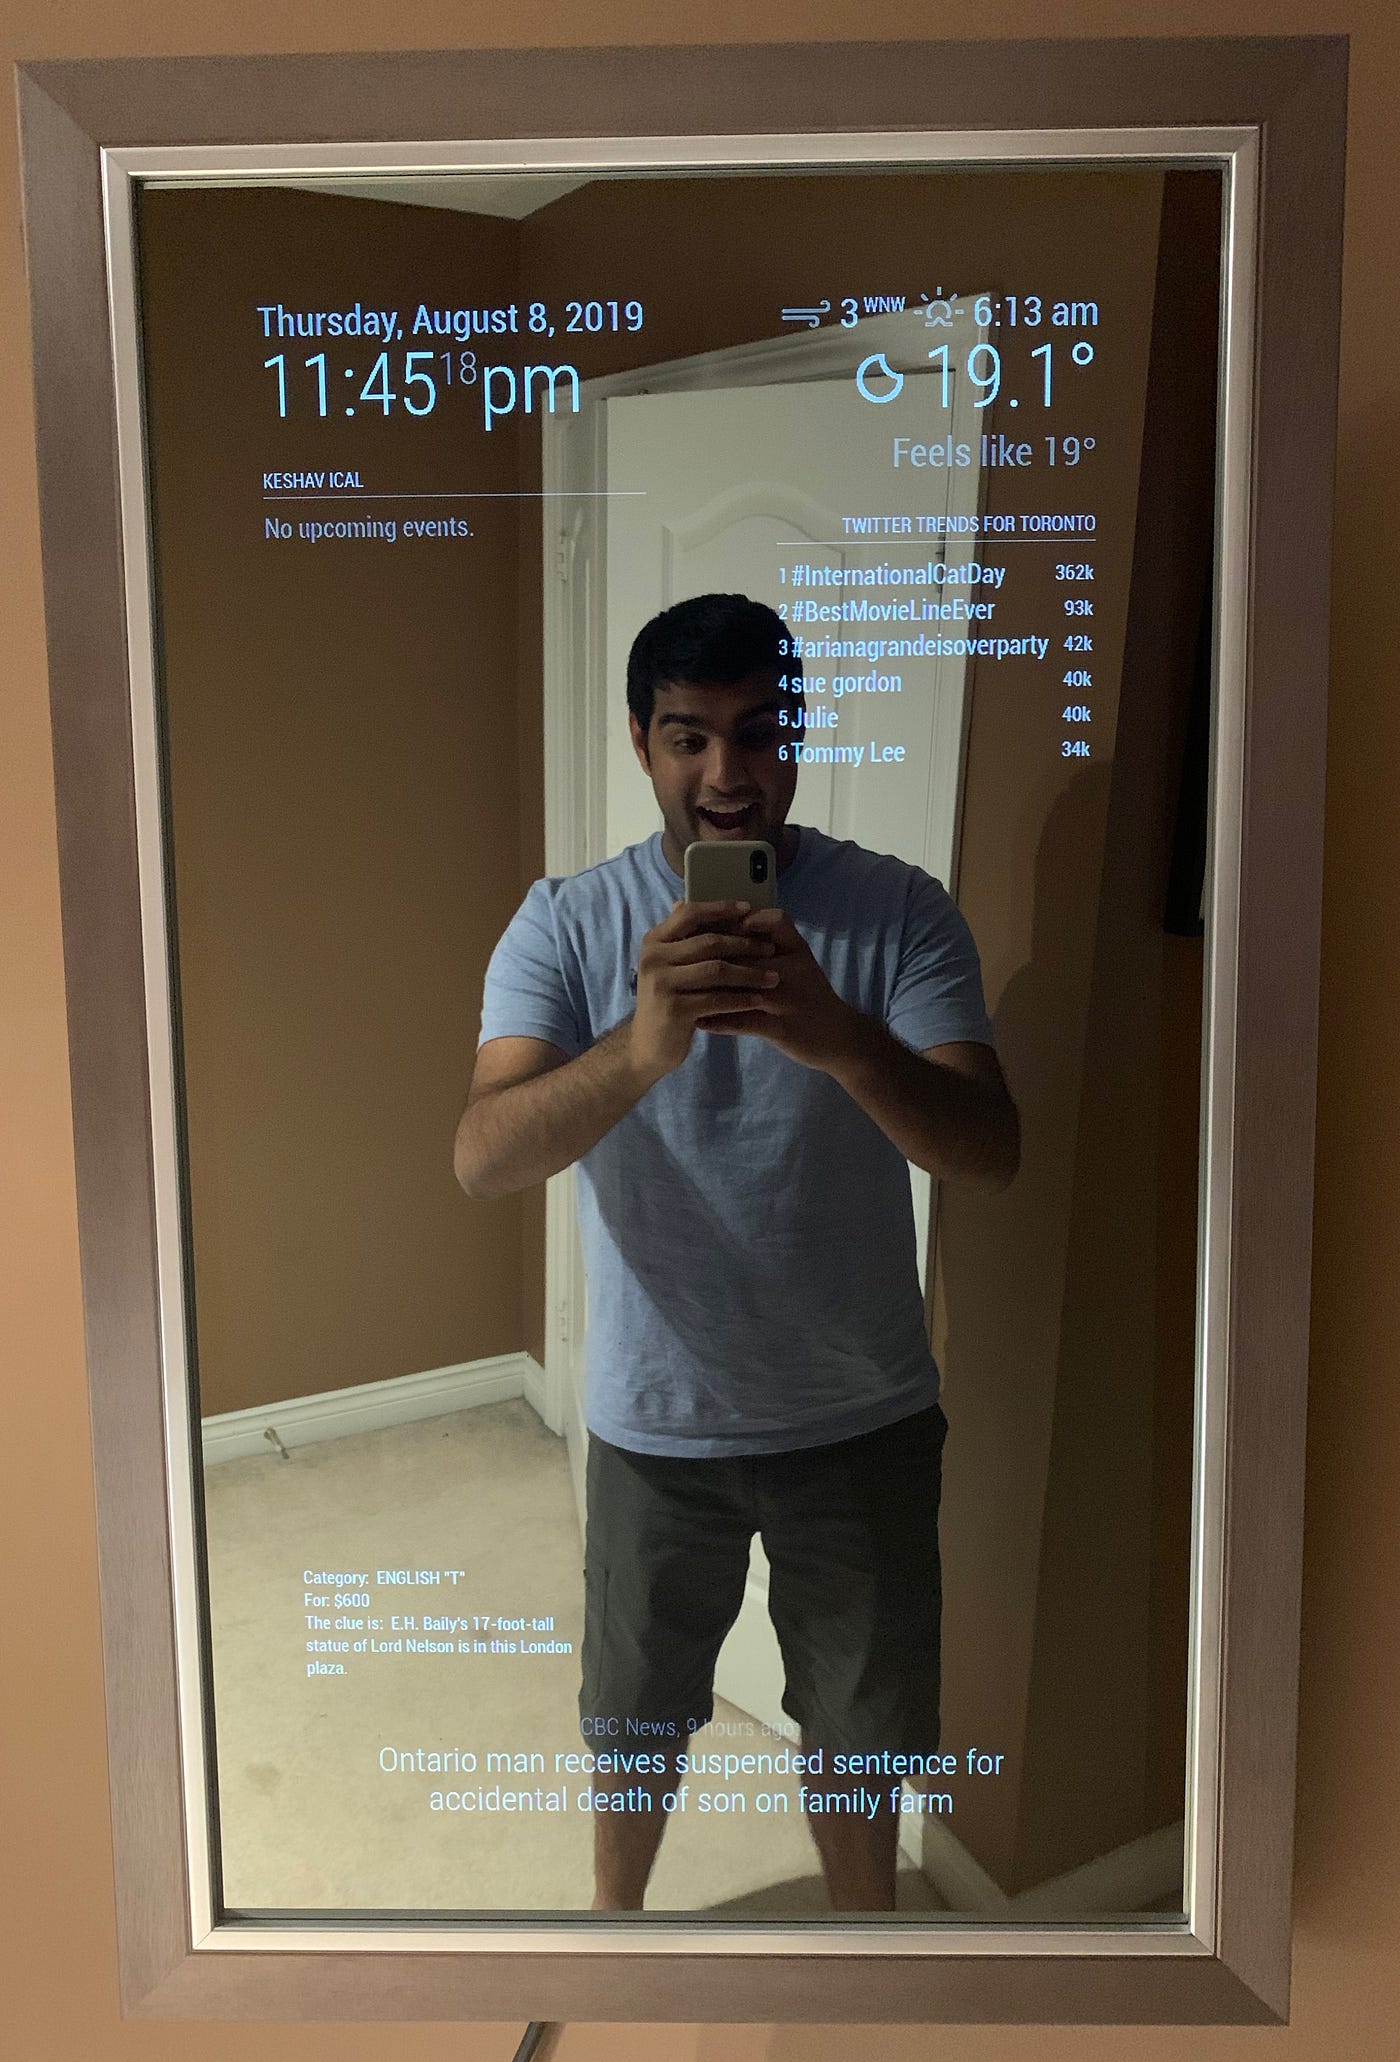
Customizing Modules And Widgets
Modules and widgets show you useful information on the mirror. You can add weather updates, news, calendar events, and more. Customize these features to suit your daily needs. Adjust the layout, colors, and size for the best view.
Integrating Voice And Touch Controls
Integrating voice and touch controls makes a smart mirror easy to use. It allows users to interact without complex steps. Voice commands and touchscreens create a smooth, modern experience. These controls help the mirror respond quickly to your needs.
Adding Microphones And Speakers
Start by installing small microphones near the mirror. They pick up your voice clearly. Use noise-cancelling microphones for better accuracy. Add compact speakers to play sounds and responses. Place them so sound does not echo or distort. Good audio hardware makes voice control reliable and clear.
Implementing Voice Assistants
Choose a voice assistant like Google Assistant or Alexa. These assistants understand commands and answer questions. Connect the assistant to your mirror’s computer or smart device. Program simple commands to control mirror features. Voice assistants make it easy to check weather, news, or calendar. They respond without needing to touch the mirror.
Setting Up Touchscreen Capabilities
Use a touchscreen panel behind the mirror glass. Capacitive touchscreens work well for smooth, accurate control. Connect the touchscreen to the mirror’s computer system. Design a simple user interface for easy navigation. Touch controls let users swipe, tap, and scroll. This makes interacting with apps and settings fast and intuitive.

Credit: all3dp.com
Assembling The Frame And Enclosure
Assembling the frame and enclosure is a key step in building a smart mirror. This part holds all the components together and gives the mirror its shape. A well-built frame protects the screen and electronics while making the mirror look neat. It also helps with cooling and organizing cables inside.
Building Or Modifying The Frame
Choose a frame that fits your mirror size. You can build one from wood or buy a pre-made frame. If you use a regular mirror frame, modify it by removing the back panel. This allows space for the screen and electronics. Ensure the frame is sturdy enough to hold all parts. Sand and paint the frame for a smooth finish.
Ensuring Proper Ventilation
The smart mirror’s screen and computer create heat. Without ventilation, this heat can damage parts. Add small vents or holes in the frame to let air flow. Place vents near heat sources like the computer board. Use a small fan inside the frame if needed. Proper airflow keeps the mirror working well for a long time.
Cable Management Tips
Keep cables tidy inside the frame to avoid damage. Use clips or zip ties to secure wires along the frame edges. Label cables for easy identification later. Avoid bending cables sharply to prevent breaks. Organize cables so they do not block ventilation holes. A neat setup makes future repairs easier.
Testing And Troubleshooting
Testing and troubleshooting are key steps in building a smart mirror. They ensure the device works well and meets your needs. This process helps find and fix problems early. It saves time and avoids frustration later.
Checking Hardware Connections
Start by examining all hardware connections. Make sure cables are plugged in tightly. Look for loose wires or damaged parts. Check the power supply to the screen and computer. Confirm the camera and sensors connect properly. Secure all components firmly to avoid interruptions.
Debugging Software Issues
Next, focus on the software side. Verify the operating system runs smoothly. Check the smart mirror app for errors or crashes. Use logs to identify bugs or failed processes. Update software to the latest version. Restart the system after changes to apply fixes. Test each feature to confirm correct behavior.
Optimizing Performance
Finally, improve the mirror’s speed and response. Close unnecessary programs running in the background. Adjust settings for better display and sensor accuracy. Use lightweight software to reduce load on the system. Ensure the internet connection is stable for updates. Regularly clean hardware to avoid overheating. These steps keep the smart mirror running fast and reliable.
Enhancing Your Smart Mirror
Enhancing your smart mirror takes it beyond a simple display. You can customize it to fit your daily needs and home style. Small upgrades can make a big difference in how you use your smart mirror every day.
Adding Smart Home Integration
Connect your smart mirror to devices like lights and thermostats. This lets you control your home from the mirror’s screen. Use voice commands or touch controls for easy access. It saves time and makes your home feel more modern. You can check the weather, news, or your calendar too.
Incorporating Sensors
Install sensors to make your smart mirror more interactive. Motion sensors can turn the screen on when you approach. Light sensors adjust the screen brightness to match the room. Temperature sensors show the current room heat. These features help your mirror respond to your environment smartly.
Upgrading Display Features
Choose a high-resolution screen for clear images and text. Use anti-glare glass to improve visibility in bright rooms. Add color and brightness controls for a better viewing experience. A touch screen allows easy navigation through apps and widgets. These upgrades make your smart mirror look and work better.
Credit: medium.com
Frequently Asked Questions
What Materials Are Needed To Build A Smart Mirror?
To build a smart mirror, you need a two-way glass, a monitor or tablet, a frame, and a Raspberry Pi. Additional items include sensors, a power supply, and software like MagicMirror for smart features and customization.
How Do Smart Mirrors Display Information Clearly?
Smart mirrors use a two-way glass that reflects like a mirror and lets light from the screen pass through. The monitor behind the glass shows information clearly without obscuring the mirror’s reflective surface.
Can I Customize The Smart Mirror Interface?
Yes, you can customize the interface using open-source platforms like MagicMirror. You can add modules for weather, news, calendar, and other personalized widgets to enhance functionality.
How Long Does It Take To Build A Smart Mirror?
Building a smart mirror typically takes 1 to 3 days, depending on your experience. This includes assembling hardware, installing software, and customizing features for your needs.
Conclusion
Building a smart mirror can be simple and fun. Start with the right tools and parts. Follow clear steps to connect and program it. Take your time and test each feature. You will enjoy seeing your smart mirror work every day.
This project shows how technology can fit in your home. Give it a try, and learn as you go. Creating your own smart mirror brings a sense of pride and joy. Keep experimenting to make it even better.