Looking to add a fresh, creative touch to your home without spending a lot? Making a paper wreath is a simple and fun way to brighten up any room.
You don’t need fancy tools or expensive materials—just a few basic supplies and a little time. Imagine having a beautiful, handmade decoration that reflects your style and welcomes guests with charm. Keep reading, and you’ll discover easy steps to create your own stunning paper wreath that will make your home feel warm and inviting.
Ready to get started? Let’s dive in!
Materials Needed
Creating a paper wreath is a fun and simple craft. Gathering the right materials makes the project easier. This section lists all you need to start making your own beautiful wreath for home decoration.
Types Of Paper
Choose paper that matches your style and color theme. Colored craft paper works well and comes in many shades. You can use recycled paper for an eco-friendly touch. Wrapping paper adds patterns and texture. Cardstock is thicker and holds shapes better. Tissue paper creates a soft, fluffy look. Each type changes the wreath’s final appearance.
Additional Supplies
Besides paper, you need a few basic tools. Scissors for cutting paper into shapes. Glue or a hot glue gun to stick pieces together. A wreath base, like a foam or wire ring, holds the paper. String or ribbon can hang the wreath on your wall. Markers or paint can add extra details. Having these supplies ready speeds up your crafting process.
Preparing The Paper
Preparing the paper is the first step to create a beautiful paper wreath. Good preparation helps your wreath look neat and lasts longer. It also makes the crafting process easier and more fun.
Choosing the right paper and handling it carefully is important. You want paper that folds well and cuts cleanly. The next steps explain simple ways to cut and fold the paper for your wreath.
Cutting Techniques
Cut the paper into shapes like strips, squares, or circles. Use sharp scissors for clean edges. Straight cuts help pieces fit together better. Cut slowly to avoid mistakes.
Try cutting decorative edges, like zigzags or curves. These add a nice touch to your wreath. Keep the pieces similar in size for a balanced look. Small pieces work best for detailed designs.
Folding Methods
Fold the paper to add texture and depth. Simple folds like accordion or triangle folds work well. Press each fold firmly to keep its shape. Folding makes your wreath look more interesting.
Use folds to create petals or leaves. Experiment with different fold sizes for variety. Folded pieces also help the wreath look fuller. Take your time to fold carefully for the best results.
Creating The Base
Creating the base is the first step in making a paper wreath. A strong base holds all the decorations. It shapes the wreath and keeps it sturdy. Take your time to build a solid base. This helps your wreath last longer and look better.
The base can be made from different materials. Choose one that fits your style and the wreath size. Keep the base lightweight for easy hanging. A good base makes the whole process easier and fun.
Choosing A Frame
Select a frame that matches your wreath size. Common options include wire, foam, or cardboard. Wire frames are flexible and durable. Foam frames are easy to stick paper pieces onto. Cardboard frames are cheap and easy to cut.
Consider the weight of the decorations. Use a strong frame for heavy paper designs. For lighter decorations, a simple cardboard ring works well. Pick a frame that fits your crafting tools and budget.
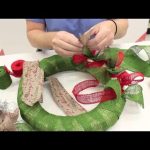
Assembling The Base
Start by shaping your frame if needed. Cut cardboard into a circle or oval shape. Wrap wire frames with tape to avoid sharp edges. Cover foam frames with paper or fabric for a smooth surface.
Secure the ends of your frame tightly. Make sure there are no loose parts. Test the frame by gently pressing it. It should feel firm and hold its shape well.
Your base is ready for paper decorations. A well-made base makes decorating easier. It helps your wreath look neat and beautiful.
Credit: happyhappynester.com
Forming Paper Elements
Forming paper elements is a key step in making a beautiful paper wreath. These elements give your wreath color, texture, and shape. You can create various parts like flowers, leaves, and other decorative shapes. Each piece adds a special touch to your home decoration.
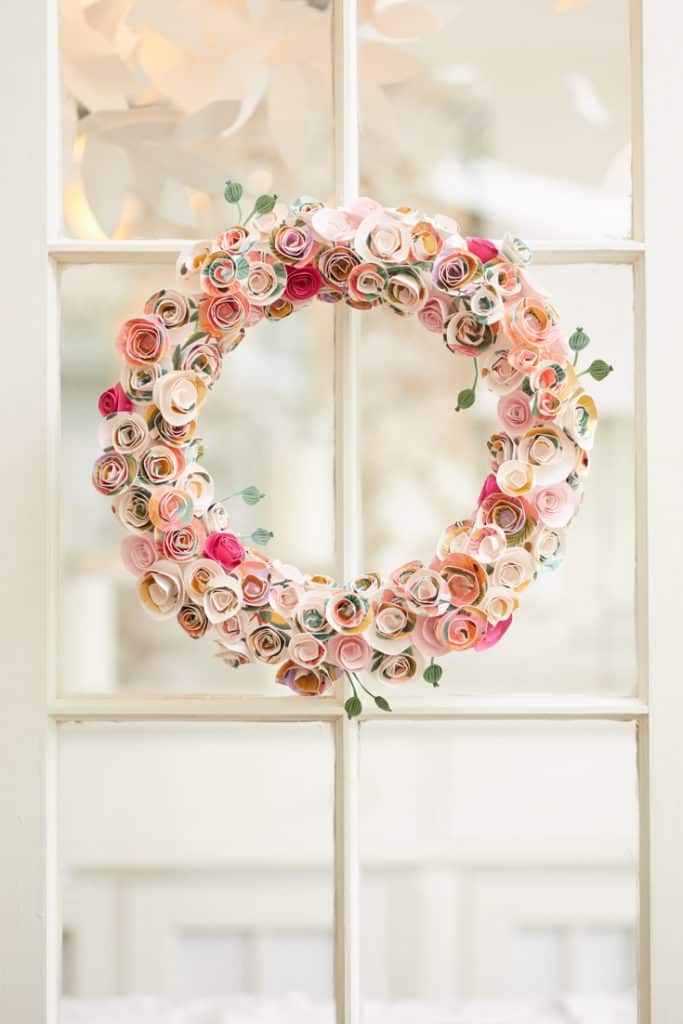
Making Flowers
Cut paper into petal shapes to start making flowers. Use different sizes for a natural look. Fold each petal slightly to add depth. Glue petals together in a circle to form the flower. Add a small paper circle or bead in the center. Experiment with colors for a bright effect.
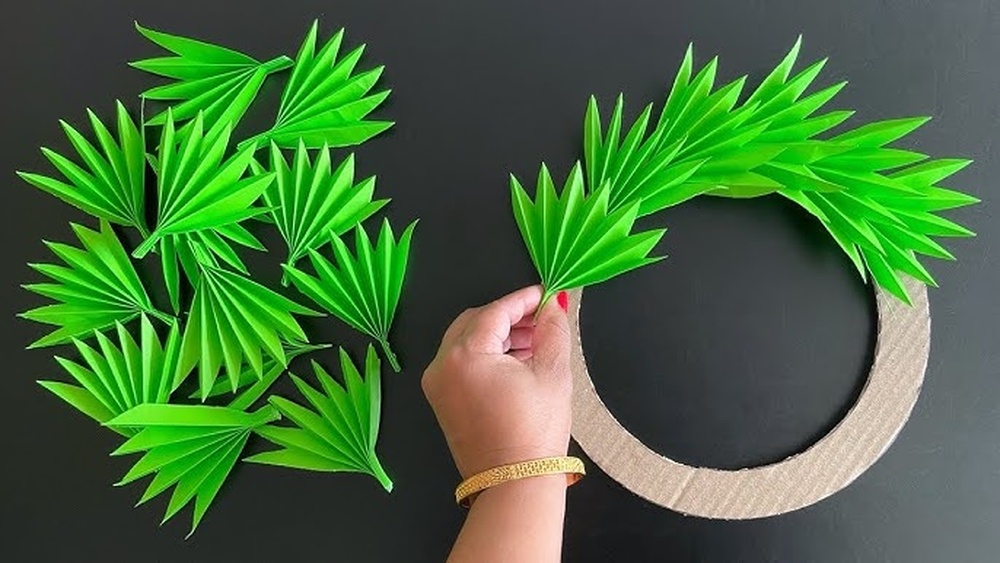
Crafting Leaves
Cut leaf shapes from green paper sheets. Vary the size and shape for realism. Score lines on leaves with a pencil for veins. Fold leaves in the middle to create dimension. Attach stems using thin paper strips or wire. Leaves add freshness and balance to your wreath.
Designing Other Shapes
Create extra shapes like stars, hearts, or circles. These can fill gaps and make the wreath fuller. Use contrasting colors to highlight these shapes. Simple shapes keep the design clean and charming. Glue them carefully on the wreath base for a neat look.
Arranging And Attaching
Arranging and attaching paper pieces is a key step in making a beautiful wreath. How you place each piece affects the look and fullness. Careful attachment keeps the wreath strong and long-lasting. Follow simple tips to arrange and glue your paper shapes with care and style.
Layout Ideas
Start by spreading your paper pieces on a flat surface. Try different patterns like circles, spirals, or clusters. Mix colors and shapes for a lively design. Leave some space to avoid a crowded look. Step back and check the balance before gluing. This helps you see if the wreath feels even and full.
Gluing And Securing
Use a hot glue gun or strong craft glue to attach pieces. Place a small dot of glue on each paper shape’s back. Press firmly onto the base ring or previous pieces. Hold for a few seconds to secure. Layer pieces slightly to cover glue spots. Add extra glue to edges if needed. This keeps everything tight and neat. Let the wreath dry fully before hanging.
Adding Finishing Touches
Adding finishing touches to your paper wreath brings it to life. This step lets you personalize and enhance the look. Small details make a big difference in home decoration. Use simple ideas to make your wreath unique and beautiful.
Painting And Decorating
Choose colors that match your room or season. Use acrylic paints for bright, lasting colors. Try sponging or brushing for different effects. Add glitter or small beads for sparkle. Glue on paper flowers or leaves for extra texture. Keep decorations light so the wreath holds well.
Hanging Options
Pick a strong ribbon or string to hang your wreath. Match the color to your wreath for a neat look. Use a suction cup hook on glass or smooth surfaces. For walls, use a nail or adhesive hook. Hang at eye level for best display. Make sure the wreath is secure and balanced.
Tips For Longevity
Keeping your paper wreath looking fresh and beautiful takes care. Simple steps can help it last longer. These tips protect your creation from damage and make storage easy.
Protecting From Damage
Keep the wreath away from water. Moisture can weaken the paper and cause tears. Avoid direct sunlight to stop colors from fading. Dust gently with a soft brush or cloth. Handle the wreath carefully to prevent bending or crushing parts. Use a clear spray sealer for extra protection, but test it on a small area first.
Storage Advice
Store the wreath in a cool, dry place. Use a large box or plastic container to avoid squashing. Place tissue paper around the wreath to cushion delicate parts. Avoid stacking heavy items on top. Label the box to find it easily next season. Check the wreath occasionally for any signs of wear or damage.

Credit: liagriffith.com
Creative Variations
Creative variations make paper wreaths unique and fun to design. They let you change styles to fit any mood or event. Simple changes in shapes, colors, or themes can bring fresh looks. These ideas help keep your home decoration lively and interesting.
Explore different ways to personalize your paper wreath. Try new shapes, textures, and colors. Mix and match materials for a one-of-a-kind piece. These creative choices add charm and personality to your space.
Seasonal Themes
Seasonal themes give your wreaths a timely touch. Use colors and shapes that match each season’s mood. For spring, try pastel flowers and soft greens. Summer wreaths can feature bright colors and sun shapes. Autumn invites warm oranges, reds, and leaf designs. Winter wreaths look great with cool blues and snowflakes. Seasonal ideas keep your home fresh all year long.
Color Combinations
Choosing the right colors changes the wreath’s style. Bold colors make a strong statement. Soft tones create a calm and cozy feel. Try contrasting colors for a lively look. Use matching shades for a smooth, elegant effect. Experiment with patterns like stripes or dots. Color choices help set the mood in any room.

Credit: www.youtube.com
Frequently Asked Questions
What Materials Are Needed To Make A Paper Wreath?
To make a paper wreath, you need colored paper, scissors, glue, and a wreath base. Optional items include ribbons and decorative embellishments. These materials are easy to find and affordable, perfect for DIY home decoration projects.
How Long Does It Take To Make A Paper Wreath?
Making a paper wreath typically takes 30 to 60 minutes. Time varies based on design complexity and your crafting experience. Simple wreaths are quicker, while detailed ones require more patience and precision.
Can I Use Recycled Paper For My Wreath?
Yes, recycled paper works well for wreaths. It’s eco-friendly and adds a unique texture. Using old magazines, newspapers, or scrap paper is a great way to reduce waste while decorating.
How Do I Hang A Paper Wreath Securely?
Use a sturdy hook, adhesive strip, or ribbon loop to hang your wreath. Ensure the hanging method supports the wreath’s weight to avoid falling. Place it on doors or walls for attractive home décor.
Conclusion
Creating a paper wreath adds charm to any home space. It is simple and fun to make. Use colorful paper to brighten your room. You can change the design anytime you want. This craft saves money and shows your style.
Try making one for your door or wall. Enjoy the process and feel proud of your work. A handmade wreath brings a warm, personal touch to your home. Give it a try today and see the difference. Crafting can be relaxing and rewarding for everyone.