
Your hardwired smoke detector is a crucial part of keeping your home safe. But did you know it also relies on a backup battery to work properly during power outages?
If that battery dies, your detector might fail when you need it most. Replacing the battery might sound tricky, but it’s easier than you think—and doing it yourself can save you time and money. In this guide, you’ll learn exactly how to replace the battery in your hardwired smoke detector quickly and safely.
Keep reading to make sure your home stays protected without any hassle.
Credit: www.homedepot.com
Tools And Materials Needed
Replacing the battery in a hardwired smoke detector requires the right tools and materials. Having these ready makes the task easier and safer. You do not need many items, but each one plays a key role.
Gather everything before starting. This way, the process goes smoothly and without interruptions.
Battery Type
Check your smoke detector for the correct battery type. Most use 9-volt batteries. Some models need AA or AAA batteries. Using the wrong type can damage the device or cause it not to work.
Screwdriver
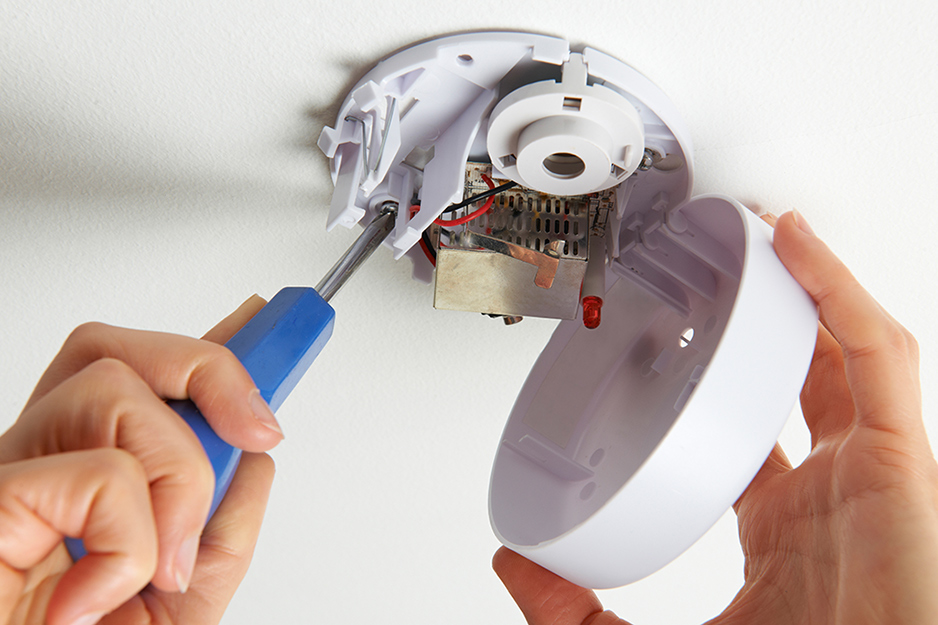
A screwdriver helps open the smoke detector cover. Usually, a Phillips head screwdriver is needed. Sometimes, a flathead screwdriver works. Choose the right size to avoid stripping screws.
Step Ladder Or Stool
A step ladder or sturdy stool helps you reach the smoke detector safely. Do not stand on unstable furniture. Safety first when working at height.
Flashlight
A flashlight helps you see inside the smoke detector, especially in dim areas. It also helps check the battery compartment clearly.
Gloves
Wear gloves to protect your hands from dirt and dust. Gloves also prevent oils from your skin from touching the device.
Safety Precautions
Safety is the top priority when replacing the battery in a hardwired smoke detector. Taking the right precautions helps prevent accidents and damage. This section covers simple steps to keep you safe during the process.
Follow these tips carefully. They protect you and your home.
Turn Off The Power
Switch off the circuit breaker connected to the smoke detector. This stops electricity flow. It lowers the risk of electric shock. Use a tester to confirm the power is off before you start.
Use A Stable Ladder
Choose a sturdy ladder or step stool. Place it on a flat, stable surface. Avoid overreaching while on the ladder. Always keep three points of contact for balance.
Handle Batteries Correctly
Use the recommended battery type for your smoke detector. Do not mix old and new batteries. Remove old batteries carefully and dispose of them safely. Avoid touching battery terminals with metal objects.
Avoid Damaging The Detector
Do not pull or yank the smoke detector. Gently twist or unclip it from its base. Avoid touching internal parts to prevent damage. Follow the manufacturer’s instructions closely.
Test The Detector After Replacement
Turn the power back on after installing the new battery. Press the test button to check if the detector works. A loud beep means it is ready to protect your home.
Locating The Smoke Detector
Finding the hardwired smoke detector is the first step in replacing its battery. These detectors are fixed to ceilings or high on walls. They connect directly to your home’s electrical system.
Knowing where your smoke detectors are helps you maintain safety. It also speeds up the battery replacement process. Most homes have several detectors in key areas.
Check Common Smoke Detector Locations
Look near bedrooms, hallways, and living rooms. These spots often have smoke detectors installed. Kitchens and basements might also have them, but less often.
Use A Ladder For High Places
Smoke detectors are usually mounted on ceilings or high walls. A sturdy ladder helps reach them safely. Always have someone nearby when using a ladder.
Identify Hardwired Smoke Detectors
Hardwired detectors have a power cable connected to the ceiling. Unlike battery-only types, they do not rely solely on batteries. They often have a small battery backup inside.
Removing The Smoke Detector Cover
Removing the smoke detector cover is the first step in replacing the battery in a hardwired smoke detector. This part protects the battery and internal parts. Taking off the cover carefully helps you avoid damage to the detector. It also makes the battery easy to reach and change.
Each smoke detector may have a different way to open the cover. Knowing the right method ensures a smooth process. It also keeps the device working properly after you close it again.
Locate The Smoke Detector Cover
Look closely at the smoke detector on your ceiling or wall. The cover is usually the round or square outer part. It may have small tabs or slots around the edges. These help hold it in place.
Unlock The Cover
Press or slide the tabs gently. Some covers twist off with a slight turn to the left. Others may need a small push or pull. Do not force the cover to avoid breaking it.
Remove The Cover Carefully
Once unlocked, pull the cover away from the base. Hold it firmly but gently. Keep the cover close so you do not drop or lose it. Set it aside in a safe spot.
Disconnecting The Power Source
Disconnecting the power source is the first step in replacing the battery of a hardwired smoke detector. This step is important to avoid electric shock and protect the device. It also stops the alarm from sounding while you work on it.
Take your time and handle everything with care. Safety is the top priority during this process.
Turn Off The Circuit Breaker
Find the circuit breaker box in your home. Look for the switch that controls power to the smoke detector. Flip the switch to the off position. This cuts power safely and completely to the device.
Test For Power
Use a voltage tester or a small electrical tool to check the smoke detector. Ensure no electricity is flowing to it. This step confirms the power is off. Avoids any risk of shock or damage.
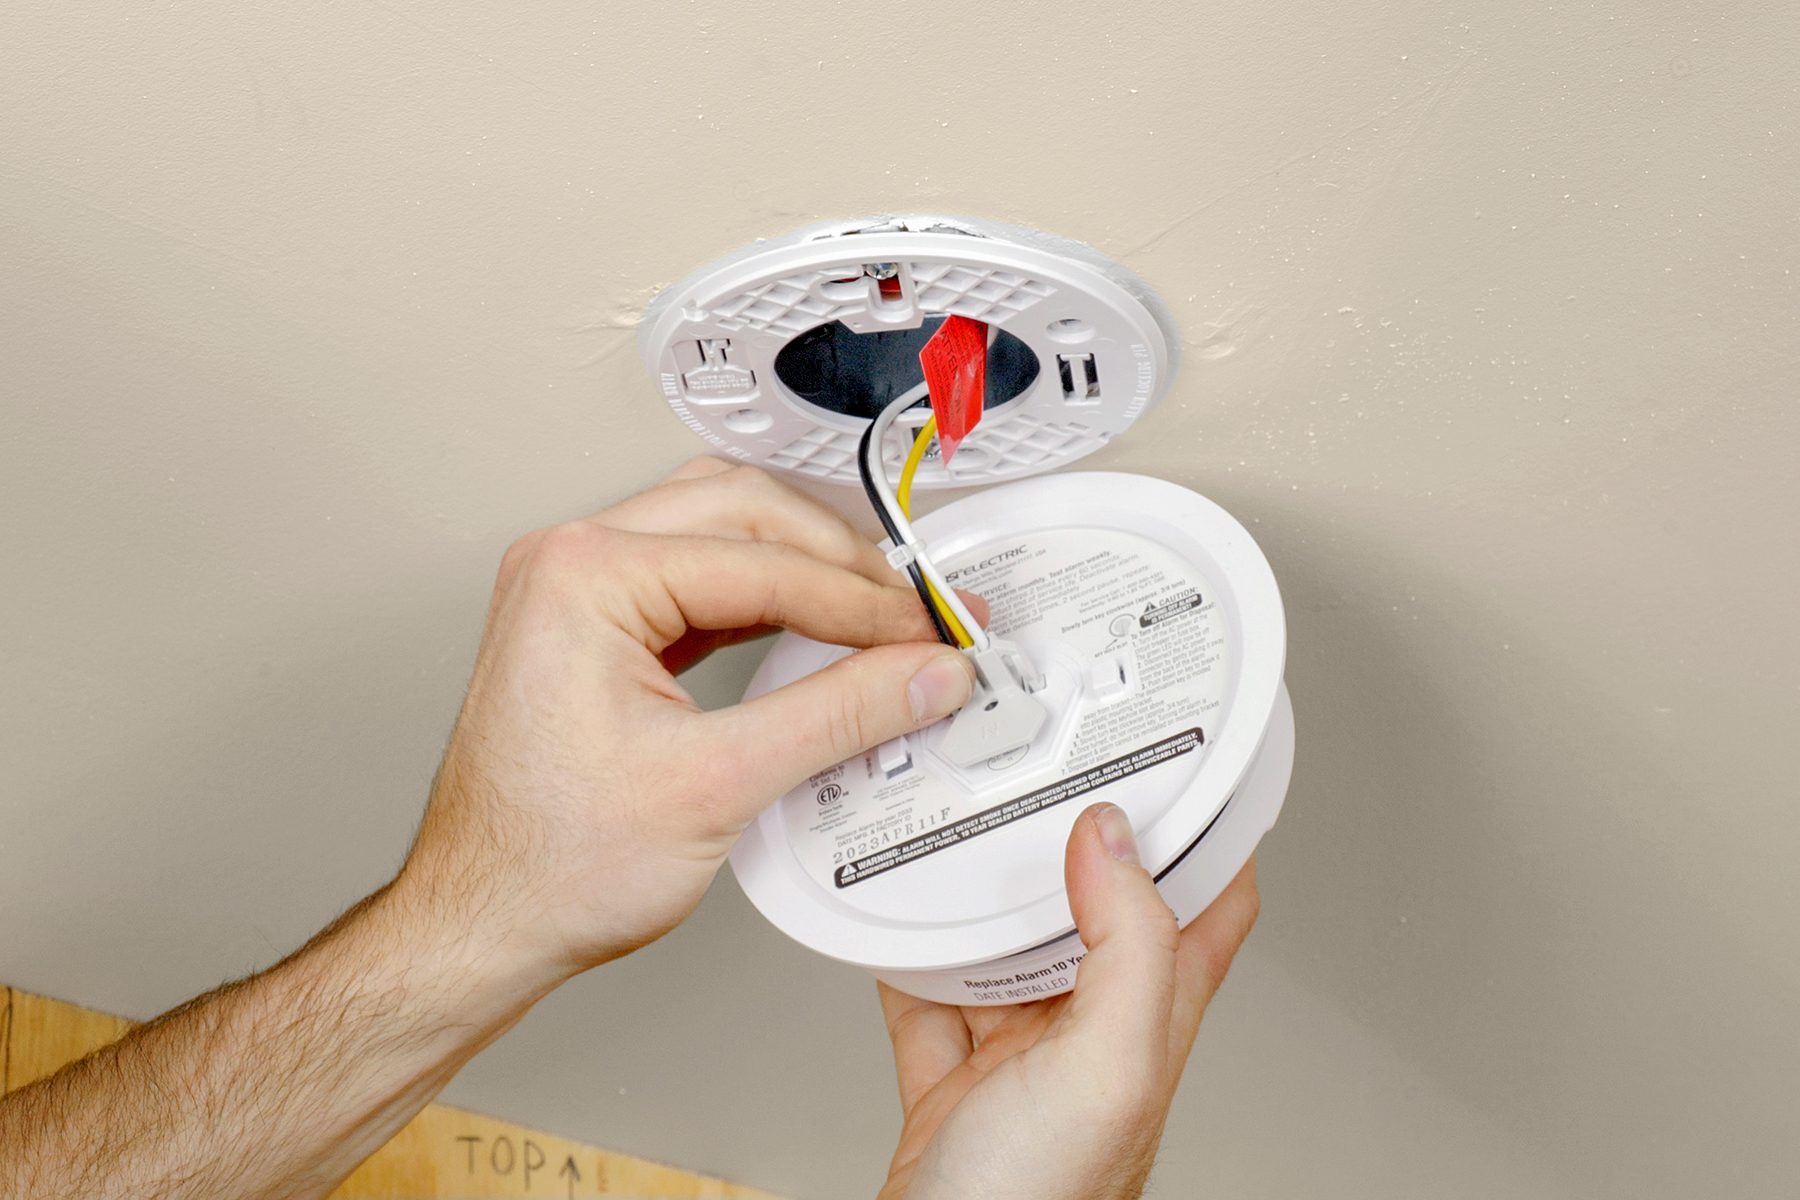
Remove The Smoke Detector From The Mount
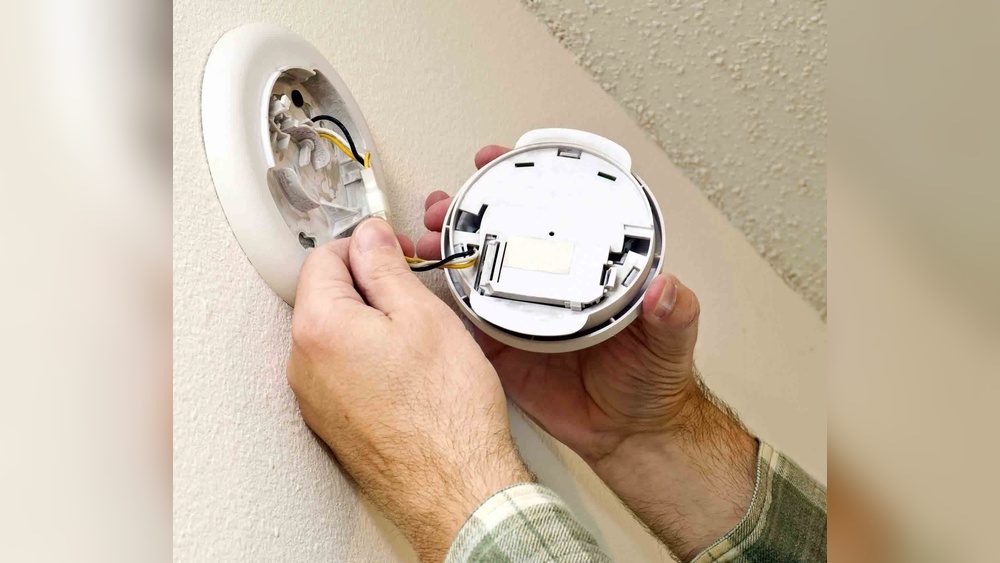
Gently twist or slide the smoke detector away from its mount. Hold the base steady to avoid damage. The power wires will still be connected but no current flows now.
Credit: www.familyhandyman.com
Removing The Old Battery
Removing the old battery from a hardwired smoke detector is a simple but important step. This task keeps your home safe by ensuring the detector works properly. Old batteries can leak or lose power, so replacing them on time is key.
Follow these clear steps to remove the old battery safely and easily. Take your time and handle the device gently to avoid damage.
Turn Off The Power
Start by turning off the power to the smoke detector at the circuit breaker. This prevents any electrical shocks during the process. Confirm the power is off by pressing the test button on the detector. It should not beep.
Open The Smoke Detector
Next, twist or slide the cover to open the smoke detector. Different models open in different ways. Look for small tabs or slots to help release the cover. Be gentle to avoid breaking any parts.
Locate And Remove The Old Battery
Inside, find the battery compartment. The battery may be a 9-volt or AA type. Carefully disconnect the battery from its connector. Take the battery out without forcing it. Dispose of it according to local rules.
Installing The New Battery
Start by turning off the power to the smoke detector. Remove the old battery carefully and insert the new one with the correct polarity. Finally, restore power and test the detector to ensure it works properly.
Prepare The Smoke Detector For Battery Installation
Start by turning off the power to the smoke detector at the circuit breaker. This step keeps you safe during the battery replacement. Next, gently remove the smoke detector from its mounting bracket. Most models twist or slide off easily. Place the detector on a flat surface for the next steps.
Insert The New Battery Correctly
Open the battery compartment on the back of the detector. Check the battery type needed; usually, it is a 9-volt or AA battery. Match the battery terminals with the compartment’s positive (+) and negative (-) signs. Insert the battery firmly into place. Avoid forcing it to prevent damage.
Reattach And Test The Smoke Detector
Place the smoke detector back onto its mounting bracket. Turn the power back on at the circuit breaker. Press the test button on the detector to check the battery and alarm. A loud beep means the installation is successful. If no sound, recheck the battery placement or power supply.
Reconnecting The Power
Reconnecting the power is an important step after replacing the battery in a hardwired smoke detector. This step restores the electrical connection and allows the device to work properly again. Careful attention helps avoid any damage or safety issues.
Before reconnecting, double-check the battery is installed correctly. The smoke detector needs the right battery type and placement to function.
Turn On The Circuit Breaker
Locate the circuit breaker panel in your home. Find the breaker for the smoke detector. Switch it back to the ON position. This restores power to the device.
Reattach The Detector To The Mounting Bracket
Align the smoke detector with its mounting bracket. Push or twist it gently until it clicks in place. This secures the device and reconnects the wiring inside.
Test The Smoke Detector
Press the test button on the smoke detector. Listen for a loud beep sound. This confirms the power is restored and the device works.
Testing The Smoke Detector
Testing the smoke detector after replacing the battery is very important. It ensures the device works properly and keeps your home safe. A working smoke detector can alert you to fire early. This simple step can save lives and protect property.
How To Perform The Test
Press the test button on the smoke detector firmly. Hold it for a few seconds until you hear a loud beep. The sound means the detector is working well. If no sound comes, check the battery or wiring again.
What To Do If The Alarm Does Not Sound
First, ensure the battery is installed correctly. Check for loose wires or dirt blocking the sensor. Replace the battery with a new one if needed. If the problem continues, consider calling a professional technician.
Frequency Of Testing Your Smoke Detector
Test your smoke detector once every month. Regular checks keep the device ready for any emergency. Mark the date on a calendar for easy reminders. Doing this routine helps maintain your home’s safety.

Credit: annarborwithkids.com
Maintaining Your Smoke Detector
Maintaining your smoke detector is key to home safety. A well-kept detector works better and lasts longer.
Regular care helps avoid false alarms and ensures it signals real danger. Simple steps keep your device ready to protect.
Cleaning The Smoke Detector
Dust and dirt can block the sensor. Use a soft brush or vacuum to clean the outside. Avoid water or harsh chemicals. Clean every six months for best results.
Press the test button monthly. Listen for the alarm sound. If it is weak or silent, replace the battery or the unit. Testing keeps the detector in working order.
Replacing The Backup Battery
Even hardwired detectors have backup batteries. Change these batteries once a year. Use the type recommended by the manufacturer. A fresh battery ensures the detector works during power outages.
Checking The Detector’s Age
Smoke detectors have a lifespan of about 10 years. Write the installation date on the unit. Replace the detector after 10 years to keep protection reliable.
Frequently Asked Questions
How Do I Safely Replace A Hardwired Smoke Detector Battery?
Turn off power at the circuit breaker before starting. Remove the detector from the mounting bracket. Replace the battery with the correct type. Reattach the detector and restore power. Test the detector to ensure it works properly.
What Type Of Battery Is Used In Hardwired Smoke Detectors?
Most hardwired smoke detectors use a 9-volt or AA lithium battery. Check the detector’s manual or label for the exact battery type. Using the correct battery ensures proper backup power during outages.
How Often Should I Replace The Battery In My Smoke Detector?
Replace the battery at least once a year to maintain safety. Also, replace it immediately if the low battery warning chirps. Regular replacement ensures your smoke detector functions reliably during emergencies.
Can I Replace The Battery Without Removing The Smoke Detector?
No, you must remove the detector from its mounting base to access the battery compartment. This ensures safe and proper battery replacement without damaging the unit.
Conclusion
Replacing the battery in a hardwired smoke detector keeps your home safe. It takes only a few minutes and simple steps. Regular checks help ensure the detector works well. Never ignore the low battery warning sound. A working smoke detector can save lives in emergencies.
Stay safe by keeping your device powered. Now you know how to change the battery easily. Keep your family protected with this small but vital task.