Are you tired of constantly opening your screen door to let your pet in and out? Installing a pet door in your screen door can give your furry friend the freedom they deserve, while saving you time and effort.
But how do you do it without damaging your screen or making a mess? You’ll discover simple, step-by-step instructions to install a pet door quickly and safely. Keep reading, and you’ll learn how to create a convenient passage that works perfectly for you and your pet.
Credit: www.novydomov.eu
Choosing The Right Pet Door
Choosing the right pet door for your screen door is important. It makes sure your pet can go in and out safely. The right door fits your pet’s size and matches your screen door type. It also lasts long and works well in your home. This guide helps you pick the best pet door for your needs.
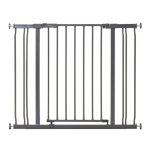
Types Of Pet Doors
There are many pet door types. Some fit in screen doors easily. Sliding screen pet doors slide open for your pet. Hinged flap doors swing open and close with ease. Some doors have magnetic or weighted flaps. Choose one that works well with your screen door and your pet’s habits.
Measuring Your Pet
Measure your pet before buying a door. Measure your pet’s height from the floor to the shoulder. Also, measure the width of your pet’s body. The pet door should be bigger than these measurements. This helps your pet move through without getting stuck or hurting.
Materials And Durability
Pet doors come in different materials. Plastic doors are light and easy to install. Metal doors are strong and last longer. Look for weather-resistant materials. This keeps the door working well in rain or wind. Choose a durable door that fits your budget and lasts for years.
Tools And Materials Needed
Before installing a pet door in your screen door, gather the right tools and materials. This step makes the process easier and faster. Having everything ready helps avoid interruptions and mistakes. Below is a list of essential tools and additional supplies you need.
Essential Tools
- Measuring tape for accurate door measurements
- Pencil to mark cutting lines
- Power drill with drill bits for making holes
- Jigsaw or handsaw to cut the screen door
- Screwdriver to secure the pet door in place
- Sandpaper or file to smooth rough edges
- Clamps to hold the door steady while cutting
Additional Supplies
- Pet door kit suitable for screen doors
- Weather stripping to seal gaps around the pet door
- Extra screws for added support
- Protective gloves for safety
- Drop cloth or newspaper to catch debris
- Cleaning cloth to wipe dust after cutting
Preparing The Screen Door
Preparing the screen door is the first step in installing a pet door. This stage requires care and precision to ensure the pet door fits well and works correctly. Proper preparation also helps avoid damage to the screen door and keeps it sturdy after installation.
Start by removing the screen to create a clear work area. Next, mark the cut area carefully to match the size of the pet door. These steps set the foundation for a smooth installation process.
Removing The Screen
Begin by locating the screen frame’s spline, the rubber strip holding the screen. Use a flat tool to gently lift and remove the spline. Pull the screen fabric out slowly, avoiding tears or holes.
Set the screen aside safely if you plan to reuse it. Cleaning the frame of dust and debris will improve the pet door’s fit and sealing. Take your time and work carefully to keep the frame intact.
Marking The Cut Area
Place the pet door template or frame on the screen door. Align it at the height your pet can easily access. Use a pencil to draw around the pet door’s edges clearly.
Double-check measurements before cutting. Measure twice to avoid mistakes. Mark straight lines with a ruler or straight edge for accuracy. Clear markings make cutting easier and more precise.

Credit: site-craft.net
Cutting The Opening
Cutting the opening for a pet door in a screen door requires care and precision. This step is critical for a good fit and smooth operation. It involves marking, measuring, and cutting the screen material and frame. Proper preparation helps avoid damage and ensures the pet door works well.
Safety Tips
Wear safety goggles to protect your eyes from flying debris. Use gloves to keep your hands safe from sharp tools. Work in a well-lit area to see clearly. Keep children and pets away from your work zone. Take breaks if you feel tired to avoid mistakes.
Cutting Techniques
Start by marking the pet door size on the screen door with a pencil. Double-check the measurements before cutting. Use a sharp utility knife for clean cuts through the screen. For the frame, use a small saw or rotary tool. Cut slowly and steadily to avoid splintering. Remove cut pieces carefully to keep edges smooth.
Installing The Pet Door Frame
Installing the pet door frame is a key step in adding a pet door to your screen door. This frame holds the door flap and creates a smooth opening for your pet. Proper installation ensures the door stays secure and works well.
Take your time with this step. A well-placed frame helps your pet go in and out easily. It also keeps the screen door strong and intact.
Positioning The Frame
First, decide where to place the pet door on the screen door. Choose a spot your pet can reach comfortably. Measure your pet’s height from the ground to the shoulder. Mark this height on the screen door.
Hold the frame against the door at the marked spot. Check the alignment carefully. The frame should be straight and level. Use a pencil to trace around the frame’s edges. This outline guides your cutting and fitting.
Securing With Screws
Next, attach the frame to the screen door using screws. Drill small pilot holes through the frame and screen door. This step makes screwing easier and avoids damage.
Use screws that fit the frame’s holes. Tighten each screw until the frame is firm. Avoid over-tightening to prevent cracking the screen door frame. Check that the frame does not move or wobble.
After securing, test the door flap to ensure it opens and closes smoothly. Adjust the screws if needed. This step guarantees your pet door functions well and lasts long.
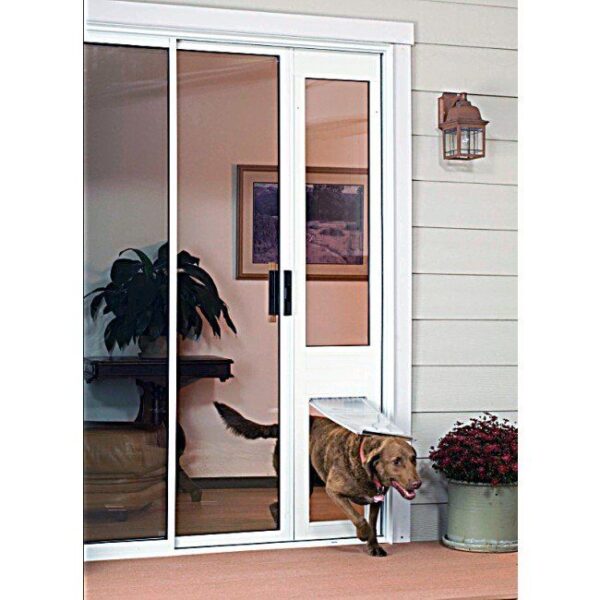
Attaching The Flap
Attaching the flap is an important step in installing a pet door in a screen door. The flap allows your pet to move freely in and out. It must be attached securely and positioned correctly for easy use. Follow clear steps to ensure it works smoothly and lasts long.
Aligning The Flap
Place the flap on the screen door frame. Check that it fits the cutout perfectly. The flap should hang evenly without touching the sides. Use a level to keep the flap straight. Mark the screw holes on the frame carefully. This helps avoid mistakes during attachment.
Testing Movement
After attaching, move the flap gently back and forth. It should swing easily without sticking or dragging. Let your pet try pushing the flap open. Watch how the flap moves with their weight. Adjust screws or position if the flap does not move smoothly.
Reinstalling The Screen
Reinstalling the screen is an important step after fitting a pet door. It restores your screen door’s function and keeps bugs out. Take care to fit the screen tightly and seal all edges well. This will help your pet door last longer and keep your home comfortable.
Fitting The Screen Back
Start by placing the screen onto the door frame. Make sure it lies flat without wrinkles. Align the edges of the screen with the frame edges. Press the screen into the frame groove carefully. Use a spline roller to push the spline back into the groove. This holds the screen tightly in place. Cut off any extra screen around the edges. Check for any gaps or loose spots.
Sealing Edges
Apply weather stripping or sealant along the screen edges. This stops air and insects from getting inside. Press the sealant firmly into all corners and seams. Use a clean cloth to smooth any excess sealant. Let the sealant dry before using the door. Tight seals help keep your home energy efficient. They also protect your pet door installation from damage.

Credit: kdfoundation.org
Training Your Pet
Training your pet to use a new pet door takes patience and care. Pets need time to get used to changes in their space. Teaching them how to use the door helps keep them safe and happy. This section guides you through simple steps to introduce the pet door and encourage your pet to use it.
Introducing The Door
Start by showing the pet door to your pet. Let them sniff and explore it. Keep the screen door open at first. This helps your pet feel safe and curious. Gently lift the flap to show how it moves. Praise your pet with soft words and pets. Repeat this several times across a few days.
Encouraging Use
Place treats or toys just outside the door. This makes your pet want to go through. Help them push the flap with your hand. Use a calm voice to cheer them on. Walk through the door yourself to show it is safe. Practice short sessions daily. Soon, your pet will use the door without help.
Maintenance Tips
Keeping your pet door in good condition helps it work well for a long time. Regular maintenance protects your screen door and keeps your pet safe. Simple care tasks prevent damage and avoid costly repairs.
Cleaning The Door
Clean the pet door often to remove dirt and dust. Use a soft cloth with mild soap and water. Wipe both sides gently to avoid scratching the screen. Dry the area well to stop rust or mold growth. Clean the flap to keep it flexible and easy to open.
Checking For Wear
Look closely at the pet door for signs of damage. Check the flap for tears or cracks. Examine the frame for loose screws or bends. Replace worn parts quickly to keep the door safe. Regular checks help catch problems early and extend the door’s life.
Frequently Asked Questions
How Do I Install A Pet Door In A Screen Door?
Measure your pet and door size, then choose a compatible pet door. Cut the screen carefully and fit the door frame. Secure it with screws or adhesive as per instructions for stability and durability.
What Tools Are Needed To Put A Pet Door In A Screen Door?
You will need a measuring tape, marker, utility knife or scissors, screwdriver, and possibly a drill. These tools help measure, cut, and secure the pet door properly to ensure a snug fit.
Can I Install A Pet Door In Any Screen Door Type?
Most screen doors support pet door installation, but check material and frame strength. Lightweight or fragile screens may require reinforcement to hold the pet door securely without damage.
How To Ensure The Pet Door Fits My Pet Perfectly?
Measure your pet’s height and width accurately. Choose a pet door size that allows easy passage but prevents drafts and unwanted animals from entering your home.
Conclusion
Installing a pet door in a screen door can be simple and quick. Measure carefully, choose the right size, and follow steps closely. Your pet will enjoy easy access outside. Keep safety in mind to protect your home. Small effort brings great comfort for you and your pet.
Enjoy the freedom it gives to your furry friend every day.