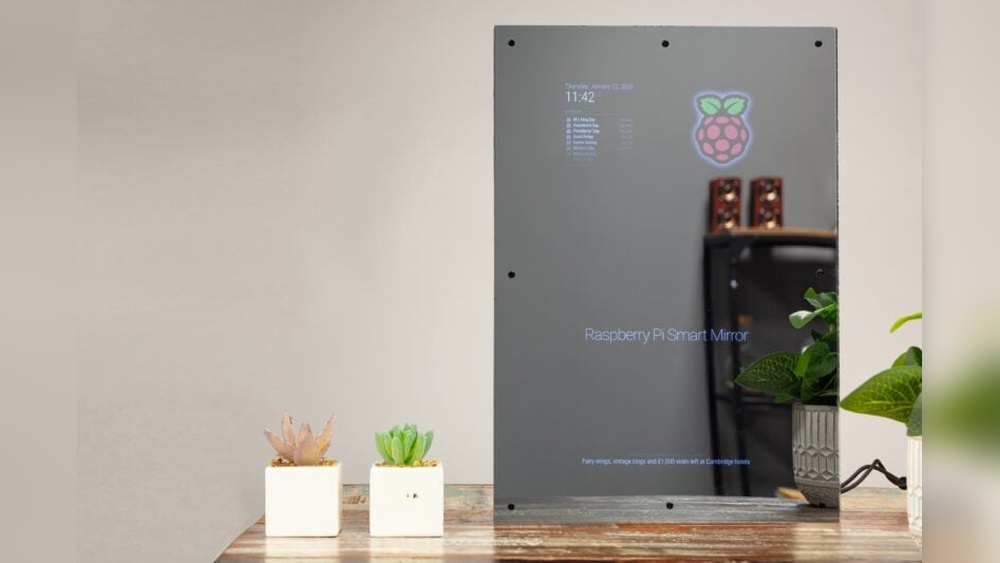

Imagine having a mirror that shows you the weather, news, and your daily schedule—all while you get ready. Sounds amazing, right?
The best part is, you don’t have to spend a fortune to build one. In this guide, you’ll discover simple steps to create your own smart mirror without breaking the bank. By the end, you’ll have a cool, high-tech addition to your home that feels like it came straight from the future.
Ready to start? Let’s dive in!
Materials Needed
Building a smart mirror on a budget needs the right materials. Choosing affordable parts saves money without cutting quality. This section lists essential items for your project. Gather these before starting your smart mirror build.
Affordable Smart Mirror Components
A two-way glass or acrylic sheet works best for the mirror surface. Use a standard monitor or an old tablet as the display. A Raspberry Pi or a similar small computer controls the smart features. Get a frame that fits your glass and display. Simple cables and connectors link the parts together.
Tools For Assembly
A screwdriver set helps with small screws and fittings. A utility knife cuts tape or trim edges. Double-sided tape or mounting brackets hold components firmly. A drill may be needed to make holes in the frame. Basic measuring tools keep everything aligned properly.
Optional Upgrades
Add a motion sensor to turn the mirror on automatically. Use a small speaker for voice responses or alerts. Include LED lights around the frame for better visibility. Attach a camera for facial recognition or video calls. These extras improve the smart mirror’s usability.
Choosing The Mirror
Choosing the right mirror is an important step in building a smart mirror cheaply. The mirror acts as the screen and frame for your project. It must allow the display to show clearly while still reflecting your image. Selecting the best type, size, and place to buy helps keep costs low. This guide explains how to pick the perfect mirror for your smart mirror build.
Types Of Mirrors
Smart mirrors use two main mirror types: one-way and acrylic. One-way mirrors let light pass from behind, showing the screen. They also reflect your image on the front. Acrylic mirrors are lighter and cheaper but can scratch easily. Glass mirrors give better reflection but cost more. Choose a mirror that balances price and quality for your needs.
Selecting The Right Size
Size matters for both looks and function. A mirror too small makes the display hard to see. Too large, and it wastes space and money. Measure the screen you plan to use. Add extra space around the edges for a clean look. Pick a size that fits your wall and room comfortably.
Where To Buy Cheap Mirrors
Buy mirrors from thrift stores or discount shops to save money. Online marketplaces offer many low-cost options. Look for used mirrors in good condition to lower costs. Home improvement stores also have affordable choices. Compare prices and check for damage before buying.
Setting Up The Display
Setting up the display is a key step in building a smart mirror. The display shows your apps, time, weather, and more. Choosing the right screen and placing it properly creates a clear, easy-to-read mirror. This section covers simple ways to use a tablet or monitor and how to fit it behind the mirror glass. You will also learn to adjust brightness and position for the best view.
Using A Tablet Or Monitor
A tablet is a good choice for a cheap smart mirror display. Tablets have built-in screens and touch controls. They are easy to power and connect to Wi-Fi. A small monitor can also work well. Choose a monitor with HDMI input and slim edges. Make sure the screen size fits your mirror frame. Tablets are portable, while monitors may need extra parts to connect.
Installing The Display Behind The Mirror
Place the tablet or monitor directly behind the two-way mirror glass. The mirror lets light from the screen pass through. This makes the display visible without showing the screen itself. Use strong double-sided tape or mounting brackets to fix the screen in place. Keep cables tidy and hidden for a clean look. Make sure the screen is centered for the best effect.
Adjusting Brightness And Position
Adjust the screen brightness to balance clear view and mirror reflection. Too bright, and the mirror looks like a screen. Too dim, and the display is hard to read. Test different brightness levels to find the right one. Position the screen so the text is easy to see from where you stand. Slight angle changes can reduce glare and improve visibility.

Credit: www.youtube.com
Installing The Software
Installing the software is a key step in building a smart mirror. This step brings the mirror to life. It allows the mirror to show useful information like time, weather, and news. Choosing the right software makes the process easier and the mirror more functional.
Popular Smart Mirror Platforms
Several smart mirror platforms are free and easy to use. MagicMirror² is the most popular choice. It runs on Raspberry Pi and has many ready-to-use modules. Another option is DakBoard, which is simple but less customizable. Open-source platforms give you more control and features.
Basic Configuration Steps
After installing the software, basic setup is next. Connect your Raspberry Pi to a monitor and keyboard. Install the software using simple commands in the terminal. Set your location and time zone for accurate information. Test the mirror to see if the modules load correctly.
Customizing Widgets And Features
Customizing makes your smart mirror personal and useful. Add or remove widgets like weather, calendar, or news. Change colors and fonts to match your style. You can also add voice control or motion sensors. Keep the interface clean for easy reading.
Building The Frame
Building the frame is the first step in creating a smart mirror. The frame holds the mirror and display together. It also protects the electronics inside. A strong, simple frame makes the project look neat and lasts long. You can make the frame using cheap, easy-to-find materials. The design depends on the size of your mirror and display.
Materials For The Frame
Wood is a popular choice for smart mirror frames. It is easy to cut and join. Plywood or pine boards work well. You can also use plastic or metal if you want. Choose materials that fit your budget and tools. Make sure the frame is sturdy and light. You will need screws, nails, or glue to hold it together. Sandpaper helps to smooth the edges. Paint or stain can finish the frame nicely.
Step-by-step Frame Construction
Start by measuring the size of your mirror and display. Cut four pieces of wood to match these dimensions. Join the pieces to form a rectangle or square frame. Use wood glue and screws for a strong hold. Check that the frame is square and flat. Sand all surfaces to remove rough spots. Paint or stain the frame and let it dry. Add a back panel if you want extra support. This step is optional but helps keep things tidy.
Mounting The Mirror And Display
Place the two-way mirror inside the frame first. Secure it with small brackets or strong tape. Next, position the display behind the mirror. Use spacers to prevent pressure on the screen. Attach the display firmly using screws or Velcro strips. Make sure cables can connect without bending. Test the display before closing the frame. Finally, add the back panel if you made one. Your smart mirror frame is ready to use.
Power And Connectivity
Power and connectivity are key for a smart mirror to work well. Without steady power, the mirror won’t turn on or stay lit. Connectivity lets the mirror show weather, news, and other smart features. Setting these up right keeps your project smooth and reliable.
Cable Management Tips
Keep cables tidy and hidden to avoid a messy look. Use clips or adhesive hooks behind the mirror. Bundle wires with zip ties or Velcro straps. Measure cable lengths before cutting to prevent excess. Organize power and data cables separately to reduce interference. A clean setup helps your mirror look neat and professional.
Wi-fi Setup
Connect your mirror to a strong Wi-Fi network for smooth updates. Use the mirror’s settings menu to find and join your home network. Choose a 2.4 GHz band if possible; it often has better range. Keep the router close to the mirror to avoid connection drops. Secure your network with a strong password. This keeps your smart mirror safe and online.
Adding Voice Control
Voice control makes the mirror easier to use. Add a simple microphone module to catch commands. Choose popular voice assistants like Google Assistant or Alexa. Install the needed apps or software on your mirror’s system. Test the microphone for clear sound pickup. Voice control lets you check information hands-free.
Troubleshooting Common Issues
Building a smart mirror can bring many challenges. Troubleshooting common issues helps keep your project on track. This section covers typical problems and easy fixes. Understanding these can save time and frustration.
Display Problems
Sometimes the mirror screen stays blank or flickers. Check the cable connections first. Loose cables often cause display issues. Adjust the brightness or contrast in settings. Clean the screen to remove dust and smudges. Replace the screen if it remains unresponsive.
Software Glitches
The smart mirror may freeze or run slowly. Restart the device to clear temporary errors. Update the software to the latest version. Check for missing files or corrupt apps. Reinstall the operating system if needed. Use simple, tested software to reduce bugs.
Hardware Fixes
Hardware problems include power failures or sensor errors. Confirm the power supply works correctly. Replace faulty sensors or wires carefully. Secure all components inside the frame. Avoid touching electronic parts with bare hands. Test each hardware part one by one.

Credit: www.edn.com
Enhancing Your Smart Mirror
Enhancing your smart mirror makes it more useful and fun. It turns a simple mirror into a high-tech gadget. You can add features that fit your daily needs. Small upgrades make a big difference in how you interact with it.
Focus on smart additions that cost little but add value. This way, your smart mirror becomes a unique part of your home. Let’s explore some easy ways to improve your smart mirror’s function and look.
Adding Sensors
Sensors help your smart mirror react to its surroundings. Motion sensors can turn the display on when you stand close. Light sensors adjust the screen brightness to match the room.
Temperature sensors add weather info to your mirror display. They help you plan your day better. These sensors are cheap and easy to connect with simple coding.
Integrating Smart Home Devices
Link your smart mirror to home devices for more control. Use it to check your smart lights or thermostat. Voice commands make it simple to manage your home.
Connect your mirror to smart plugs or security cameras. This turns your mirror into a home control panel. You can monitor and adjust devices without extra gadgets.
Personalizing Appearance
Customize your mirror’s look to match your style. Choose the font and colors for displayed info. Change the background to suit your room’s mood.
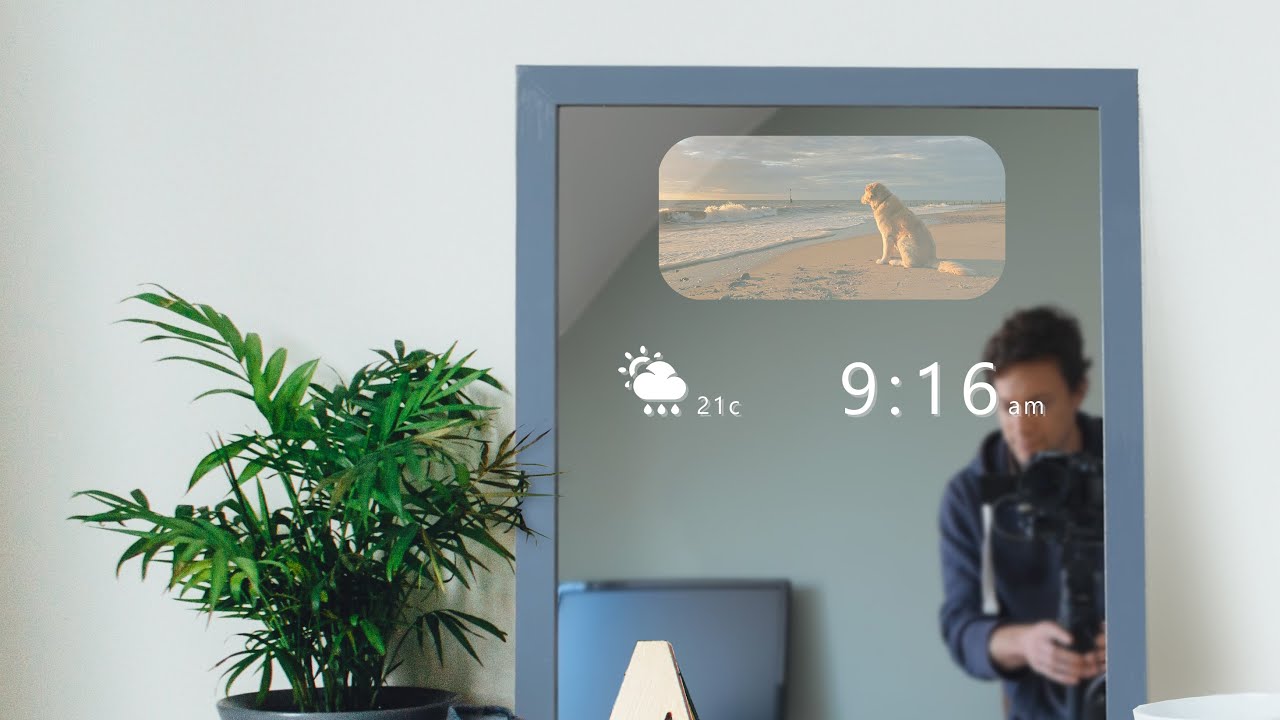
Add widgets like calendars, news, or daily quotes. Make the screen layout easy to read and friendly. A personal touch makes the mirror feel more like yours.
Credit: www.youtube.com
Frequently Asked Questions
What Materials Are Needed To Build A Cheap Smart Mirror?
You need a two-way mirror, a monitor, a Raspberry Pi, and basic tools. These materials are affordable and easy to find online or locally.
How Do I Set Up The Software For A Smart Mirror?
Install MagicMirror² on your Raspberry Pi. It’s free, open-source, and user-friendly. Configure modules for weather, news, and calendar.
Can I Build A Smart Mirror Without Technical Skills?
Yes, many tutorials simplify the process. Basic DIY skills and patience are enough to create a functional smart mirror at low cost.
How Much Does It Cost To Make A Smart Mirror?
Building a smart mirror typically costs between $100 and $200. Costs vary based on monitor size and additional features.
Conclusion
Building a smart mirror on a budget is easier than it seems. You only need a few simple parts and some patience. The steps are clear and doable for anyone. This project saves money and adds tech to your home.
Plus, you get to customize it your way. Try it out and enjoy a smart mirror made by you. It’s a fun and useful DIY task. Start small, learn along the way, and see great results.