
Installing a hardwired smoke detector in your home is one of the smartest safety moves you can make. It’s not just about following rules—it’s about protecting your loved ones and giving yourself peace of mind.
If you’ve been putting off this task because it sounds complicated, don’t worry. You can do it yourself with the right steps and tools. In this guide, you’ll find clear, simple instructions that make the process easy to understand and follow.
By the end, you’ll have a reliable smoke detector working quietly in the background, ready to alert you if danger strikes. Keep reading to learn how to protect your home and family with a hardwired smoke detector.
Choosing The Right Smoke Detector
Choosing the right smoke detector is important for home safety. The right detector can save lives by alerting you early during a fire. Different types fit different needs and home layouts. Understanding features helps pick a reliable and efficient device. Safety standards ensure the detector meets legal and quality requirements.
Types Of Smoke Detectors
There are two main types of smoke detectors: ionization and photoelectric. Ionization detectors respond quickly to fast, flaming fires. Photoelectric detectors sense slow, smoldering fires better. Some models combine both types for broader protection. Hardwired smoke detectors connect to your home’s electrical system. They often have battery backup for power failures.
Features To Consider
Look for detectors with loud alarms and clear signals. Some have voice alerts or flashing lights for better warnings. Interconnected detectors alert all units in the home simultaneously. Battery backup keeps the alarm working during power cuts. Easy installation and low maintenance improve safety in the long run.
Compliance And Safety Standards
Choose smoke detectors that meet local building codes. UL (Underwriters Laboratories) certification ensures product reliability. Check for compliance with NFPA (National Fire Protection Association) guidelines. Proper certification means the detector passed safety and performance tests. Installing certified devices keeps your home legally protected and safe.
Gathering Necessary Tools And Materials
Gathering all tools and materials before starting makes the installation smooth. It saves time and avoids interruptions. Having everything ready helps complete the job safely and correctly. Below is a clear list of what you need.
Essential Tools List
- Voltage tester to check power off
- Wire stripper to remove insulation
- Screwdriver set for mounting and connections
- Drill with bits for making holes
- Measuring tape to mark placement
- Wire nuts to connect wires securely
- Fish tape to pull wires through walls
Safety Equipment
- Insulated gloves to protect from electric shock
- Safety goggles to shield eyes from debris
- Dust mask to prevent inhaling particles
- Work boots to protect your feet
Additional Materials
- Hardwired smoke detector unit
- Mounting bracket or plate
- Electrical box for housing wires
- Wire connectors matching your home wiring
- Electrical tape for extra insulation
- Instruction manual for your specific detector
Preparing The Installation Site
Preparing the installation site is the first step to install a hardwired smoke detector. It sets the foundation for a safe and effective setup. Careful preparation reduces problems during installation and ensures the detector works well.
Focus on choosing the right place, checking the electrical system, and turning off power safely. These tasks help keep you safe and make installation easier.
Selecting The Ideal Location
Choose a spot on the ceiling or high on a wall. Smoke rises, so higher spots detect smoke faster. Avoid places near windows, fans, or vents. These areas can blow smoke away from the detector.
Pick a location away from kitchens or bathrooms. Steam and cooking smoke can cause false alarms. Follow your local building codes and manufacturer rules for the best results.
Checking Electrical Wiring
Look for existing wiring that can power the smoke detector. Use a voltage tester to check the wires. Ensure the wires are in good condition, not damaged or frayed.
Confirm the wiring supports a hardwired smoke detector system. Some homes need new wiring or upgrades. Consult a professional electrician if unsure about the wiring safety.
Turning Off Power Safely
Switch off power at the main circuit breaker before starting. This step protects you from electric shocks. Use a voltage tester again to confirm the power is off.
Never skip this step. Working with live wires is dangerous and can cause injury. Safety first for a smooth installation process.
Credit: www.homedepot.com
Wiring The Smoke Detector
Wiring the smoke detector is a key step in installation. Proper wiring ensures the detector works well and keeps your home safe. It involves identifying the right wires, connecting them carefully, and securing the connections to avoid problems.
Identifying Wires
Start by turning off the power at the breaker. Look inside the electrical box. You will see a few wires: usually black, white, and a bare copper or green wire. The black wire is the hot wire, carrying electricity. The white wire is neutral, and the bare copper or green is the ground wire. Identifying these wires correctly is very important.
Connecting Wires Correctly
Connect the black wire from the smoke detector to the black hot wire in the box. Join the white neutral wire from the detector to the white neutral wire in the box. Attach the ground wire from the detector to the bare copper or green ground wire. Use wire nuts to twist the wires together tightly. Make sure no bare wire shows outside the nuts.
Securing Wire Connections
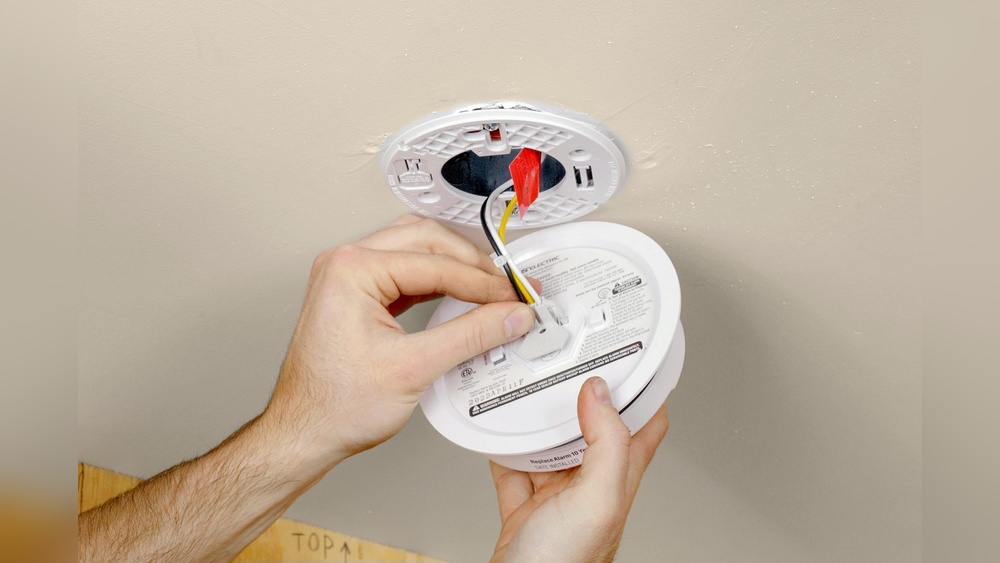
After connecting the wires, push them gently into the electrical box. Ensure there is no strain on the wires or connections. Use electrical tape around wire nuts for extra security. Tighten any screws that hold the detector base in place. A firm connection prevents loose wires and improves safety.
Mounting The Detector
Mounting the hardwired smoke detector is a key step. It ensures the device stays secure and works well. Follow each step carefully for a safe installation.
Marking Mounting Points
Start by choosing the right spot on the ceiling or wall. Use the detector base as a template. Hold it firmly and mark the holes with a pencil. Make sure the marks are clear and evenly spaced.
Drilling And Fixing The Base
Use a drill with the right drill bit size for your wall or ceiling. Drill holes at the marked points carefully. Insert wall anchors if needed. Fix the base using screws to keep it tight and steady.
Attaching The Detector Unit
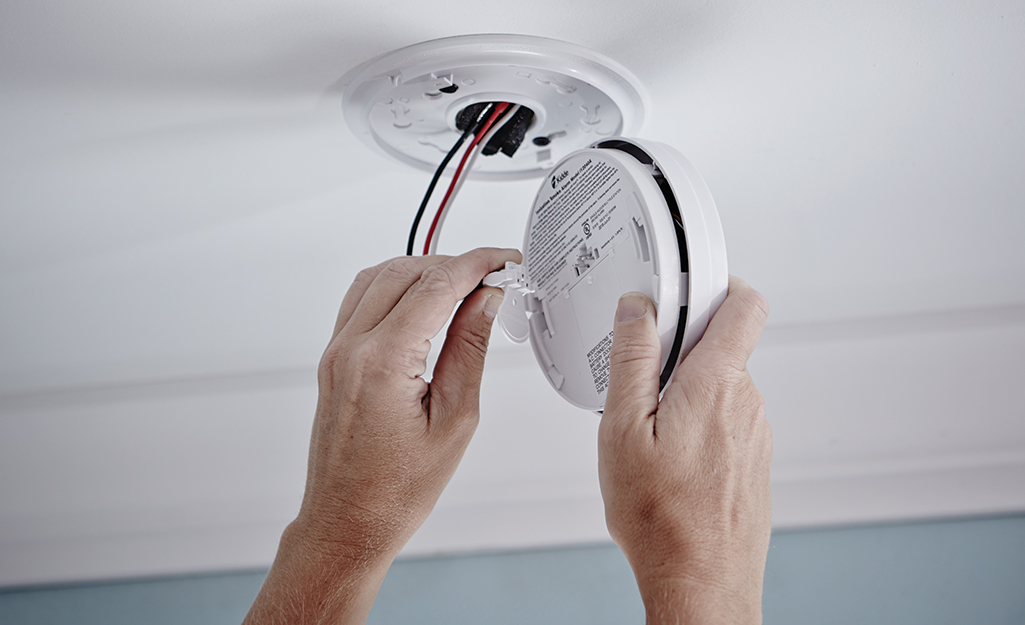
Align the detector unit with the base. Push or twist it gently until it locks in place. Check that it fits well and does not wobble. Test the smoke detector to ensure it works properly.
:max_bytes(150000):strip_icc()/install-hardwired-smoke-detectors-1152329-07-e423cc5f28c342089d65bd675e5d4e20.jpg)
Credit: www.thespruce.com
Testing The Installation
Testing the installation of a hardwired smoke detector is a critical step. It ensures the device works correctly and keeps your home safe. This section guides you through restoring power, performing tests, and troubleshooting common issues.
Restoring Power
After installing the smoke detector, restore power to the circuit. Turn the breaker back on at the electrical panel. Check that the smoke detector’s indicator light turns on. This light shows the unit has power. If the light stays off, recheck your wiring connections.
Performing Functional Tests
Press the test button on the smoke detector. Hold it until you hear a loud alarm sound. This test confirms the detector’s alarm and speaker work. Test each hardwired unit in your home. Also, check if interconnected alarms sound together. This confirms they communicate properly.
Troubleshooting Common Issues
If the detector does not sound, check the power supply again. Ensure wires are securely connected. Replace batteries in backup units if needed. Look for any error lights or blinking patterns on the detector. Consult the manual for specific error codes. Repeat the test after fixing any issues.
Maintaining Your Smoke Detector
Maintaining your hardwired smoke detector is key to keeping your home safe. Regular care ensures the device works when you need it most. Neglect can cause false alarms or failure during emergencies. Follow simple steps to keep your smoke detector in good shape.
Regular Testing Schedule
Test your smoke detector every month. Press the test button until the alarm sounds loud and clear. If it does not sound, check the power connection or replace the unit. Mark your calendar to never miss these tests.
Cleaning Tips
Dust and dirt can block the smoke sensor. Use a soft brush or vacuum with a brush attachment. Gently clean around the detector’s vents and surface. Avoid using water or cleaning sprays on the device. Clean it at least twice a year for best results.
When To Replace Your Detector
Smoke detectors have a lifespan of about 10 years. Check the manufacture date on the back of the unit. Replace it if it is older or if it fails tests repeatedly. A new detector ensures your home stays protected at all times.
Safety Tips During Installation
Installing a hardwired smoke detector is important for home safety. During installation, safety is the top priority. Follow these safety tips to protect yourself and ensure the device works well.
Handling Electrical Components
Turn off the power at the circuit breaker before starting. Use a voltage tester to confirm no electricity flows. Handle wires carefully to avoid shocks. Wear insulated gloves for extra protection. Connect wires as per the manufacturer’s instructions. Never touch exposed wires with bare hands.
Working At Heights
Use a sturdy ladder to reach the ceiling. Check the ladder for stability before climbing. Keep tools within easy reach to avoid falling. Do not overreach while on the ladder. Ask someone to hold the ladder steady. Take breaks to avoid fatigue and maintain focus.
Avoiding Common Hazards
Clear the work area of clutter and obstacles. Avoid working in wet or damp conditions. Keep children and pets away during installation. Use proper tools to prevent injury. Follow all local electrical codes and regulations. Double-check connections before turning the power back on.
:max_bytes(150000):strip_icc()/install-hardwired-smoke-detectors-1152329_FINAL-5233cb01c4f34ee1bae5860132624788.png)
Credit: www.thespruce.com
Frequently Asked Questions
How Do You Install A Hardwired Smoke Detector?
Turn off power, mount the detector, connect wires, and restore power. Follow the manufacturer’s wiring diagram carefully for safety.
What Tools Are Needed For Hardwired Smoke Detector Installation?
You need a screwdriver, wire stripper, voltage tester, drill, and mounting hardware for a proper installation.
Can I Install A Hardwired Smoke Detector Myself?
Yes, if you have basic electrical knowledge and follow safety guidelines. Otherwise, hire a professional electrician.
How Do I Test A Hardwired Smoke Detector After Installation?
Press the test button on the detector to check its alarm sound and power connection.
Conclusion
Installing a hardwired smoke detector keeps your home safe from fire risks. Follow each step carefully for the best results. Double-check all connections to ensure the device works properly. Test the detector regularly to maintain safety at all times. Remember, a working smoke detector can save lives.
Stay alert and protect your loved ones with this simple installation. Safety starts with small actions like this.