Your home’s safety depends on working smoke detectors, and Kidde hardwired smoke detectors are a popular choice for reliable protection. But what happens when it’s time to replace one?
You might feel unsure about how to do it safely and correctly. Don’t worry—this guide will walk you through every step, making the process simple and stress-free. By the end, you’ll know exactly how to replace your Kidde hardwired smoke detector and keep your home secure without any hassle.
Keep reading to protect what matters most.

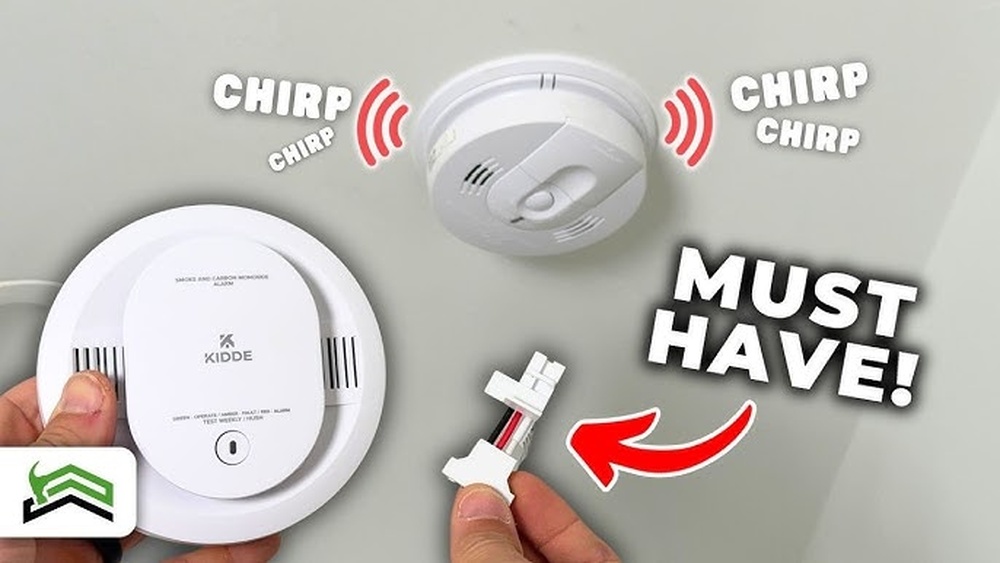
Credit: www.youtube.com
Tools And Materials Needed
Replacing a Kidde hardwired smoke detector requires the right tools and materials. Having everything ready makes the process smoother and safer. This section lists the essentials you need before starting the replacement.
Basic Tools
A screwdriver is necessary for removing the old detector and securing the new one. A flathead and a Phillips head screwdriver cover most screws. A ladder helps reach the smoke detector on the ceiling. Make sure it is stable and tall enough to avoid accidents.
Safety Equipment
Turn off power at the circuit breaker before starting work. Use a voltage tester to check no electricity is flowing. This tool ensures your safety during the replacement. Wear gloves to protect your hands from sharp edges or wires.
Replacement Parts
Get a new Kidde smoke detector compatible with your system. Check the model number to find the correct one. The new detector usually comes with mounting screws and a mounting bracket. Have extra batteries on hand if your detector uses a backup battery.
Additional Supplies
Electrical tape helps secure wire connections safely. Wire nuts may be needed to connect wires if they are not included. Keep a flashlight nearby in case of poor lighting during the work.
Safety Precautions
Replacing a Kidde hardwired smoke detector requires care and attention. Safety is the top priority. Taking proper precautions prevents accidents and damage. Always prepare before starting the replacement process.
Turn Off The Power Supply
Switch off the power at the circuit breaker. This stops electricity from flowing to the smoke detector. Use a voltage tester to confirm no power is present. Never work on live wires to avoid electric shock.
Use A Sturdy Ladder
Choose a stable ladder to reach the smoke detector. Place it on a flat surface. Avoid leaning or stretching too far. Keep your balance to prevent falls or injuries.
Wear Safety Gear
Put on safety goggles to protect your eyes. Wear gloves to avoid cuts from wires or sharp edges. Use a dust mask if needed to prevent inhaling dust or debris.
Handle Wires Carefully
Gently disconnect wires from the old detector. Do not pull or yank wires forcefully. Label wires to match them with the new detector. This makes re-connection easier and safer.
Follow Manufacturer’s Instructions
Read the Kidde smoke detector manual fully. Follow all steps exactly as described. This ensures safe and proper installation. Avoid guessing or skipping steps during replacement.
Turn Off Power Supply
Turning off the power supply is the first and most important step before replacing a Kidde hardwired smoke detector. This step keeps you safe from electric shock. It also protects the smoke detector and wiring from damage.
Always treat electrical devices with caution. Smoke detectors connect directly to your home’s electrical system. This means electricity flows through their wires at all times. Stopping this flow prevents accidents.
Locate The Circuit Breaker Panel
Find your home’s circuit breaker panel. It is usually in the basement, garage, or utility room. The panel contains switches that control power to different parts of your house.
Identify The Correct Breaker
Look for the breaker labeled for the smoke detectors or the area where the detector is installed. If labels are missing, turn off the main breaker to cut all power. This ensures safety but affects the whole home.
Switch Off The Power
Flip the breaker switch to the “off” position. This stops electricity from reaching the smoke detector. Double-check by testing other devices or the detector itself. No power means it is safe to proceed.
Confirm Power Is Off
Use a non-contact voltage tester or a simple screwdriver tester. Hold it near the smoke detector wires. No light or sound means no electricity. Always be sure before touching any wires.
Remove The Old Smoke Detector
Removing the old Kidde hardwired smoke detector is the first step in the replacement process. This step ensures the new detector fits properly and works safely. It involves two main tasks: disconnecting the detector and taking off the mounting bracket. Both tasks need care and attention.
Disconnecting The Detector
Start by turning off the power to the smoke detector at the circuit breaker. This prevents electric shock during removal. Next, gently twist the smoke detector counterclockwise. Pull the detector away from the mounting base carefully. You will see a connector with wires attached to the back of the detector. Press the release tab on the connector and unplug the wires. Set the old detector aside safely.
Removing The Mounting Bracket
After disconnecting the detector, check the mounting bracket on the ceiling or wall. The bracket holds the detector in place. Usually, it is secured with screws. Use a screwdriver to remove these screws. Keep the screws; you may need them for the new detector. Once the screws are out, take down the mounting bracket. Clean the area before installing the new smoke detector.
Prepare The New Detector
Preparing the new Kidde hardwired smoke detector is an important step. It ensures the device fits well and works properly. Careful preparation makes installation smoother and safer.
This stage involves checking the detector’s compatibility and attaching the mounting bracket. Both steps need attention to detail.
Check Compatibility
Start by confirming the new detector matches your home’s wiring and setup. Kidde models vary, and not all fit every system. Look at the model number on the old detector and compare it to the new one.
Check the power requirements and sensor types. Some detectors connect with others in a network. Make sure your new device supports this if needed. This avoids future problems.
Attach Mounting Bracket
Locate the mounting bracket that comes with the new detector. This bracket holds the device on the ceiling or wall. Remove any protective film from the bracket before use.
Align the bracket holes with the screw points on the mounting base. Use screws to secure the bracket tightly. A firm bracket keeps the detector stable and working right.

Credit: www.kidde.com
Connect The New Detector
Connecting the new Kidde hardwired smoke detector is a key step in the replacement process. This part ensures your detector works properly and keeps your home safe. It involves carefully wiring the device and securing all connections to avoid future problems.
Wiring The Detector
Start by matching the wires from the ceiling to the new detector. Usually, the wires are color-coded: black for power, white for neutral, and red or yellow for interconnect. Attach each wire to its matching terminal on the detector. Use a screwdriver to tighten the screws firmly. Check that no wires are loose or exposed.
Securing The Connection
Once the wires are connected, push them gently back into the electrical box. Align the detector base with the mounting bracket. Twist or snap the detector into place according to the instructions. Make sure it fits tightly and does not wobble. A secure connection prevents false alarms and keeps the detector functioning well.
Mount The New Detector
Mounting the new Kidde hardwired smoke detector is a key step in keeping your home safe. This process ensures the device is secure and works properly. Taking care during installation helps the detector respond quickly to smoke or fire.
Follow these clear steps to mount the new detector correctly. Check the base plate, align it well, and tighten it without damage. Proper mounting prevents false alarms and improves the detector’s lifespan.
Prepare The Mounting Base
Start by attaching the mounting base to the ceiling or wall. Use screws provided with the detector. Make sure the base sits flat and snug against the surface. Avoid loose or uneven placement to keep the detector stable.
Align The Detector Properly
Line up the new detector with the base plate. The connector pins should match perfectly. Twist the detector clockwise until you hear a click. This sound confirms a secure lock between the parts.
Check The Detector’s Position
Confirm the detector points downward or outward, depending on the model. This placement allows smoke to enter quickly. Avoid corners or areas near vents where airflow is limited.
Test The Detector
Press the test button to verify power and sound. A loud beep means the detector works well. If no sound appears, check the wiring connection or battery backup.
Restore Power And Test
After replacing your Kidde hardwired smoke detector, restoring power and testing it is crucial. This step ensures the device works properly and keeps your home safe. Follow these simple steps carefully to complete the process.
Turn On Power
First, restore electricity to the smoke detector circuit. Go to your home’s main electrical panel. Switch the breaker that controls the smoke detector back to the “on” position. Listen for any sounds from the detector, such as a brief beep. This beep means the power is back and the unit is starting up.
Run Test Alarm
Next, test the smoke detector to confirm it works well. Press and hold the test button on the detector. Hold it until you hear a loud alarm sound. This sound shows the detector can alert you in case of smoke or fire. Release the button after the test. Wait a few seconds for the alarm to stop. If the alarm sounds weak or does not sound, check the power or installation again.
Troubleshooting Tips
Troubleshooting your Kidde hardwired smoke detector can save time and avoid costly repairs. Problems might seem complex but often have simple solutions. This section provides clear steps to identify and fix common issues.
Check Power Supply And Connections
Ensure the smoke detector is receiving power. Turn off the circuit breaker before inspection. Look for loose or disconnected wires. Tighten all wire nuts securely. A stable power connection is essential for proper operation.
Test The Smoke Detector Button
Press the test button on your detector. It should emit a loud alarm sound. No sound means a problem with power or the unit. A weak or no alarm often signals battery or wiring issues.
Replace The Backup Battery
Even hardwired detectors need backup batteries. Remove the unit from the mounting bracket. Replace the battery with a fresh one. Check the battery type recommended by Kidde. A dead battery can cause frequent beeping.
Inspect For Dust And Debris
Dust can block the sensor and cause false alarms. Use a vacuum or soft brush to clean the detector. Avoid using water or spray cleaners. Regular cleaning keeps your smoke detector working well.
Reset The Smoke Detector
Sometimes a reset clears errors. Turn off power at the circuit breaker. Remove the detector and press the test button for 15 seconds. Restore power and remount the unit. Resetting can solve many electronic glitches.
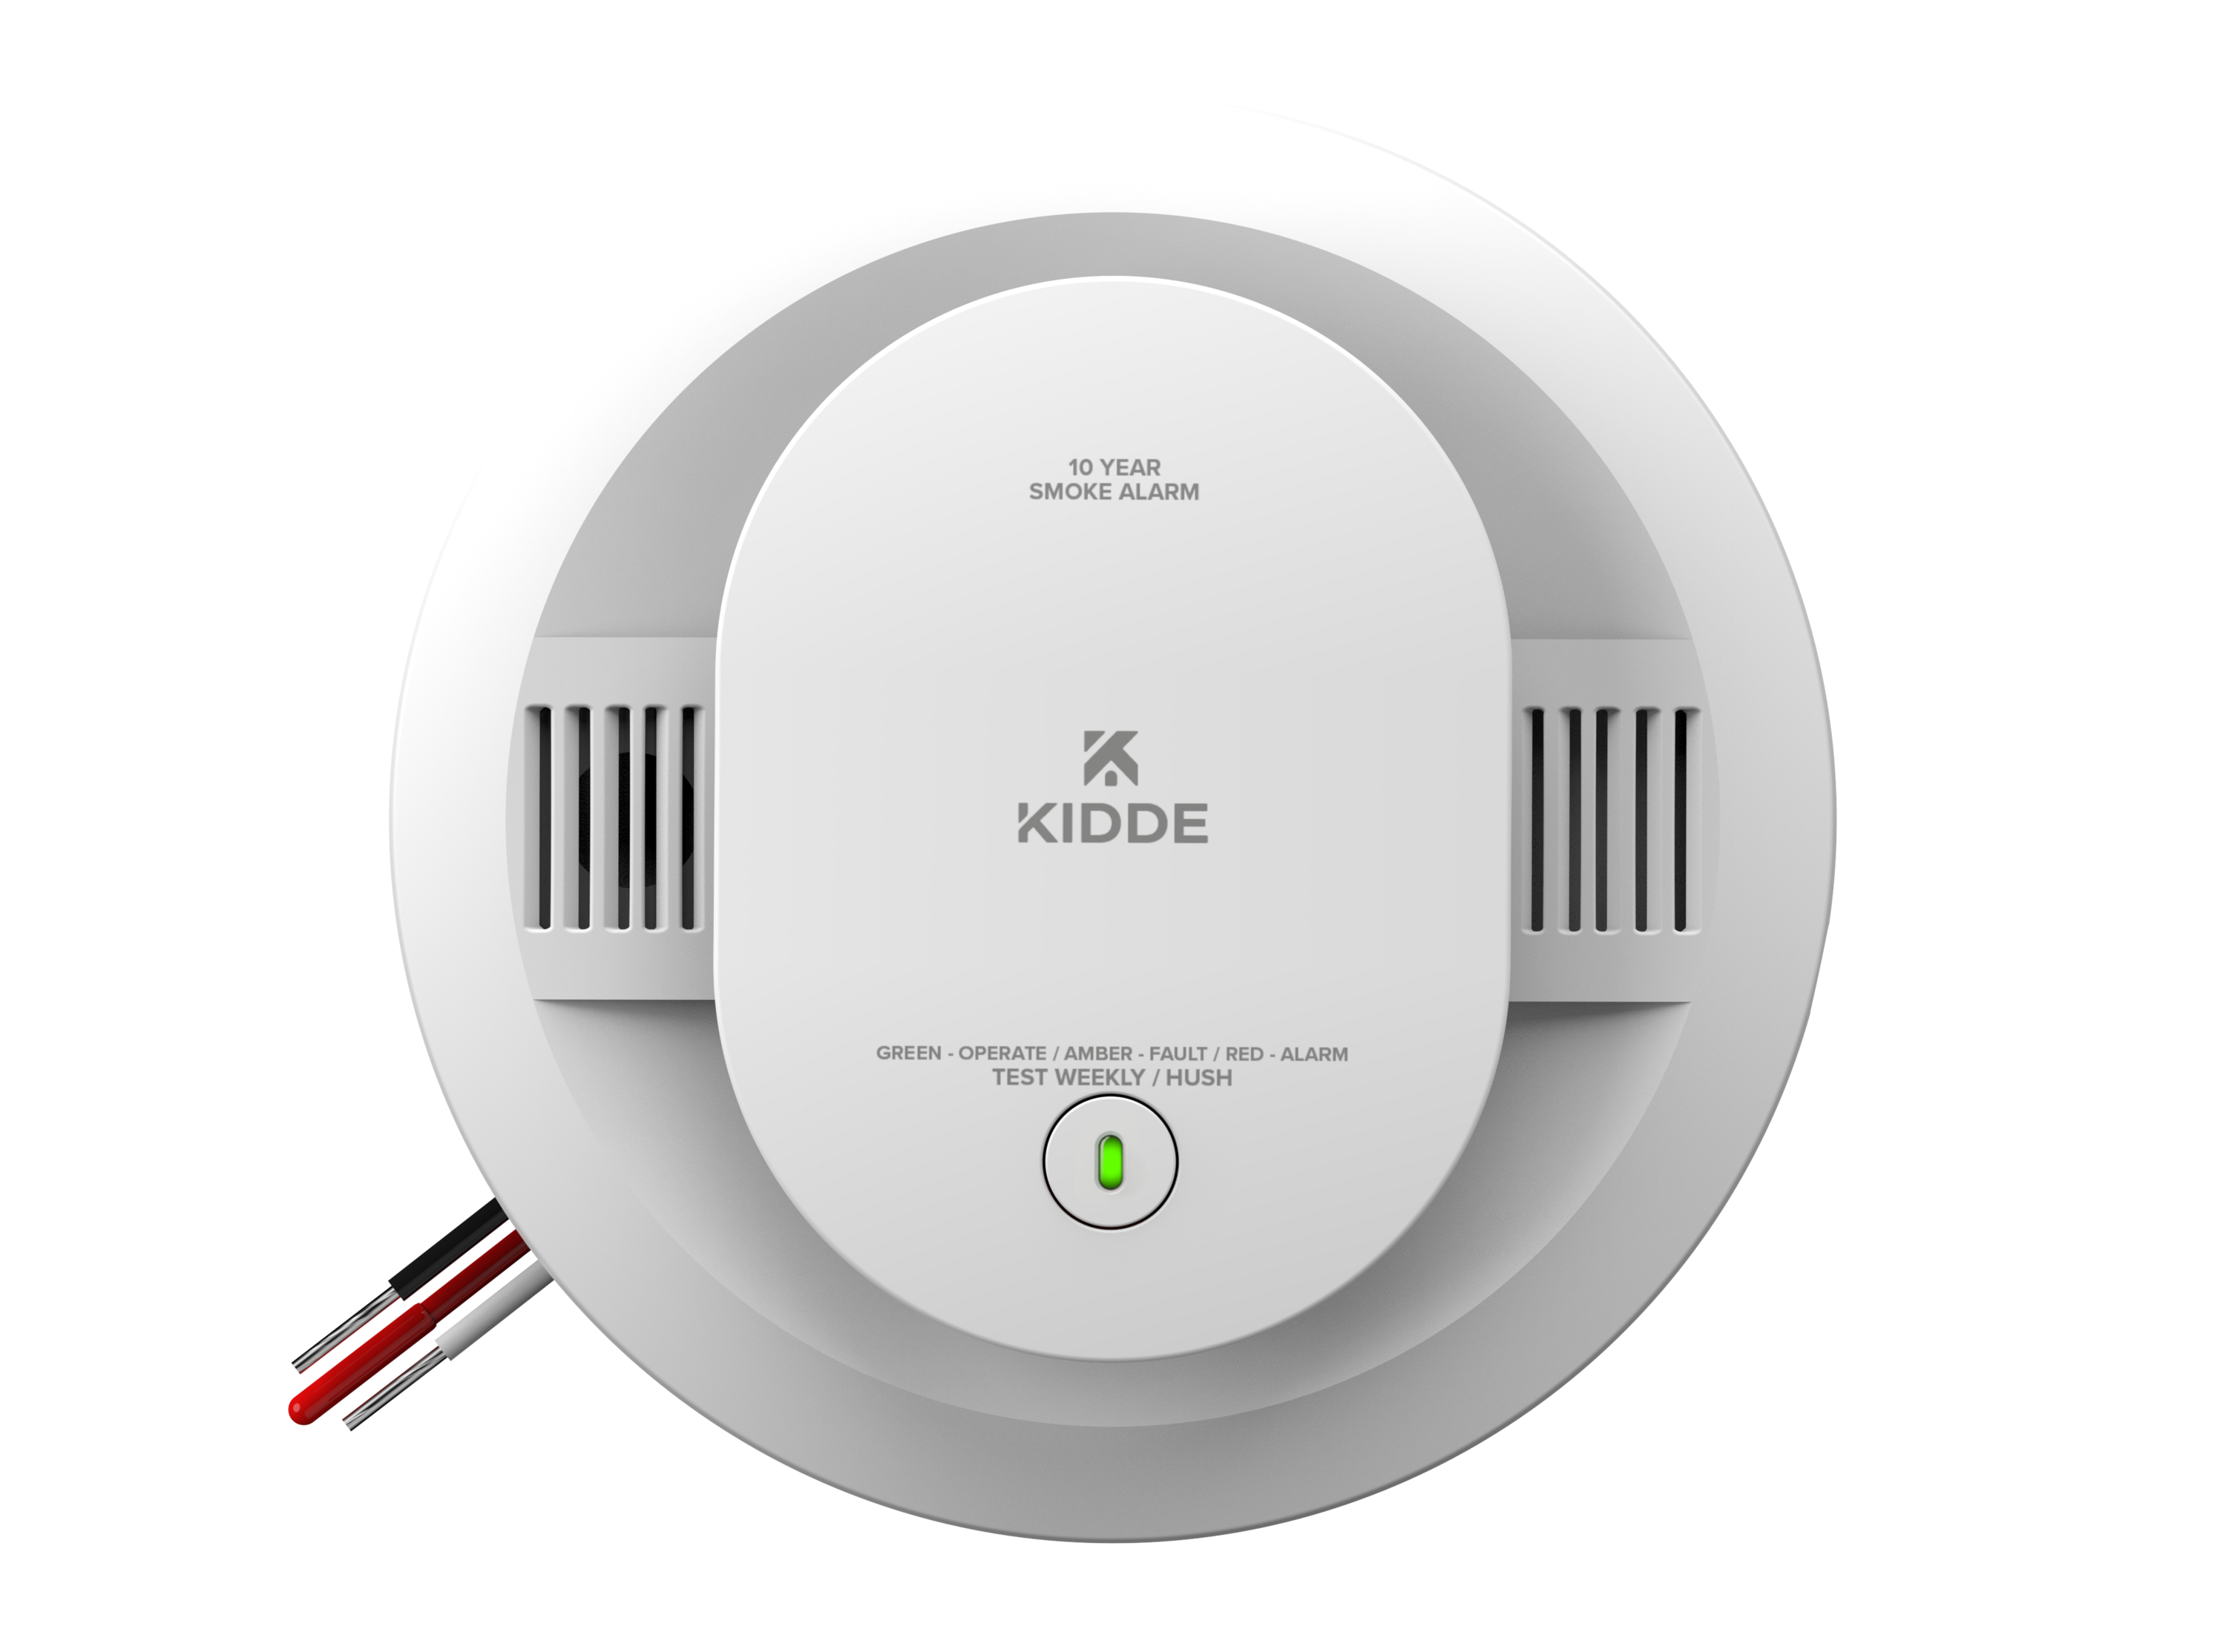
Credit: www.kidde.com
Frequently Asked Questions
How Do You Safely Disconnect A Kidde Hardwired Smoke Detector?
First, turn off power at the circuit breaker. Then, carefully remove the detector from its mounting base. Disconnect the wiring harness by pressing the release tab. Always handle the wires gently to avoid damage or shorts.
What Tools Are Needed To Replace A Kidde Smoke Detector?
You need a screwdriver, wire stripper, and a new Kidde smoke detector. Optionally, a voltage tester ensures power is off. These tools help safely remove and install the new unit without damaging wiring.
Can I Replace A Kidde Hardwired Smoke Detector Myself?
Yes, if you follow safety steps and instructions carefully. Turn off power, disconnect old detector, connect new one, and restore power. If unsure, consult a professional electrician to avoid hazards or installation errors.
How Do I Test A New Kidde Smoke Detector Installation?
Press and hold the test button on the detector. It should emit a loud alarm sound if installed correctly. This confirms power and wiring are functional. Test monthly to ensure ongoing safety and detector reliability.
Conclusion
Replacing a Kidde hardwired smoke detector is simple and important. Safety starts with working smoke alarms. Follow the steps carefully to ensure correct installation. Double-check all connections before turning the power back on. Test the detector to confirm it works well.
Regular maintenance keeps your home safe from fire risks. Stay alert and replace detectors every 10 years or as needed. Small actions can protect your family and property. Safety is worth the effort.