
Are you struggling to get the perfect view from your Ring Video Doorbell? If your doorbell camera angle isn’t quite right, you might be missing important moments or people at your doorstep.
Adjusting your Ring Video Doorbell correctly can make all the difference in keeping your home safe and staying connected with visitors. In this guide, you’ll learn simple steps to position your device just right, so you never miss a thing again.
Ready to make your Ring work smarter for you? Let’s dive in.

Credit: www.youtube.com
Choosing The Right Location
Choosing the right location for your Ring Video Doorbell is key to getting clear video and reliable alerts. The spot affects how well the device sees visitors and connects to your Wi-Fi. A good location helps capture the best view of your door and the area around it. It also avoids common problems like blocked views or weak signals.
Ideal Height And Angle
Place the Ring doorbell about 48 inches from the ground. This height captures faces clearly and shows packages left on the floor. Tilt the device slightly downward to cover the doorstep area. Avoid angles that point too far up or down. A straight view works best for motion detection and video quality.
Avoiding Obstructions
Keep the doorbell free from objects like plants, decorations, or walls that block the view. Obstructions can hide visitors and reduce motion alerts. Make sure nothing covers the camera lens or sensor. Clear, open space helps the doorbell capture all activity near your door.
Considering Wi-fi Signal Strength
Test your Wi-Fi signal near the doorbell location. A strong signal ensures smooth video streaming and quick alerts. Move the router closer or add a Wi-Fi extender if signals are weak. Avoid metal objects or thick walls that block Wi-Fi signals. Good connection keeps your Ring doorbell working without interruptions.

Credit: www.amazon.com
Mounting The Doorbell
Mounting the Ring Video Doorbell is the first step to secure its position and get clear video footage. Proper mounting ensures the doorbell works well and catches every visitor. The process is simple, but doing it right saves time and effort later. Follow the steps below to install your doorbell with ease.
Tools And Materials Needed
Gather these tools before starting:
- Ring Video Doorbell kit
- Drill with bits
- Screwdriver
- Level tool
- Anchors and screws (included in kit)
- Pencil for marking
- Mounting bracket (included)
Step-by-step Installation
Start by choosing the right spot near your door. Hold the mounting bracket against the wall. Use a level to keep it straight. Mark holes with a pencil through the bracket’s holes. Drill pilot holes for screws. Insert anchors if mounting on drywall or brick. Attach the bracket firmly with screws. Snap the doorbell onto the bracket. Secure it with the provided locking screw at the bottom.
Using The Mounting Bracket
The mounting bracket holds the doorbell in place. It allows easy removal for charging or maintenance. The bracket fits snugly against your wall or doorframe. It aligns the doorbell at the correct angle. Ensure the bracket is secure and level before attaching the doorbell. This prevents shaky video or missed motion alerts. Tighten all screws but avoid over-tightening to protect the bracket and wall.
Adjusting The Camera Angle
Adjusting the camera angle of your Ring Video Doorbell improves security and captures clear video. Proper adjustment helps avoid blind spots and shows visitors’ faces well. Small tweaks can make a big difference in video quality and coverage.
Manual Angle Adjustment
Start by loosening the screws that hold the doorbell. Gently tilt the device up or down to change the view. Tighten the screws once the angle looks right. Make sure the camera faces the area you want to monitor. Avoid sharp angles that miss important spots.
Using The Adjustable Wedge
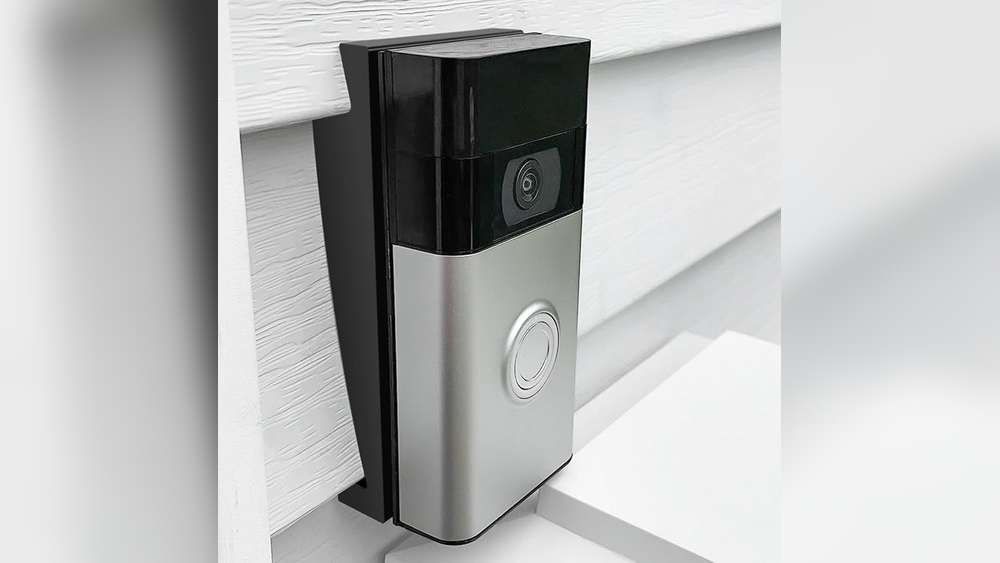
The adjustable wedge changes the camera’s tilt easily. Attach the wedge behind the doorbell for a better angle. It helps if your doorbell is mounted on a flat surface. Choose a wedge with the right angle for your needs. This tool is simple to install and adjust.
Testing The View
Check the camera view through the Ring app. Walk near the doorbell to see how well it captures motion. Adjust the angle again if the view is too narrow or wide. Test multiple times to find the best position. Clear and wide views improve home security.
Configuring Motion Settings
Configuring motion settings on your Ring Video Doorbell helps you control alerts and recording. It lets you focus on important movements and avoid false alarms. Adjusting these settings improves your security and saves battery life.
Setting Motion Zones
Motion zones let you choose which parts of your camera view trigger alerts. Draw zones on the screen to cover doors, walkways, or driveways. Ignore areas with trees or streets to reduce unwanted notifications.
Set zones carefully to catch visitors and ignore passing cars or animals. This saves your time and keeps alerts meaningful.
Adjusting Sensitivity Levels
Sensitivity controls how easily your doorbell detects motion. Higher sensitivity picks up small movements but may cause false alerts. Lower sensitivity reduces false alerts but might miss some activity.
Find a balance that fits your environment. Test different levels to see what works best for your home.
Enabling Person Detection
Person detection focuses on human shapes, reducing alerts from pets or cars. This feature uses smart technology to identify people only. It helps you get alerts that matter most.
Turn on person detection for better security and fewer distractions. This makes your Ring Doorbell smarter and more efficient.
Optimizing Video Quality
Optimizing the video quality of your Ring Video Doorbell is crucial for clear and reliable footage. Good video quality helps identify visitors and improves security. Small adjustments can make a big difference in what the camera captures.
Selecting Video Resolution
Choose the right video resolution to balance clarity and data use. Higher resolution shows more detail but uses more bandwidth. Lower resolution saves data but may blur important details. Adjust the resolution in the Ring app settings to fit your needs.
Managing Lighting Conditions
Lighting affects video clarity greatly. Bright sunlight or strong backlight can cause glare or shadows. Position the doorbell to avoid direct light facing the camera. Use outdoor lights near the doorbell to improve night vision. Soft, even lighting produces the best results.
Cleaning The Lens
A clean lens ensures sharp video images. Dirt, dust, or water spots blur the view. Wipe the lens gently with a soft cloth regularly. Avoid harsh cleaners that can damage the lens coating. Clear lens means better video quality and accurate motion detection.
Connecting To Power And Wi-fi
Connecting your Ring Video Doorbell to power and Wi-Fi is key to its performance. Proper setup ensures your doorbell works smoothly. It lets you see visitors and receive alerts without interruption.
Power options vary based on your doorbell model. Wi-Fi connection affects video quality and response time. Both need attention for the best experience.
Battery Vs Wired Options
Ring doorbells come with two power choices: battery or wired. Battery models offer easy installation and no wires. They need charging every few months.
Wired models connect to your home’s existing doorbell wires. They get constant power and never run out of charge. Installation can take more time and tools.
Choose the option that fits your home setup and needs.
Ensuring Stable Wi-fi Connection
Your doorbell needs a strong Wi-Fi signal. Place it where your router’s signal is strong. Walls and distance can weaken the connection.
Use a 2.4 GHz network for better range. Avoid 5 GHz if the doorbell is far from the router. Check your Wi-Fi speed to ensure smooth video streaming.
Troubleshooting Connectivity Issues
Slow or no video feed means connection problems. Restart your router and doorbell to reset connections. Check if your Wi-Fi password is correct.
Move the router closer or add a Wi-Fi extender. Update the doorbell’s firmware for better performance. Contact support if problems continue after these steps.
Testing And Final Adjustments
After installing your Ring Video Doorbell, testing and final adjustments are key. This step ensures the device works well and fits your needs. Small tweaks can improve video quality and notifications. Taking time here saves hassle later. Follow these tips to get the best results.
Live Video Check
Open the Ring app and start a live video feed. Watch the view from the doorbell camera. Make sure the angle covers the area you want. Check for any glare or dark spots. Move the doorbell slightly if needed. The video should be clear and show visitors fully.
Adjusting Notifications
Go to the app’s notification settings. Choose how and when you want alerts. Set alerts for motion, rings, or both. Test by walking near the doorbell or pressing the button. Adjust sensitivity if you get too many alerts. Keep notifications useful but not annoying.
Regular Maintenance Tips
Clean the camera lens regularly for clear video. Use a soft cloth to avoid scratches. Check the battery level often if your doorbell is wireless. Update the app and device firmware when available. Test the doorbell every few weeks to catch issues early.
Credit: www.youtube.com
Frequently Asked Questions
How Do I Adjust My Ring Video Doorbell Angle?
To adjust the angle, loosen the screws on the mounting bracket. Tilt the doorbell to your preferred angle. Tighten the screws to secure it firmly in place.
Can I Reposition The Ring Doorbell After Installation?
Yes, you can reposition the Ring Doorbell anytime. Simply remove it from the mount, choose a new location, and reinstall it using the mounting kit.
How To Improve Ring Doorbell Motion Detection?
Adjust motion zones in the Ring app for better detection. Customize sensitivity settings to reduce false alerts and focus on key areas.
What Tools Are Needed To Adjust Ring Doorbell?
You need a screwdriver (usually a Phillips head) to loosen or tighten mounting screws. Optionally, use the included wedge for angle adjustment.
Conclusion
Adjusting your Ring Video Doorbell is simple and quick. You control the camera view and motion settings yourself. This helps you see visitors clearly and get alerts only when needed. Small changes make a big difference in security and convenience.
Take a few minutes to set it just right. Your home stays safer, and you stay informed. Keep checking and tweaking as needed. A well-adjusted doorbell keeps you connected and aware. Easy steps, better protection.