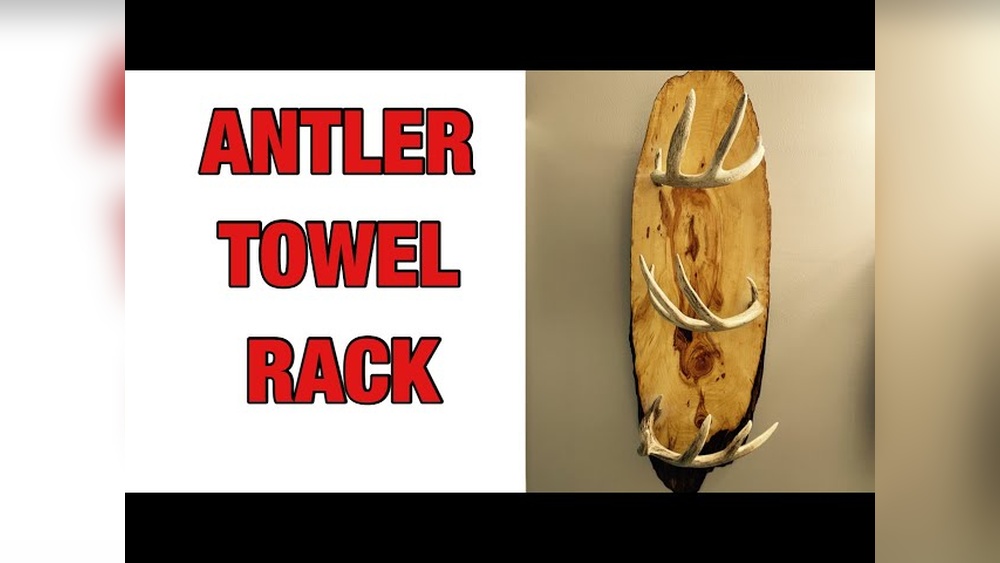

Looking for a unique way to add charm and personality to your bathroom or entryway? Making a deer antler towel rack is easier than you might think, and it’s a perfect project if you want something rustic and eye-catching.
Imagine having a towel rack that not only holds your towels but also sparks conversations and brings a bit of nature indoors. In this guide, you’ll discover simple steps to create your own deer antler towel rack, even if you’re not a crafts expert.
Ready to transform your space with a touch of wilderness? Let’s get started!

Credit: cm-saska-kepa.pl
Materials Needed
Gathering the right materials is the first step to make a deer antler towel rack. Each item has a role to help you create a sturdy and stylish rack. Prepare everything before starting your project. This saves time and avoids interruptions.
Selecting Deer Antlers
Choose antlers that are strong and well-shaped. Look for ones with a natural curve to hold towels easily. Clean them well to remove dirt and debris. Avoid antlers with cracks or weak spots to ensure durability.
Essential Tools
Basic tools make your work easier and safer. You will need a drill for making holes. A screwdriver helps fix screws tightly. Sandpaper smooths rough edges on the antlers. A measuring tape ensures proper spacing. Wear safety glasses to protect your eyes.
Additional Supplies
Get screws and wall anchors for secure mounting. Use wood or metal brackets to hold the antlers firmly. A strong adhesive can add extra support. Paint or sealant protects the antlers from moisture. Choose supplies that fit your wall type and style.
Preparing The Antlers
Preparing the antlers is a key step before making your towel rack. Clean and smooth antlers will look better and last longer. Taking time here makes your project easier and safer. Proper preparation helps the antlers hold hooks or screws well. Follow these simple steps to get your antlers ready for use.
Cleaning And Sanitizing
Start by removing dirt and debris from the antlers. Use a soft brush and warm soapy water. Gently scrub all surfaces to avoid damage. Rinse with clean water and dry thoroughly. To kill bacteria, wipe the antlers with rubbing alcohol. Let them air dry completely before the next step.
Sanding And Smoothing
Use medium-grit sandpaper to smooth rough spots. Sand all surfaces lightly for a clean finish. Focus on sharp edges to prevent injury. Switch to fine-grit sandpaper for a smooth feel. Wipe off dust with a dry cloth. Smooth antlers are easier to work with and look better.
Preserving The Finish
Apply a clear wood finish or sealant to protect the antlers. Use a brush or cloth for an even coat. Let the finish dry according to product instructions. This step enhances the antlers’ color and protects against moisture. A good finish keeps your towel rack durable and attractive.
Designing Your Towel Rack
Designing your deer antler towel rack is an exciting part of the project. It lets you add a personal touch to a practical item. Planning the design ensures the rack is both strong and stylish. Careful design helps your towel rack fit perfectly in your space.
Start by thinking about the size and shape of the antlers. This influences how many towels you can hang. Also, consider the style of your room. The design should match or complement your decor. A well-designed towel rack looks natural and inviting.
Choosing The Layout
Begin by arranging the antlers in different positions. Think about balance and how the rack will hang on the wall. Decide if the antlers will stand upright or lay flat. Space the antlers so towels hang without overlapping too much. A good layout makes the rack functional and attractive.
Marking Attachment Points
Find strong spots on the antlers to attach the rack to the wall. Mark these points clearly with a pencil. Make sure the marks align with wall studs for support. Measure twice to keep the rack level. Proper marking prevents damage and ensures safety.

Credit: crookedcreekantlerart.com
Assembling The Rack
Assembling the deer antler towel rack is a rewarding step. It brings your project closer to use and display. Careful assembly ensures the rack is strong and looks great. Follow simple steps to attach the antlers and secure the hardware. This guarantees a sturdy and beautiful towel rack for your space.
Attaching Antlers To Base
Start by placing the antlers on the wooden base. Align them to match your design plan. Use clamps to hold antlers in place firmly. Drill pilot holes through the base into the antlers. This prevents wood from splitting during screws insertion. Screw the antlers tightly to the base using wood screws. Check the antlers sit steady and do not wobble.
Securing Mounting Hardware
Choose strong mounting hardware suitable for your wall type. Attach brackets or hooks to the back of the base. Use a level to keep the rack straight on the wall. Mark screw holes clearly before drilling into the wall. Insert anchors if mounting on drywall for extra support. Screw the mounting hardware firmly to the wall. Hang the rack and test its stability with gentle pulls.
Finishing Touches
The finishing touches make your deer antler towel rack look complete and polished. These steps protect the wood and bring out its natural beauty. They also help the rack last longer in your bathroom or kitchen.
Painting Or Staining
Choose paint or stain based on the style you want. Paint gives you bright colors and a smooth look. Stain shows the wood grain and adds warmth. Use a brush or cloth to apply evenly. Let the paint or stain dry fully before moving on.
Adding Protective Coating
Apply a clear protective coat to guard against moisture and wear. Polyurethane or varnish works well for this. Use thin, even layers and let each coat dry before adding the next. This step seals the finish and keeps your rack looking good for years.
Mounting The Rack
Mounting the deer antler towel rack is an important step. It gives your rack a sturdy hold and makes it easy to use. You want to place it where it looks good and stays strong. This section guides you on finding the right spot and installing the rack on the wall safely and neatly.
Finding The Right Spot
Choose a spot where towels are easy to reach. Near the bathroom door or sink works well. Make sure the wall is flat and clean. Avoid areas with moisture or direct sunlight. Measure the space to fit the rack without crowding. Check the height so everyone can reach the towels. Mark the exact points for drilling holes. This helps keep the rack level and balanced.
Installing On The Wall
Use a stud finder to locate wall studs for strong support. If no studs are available, use wall anchors made for your wall type. Drill holes at the marked points carefully. Insert the anchors or screws as needed. Hold the rack against the wall and align the holes. Screw the rack tightly but do not over-tighten. Test the rack by gently pulling on it. It should feel secure and steady before hanging towels.
Maintenance Tips
Maintaining your deer antler towel rack keeps it looking great and lasting long. Regular care prevents wear and keeps the natural beauty of the antlers. Simple steps make a big difference in its lifespan. Follow easy tips to protect your unique towel rack.
Cleaning The Antlers
Dust the antlers often with a soft, dry cloth. Avoid using water or harsh cleaners. Use a damp cloth only if needed, then dry immediately. Mild soap can help remove stubborn dirt. Clean gently to keep the antlers’ natural texture and color.
Preventing Damage
Keep the rack away from direct sunlight to stop fading. Avoid placing it near heat sources that dry out the antlers. Handle with care to prevent cracks or breaks. Check for loose parts and tighten screws regularly. Proper care preserves the rack’s strength and appearance.

Credit: www.youtube.com
Frequently Asked Questions
What Materials Are Needed For A Deer Antler Towel Rack?
You need deer antlers, wooden board, screws, wall anchors, drill, and sandpaper. Choose sturdy antlers and quality wood for durability.
How Do You Attach Antlers To The Wooden Board?
Drill holes in the antlers and board. Use screws to secure antlers firmly. Ensure alignment and stability before mounting.
Can I Use Shed Antlers For A Towel Rack?
Yes, shed antlers are ideal and eco-friendly. They are naturally cast off and easily sourced.
How Do I Mount The Towel Rack On A Wall?
Use wall anchors and screws suitable for your wall type. Mount securely to support the rack’s weight.
Conclusion
Building a deer antler towel rack adds charm to any room. The process is simple and fun. You only need basic tools and materials. Each step helps you create a unique, rustic piece. This project suits both beginners and hobbyists.
Enjoy the satisfaction of making something with your hands. Your new towel rack will impress guests and last long. Try this craft to bring nature’s beauty indoors. It’s a great way to add character and function. Start today and see how rewarding it feels.