
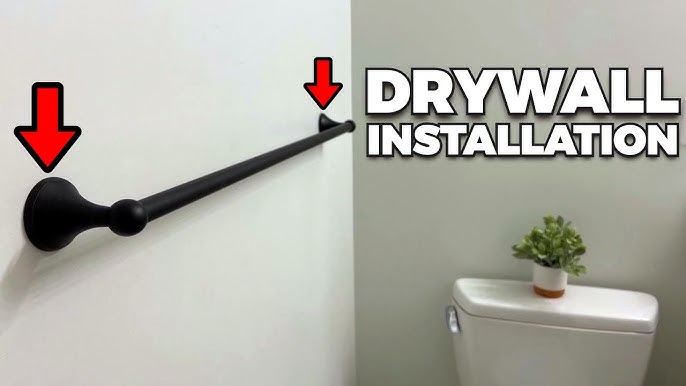
Are you tired of towels slipping off flimsy hooks or cluttering your bathroom counter? Installing a towel rack on drywall can solve that problem quickly and neatly.
But if you’re worried about damaging your walls or unsure where to start, you’re not alone. This guide will walk you through simple, step-by-step instructions to help you mount a sturdy towel rack that stays put. By the end, you’ll have a clean, organized space and the confidence to tackle similar projects on your own.
Let’s get your bathroom looking and feeling more functional right now.

Credit: www.youtube.com
Choose The Right Towel Rack
Choosing the right towel rack is the first step in a smooth installation on drywall. The rack must fit your bathroom style and hold towels securely. Picking the right type and material helps avoid damage and ensures long use. This guide helps you select the best towel rack for your needs.
Types Of Towel Racks
Towel racks come in many styles. The most common are bar racks, ring racks, and hooks. Bar racks hold multiple towels and suit bigger spaces. Ring racks are good for small towels and compact areas. Hooks offer flexibility and can hold several towels or robes. Choose a type that fits your bathroom size and towel use.
Selecting Suitable Materials
Material matters for durability and looks. Stainless steel racks resist rust and last long. Aluminum racks are lightweight and easy to install. Plastic racks cost less but may break faster. Wood racks add warmth but need protection from moisture. Pick a material that suits your bathroom’s humidity and style.
Credit: www.youtube.com
Gather Necessary Tools
Gathering the right tools is the first step to install a towel rack on drywall. Having everything ready makes the job faster and easier. It also helps avoid mistakes and damage to the wall.
Here are the essential tools you need to prepare before starting the installation.
Drill And Bits
A drill is needed to make holes in the drywall. Use a drill with variable speeds for better control. Choose drill bits that match the size of your anchors. A standard drill set usually has several bit sizes.
Make sure the bits are sharp and clean. This prevents cracking the drywall during drilling. A drill makes the process clean and precise.
Level And Measuring Tape
A level ensures the towel rack is straight. It avoids a crooked or uneven installation. Use a bubble level or a laser level for accuracy.
Measuring tape helps find the right spot on the wall. Measure twice to avoid mistakes. Mark the drill points clearly before drilling.
Both tools help place the towel rack evenly and neatly.
Anchors And Screws
Anchors provide strong support in drywall. They prevent the towel rack from falling off. Use anchors designed for drywall weight limits.
Screws hold the towel rack firmly. Match the screw length to the anchor size. Use rust-resistant screws for bathroom humidity.
Secure anchors and screws ensure the towel rack stays safe and stable.
Find The Best Location
Finding the best location for your towel rack on drywall is important. The right spot makes the rack useful and safe. It should be easy to reach and fit well in your space. Careful placement helps avoid damage to the wall.
Height And Accessibility
Choose a height that suits everyone in your home. Usually, 48 inches from the floor works well. It keeps towels within easy reach for adults and children. Make sure the rack is not too low or too high. This helps keep towels dry and easy to grab after a shower or bath.
Avoiding Wall Studs
Wall studs can make installing a towel rack tricky. Studs are strong but can block the right spot. Use a stud finder to locate them behind the drywall. Pick a place between studs to use drywall anchors. This keeps the rack secure without damaging the wall. Avoiding studs lets you place the rack exactly where you need it.

Credit: diy.stackexchange.com
Mark Mounting Points
Drilling holes in drywall is a key step when installing a towel rack. The holes hold anchors and screws that keep the rack secure. Doing this carefully protects the wall and ensures the rack stays put for years. Use the right tools and follow simple steps to make clean, precise holes.
Selecting Drill Bit Size
Pick a drill bit that matches the size of your wall anchors. The bit should be the same diameter as the anchor’s body. Too small, and the anchor won’t fit. Too big, and the anchor will be loose. Check the package of your anchors for size recommendations. Use a standard drill bit for drywall, usually a twist bit.
Drilling With Precision
Mark the spot for each hole before you drill. Use a pencil to make small dots where the towel rack will mount. Hold the drill steady and start slowly. Drill straight into the wall to avoid angled holes. Push gently, letting the drill do the work. Stop once the hole is deep enough for the anchor. Clean up any dust or debris from the holes before inserting anchors.
Drill Holes In Drywall
Installing drywall anchors is a key step in securing a towel rack on drywall. Drywall alone cannot hold heavy weight well. Anchors provide extra support and keep the rack stable. Correct anchor installation prevents damage to your wall and ensures safety.
Types Of Anchors
Plastic expansion anchors are common and easy to use. They work well with light loads like towel racks. Metal anchors, such as molly bolts, offer stronger support. They expand inside the wall for a firm grip. Toggle bolts are best for heavy items. Their wings open behind the drywall to spread the weight. Choose the anchor type based on your towel rack’s weight and wall condition.
Inserting Anchors Properly
Mark the spot for your towel rack holes with a pencil. Drill a hole matching the size of the anchor. Push the anchor gently into the hole until it sits flush. For metal anchors, tighten the screw slowly to expand the anchor inside. Avoid over-tightening to prevent wall damage. Test the anchor by pulling lightly. It should feel secure before mounting the towel rack.
Install Drywall Anchors
Attaching the towel rack to drywall is a key step for a secure hold. Proper attachment ensures the rack stays strong and stable. Follow these steps carefully for the best results.
Aligning With Anchors
Start by lining up the towel rack with the wall anchors. Check each hole on the rack matches the anchor’s position. This step prevents the rack from being crooked or loose. Hold the rack steady against the wall while aligning.
Securing Screws Firmly
Insert screws into the aligned holes and anchors. Use a screwdriver to tighten each screw firmly. Avoid over-tightening to protect the drywall. Tight screws keep the rack stable under towel weight. Double-check all screws for a secure fit before finishing.
Attach The Towel Rack
After installing the towel rack on drywall, testing its stability is important. This step ensures the rack stays secure and holds towels safely. Small adjustments might be needed to keep it steady and strong. Take time to check every part carefully.
Checking For Loose Parts
Start by gently shaking the towel rack. Look for any movement or wobbling. Check the screws and anchors for tightness. Use a screwdriver to tighten any loose screws. Make sure the rack feels firm against the wall. Loose parts can cause the rack to fall or damage the wall.
Making Final Adjustments
If the rack still moves, adjust the screws little by little. Tighten until the rack is steady but avoid over-tightening. Over-tightening can crack the drywall or strip the screws. Align the rack so it sits straight and level. Use a level tool for accuracy. Proper adjustment ensures the towel rack looks good and works well.
Test Stability And Adjust
Maintaining your towel rack keeps it strong and looking good for years. Simple care stops damage and extends its life. This section covers easy ways to keep your rack clean and safe.
Regular Cleaning Tips
Clean your towel rack often to avoid dust and dirt buildup. Use a soft cloth dampened with mild soap and water. Wipe the rack gently, then dry it well with a dry cloth. Avoid harsh cleaners that can harm the finish. Cleaning keeps the rack shiny and fresh.
Preventing Rust And Damage
Rust weakens metal towel racks and looks bad. Dry your rack after use to stop moisture buildup. Check for loose screws and tighten them to keep it stable. Avoid hanging very heavy items that can pull it off the wall. Small care steps protect your towel rack from damage.
Frequently Asked Questions
How Do I Find Studs For Towel Rack Installation?
Use a stud finder to locate studs behind drywall. Mark the stud positions with a pencil for secure towel rack mounting.
Can I Install A Towel Rack Without Studs?
Yes, use heavy-duty drywall anchors or toggle bolts to support the towel rack safely without studs.
What Tools Are Needed To Install A Towel Rack?
You need a drill, screwdriver, level, tape measure, pencil, anchors, screws, and a stud finder for installation.
How High Should A Towel Rack Be Installed?
Install the towel rack 48 to 52 inches above the floor for easy reach and optimal usability.
Conclusion
Installing a towel rack on drywall is simple with the right steps. Use a stud finder to locate strong spots. Mark and drill carefully to avoid damage. Secure the rack firmly so it holds weight well. Take your time to measure and level it right.
A well-installed rack keeps towels neat and easy to reach. You can do this even with basic tools. Enjoy a tidy bathroom with your new towel rack.

