
Imagine knowing exactly who’s at your door without leaving your seat. Installing a doorbell video can give you that peace of mind and add a layer of security to your home.
If you’ve ever felt unsure about how to set one up or worried it might be too complicated, this guide is made just for you. By the end, you’ll have the confidence to install your own doorbell video quickly and easily.
Ready to take control of your home’s safety? Let’s dive in.
Choosing The Right Doorbell Video
Choosing the right doorbell video is key for home security and convenience. The right choice fits your needs and works well with your home. Consider how you want to install it and which features matter most. This helps you pick a model that keeps your home safe and easy to use.
Wired Vs Wireless Models
Wired doorbell videos connect to your home’s existing wiring. They offer steady power without battery worries. Installation can be harder and may need an electrician. Wireless models run on batteries and are easy to install. Move them anywhere without rewiring. Batteries need regular charging or replacement.
Key Features To Consider
Look for video quality. Clear images help you see visitors well. Night vision is useful in the dark. Motion detection alerts you to activity at your door. Two-way audio lets you talk to visitors remotely. Some models include cloud storage to save videos safely. Check for easy app use on your phone.
Compatibility With Home Systems
Check if the doorbell works with your smart home devices. Some connect to Alexa, Google Home, or Apple HomeKit. This lets you control the doorbell by voice. Also, ensure it matches your Wi-Fi network type. A good fit avoids connection problems and keeps your system smooth.

Credit: www.youtube.com
Tools And Materials Needed
Installing a video doorbell requires a few basic tools and materials. Having the right items ready makes the process faster and easier. This section lists what you need to start your installation.
Basic Tools List
- Power drill with drill bits
- Screwdriver (Phillips and flathead)
- Level tool
- Measuring tape
- Wire stripper
- Voltage tester
- Anchors and screws (usually included)
- Smartphone or tablet for setup
Optional Accessories
- Extension wires for longer cable runs
- Weatherproof sealant for outdoor protection
- Additional mounting brackets
- Battery pack if no wiring is available
- Drill guide for precise holes
Preparing The Installation Site
Preparing the installation site is the first step to install a doorbell video. This step ensures the device works well and stays secure. Proper preparation helps avoid problems during and after installation. Follow these simple tasks to get ready.
Selecting The Best Location
Choose a spot near your front door. It should show visitors clearly. Avoid places with direct sunlight or heavy shadows. The camera needs good lighting for clear images. Pick a location easy to reach for installation and maintenance.
Checking Power Sources
Verify there is power near the chosen spot. Some doorbell videos use existing doorbell wiring. Others use batteries or USB power. Make sure power is steady and safe. Turn off power at the breaker before handling wires.
Measuring And Marking
Measure the height where you want to place the doorbell. Usually, it is about 48 inches from the ground. Mark the exact spots for screws and wires. Use a pencil for easy changes. Accurate marks help the device fit perfectly.
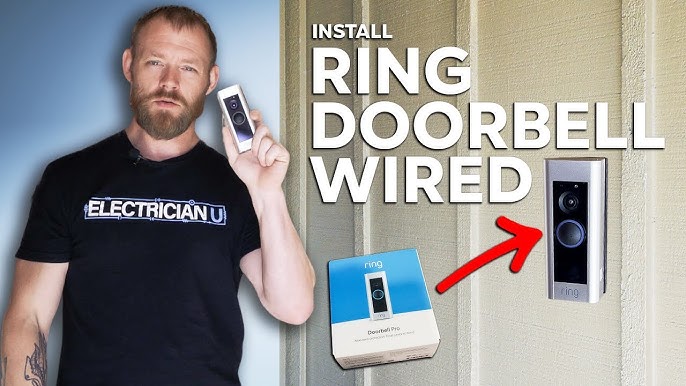
Credit: www.youtube.com
Installing The Doorbell Video
Installing your doorbell video is a straightforward process. It requires some basic tools and careful steps. Follow the instructions below to set up your device securely and correctly. This ensures your doorbell video works well and lasts long.
Mounting The Bracket
Start by choosing the right spot for your doorbell. It should be near your door at a height that captures faces well. Use a pencil to mark the screw holes on the wall. Drill holes where you marked. Insert wall anchors if your wall is made of drywall or brick. Attach the bracket with screws, making sure it is tight and level.
Connecting The Wiring
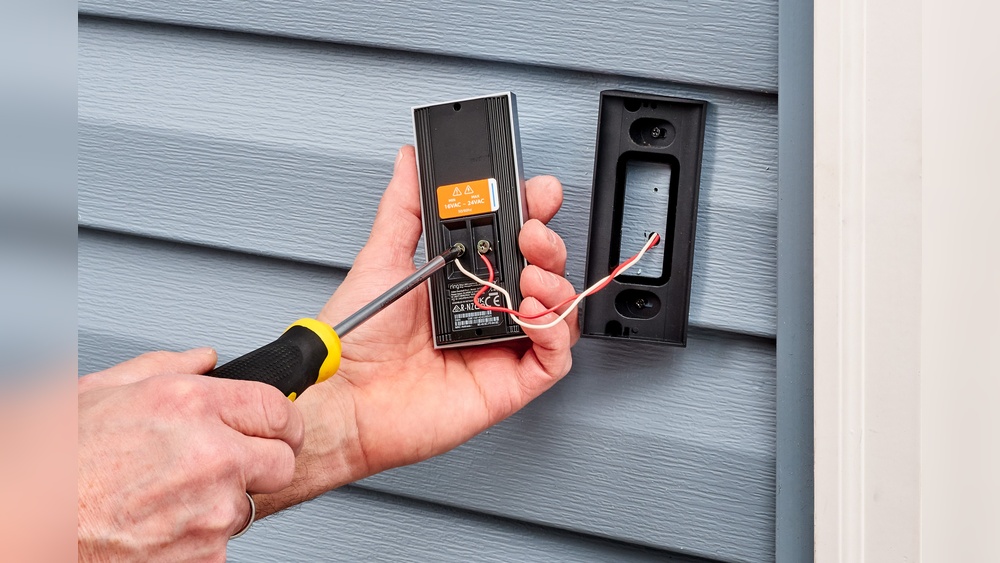
Turn off the power at your circuit breaker to avoid shocks. Remove your old doorbell if you have one. Connect the wires from your house to the terminals on the new doorbell. Usually, there are two wires; polarity does not matter. Tighten the screws to hold the wires firmly. Check that no wires are loose or touching each other.
Attaching The Doorbell Unit
Align the doorbell unit with the mounted bracket. Slide or click it into place according to your model’s design. Make sure it fits snugly and does not wobble. Restore power at the circuit breaker. Test the button and camera to confirm everything works properly. Adjust the angle if your doorbell has a camera lens.
Setting Up The Software
Setting up the software is the next step after installing your video doorbell. This part connects your device to your phone and home network. It allows you to receive alerts and watch live video from anywhere. Follow each step carefully to get your doorbell working smoothly.
Downloading The App
Start by finding the official app for your doorbell. Visit the App Store or Google Play Store. Search the brand name and download the app. Install it on your smartphone. The app lets you control the doorbell and see visitors instantly.
Connecting To Wi-fi
Open the app and follow the prompts to connect the doorbell to Wi-Fi. Make sure your phone is near the doorbell during setup. Select your home Wi-Fi network and enter the password. A strong Wi-Fi signal ensures clear video and quick alerts.
Configuring Settings
After connecting, customize your doorbell settings in the app. Set motion detection zones to avoid false alerts. Adjust alert sounds and notification preferences. Enable video recording if available. These settings help you get the most from your video doorbell.

Credit: www.eufy.com
Testing And Troubleshooting
Testing and troubleshooting your doorbell video after installation is key to ensure it works well. This step helps catch problems early and guarantees clear video and sound. Follow these simple checks to make sure your device performs perfectly.
Verifying Video And Audio
Start by checking the video feed on your phone or monitor. Look for clear, sharp images without any blur or lag. Test the audio by speaking through the doorbell and listening carefully. Make sure both the microphone and speaker work well. Poor sound or video may mean connection issues or settings need adjustment.
Adjusting Camera Angles
Position the camera to cover your door area fully. Tilt or rotate it to avoid glare from the sun or lights. A small change can improve the view greatly. Check the live feed after each move to confirm the angle shows visitors clearly. Avoid pointing the camera at busy streets or areas with too much motion.
Common Issues And Fixes
Watch for common problems like no video, poor connection, or delayed alerts. Restart the doorbell and your Wi-Fi router to solve many issues. Ensure the device is within range of your router. Update the app and firmware regularly to fix bugs. Replace batteries if power is low. Follow these quick fixes to keep your doorbell video running smoothly.
Maintenance Tips
Maintaining your video doorbell ensures it works well for a long time. Regular care keeps the video clear and the device reliable. Simple steps help avoid common problems and save repair costs.
Cleaning The Camera Lens
Dust and dirt can blur the camera lens. Clean it gently with a soft cloth. Avoid using harsh chemicals that might damage the lens. Wipe the lens regularly for clear video quality.
Updating Firmware
Firmware updates improve security and add new features. Check for updates through the doorbell’s app. Install updates as soon as they are available. This keeps your device running smoothly and safely.
Battery Care
Battery health affects the doorbell’s performance. Charge the battery fully before first use. Replace batteries if they drain quickly or show damage. Keep the battery contacts clean and dry for best results.
Frequently Asked Questions
What Tools Do I Need To Install A Doorbell Video?
You need a drill, screwdriver, voltage tester, wire stripper, and mounting screws. A ladder may be required for higher installations. Ensure you have the doorbell kit with all parts before starting.
How Do I Connect The Doorbell Video To Wi-fi?
Follow the manufacturer’s app instructions to connect the device. Typically, you select your Wi-Fi network and enter the password. Ensure your router is nearby for a strong signal.
Can I Install A Doorbell Video Without Professional Help?
Yes, most doorbell videos are designed for DIY installation. Follow the step-by-step guide carefully. If you encounter wiring issues, consult an electrician for safety.
How Long Does It Take To Install A Doorbell Video?
Installation usually takes 20 to 40 minutes. Time depends on your experience and wiring complexity. Setting up the app may add 10 to 15 minutes.
Conclusion
Installing a doorbell video is a smart way to boost home security. Follow the steps carefully for a smooth setup. Test the system to ensure it works well. Enjoy the peace of mind it brings every day. Small effort, big benefits.
Stay safe and connected with your visitors anytime.