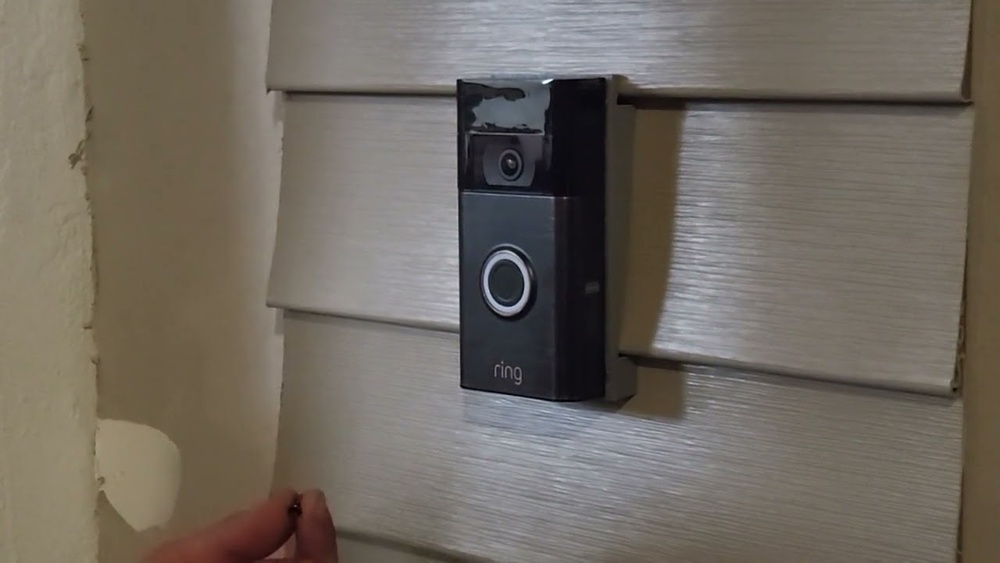

Installing your Ring Video Doorbell on siding might seem tricky at first, but it doesn’t have to be. You want your home to be safe and smart, and a Ring Doorbell is a perfect way to start.
Imagine knowing who’s at your door before you even get up—that’s the kind of control and peace of mind you deserve. In this guide, you’ll discover simple, step-by-step instructions that make the installation smooth and stress-free. By the end, you’ll have your Ring Doorbell working perfectly on your siding, keeping your home secure and connected.
Ready to get started? Let’s dive in.

Credit: www.youtube.com
Tools And Materials Needed
Installing a Ring Video Doorbell on siding needs careful preparation. Gathering the right tools and materials saves time and makes the job easier. Each component helps ensure a secure and safe installation. This section covers the essential items you need to get started.
Ring Video Doorbell Models
Select the correct Ring model for your home. Different models have unique features and mounting styles. Common models include the Ring Video Doorbell 3, 4, and Pro. Choose one that fits your needs and budget. Check if the model supports battery or wired power options.
Mounting Tools
You need a drill with appropriate drill bits for siding. A screwdriver is necessary to secure screws firmly. A level tool helps keep the doorbell straight. Use a pencil to mark drill points clearly. Anchors or mounting brackets may come with the Ring package. These tools ensure a stable installation on siding surfaces.
Safety Equipment
Wear safety glasses to protect your eyes from debris. Gloves help protect your hands during drilling. Use a sturdy ladder if installing above ground level. Ensure the ladder is on a flat surface. Take care to avoid electrical wires inside the wall. Safety equipment prevents accidents and keeps you secure.
Choosing The Right Spot On Siding
Choosing the right spot on your siding for the Ring Video Doorbell is important. The position affects how well the doorbell works and what it can see. A good location helps capture clear video and lets the doorbell connect to your Wi-Fi easily. Consider height, angle, and any obstacles around the siding. These details make a big difference in performance.
Optimal Height And Angle
Place the doorbell at about 48 inches from the ground. This height captures faces clearly. Aim the doorbell slightly downward to cover your doorstep. Avoid placing it too high or too low. A good angle helps the camera see visitors well.
Avoiding Obstructions
Check for objects blocking the camera view. Avoid plants, decorations, or porch lights nearby. These can hide visitors or cause false alerts. Keep the area clear to get the best video quality. Siding with smooth, flat surfaces works best for mounting.
Checking Wi-fi Signal Strength
Test the Wi-Fi signal at your chosen spot. The doorbell needs a strong connection to work well. Use your phone to check signal strength near the siding. Move the doorbell location if the signal is weak. Good Wi-Fi ensures fast video streaming and alerts.
Preparing The Siding Surface
Preparing the siding surface is an important step before installing your Ring Video Doorbell. A clean and well-marked surface ensures a secure fit. Protecting the siding helps avoid damage during installation. This section guides you through these key steps to get ready for your doorbell setup.
Cleaning The Area
Start by removing dirt and dust from the siding. Use a soft brush or cloth for gentle cleaning. Avoid harsh chemicals that may damage the surface. A clean area helps the mounting bracket stick better. Let the siding dry completely before moving to the next step.
Marking Drill Points
Hold the mounting bracket against the siding. Use a pencil to mark where you will drill. Double-check the marks to ensure correct placement. Accurate marks prevent mistakes and keep the doorbell level. Take your time to get it right.
Protecting The Siding
Cover the area around the drill points with painter’s tape. This stops the siding from cracking while drilling. Use a drill bit made for your siding type. Drill slowly and gently to protect the material. Proper care keeps your siding safe and intact.
Mounting The Doorbell Bracket
Mounting the doorbell bracket is a key step for a secure Ring Video Doorbell installation on siding. A steady bracket keeps the doorbell safe and working well. Follow each step carefully to avoid damage and ensure stability.
Drilling Pilot Holes
Start by marking where the bracket will go. Use a pencil for clear marks. Choose a drill bit smaller than your screws. Drill pilot holes at the marks. These holes guide the screws and prevent the siding from cracking.
Using Anchors For Stability
Plastic anchors help hold screws firmly in the siding. Push the anchors into the pilot holes. Tap gently with a hammer until flush with the surface. Anchors stop the screws from loosening over time. This is important for long-term stability.
Securing The Bracket
Align the bracket with the holes and anchors. Insert screws and tighten them with a screwdriver. Tighten just enough to hold the bracket firmly. Avoid overtightening to prevent damage. Check the bracket is level and steady before moving on.
Wiring And Power Options
Choosing the right wiring and power option is key for installing your Ring Video Doorbell on siding. The device can run on battery power or connect to existing doorbell wiring. Each method has its own steps and safety considerations. Understanding these helps ensure smooth installation and long-lasting operation.
Battery Installation
The Ring Video Doorbell comes with a rechargeable battery. Start by removing the front cover. Insert the battery into the compartment until it clicks. Charge the battery fully before installation. Battery power allows easy placement without wiring. Check the battery level often for continuous use.
Connecting To Existing Doorbell Wiring
Use your home’s current doorbell wiring for constant power. Turn off the power at the breaker first. Remove the old doorbell and disconnect wires carefully. Attach the wires to the Ring Doorbell terminals. Secure the device on the siding using screws. Restore power and test the doorbell’s function.
Power Source Safety Tips
Always turn off power before handling wires. Use insulated tools to avoid electric shock. Avoid installing in wet or damp conditions. Check wires for damage before connecting. Keep the device away from direct sunlight and extreme weather. Follow all manufacturer instructions for safety.
Credit: www.doorbellmounts.com
Attaching The Doorbell Unit
Attaching the Ring Video Doorbell unit to your home’s siding is an important step. It ensures the device stays secure and works well. This part is simple but needs care. Follow the steps closely to avoid problems later.
Aligning With The Bracket
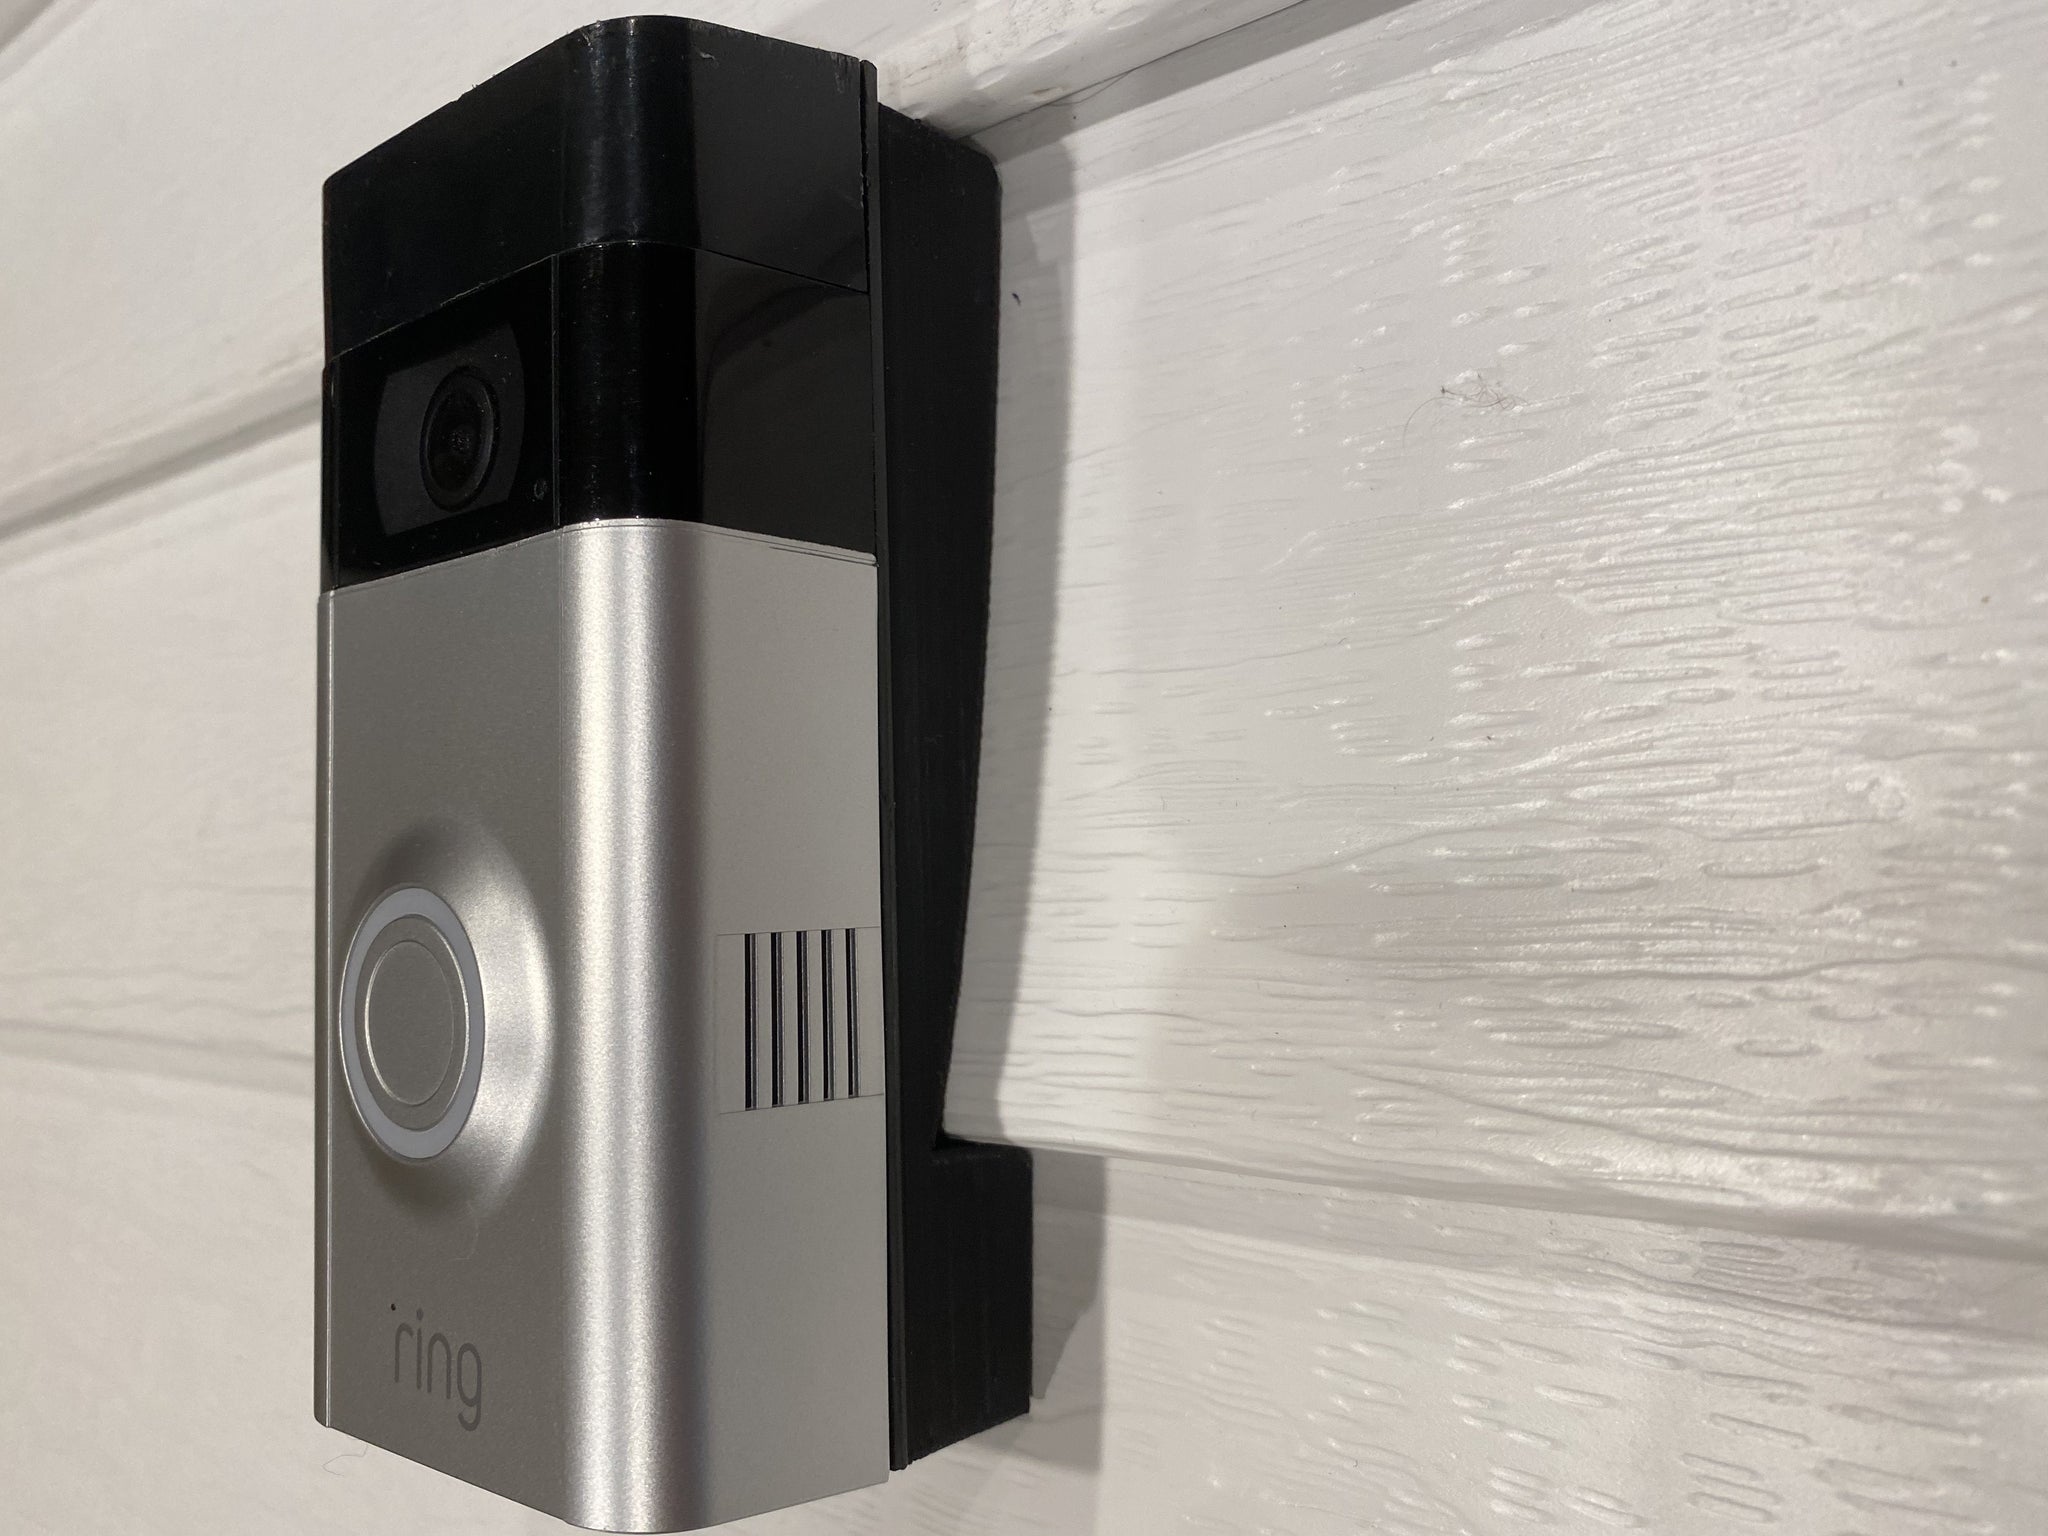
First, take the doorbell unit and hold it near the mounted bracket. Make sure the bottom hooks of the doorbell line up with the bracket slots. The doorbell should sit flat against the siding. Aligning it well helps keep the device steady and ready for use.
Locking Mechanism
Next, press the doorbell firmly against the bracket. You will hear a click sound. This means the locking pins have engaged. The doorbell is now locked in place. This step prevents the unit from falling or being easily removed.
Testing The Fit
After locking the doorbell, gently pull on it to check the fit. It should not move or wiggle. A tight fit means the doorbell is secure. Loose fitting can cause issues with the device’s performance and safety.
Configuring The Doorbell
Configuring your Ring Video Doorbell is the next step after installation. This step ensures your device works smoothly and fits your security needs. Proper setup helps you get alerts quickly and keeps your home safe.
App Setup And Connectivity
Download the Ring app from your phone’s app store. Create an account or log in if you already have one. Follow the app instructions to connect your doorbell to Wi-Fi. Strong Wi-Fi improves video quality and response time. Test the connection by pressing the doorbell button.
Adjusting Motion Settings
Open the app and go to motion settings. Customize the motion zones to focus on important areas. Adjust sensitivity to avoid false alerts from small animals or passing cars. Set a schedule to control when motion alerts are active. This saves battery and prevents unnecessary notifications.
Enabling Notifications
Enable push notifications in the app settings. Choose how you want to receive alerts—phone, email, or both. Turn on sound alerts for immediate awareness. Check notification permissions on your phone to ensure alerts work. This keeps you informed of visitors or unusual activity right away.

Credit: www.amazon.com
Troubleshooting Installation Issues
Installing a Ring Video Doorbell on siding may sometimes bring small problems. These issues can slow down your setup or stop the device from working well. This section helps you fix common installation troubles. Follow these tips to make your Ring doorbell work perfectly on your siding.
Common Mounting Problems
Mounting on siding can be tricky. The surface may be uneven or too soft. This can cause the doorbell to hang loosely or fall off. Use a mounting bracket made for siding. Check if the screws fit well and hold tight. Avoid drilling too deep to prevent damage. Make sure the doorbell sits flat against the siding for a strong hold.
Wi-fi Connectivity Solutions
A strong Wi-Fi signal is key for your Ring doorbell. Weak signals cause delays or lost video. Place your router closer to the doorbell if possible. Remove obstacles like thick walls or metal objects. Use a Wi-Fi extender to boost the signal. Confirm your network password is correct. Restart your router to refresh the connection.
Resetting The Device
Resetting the Ring doorbell can solve many problems. Press and hold the reset button for 15 seconds. The light will blink to show the reset is working. Release the button and wait for the device to restart. After resetting, set up the doorbell again in the Ring app. This often fixes software glitches or connection errors.
Maintenance Tips For Longevity
Maintaining your Ring Video Doorbell installed on siding helps it last longer and work better. Simple care steps keep the device clean and fully charged. Regular updates improve its performance and fix issues. Follow these tips to protect your investment and enjoy smooth operation.
Cleaning The Doorbell
Remove dirt and dust from the doorbell regularly. Use a soft, dry cloth to wipe the surface gently. Avoid harsh cleaners or water sprays that may damage electronics. Clean the camera lens carefully to keep video clear. Check the mounting area for debris that can block sensors or buttons.
Checking Battery Life
Monitor your doorbell’s battery level often. Use the Ring app to check battery status in real-time. Charge the battery before it gets too low to avoid interruption. Remove the battery and clean contacts if charging slows down. A well-charged battery ensures constant security and quick response.
Firmware Updates
Keep your Ring doorbell’s software up to date. Updates fix bugs and improve features for better use. Enable automatic updates in the app for hassle-free maintenance. Check for updates manually if you notice any issues. Updated firmware strengthens device security against threats.
Frequently Asked Questions
How Do I Mount Ring Doorbell On Vinyl Siding?
Use a mounting bracket with weatherproof anchors. Drill holes carefully without damaging siding. Secure the bracket firmly before attaching the doorbell.
Can I Install Ring Doorbell Without Drilling?
Yes, use adhesive mounting plates designed for siding. Ensure the surface is clean and dry for strong adhesion. This method is less secure but prevents siding damage.
What Tools Are Needed For Installation On Siding?
You’ll need a drill, level, screwdriver, anchors, and mounting bracket. A tape measure helps for accurate placement. Safety gear like gloves and goggles is recommended.
How To Protect Siding When Installing Ring Doorbell?
Use proper anchors and avoid over-tightening screws. Pre-drill holes to prevent cracking. Seal around screws with weatherproof caulk to prevent moisture damage.
Conclusion
Installing a Ring Video Doorbell on siding is simple with the right steps. You only need basic tools and some patience. Follow the instructions carefully for a secure fit. Make sure the doorbell works properly before finishing. This setup helps keep your home safe and lets you see visitors anytime.
Enjoy the peace of mind that comes with your new doorbell. Now, your home feels more connected and protected.