
Is your bathroom feeling cluttered or missing that perfect spot to hang your towels? Adding a towel rack is a simple change that can make a big difference.
Not only does it keep your towels organized and within reach, but it also adds a touch of style to your space. You might think installing one is tricky or time-consuming, but it’s easier than you imagine. In this guide, you’ll learn step-by-step how to add a towel rack to your bathroom quickly and confidently.
By the end, you’ll have a neat, functional bathroom upgrade that you’ll love every day. Let’s get started!
Choosing The Right Towel Rack
Choosing the right towel rack is important for both style and function. It helps keep towels dry and organized. The right rack fits your bathroom space and matches your decor. It also supports your daily routine smoothly. Think about your needs and space before buying a towel rack.
Types Of Towel Racks
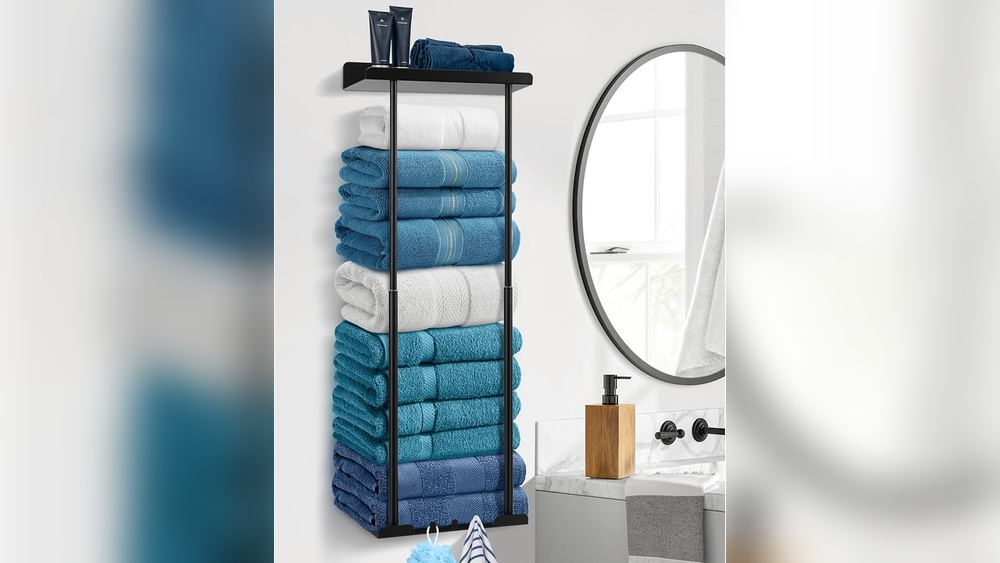
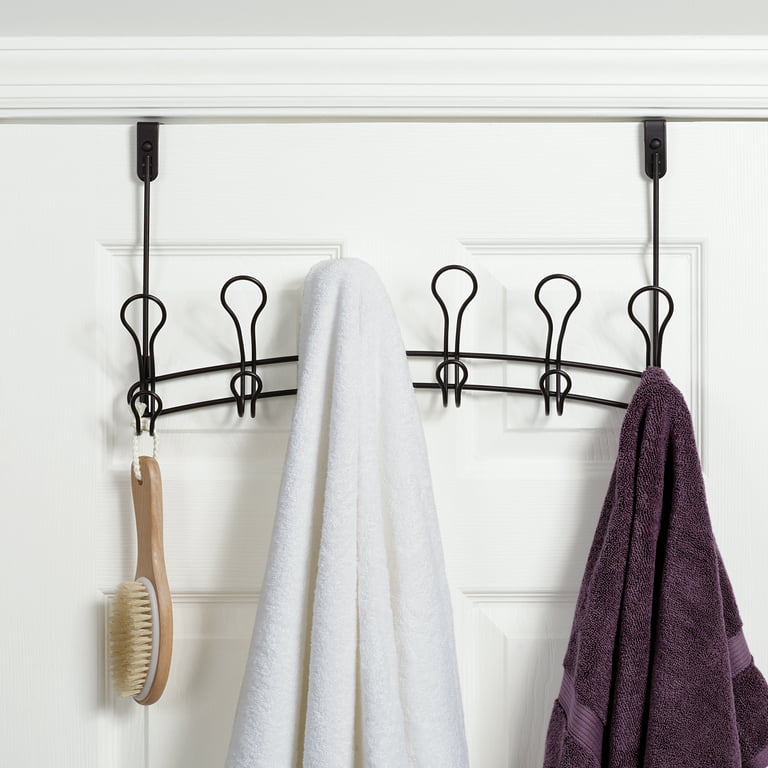
Towel racks come in many styles. Wall-mounted racks save space and keep towels close. Freestanding racks can move and hold more towels. Over-the-door racks are easy to install and remove. Towel bars hold one or two towels well. Towel rings work best for small towels. Choose a type that fits your bathroom size and use.
Materials And Finishes
Towel racks come in different materials. Stainless steel is strong and resists rust. Aluminum is lightweight and affordable. Wood adds warmth and style but needs good care. Plastic racks are cheap and easy to clean. Finishes like chrome, brushed nickel, or bronze affect the look. Pick a finish that matches your bathroom fixtures.
Size And Placement Considerations
Measure your bathroom space before choosing a rack size. A large rack fits multiple towels but needs room. Small racks suit tight spaces or guest bathrooms. Place racks near the shower or sink for easy reach. Avoid spots that block doors or drawers. Mount racks at a height that is easy to reach for all users.

Credit: www.amazon.com
Gathering Necessary Tools
Before starting to install a towel rack, gather all the tools you need. This step helps avoid delays and frustration. Having the right tools makes the job easier and faster. It also ensures a secure and neat installation.
Basic Tools Needed
You will need a drill to make holes in the wall. A screwdriver is essential to fix screws tightly. Use a tape measure to mark the right height and spacing. A pencil helps mark the spots where you will drill. A level keeps the towel rack straight and balanced. Anchors and screws come with the rack or can be bought separately.
Optional Tools For Different Surfaces
For tile walls, use a masonry bit for drilling. A hammer drill works better on concrete or brick walls. Wall anchors designed for heavy loads give extra support on drywall. A stud finder helps locate wooden studs behind drywall. Safety goggles protect your eyes from dust and debris. Masking tape can prevent tiles from cracking while drilling.
Preparing The Installation Area
Preparing the installation area is the first step to adding a towel rack. It helps ensure the rack is secure and looks good. Taking time here saves effort later. Follow these simple steps to get ready.
Selecting The Perfect Spot
Choose a spot near the sink or shower. The rack should be easy to reach. Avoid placing it too close to electrical outlets. Also, check the height. It should fit the average user’s arm length. This makes grabbing towels quick and simple.
Measuring And Marking
Use a tape measure to find the exact spot. Measure twice to avoid mistakes. Mark the points lightly with a pencil. These marks show where to drill holes. Keep the marks level so the rack sits straight. A level tool helps with this step.
Checking Wall Structure
Check if the wall is drywall or tile. Different walls need different tools. Use a stud finder to locate wooden studs. Mounting on studs makes the rack strong. If no studs are found, use wall anchors. These give extra support on drywall. Avoid weak spots or damaged areas.
Credit: www.walmart.com
Step-by-step Installation Guide
Adding a towel rack to your bathroom is simple with the right steps. This guide breaks down the process into easy parts. Follow each step carefully for a strong, neat towel rack. Safety and precision matter for a good result.
Drilling Holes Safely
Start by marking where the towel rack will go. Use a pencil to mark spots for screws. Check behind the wall for pipes or wires. Use a stud finder if available. Wear safety glasses to protect your eyes. Use a drill bit that matches the screw size. Drill slowly and keep the drill steady. Clear dust from holes before moving on.
Mounting Brackets Securely
Line up the brackets with the drilled holes. Insert wall anchors if the wall is drywall. Use a screwdriver to tighten screws firmly. Make sure brackets do not wiggle. Check that brackets are level using a small level tool. Adjust if needed before tightening screws fully. Secure brackets tightly for strong support.
Attaching The Towel Rack
Place the towel rack onto the brackets carefully. Look for screws or clips that hold the rack. Tighten these screws to fix the rack in place. Test the rack by gently pulling on it. It should not move or feel loose. Clean off any pencil marks or dust. Your towel rack is ready for use.
Tips For Stylish Towel Storage
Stylish towel storage makes your bathroom look neat and inviting. It helps keep towels dry and easy to reach. Choosing the right towel rack adds charm and function to your space. Small choices can make a big difference in your bathroom’s style and order.
Consider these tips to keep towels organized and your bathroom looking great.
Coordinating With Bathroom Decor
Pick a towel rack that matches your bathroom’s style. Choose materials like chrome, wood, or matte black to fit your theme. Match the rack’s color with other fixtures like faucets or mirrors. This creates a balanced and unified look. Avoid racks that clash with your decor or stand out too much.
Maximizing Space Efficiency
Use vertical space by installing racks higher on the wall. Choose multi-tier racks to hold more towels in less space. Corner racks make use of unused areas. Keep racks close to the shower or sink for easy access. This keeps your bathroom tidy without crowding it.
Maintaining And Cleaning Your Rack
Clean your towel rack regularly to prevent dust and rust. Use mild soap and a soft cloth for cleaning. Avoid harsh chemicals that can damage finishes. Dry the rack after cleaning to stop water spots. Regular care keeps your rack looking new and strong.
Credit: kitchencabinetkings.com
Frequently Asked Questions
How Do I Choose The Right Towel Rack Size?
Measure your bathroom wall space before buying. Choose a rack that fits comfortably and holds your towels. Consider the number of towels you usually hang to ensure sufficient space.
What Tools Are Needed To Install A Towel Rack?
You’ll need a drill, screwdriver, level, measuring tape, and wall anchors. These tools help ensure a secure and straight installation of your towel rack.
Can I Install A Towel Rack On Tile Walls?
Yes, use a drill with a masonry bit to make holes in tile. Use wall anchors designed for tile to secure the towel rack safely.
How High Should I Mount A Towel Rack?
Mount the towel rack about 48 inches from the floor. This height is convenient for most users and keeps towels within easy reach.
Conclusion
Adding a towel rack to your bathroom is simple and useful. It helps keep towels dry and the space neat. Choose the right spot and tools before you start. Measure carefully to place the rack evenly on the wall. Screw the rack firmly so it holds weight well.
This small change can improve your bathroom’s look and function. Try it yourself and enjoy the neat, fresh feel every day. A tidy bathroom feels nice and works better.