
Looking to organize your towels without cluttering your bathroom? Learning how to assemble a multi towel rack is easier than you think—and it can completely transform your space.
Imagine having a neat, stylish spot for every towel, ready whenever you need it. In this guide, you’ll discover simple steps that save you time and frustration, making your bathroom look cleaner and feel more comfortable. Keep reading, and by the end, you’ll have the confidence to put together your own towel rack like a pro.
Tools And Materials Needed
Gathering the right tools and materials makes assembling a multi towel rack easier. Being prepared helps avoid delays and frustration. It also ensures the rack is sturdy and safe to use.
Essential Tools
Start with a drill to make holes in the wall. Use a screwdriver to tighten screws securely. A measuring tape helps mark the correct height and spacing. A level keeps the rack straight and balanced. Pencil marks the drill spots clearly. Stud finder locates wall studs for stronger mounting. Safety glasses protect your eyes from dust and debris.
Rack Components
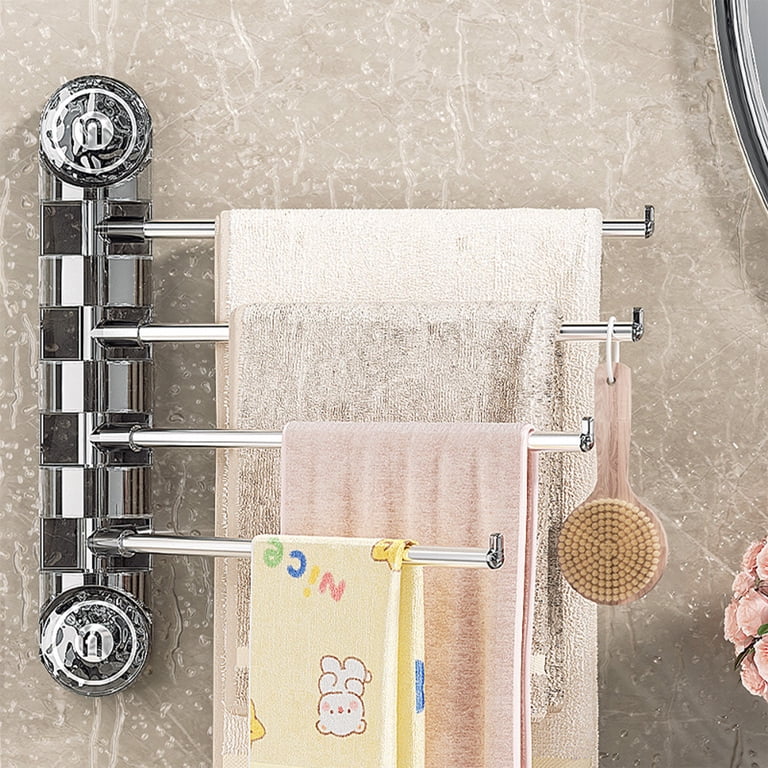
The rack usually comes with metal or wooden bars to hold towels. Look for mounting brackets that support the rack firmly. Screws and wall anchors are included for attaching the rack. Some racks have end caps or decorative covers. Check all parts before starting assembly. Missing pieces can cause problems later.
Credit: www.walmart.com
Choosing The Right Location
Choosing the right location for your multi towel rack is important. It affects how useful and sturdy the rack will be. Picking a good spot helps your towels dry faster and keeps your space tidy. Think about where you use towels most and where the rack will fit best.
Wall Type Considerations
Check what type of wall you have before installation. Drywall, tile, and plaster walls need different tools and anchors. Use strong anchors for heavy towel racks. Avoid weak walls that cannot hold weight well. Solid walls give better support and safety for your rack.
Optimal Height And Spacing
Place the rack at a height easy to reach for all users. Usually, 48 to 52 inches from the floor works well. Leave enough space between bars to let towels dry quickly. Avoid putting bars too close to stop damp towels from touching. Good spacing helps keep towels fresh longer.
Preparing The Wall
Preparing the wall is a key step before installing a multi towel rack. A strong and stable wall ensures the rack holds well and stays safe. This process includes marking exact points to drill and choosing the right anchors or studs. Taking time here makes the assembly easier and the rack more secure.
Marking Drill Points
Start by holding the towel rack against the wall. Use a pencil to mark where the screws will go. Check that the rack is level to avoid a crooked installation. Measure twice to confirm the marks are even. These points guide where you will drill holes. Accurate marks help the rack fit perfectly and stay steady.
Using Anchors And Studs
Find wall studs behind the drywall with a stud finder. Screwing into studs gives strong support for heavy racks. If no studs align with your marks, use wall anchors. Anchors expand inside the wall to hold screws tightly. Choose anchors based on your wall type and rack weight. Proper anchors or studs prevent the rack from falling or loosening over time.

Credit: www.amazon.com
Assembling The Rack Frame
Assembling the rack frame is the first step in building your multi towel rack. It creates the strong base that holds the towels. A well-built frame keeps the rack stable and long-lasting. Follow these simple steps to put the frame together quickly and safely.
Connecting Parts
Start by laying out all frame parts on a flat surface. Match each piece with the instructions or labels. Align holes and edges carefully before joining. Use the connectors provided, such as brackets or slots. Push or slide parts together until they fit snugly. Avoid forcing parts, which can damage the frame.
Securing Screws
Once parts connect, fasten them with screws. Use a screwdriver or drill for quick work. Tighten screws firmly but not too tight. Over-tightening can strip the threads or crack the frame. Check all screws to ensure the frame is solid and stable. Loose screws weaken the rack and cause wobbling.
Mounting The Rack
Mounting the multi towel rack is a key step. Proper mounting keeps the rack strong and steady. It also ensures the towels stay organized and easy to reach.
Follow the steps carefully. Use the right tools and take your time. This will help avoid mistakes and make your rack last longer.
Aligning With Markings
Start by holding the rack against the wall. Use a pencil to mark the screw holes. Check the marks with a level tool. Make sure the marks are straight and even. This step sets the base for a secure mount.
Drilling And Fixing
Choose the right drill bit for your wall type. Drill holes where you made the marks. Insert wall plugs if needed for extra support. Place the rack and screw it in tightly. Double-check the rack is firm and does not wobble.
Credit: www.walmart.com
Final Adjustments
Final adjustments are key to making your multi towel rack safe and useful. This step ensures the rack stands firm and looks clean. Small tweaks can improve its function and lifespan. Take your time to finish these details well.
Checking Stability
Start by gently shaking the towel rack. It should not wobble or tilt. Tighten any loose screws or bolts. Make sure all parts fit snugly. A stable rack holds towels without falling or bending. Test each bar to confirm it stays in place. A firm rack keeps towels organized and easy to reach.
Cleaning And Maintenance Tips
Wipe the rack with a soft, damp cloth to remove dust. Avoid harsh cleaners that can damage the finish. Dry the rack well to stop rust or water spots. Regularly check screws and joints for tightness. Clean the rack often to keep it looking new. Proper care extends the life of your towel rack.
Frequently Asked Questions
How Do I Start Assembling A Multi Towel Rack?
Begin by unpacking all parts and checking the instruction manual. Gather necessary tools like a screwdriver and drill. Identify wall studs for secure mounting. Follow step-by-step instructions carefully to ensure proper assembly and stability.
What Tools Are Needed For Towel Rack Assembly?
You typically need a screwdriver, drill, level, measuring tape, and wall anchors. These tools help secure the rack firmly and align it correctly on the wall. Having the right tools ensures a smooth and safe installation process.
How To Mount A Multi Towel Rack On Drywall?
Locate wall studs using a stud finder. If studs are unavailable, use heavy-duty wall anchors. Mark mounting holes precisely, drill pilot holes, then secure the rack with screws. This ensures the rack holds weight without damaging the drywall.
Can I Assemble A Towel Rack Without Professional Help?
Yes, most multi towel racks come with clear instructions and require basic tools. With patience and careful following of steps, you can easily assemble and install it yourself. This saves cost and offers a rewarding DIY experience.
Conclusion
Assembling a multi towel rack can be simple and quick. Follow each step carefully and take your time. Use the right tools to make the job easier. Check that all parts fit well before fixing them. A sturdy towel rack keeps towels neat and dry.
Enjoy your organized bathroom space every day. This project adds both function and style to your home. Keep your towels within easy reach and off the floor. With patience and care, you will finish successfully. Ready to hang your towels with ease?