Your bathroom should be a place of comfort and safety, no matter your abilities. If you or a loved one have mobility challenges, designing a bathroom that truly meets your needs is essential.
Imagine a space where wide doorways welcome you in, a curbless shower lets you move freely, and grab bars offer support exactly where you need it. With simple, thoughtful design choices like these, your bathroom can become a sanctuary that empowers independence and ease every day.
Ready to discover how to create a bathroom for disabled design that fits your lifestyle perfectly? Let’s explore practical ideas and must-have features that transform your space into one that works for you.
Wide Doorways And Clear Entry
Wide doorways and clear entry points are essential in bathrooms designed for disabled users. These features ensure easy access and smooth movement for people using wheelchairs or walkers. Proper design reduces barriers and creates a safer environment. It also adds comfort and independence for users.
Standard Door Widths For Accessibility
Accessible bathrooms need wider doorways than regular ones. The minimum recommended width is 32 inches. This allows most wheelchairs to pass through easily. Some designs use 36 inches for extra comfort. Wider doors prevent users from struggling to enter or exit the bathroom. This simple change improves usability greatly.
Benefits Of Curbless Entries
Curbless entries eliminate steps or raised edges at the doorway. This design makes entry seamless and safe. It prevents tripping hazards and eases movement for wheelchairs. Curbless showers are popular for accessible bathrooms. They allow users to enter without help. This feature supports independence and reduces accidents.
Non-slip Flooring Options
Non-slip flooring is critical in disabled bathrooms. Wet floors can cause dangerous falls. Materials like textured tiles or rubber mats increase grip. These surfaces help users maintain balance. Non-slip floors offer safety without sacrificing style. Choosing the right flooring completes an accessible bathroom design.
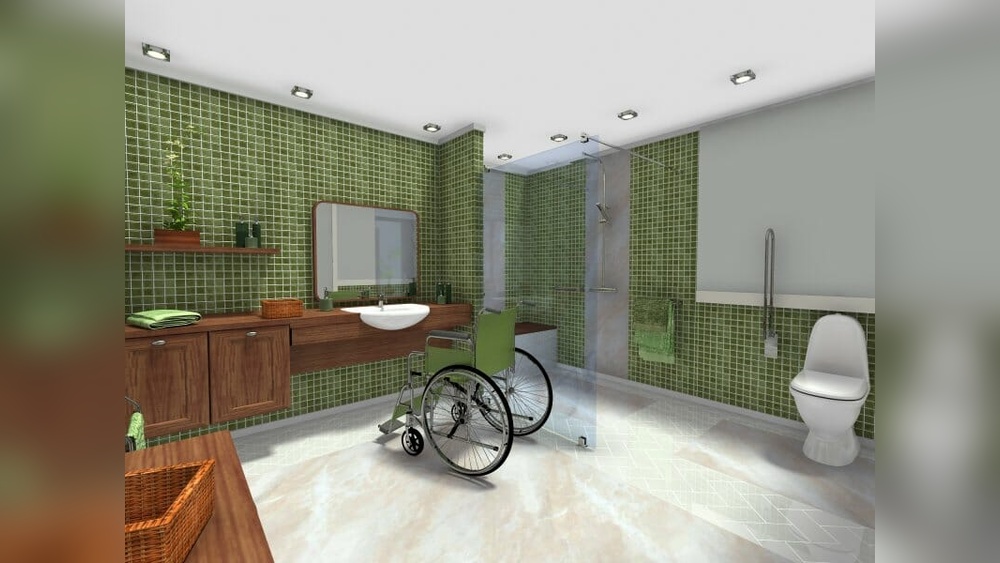
Credit: liveinplacedesigns.com
Spacious Layout And Turning Radius
A spacious bathroom layout is crucial for disabled design. It allows easy movement and reduces stress. The turning radius lets wheelchair users rotate comfortably. Proper space planning improves safety and independence. Thoughtful design avoids cramped areas and tight corners.
Minimum Space For Wheelchair Maneuvering
The minimum turning radius for a wheelchair is 60 inches (about 5 feet). This space lets users spin and change direction without difficulty. The bathroom should have at least a 5-foot clear circle. This area must be free of furniture and fixtures. Meeting this requirement helps prevent accidents and frustration.
Optimizing Bathroom Flow
Arrange fixtures logically for smooth movement. Place the toilet, sink, and shower in a way that minimizes travel distance. Keep pathways at least 36 inches wide to allow easy access. Avoid sharp turns or narrow spots that block movement. Clear flow supports independence and comfort.
Avoiding Obstacles And Clutter
Remove unnecessary items that block paths. Store toiletries and cleaning supplies out of the way. Use wall-mounted shelves or cabinets to save floor space. Keep floors clear of rugs or mats that may cause tripping. A tidy bathroom improves safety and ease of use.
Accessible Shower Designs
Accessible shower designs create safe, comfortable spaces for people with disabilities. These showers focus on ease of use and independence. Thoughtful features help prevent slips and falls. They also make bathing less stressful and more dignified.
Proper design improves daily routines and overall bathroom experience. Accessibility does not mean sacrificing style or comfort. Many modern solutions blend function with appealing looks.
Walk-in Showers Without Steps
Walk-in showers without steps remove barriers to entry. They allow wheelchairs and walkers to enter easily. A smooth, level floor reduces tripping risks. Wide doorways improve access for all users. Non-slip flooring adds extra safety in wet conditions. This design supports freedom and confidence during bathing.
Installing Grab Bars Safely
Grab bars provide crucial support in showers. Position them where users need balance and assistance. Secure installation into wall studs ensures strength and durability. Choose bars with a comfortable grip and rust-resistant finish. Proper height and spacing improve ease of use. Grab bars reduce falls and increase independence.
Handheld Showerheads And Controls
Handheld showerheads offer flexibility and control. They let users direct water flow where needed. Easy-to-reach controls simplify temperature and pressure adjustments. Lever-style handles work well for limited hand strength. Adjustable height mounts accommodate different users. These features enhance comfort and convenience for everyone.
Toilet Accessibility Features
Toilet accessibility features play a key role in designing bathrooms for disabled users. These features improve safety and comfort. They also help maintain independence for people with mobility challenges.
Careful selection of toilet height and placement supports ease of use. Safety equipment like support rails adds stability. Adequate space around the toilet allows freedom of movement and wheelchair access.
Choosing Higher Toilets
Higher toilets reduce the effort needed to sit and stand. They help users with weak legs or balance problems. Standard toilets are often too low for many disabled users.
Choosing a toilet height of 17 to 19 inches is ideal. This height meets many accessibility standards. Comfort and safety improve when the user does not have to bend too far.
Support Rails And Safety
Support rails offer essential stability near the toilet. They help prevent falls and provide a strong grip. Rails should be installed on both sides of the toilet when possible.
Materials should be sturdy and easy to clean. Position rails at a height that matches the user’s needs. Well-placed rails make transfers easier and safer.
Space Around The Toilet
Space around the toilet must allow wheelchair access and turning. A clear area at least 60 inches wide is recommended. This space avoids crowding and ensures smooth movement.
Extra room also helps caregivers assist users if needed. Avoid placing cabinets or fixtures too close. Open space improves comfort and reduces accidents.
Sink And Vanity Adaptations
The sink and vanity area is a key part of a bathroom designed for disabled users. Proper adaptations improve comfort and independence. Thoughtful design helps users access the sink with ease.
Many elements need adjustment. These include space, fixtures, and lighting. The goal is to create a safe and functional space for all users.
Clear Knee Space Underneath
A clear knee space below the sink allows wheelchair users to get close. This space should be at least 27 inches high and 30 inches wide. It removes barriers and makes washing hands easier. Avoid cabinets or obstacles that block legroom under the sink.
Lever-style Faucets
Lever-style faucets require less strength and dexterity. They are easier to use than traditional knobs. Users can operate them with a closed fist, elbow, or wrist. Choose faucets with smooth, slow movements to prevent splashing. Touchless options add extra convenience and hygiene.
Mirror Placement And Lighting
Mirrors should be placed low enough for seated users to see their reflection. Tilted or angled mirrors work well in these setups. Good lighting reduces shadows and improves visibility. Use bright, soft lights near the mirror to avoid glare. Proper mirror and light placement enhance daily grooming tasks.
Additional Safety Elements
Safety is key in a bathroom designed for disabled users. Adding extra safety features helps prevent accidents and supports independence. Thoughtful details create a secure and comfortable space for everyone.
Proper Lighting And Contrast
Bright, even lighting reduces shadows and glare. It helps users see clearly and avoid obstacles. Use light switches at reachable heights and consider motion sensors for ease. Contrast between walls, floors, and fixtures improves depth perception. Dark-colored grab bars against light walls stand out well. This contrast guides users safely around the room.
Emergency Call Systems
Emergency call systems give users peace of mind. They allow quick requests for help if needed. Install pull cords or buttons near the toilet and shower. Choose systems with clear audio or visual signals. Make sure they connect to a caregiver or family member. Testing these regularly ensures they function properly.
Slip-resistant Mats And Accessories
Slip-resistant mats reduce fall risks on wet floors. Place them inside and outside the shower or bathtub. Use mats with strong grip and quick drainage. Grab bars with textured grips add extra security. Avoid loose rugs or slippery surfaces. These simple tools create a safer bathroom environment.
Material Choices And Finishes
Choosing the right materials and finishes is crucial in designing a bathroom for disabled users. Materials must support safety, comfort, and hygiene. Surfaces should be strong and simple to clean. Finishes need to reduce slip risks and resist wear. Thoughtful material choices improve usability and maintain a fresh look over time.
Durable And Easy-to-clean Surfaces
Durability is key for bathroom surfaces. Tiles, solid surface countertops, and acrylic materials work well. These resist scratches and cracks. Smooth finishes prevent dirt buildup and make cleaning fast. Avoid porous materials that can trap moisture and germs. Easy-to-clean surfaces help maintain hygiene and reduce maintenance time.
Anti-microbial Materials
Anti-microbial materials reduce bacteria and mold growth. Copper and silver-infused surfaces offer natural protection. Some plastics and coatings have built-in antimicrobial properties. These materials support a healthier bathroom environment. They are especially important in high-touch areas like grab bars and faucets.
Color Contrast For Visibility
Color contrast improves visibility and safety. Use different colors for walls, floors, and fixtures. Contrasting colors help users with low vision identify edges and objects. For example, dark grab bars on light walls stand out clearly. Good contrast reduces accidents and increases confidence in moving around.
.jpg?auto=compress%2Cformat&cs=strip&ixlib=php-1.1.0&s=8a57f0d15597505c17c4f5968b7ff940)
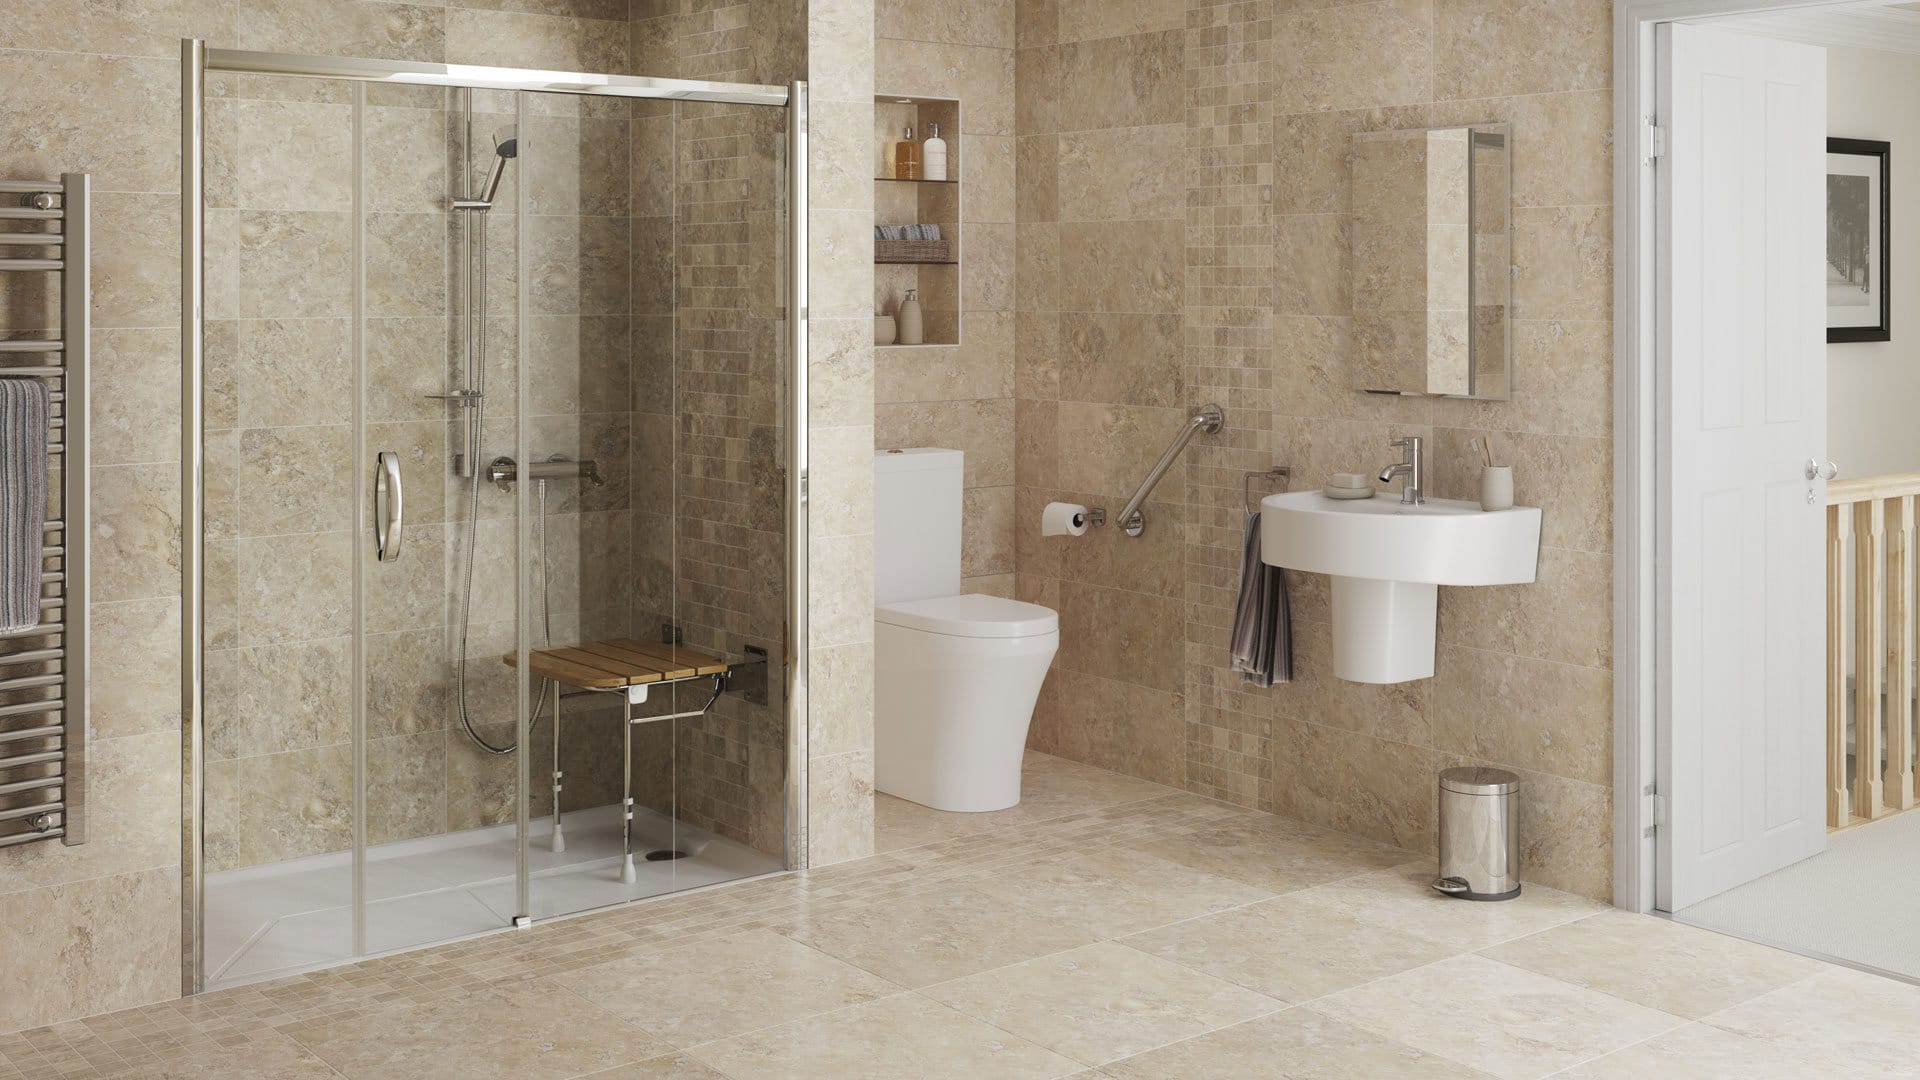
Credit: www.moreability.co.uk
Smart Technology Integration
Smart technology integration makes bathrooms more accessible and comfortable for people with disabilities. It simplifies daily tasks and enhances safety. These technologies reduce the need for physical effort and improve independence.
Voice-activated Controls
Voice-activated controls allow users to manage bathroom features without touching switches. They can turn on lights, adjust water temperature, or flush the toilet using simple voice commands. This technology helps users with limited hand mobility control their environment easily.
Automated Fixtures
Automated fixtures include toilets, faucets, and showers that operate without manual effort. Sensors detect user presence and activate the fixture automatically. These fixtures provide a hygienic and convenient experience, reducing the risk of accidents and spills.
Motion Sensor Lighting
Motion sensor lighting turns lights on and off based on movement. It ensures the bathroom is always well-lit when needed, preventing falls and injuries. This lighting saves energy and removes the need to find switches in the dark.
Customization For Individual Needs
Bathrooms designed for disabled users must meet unique needs. Customizing each bathroom ensures comfort and safety. Personal preferences and mobility requirements vary widely. Tailoring the design helps users feel independent and secure. Thoughtful customization improves daily routines and quality of life.
Adjustable Fixtures
Fixtures that adjust in height and position support different abilities. Adjustable sinks, showerheads, and toilets allow easy access. Users can change settings to suit their comfort. This flexibility reduces strain and risk of injury. Adjustable fixtures create a more user-friendly bathroom.
Personalized Layouts
Layouts must consider wheelchair space and movement. Clear pathways prevent accidents and make navigation simple. Fixtures placed at reachable heights improve usability. Custom layouts also include grab bars where needed. Each design reflects the user’s daily habits and mobility.
Consulting With Accessibility Experts
Experts understand legal standards and practical needs. They recommend the best fixtures and layout options. Consulting professionals avoids costly mistakes and ensures compliance. Experts tailor solutions to individual challenges and home specifics. Their guidance leads to safer, more comfortable bathrooms.
Compliance With Accessibility Standards
Compliance with accessibility standards is essential in designing bathrooms for disabled users. These standards ensure safety, comfort, and independence. Following the right guidelines makes bathrooms usable for everyone. It also helps avoid costly redesigns and legal issues. Understanding the rules and requirements simplifies the design process.
Key Ada Guidelines
The Americans with Disabilities Act (ADA) sets clear rules for accessible bathrooms. It requires enough space for wheelchair movement. Grab bars must be installed near toilets and showers. Sinks should be at a height that wheelchair users can reach. Doors must be wide and easy to open. These guidelines focus on safety and ease of use.
Local Building Codes
Local building codes may have extra rules beyond the ADA. They vary by city and state. Austin, Texas, for example, may require specific fixtures or measurements. Checking these codes early avoids delays in construction. Always confirm local requirements with building authorities. This step ensures full compliance and smooth project approval.
Certification And Inspection Tips
After installation, certification confirms the bathroom meets all standards. Inspections check measurements, fixture placement, and safety features. Prepare by reviewing the checklist beforehand. Keep documentation of all materials and designs used. Fix any issues found during inspections quickly. Certification gives confidence that the bathroom is safe and accessible.
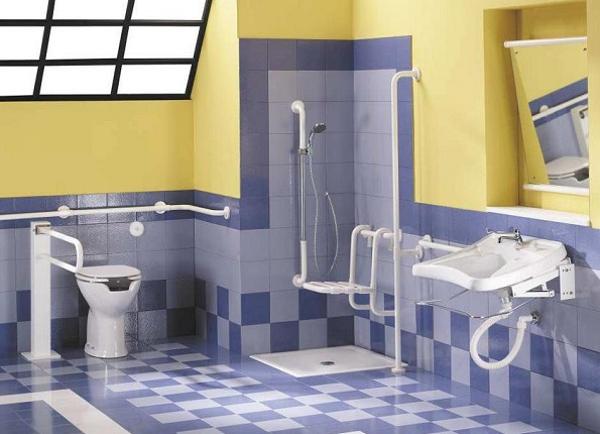
Credit: www.lushome.com
Frequently Asked Questions
How To Design A Bathroom For A Disabled Person?
Design a disabled bathroom by installing grab bars, a roll-in shower, non-slip flooring, and a wheelchair-accessible sink and toilet. Ensure ample space for maneuvering and easy-to-reach controls. Use lever handles and proper lighting for safety and convenience.
Does Medicare Pay For A Handicap Bathroom Remodel?
Medicare usually does not cover handicap bathroom remodels. Coverage may apply only if medically necessary durable equipment is involved.
How Much Does It Cost To Install A Handicap Bathroom?
Installing a handicap bathroom typically costs between $5,000 and $15,000. Price varies by size, features, and location.
What Does An Ada-compliant Bathroom Look Like?
An ADA-compliant bathroom features wide doorways, grab bars, accessible sinks, roll-in showers, and enough space for wheelchair maneuvering.
Conclusion
Designing a bathroom for disabled users ensures safety and comfort daily. Simple changes can make a big difference in accessibility. Thoughtful layouts help users move freely without struggle. Installing grab bars and non-slip floors improves stability and confidence. Bright lighting and easy-to-reach fixtures support independence.
Everyone deserves a bathroom that feels safe and welcoming. Prioritize accessibility to enhance quality of life at home. Small adjustments create a more inclusive and user-friendly space. Embrace these design ideas to build a bathroom that works for all.