Are you ready to boost your home security with the Ring Video Doorbell 3? Installing this smart device may seem tricky, but with the right steps, you can have it up and running quickly.
Imagine knowing exactly who’s at your door, even when you’re not home. This guide will walk you through each part of the installation process, making it simple and stress-free. Keep reading, and by the end, you’ll have your Ring Video Doorbell 3 working perfectly to keep your home safe and connected.
Preparing For Installation
Preparing for installation is the first step to set up your Ring Video Doorbell 3. This stage helps you avoid problems and saves time. You will gather everything needed, check if the doorbell fits your home, and make sure the battery is ready.
Tools And Materials Needed
Gather basic tools before you start. You will need a drill, a screwdriver, and a level. Have the screws and anchors from the Ring package ready. A ladder might be necessary if your doorbell goes high up. Keep your smartphone nearby to connect the doorbell to the app.
Checking Compatibility
Check if your home supports the Ring Doorbell 3. It works with most door frames and walls. Make sure your Wi-Fi signal is strong near your door. The doorbell needs 2.4 GHz or 5 GHz Wi-Fi to work well. Confirm your existing doorbell wires if you want to connect them.
Charging The Doorbell Battery
Charge the battery fully before installation. The battery comes inside the doorbell box. Use the included USB cable to charge it. A full charge takes about 5 hours. A fully charged battery lasts for months. Charging first avoids interruptions during setup.

Credit: www.youtube.com
Removing The Old Doorbell
Removing the old doorbell is the first step to install your new Ring Video Doorbell 3. This process requires care and attention to avoid damage or injury. Follow each step carefully to make the process safe and smooth.
Turning Off Power
Start by turning off the power to your doorbell at the circuit breaker. This step is very important for your safety. Do not skip it. Use a voltage tester to confirm the power is off before touching any wires.
Detaching Existing Doorbell
Remove the screws that hold your old doorbell in place. Gently pull the doorbell away from the wall. Keep the wires connected for now. Place the old doorbell somewhere safe to avoid losing parts.
Handling Wiring Safely
Handle the wires with care. Do not touch the exposed wire ends together. Wrap the wire tips with electrical tape to prevent short circuits. If the wires are stuck, use a screwdriver to loosen them gently.
Installing The Ring Video Doorbell 3
Installing the Ring Video Doorbell 3 is a simple process anyone can follow. This smart doorbell helps you see visitors and talk to them from anywhere. The installation involves three key steps: mounting the bracket, connecting the wires, and attaching the doorbell unit. Each step is quick and easy with the right tools and instructions.
Mounting The Bracket
Start by choosing the best spot near your door. Use the included screws to fix the mounting bracket on the wall. Make sure the bracket is level so the doorbell works properly. If you have brick or stucco walls, use the supplied anchors. This will keep the bracket secure and stable.
Connecting The Wires
Turn off power at the breaker before handling wires. Connect the existing doorbell wires to the screws on the back of the bracket. Tighten the screws to hold the wires firmly. If you do not have wires, you can use the Ring Video Doorbell 3 in battery mode. Double-check all connections before moving to the next step.
Attaching The Doorbell Unit
Place the doorbell unit onto the mounted bracket. Press it firmly until you hear a click. Use the small security screws to lock the unit in place. This prevents theft and keeps the doorbell safe. Turn the power back on and follow the app instructions to finish setup.
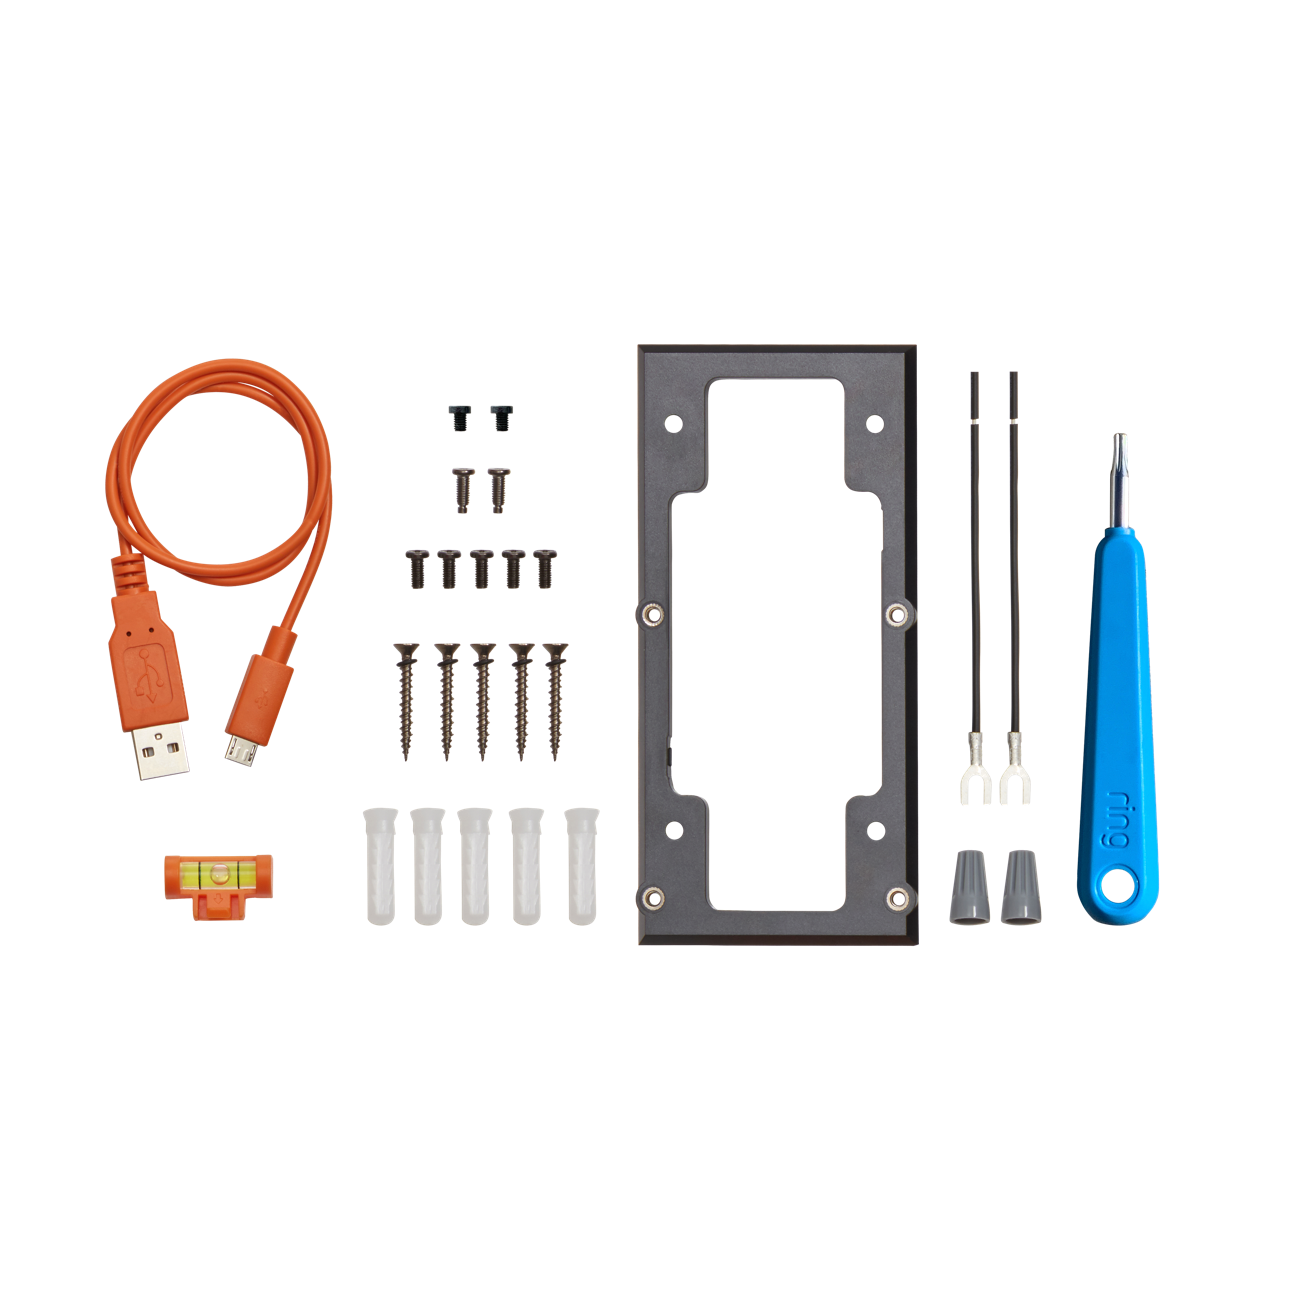
Credit: ring.com
Setting Up The Device
Setting up the Ring Video Doorbell 3 is simple and quick. Follow these steps to get your device ready for use. Make sure your phone is nearby. The process involves downloading the app, creating an account, and connecting your device to Wi-Fi.
Downloading The Ring App
First, download the Ring app on your smartphone. Visit the App Store for iPhones or Google Play for Android phones. Search for “Ring” and tap the download button. The app is free and easy to install. It lets you control your doorbell and view live video.
Creating An Account
Open the Ring app after installation. Tap “Create Account” to start. Enter your email address and choose a strong password. Follow the prompts to enter your name and phone number. This account will connect your device to the app. It also helps keep your home secure.
Connecting To Wi-fi
Next, connect your Ring Doorbell 3 to Wi-Fi. The app will guide you through this step. Choose your home Wi-Fi network from the list. Enter your Wi-Fi password carefully. Your doorbell needs a strong, stable connection to work well. Wait for the app to confirm the connection.
Testing And Adjustments
After installing your Ring Video Doorbell 3, testing and adjustments are essential. They help ensure your doorbell works perfectly. This step guarantees clear video, crisp audio, and accurate motion alerts. Take time to fine-tune the settings for the best experience.
Checking Video And Audio
Start by opening the Ring app on your smartphone. View the live video feed from your doorbell. Check the video clarity and brightness. Speak near the doorbell to test audio quality. Listen to the speaker on your phone. Adjust the volume if needed for clear sound.
Adjusting Motion Settings
Go to the motion settings in the Ring app. Set the motion sensitivity to avoid false alerts. Create motion zones to focus on specific areas. This helps reduce unnecessary notifications. Test the motion detection by walking near the doorbell. Adjust settings until you get accurate alerts.
Securing The Doorbell
Ensure the doorbell is tightly mounted to the wall. Use the provided screws and security tools. Check if the doorbell feels stable and does not move. A secure doorbell prevents theft and damage. Tighten the screws if you notice any wobble.

Credit: www.amazon.com
Troubleshooting Tips
Installing the Ring Video Doorbell 3 is usually simple. Yet, some issues may arise during setup. Troubleshooting helps fix these problems quickly. This section guides you through common issues and easy fixes. Follow these tips to get your doorbell working smoothly.
Common Installation Issues
Sometimes, the doorbell does not fit well on the wall. Check the mounting bracket and screws. Make sure they are tight and aligned. Use the right tools for a secure fit. The doorbell might not detect the button press. Clean the button area to remove dirt or dust. Restart the device to refresh its system.
Connectivity Problems
The Ring Doorbell needs a strong Wi-Fi signal. Place your router closer to the doorbell if the signal is weak. Avoid obstacles like thick walls or metal objects. Use the Ring app to test the Wi-Fi strength. Restart your router if the connection is unstable. Keep your doorbell’s firmware updated for better performance.
Battery And Power Solutions
Low battery can stop your doorbell from working. Check the battery level in the Ring app. Charge the battery fully before installing. Remove the battery and plug it into a charger if needed. Use a wired connection if available for constant power. Replace the battery if it no longer holds charge well.
Frequently Asked Questions
How Do I Install Ring Video Doorbell 3 Step-by-step?
Start by charging the battery fully. Attach the mounting bracket using screws. Connect the doorbell to Wi-Fi, then snap it onto the bracket. Use the Ring app to complete setup and customize settings.
What Tools Are Needed For Installing Ring Video Doorbell 3?
You’ll need a drill, screwdriver, level, and the included screws. A smartphone with the Ring app is essential for setup and configuration.
Can I Install Ring Video Doorbell 3 Without Existing Doorbell Wiring?
Yes, it works on battery power alone. You can install it without wiring by charging the battery and mounting the device wirelessly.
How Do I Connect Ring Video Doorbell 3 To Wi-fi?
Open the Ring app, select your device, and follow prompts to join your home Wi-Fi network. Ensure a strong signal for optimal performance.
Conclusion
Installing the Ring Video Doorbell 3 is simple and quick. Follow the steps carefully to avoid mistakes. Make sure your Wi-Fi works well for smooth setup. Test the doorbell to confirm it sends alerts properly. Enjoy feeling safer with your new video doorbell.
Stay aware of visitors anytime, from anywhere. This device adds convenience and peace of mind. Keep your home secure with easy technology. Give yourself confidence in your home’s safety.