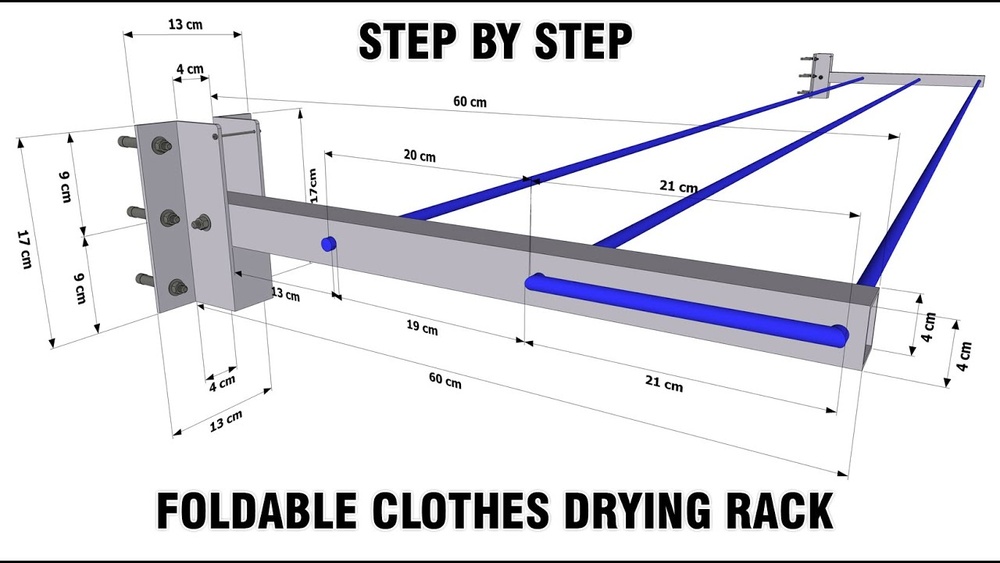

Are you tired of towels taking forever to dry and cluttering your bathroom? Imagine having a simple, space-saving solution that lets your towels dry faster and keeps your space neat.
Making your own folding towel drying rack is easier than you think. In this guide, you’ll discover step-by-step how to create a practical rack that folds away when you don’t need it. Keep reading, and you’ll soon enjoy fresh, dry towels without the mess or hassle.
Materials Needed
Gathering the right materials is the first step to build a folding towel drying rack. Using good materials makes the rack strong and long-lasting. This section lists all tools and supplies needed.
Wooden Dowels
Wooden dowels form the main frame and bars of the rack. Choose smooth, sturdy dowels about 1 inch in diameter. They hold towels well and can support weight.
Hinges
Small metal hinges connect the frame parts. Hinges allow the rack to fold flat. Pick hinges that fit the dowel size and move easily.
Screws And Nails
Use short screws and nails to attach hinges and secure parts. Make sure screws are rust-resistant to last in humid spaces.
Wood Glue
Wood glue strengthens joints and holds pieces together firmly. It adds durability without adding weight.
Sandpaper
Sandpaper smooths rough edges and surfaces on the wood. It prevents splinters and gives a neat finish.
Wood Finish Or Paint
Applying wood finish or paint protects the wood from moisture. Choose a finish safe for indoor use and easy to clean.
Measuring Tape And Pencil
Measuring tape helps cut dowels to exact length. A pencil marks where to cut and place hinges.
Hand Saw Or Cutting Tool
A hand saw cuts the wooden dowels to size. Use a tool that provides straight, clean cuts.
Tools Required
Basic tools like a saw, drill, screws, and measuring tape are needed. A screwdriver and sandpaper will help with assembly and finishing. Simple materials make the project easy to complete.
Basic Hand Tools
Start with simple hand tools for easy handling. A hammer is necessary for nailing parts together. Use a screwdriver to tighten screws securely. A measuring tape helps get the right sizes. A saw cuts wood pieces to length. These tools are common and easy to use.
Power Tools
A drill speeds up making holes for screws. It makes assembly faster and more precise. Sanding tools smooth rough edges for safety. These tools save time and improve quality. Use them carefully and follow safety rules.
Safety Equipment
Wear safety glasses to protect your eyes. Gloves prevent splinters and cuts on hands. Use ear protection when using loud power tools. Safety gear keeps you safe during the project. Never skip this step for your well-being.
Materials And Accessories
Gather wood pieces, nails, screws, and hinges. Hinges allow the rack to fold easily. Choose quality materials for durability and strength. Proper materials ensure your rack lasts long. Keep everything ready before starting the build.
Choosing The Right Wood
Choosing the right wood is important for making a folding towel drying rack. The wood must be strong enough to hold wet towels. It should also resist water and not bend or break easily. Picking the correct wood ensures your rack lasts a long time and works well every day.
Some woods are better for drying racks because they handle moisture well. Others are soft and may get damaged quickly. Knowing the types of wood helps you pick the best one for your project.
Hardwood Vs. Softwood
Hardwood is strong and durable. It lasts longer under weight and moisture. Examples include oak, maple, and teak. Softwood is lighter and easier to cut. Pine and cedar are common softwoods. Hardwood usually costs more but is more reliable for a drying rack.
Water Resistance
Wood that resists water stays dry and lasts longer. Teak and cedar have natural oils that protect against water. Pine can absorb water and may swell or rot. Choosing water-resistant wood reduces damage and keeps your rack sturdy.
Weight And Portability
A folding rack should be easy to move. Heavy wood can make it hard to carry. Softwoods are lighter but less durable. Find a balance between weight and strength. This makes your drying rack both strong and easy to fold.
Cost And Availability
Wood price varies by type and location. Hardwood is often more expensive and less common. Softwood is cheaper and easier to find. Choose wood that fits your budget but still meets strength needs. This keeps your project affordable.
Cutting The Pieces
Cutting the pieces is the first step in building your folding towel drying rack. Precise cuts help the rack fit together perfectly. Use the right tools and measure carefully to avoid mistakes.
Prepare your workspace with enough light and a flat surface. Safety is important, so wear goggles and gloves before starting. Mark the wood clearly using a pencil and ruler. Take your time to ensure each piece matches the plan.
Select wood that is light but strong. Pine and cedar are good choices. They resist moisture and dry quickly. Avoid soft or weak wood that may break easily.
Measuring And Marking
Measure each piece twice before cutting. Mark the wood with clear lines. Use a square to keep marks straight. This helps the pieces align well later.
Cutting The Wood Pieces
Use a hand saw or power saw for cutting. Follow the marked lines closely. Cut slowly to keep edges smooth. Sand rough edges to avoid splinters.
Assembling The Frame
Assembling the frame is the first step in making your folding towel drying rack. The frame holds the rack together and gives it strength. Take time to build it carefully. A strong frame means a sturdy rack that will last.
Gather all the materials before starting. You will need wooden or metal rods, screws, and hinges. Check that all parts are clean and ready to use.
Preparing The Frame Pieces
Cut the rods to the right length. Use a saw for wood or metal cutters for metal rods. Make sure the cuts are straight and smooth. Sand the edges if needed to avoid splinters.
Label each piece. This helps during assembly. It stops confusion and saves time.
Joining The Sides
Start by connecting the two side pieces. Use screws to fix them firmly. The sides should be parallel and even. Use a square tool to check the angles. This keeps the frame balanced.
Adding The Crossbars
Attach the crossbars between the sides. They hold the towels and add strength. Space them evenly. Screw them tightly in place. Test the frame for stability before moving on.
Installing The Hinges
Fix the hinges where the frame folds. Choose strong hinges that move smoothly. Attach them with screws. Check the folding action. The rack should open and close easily.
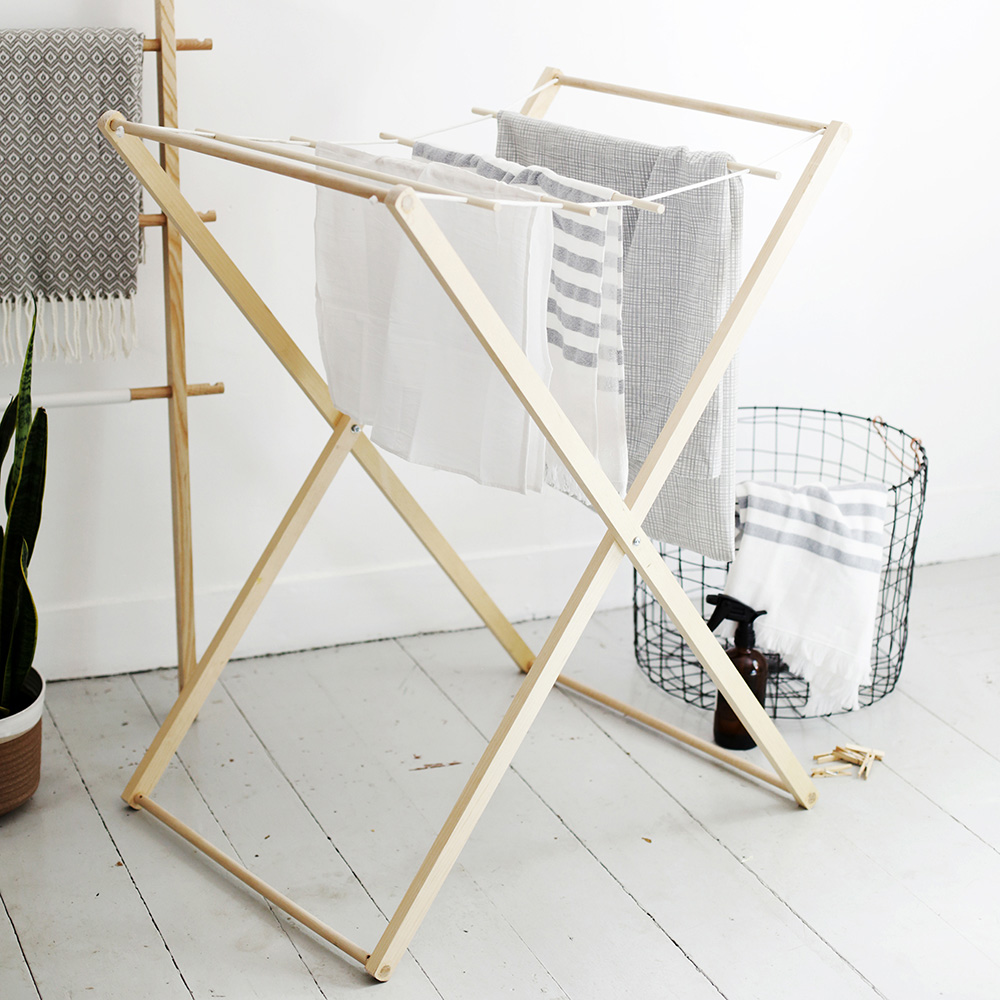
Credit: www.homedepot.com
Adding The Folding Mechanism
Adding a folding mechanism to your towel drying rack saves space and makes it easy to store. The folding part should be strong and smooth to operate. Choose the right materials and tools before starting. The mechanism must allow the rack to open and close without trouble.
Choosing The Hinges
Select hinges that fit your rack size and weight. Piano hinges work well for long, straight folds. Butt hinges suit smaller racks with simple folding points. Use rust-resistant metal for durability. Attach hinges evenly to keep the rack balanced.
Measuring And Marking
Measure where the rack will fold carefully. Mark the hinge positions on both parts of the rack. Use a pencil for clear, removable marks. Double-check measurements to avoid mistakes. Accurate marking helps the rack fold neatly and safely.
Attaching The Hinges
Pre-drill holes to prevent wood splitting. Screw the hinges firmly but do not overtighten. Test the hinge movement as you work. Adjust screws if the folding feels stiff or loose. Secure hinges on both sides for strong support.
Testing The Folding Action
Open and close the rack several times. Check for smooth motion and no binding parts. Make sure the rack stays stable when open. Fix any loose screws or misaligned hinges. Smooth folding means easier use and longer rack life.
Sanding And Finishing
Sanding and finishing are key steps in making a folding towel drying rack. They give the wood a smooth feel and help protect it from moisture. Taking time in this stage makes your rack last longer and look better.
Start by sanding the wood surfaces carefully. Use medium-grit sandpaper to remove rough spots. Then switch to fine-grit paper for a smooth finish. Always sand along the grain of the wood. This prevents scratches and keeps the surface even.
After sanding, clean the wood dust with a dry cloth. This prepares the surface for finishing. A clean surface helps the finish stick well and look nice.
Sanding The Wood
Choose sandpaper with a grit of 120 to 150 for the first round. Sand all parts of the rack, including edges and corners. Check for any splinters or rough areas. Use finer sandpaper, around 220 grit, to smooth the surface. Sand lightly until you feel a soft texture.
Choosing The Finish
Pick a finish that protects wood from water. Options include varnish, lacquer, or wood oil. Wood oil soaks in and keeps the wood natural. Varnish and lacquer form a hard shell on top. They give extra protection against moisture and dirt.
Applying The Finish
Use a brush or cloth to apply the finish evenly. Follow the wood grain for best results. Apply thin coats and let each dry fully before the next. Sand lightly between coats with fine sandpaper. This helps the finish stick and look smooth.

Credit: thecarpentersdaughter.co.uk
Painting Or Staining Options
Painting or staining your folding towel drying rack protects the wood. It also makes the rack look nice. Choosing the right finish helps the rack last longer. It stops water damage and keeps the wood strong. You can pick colors or natural wood tones. Each option gives a different style and feel. Let’s explore some painting and staining ideas for your rack.
Painting Your Towel Drying Rack
Painting covers the wood with a solid color. It hides any imperfections. Use paint made for wood and moisture. Choose light colors to brighten a room. Dark colors add a bold touch. Paint also protects the wood from water and dirt. Apply two coats for a smooth finish. Let each coat dry well before the next.
Staining For A Natural Look
Staining shows the wood’s natural grain and texture. It adds color but keeps the wood’s beauty. Stains come in many shades, from light to dark. Use a water-resistant stain for better protection. Staining needs less paint but more care. Apply with a brush or cloth. Wipe off extra stain to avoid blotches.
Sealing After Painting Or Staining
Sealing adds a clear protective layer on top. It helps the rack resist water and wear. Use a clear varnish or polyurethane sealant. Pick a finish that matches your paint or stain. Matte, satin, or glossy finishes are common. Apply two thin coats for best results. Let each coat dry fully before use.
Testing Stability And Function
Testing the stability and function of your folding towel drying rack is an important step. It ensures the rack is safe and works well. This step helps you avoid problems later. You want the rack to hold towels without tipping or wobbling.
Check the rack’s sturdiness before using it daily. Test how easy it folds and unfolds. Confirm it stays in place when open. This process helps you spot any weak points in the design.
Checking The Base Stability
Place the rack on a flat surface. Press gently on different sides. Watch for any shaking or movement. The base should feel solid and steady. If it wobbles, adjust the legs or tighten screws.
Testing The Folding Mechanism
Open and close the rack several times. It should move smoothly without sticking. Make sure the joints lock firmly when open. If it feels loose, add washers or tighten parts.
Load Testing With Towels
Hang wet towels on the rack. Use a weight similar to real towels. Check if the rack holds the load without bending. Look for any signs of strain on joints or legs.
Final Adjustments For Safety
Fix any loose parts or weak spots found during tests. Add rubber caps to legs to prevent slipping. Make sure the rack folds flat for easy storage. Your drying rack is ready when it is stable and functional.
Tips For Maintenance
Keeping your folding towel drying rack in good shape helps it last longer. Regular care stops damage and keeps it working smoothly. A well-maintained rack holds towels better and looks neat in your space.
Clean The Rack Regularly
Dust and dirt can build up on the rack. Wipe it with a damp cloth every week. Use mild soap for tough spots. Dry it well to stop rust or mold growth.
Check Hinges And Joints
Hinges and joints need attention. Look for loose screws or parts. Tighten screws with a screwdriver to keep the rack stable. Apply a little oil to moving parts to avoid squeaks.
Avoid Overloading
Do not put too many towels on the rack at once. Heavy loads can bend or break the frame. Spread towels evenly to balance the weight. This keeps the rack strong and steady.
Store Properly When Not In Use
Fold the rack and store it in a dry place. Avoid damp or humid areas that cause rust. Keep it away from direct sunlight to prevent fading or warping.

Credit: cottagecraftworks.com
Frequently Asked Questions
How Do I Start Making A Folding Towel Drying Rack?
Begin by gathering materials: wooden slats, hinges, screws, and a drill. Cut the wood to size. Attach hinges to connect slats, allowing them to fold. Assemble carefully for stability and smooth folding action.
What Tools Are Needed For A Towel Drying Rack?
You need a saw, drill, screwdriver, measuring tape, and sandpaper. These tools help cut, assemble, and smooth the wooden parts. Having the right tools ensures a safe, precise build and a sturdy finished rack.
Can I Customize The Size Of The Drying Rack?
Yes, customize the rack by adjusting wooden slat lengths. Measure your space first to ensure a proper fit. Custom sizes make the rack more functional and suited to your drying needs.
How To Maintain A Folding Towel Drying Rack?
Keep the rack clean by wiping with a damp cloth regularly. Check hinges for tightness and oil if needed. Store folded when not in use to save space and prolong its lifespan.
Conclusion
Making a folding towel drying rack is simple and useful. You save space and keep towels dry. The steps are easy to follow and need few tools. This rack fits well in small rooms or bathrooms. It helps towels dry faster and stay fresh longer.
Try building one yourself and enjoy the benefits. A small project with a big difference.