Is your ceramic towel rack cracked, loose, or just outdated? Replacing it might seem tricky, but with the right steps, you can do it yourself quickly and safely.
Imagine having a fresh, sturdy rack that not only holds your towels but also adds style to your bathroom. In this guide, you’ll discover simple tips and clear instructions to replace your ceramic towel rack without hassle. Ready to upgrade your space and save money?
Let’s get started!

Credit: www.youtube.com
Tools And Materials Needed
Replacing a ceramic towel rack needs specific tools and materials. Having the right items makes the job easier and safer. This section covers what you must prepare before starting.
Essential Tools
Start with a screwdriver set. Both flathead and Phillips screwdrivers are useful. You also need a drill with bits for making new holes. A level helps keep the rack straight. Use a tape measure to check spacing accurately. Safety goggles protect your eyes from dust. A utility knife helps cut caulk or paint around the rack. Finally, have a putty knife ready to remove old adhesive or grout.
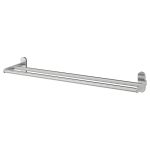
Choosing Replacement Parts
Select a towel rack that fits your bathroom style. Measure the space to pick the right size. Choose ceramic racks that match your bathroom colors. Check the mounting hardware comes with the rack. If not, buy screws and anchors made for ceramic walls. Pick materials that resist moisture to avoid rust. Simple designs often last longer and are easier to install. Always buy from trusted brands for quality and durability.
Preparing The Work Area
Preparing the work area is the first step to replace a ceramic towel rack safely and smoothly. A clean and organized space helps avoid accidents and damage. It also makes the job faster and less stressful.
Clearing The Space
Remove all items near the towel rack. Take off towels, toiletries, and any decorations. Clear the countertop and floor area around the rack. This gives you enough room to work freely. It also prevents things from falling or getting broken.
Protecting Surfaces
Cover nearby surfaces with a drop cloth or old towels. Protect walls, countertops, and floors from dust and debris. Use painter’s tape to secure protective covers. This keeps your bathroom clean and damage-free during the replacement. Small steps like these save time on cleanup later.
Removing The Old Towel Rack
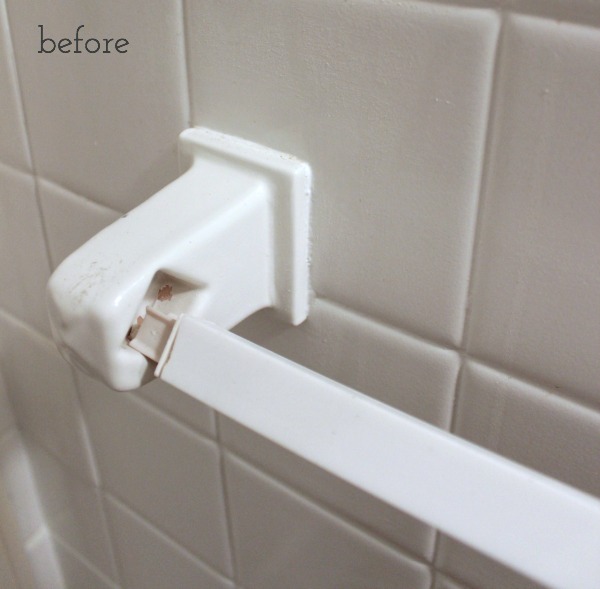
Removing the old ceramic towel rack is the first step to a fresh bathroom look. Take your time to avoid damage to the wall or tiles. Careful removal helps prepare the space for the new rack.
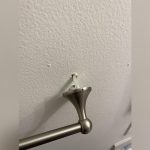
Locating Mounting Hardware
Start by finding the screws or brackets holding the rack. These are often hidden under decorative caps or behind the ceramic pieces. Use a flat tool to gently pry off any covers. This reveals the mounting hardware beneath.
Check for screws on both ends of the towel rack. Sometimes, brackets are fixed inside the wall. Note their positions before proceeding.
Detaching The Rack Carefully
Use a screwdriver to remove the screws slowly. Keep the rack supported with your other hand. This prevents it from falling and breaking.
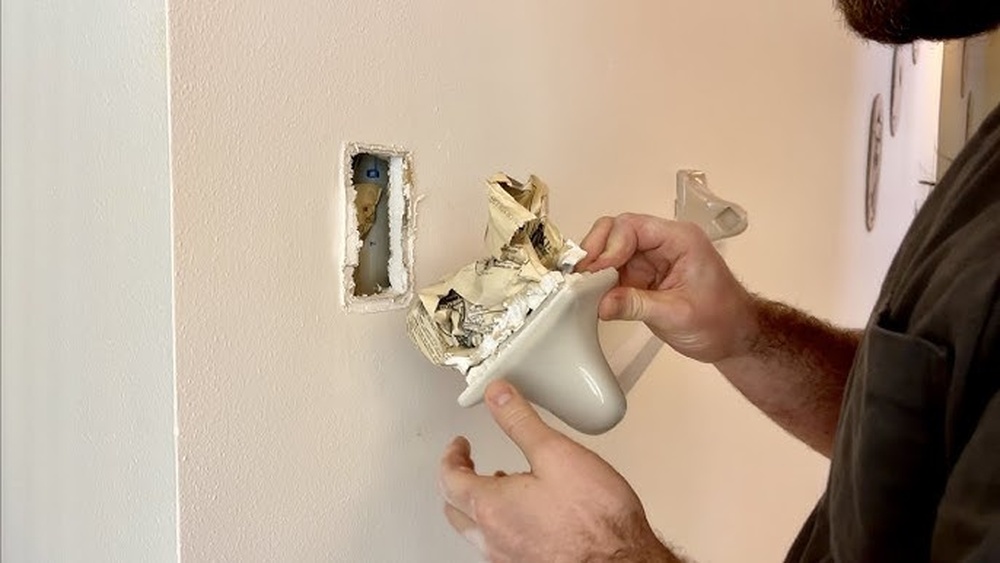
Once screws are out, gently lift the rack away from the wall. If it feels stuck, wiggle it slightly to loosen any adhesive. Avoid forcing it to stop tile damage.
Place the old rack aside safely. Clean the wall surface to remove leftover glue or dirt before installing the new rack.
Inspecting The Wall And Fixtures
Before replacing a ceramic towel rack, start by inspecting the wall and fixtures. This step helps ensure a secure and lasting installation. Careful inspection reveals any hidden damage or weak spots that could affect the new rack.
Taking the time to examine the area saves effort later. It also prevents future accidents or repairs.
Checking For Damage
Look closely at the wall around the towel rack. Check for cracks, holes, or water damage. Tap the wall gently to find hollow or soft spots. These indicate weak areas that need attention. Examine the old mounting screws and brackets. Are they rusted or loose? Remove any broken parts carefully. Make sure the surface is clean and dry before moving on.
Repairing Mounting Areas
Fix any damage before installing the new rack. Fill small holes or cracks with wall filler or putty. Let it dry completely. Sand the area smooth for a flat surface. For larger holes, use a patch kit to reinforce the wall. Replace any weak or missing anchors with new ones. Tighten screws to hold firmly. Strong mounting points keep the towel rack steady and safe.
Installing The New Ceramic Towel Rack
Installing the new ceramic towel rack is the next important step. This process ensures your rack stays firm and looks great. Follow the steps carefully for a strong hold and neat finish.
Marking Drill Points
Hold the new towel rack against the wall. Use a pencil to mark where the screws will go. Check that the rack is level before marking. Even marks help the rack sit straight.
Drilling And Anchoring
Choose a drill bit that fits your wall anchors. Drill holes on the marked points gently. Insert wall anchors into the holes for extra support. Anchors stop the rack from loosening over time.
Securing The Rack
Place the towel rack over the drilled holes. Use screws to fasten it tightly to the wall. Tighten screws until the rack feels secure. Avoid over-tightening to prevent damage.
Credit: www.drivenbydecor.com
Finishing Touches
After installing your new ceramic towel rack, the final steps matter a lot. These finishing touches ensure the rack looks good and works well. Take time to clean the area and check the rack’s strength. This keeps your bathroom neat and safe.
Cleaning Up
Start by wiping away dust and dirt from the towel rack. Use a soft cloth and mild cleaner. Avoid harsh chemicals that may damage the ceramic finish. Clean the wall around the rack too. This keeps the space fresh and tidy. Check for any leftover screws or tools. Put them away carefully to avoid accidents.
Testing Stability
Gently pull the towel rack to test its hold. It should feel firm and not move. Hang a small towel and see if it stays secure. If the rack wobbles, tighten the screws more. Make sure it can support the weight of wet towels. A stable rack lasts longer and prevents falls.
Tips For Maintenance
Maintaining your ceramic towel rack keeps it looking fresh and working well. Small efforts can stop damage and save you money. Follow these tips to extend the life of your rack and keep your bathroom neat.
Preventing Damage
Handle your ceramic towel rack gently. Avoid hanging heavy items that may cause cracks. Check the screws and mounts regularly to keep the rack secure. Fix loose parts quickly to prevent further harm. Keep the rack away from sharp objects to avoid chips.
Regular Cleaning
Clean the ceramic towel rack often to remove dust and stains. Use a soft cloth with mild soap and warm water. Avoid harsh chemicals that can damage the surface. Dry the rack well after cleaning to prevent water spots. Regular cleaning helps maintain the rack’s shine and strength.

Credit: diy.stackexchange.com
Frequently Asked Questions
How Do I Remove A Ceramic Towel Rack Safely?
To remove a ceramic towel rack, first unscrew any visible screws. Use a putty knife to gently pry it off. Be careful to avoid damaging the wall or ceramic. Clean any residue before installing a new rack.
What Tools Are Needed To Replace A Ceramic Towel Rack?
You will need a screwdriver, putty knife, drill, wall anchors, screws, and a level. These tools help remove the old rack and secure the new one properly. Always use a stud finder if necessary for a stronger hold.
Can I Install A Ceramic Towel Rack On Drywall?
Yes, you can install a ceramic towel rack on drywall. Use wall anchors to support the weight. Avoid just screwing into drywall alone as it won’t hold the rack securely.
How Do I Align The New Towel Rack Correctly?
Use a level to ensure the new rack is straight. Mark drill holes with a pencil before installation. Double-check measurements to align with existing fixtures or bathroom decor.
Conclusion
Replacing a ceramic towel rack can be simple and quick. Follow the steps carefully and take your time. Use the right tools to avoid damage. Check that the new rack fits well before fixing it. A sturdy towel rack keeps your bathroom neat and safe.
Practice patience and stay safe while working. Your bathroom will look fresh and organized after the job. Try this project to improve your home with ease.