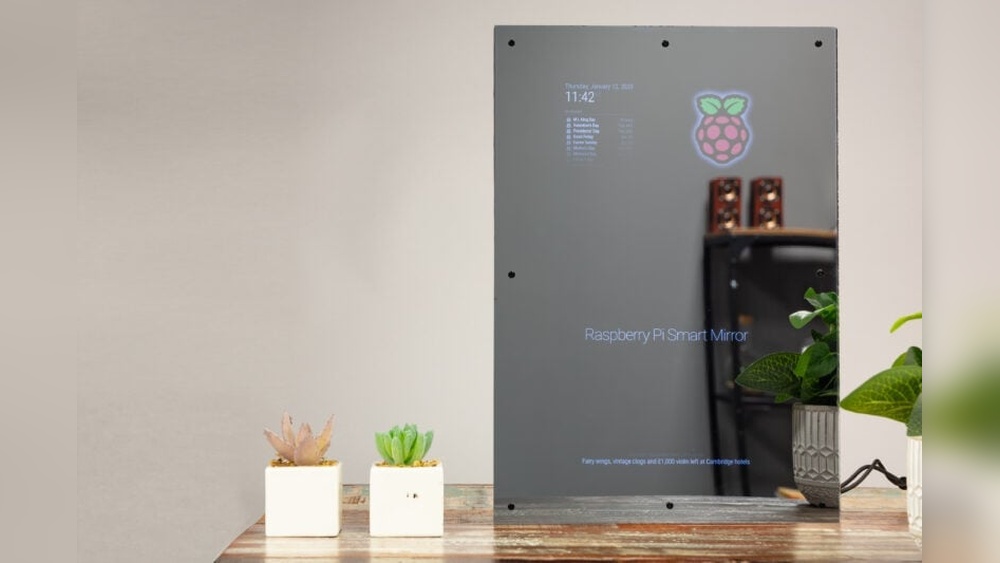

Imagine starting your day with a mirror that shows more than just your reflection. Your weather updates, calendar events, news headlines, and even personal reminders—all right where you need them.
If you’ve ever wanted to build a smart mirror using a Raspberry Pi 3, you’re in the right place. This guide will walk you through the coding steps in a simple, clear way. By the end, you’ll have a smart mirror that not only looks cool but makes your daily routine smarter and smoother.
Ready to transform your mirror into a powerful tool? Let’s dive in.
Credit: auth0.com
Gathering Materials
Building a smart mirror with Raspberry Pi 3 starts with gathering the right materials. Each component plays a key role in the mirror’s function and look. Having everything ready makes the coding and assembly much easier. This section guides you through the essential parts needed to create your smart mirror.
Raspberry Pi 3 And Accessories
The Raspberry Pi 3 is the heart of the smart mirror. It runs the software and connects all parts. You will need a power supply to keep it running. A microSD card stores the operating system and data. A case protects the Raspberry Pi from dust and damage. Don’t forget a keyboard and mouse for setup.
Two-way Mirror And Frame
A two-way mirror lets you see the display behind it. It reflects like a normal mirror when the screen is off. The frame holds the mirror and display in place. Choose a frame that fits your room style. Make sure it is sturdy and easy to assemble.
Display Screen Options
The display shows information like time, weather, and news. You can use an old monitor or a new LCD screen. The screen size depends on your space and preference. A thin display fits better behind the mirror. Check the screen’s resolution for clear visuals.
Additional Sensors And Components
Sensors add smart features to your mirror. A motion sensor can turn the display on when you approach. A light sensor adjusts brightness based on room light. Other parts include a speaker for sound and a camera for face recognition. These extras make your mirror more interactive.
Setting Up Raspberry Pi
Setting up your Raspberry Pi is the first step to building a smart mirror. It prepares the device to run the software needed for your project. This section guides you through installing the operating system, connecting to the network, and doing basic configuration.
Installing The Operating System
Start by downloading the Raspberry Pi OS from the official website. Use a tool like Raspberry Pi Imager to write the OS to a microSD card. Insert the microSD card into your Raspberry Pi. Power on the device and follow the on-screen instructions to complete the installation.
Connecting To Network
Connect your Raspberry Pi to the internet for updates and downloads. Use Wi-Fi or an Ethernet cable depending on your setup. Access the network settings from the desktop or the command line. Enter your network credentials to establish the connection.
Basic Configuration
Open the Raspberry Pi Configuration tool to set your preferences. Change the default password to keep your device secure. Set your time zone and enable SSH for remote access. Update your system to make sure all software is current.
Choosing The Software
Choosing the right software is key to building a smart mirror with Raspberry Pi 3. The software controls how your mirror shows information. It also decides how easy or hard it is to change your mirror’s look and features. Pick software that fits your skills and what you want your smart mirror to do.
Smart Mirror Platforms
Smart mirror platforms are ready-made systems. They help you start quickly. Popular platforms include MagicMirror² and Dakboard. These platforms have many modules for weather, news, and calendar. They offer simple ways to add or remove features. They also have active communities for support.
Custom Coding Options
Custom coding lets you build your mirror from scratch. Use languages like Python, JavaScript, or HTML. This method gives full control over design and function. You can create unique features not found in platforms. Coding takes more time and skill but offers more freedom.
Required Libraries And Tools
Libraries and tools help your code work smoothly. For Raspberry Pi, libraries like Pygame or OpenCV are common. Tools like Node.js or Python IDEs make coding easier. Choose tools that match your chosen platform or coding style. Keep your setup simple for better results.
Building The Smart Mirror Interface
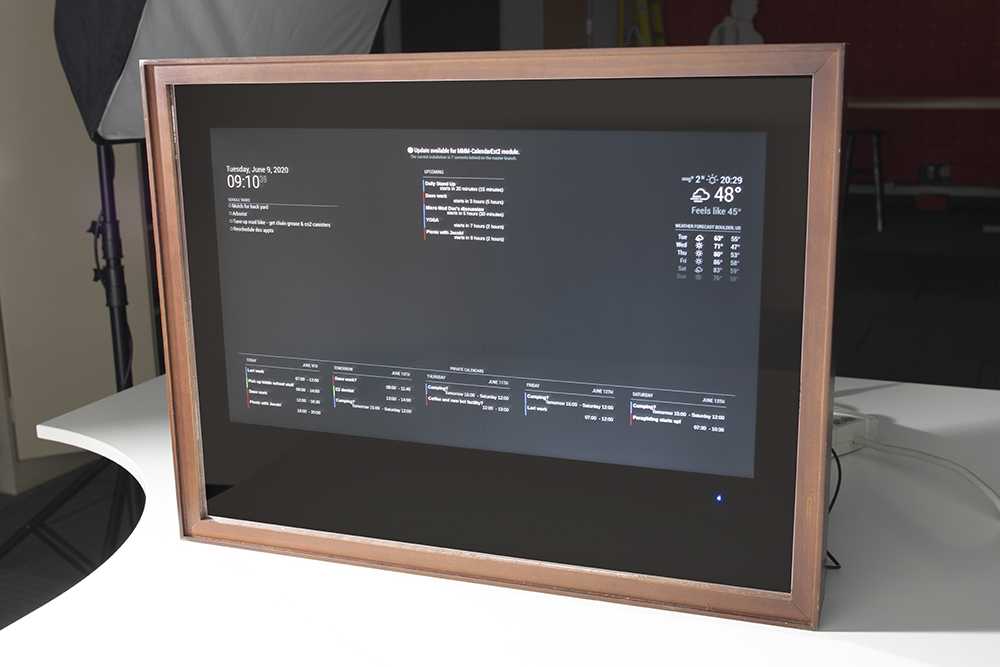
Building the smart mirror interface is a key step in creating a Raspberry Pi 3 smart mirror. This interface shows information clearly and looks good. A well-made interface helps users quickly see useful data like time, weather, and news.
Focus on simple design and easy navigation. The interface should be clean and not crowded. Let’s explore how to design the layout, add widgets, and customize the appearance.
Designing The Layout
Start by planning the screen space. Divide the screen into sections for different information. Use a grid or columns to organize content. Keep important data at eye level.
Use CSS to set the size and position of each section. Make sure the layout works on the Raspberry Pi screen size. Test different layouts to find the best fit.
Adding Widgets And Modules
Widgets show data like time, weather, or news. Choose simple widgets that load fast. Use JavaScript modules to add these widgets.
Connect each widget to a data source, like an API for weather updates. Update widgets regularly to keep information fresh. Avoid adding too many widgets to prevent slow performance.
Customizing Appearance
Change colors and fonts to match your style. Use soft colors for easy reading. Select clear fonts with good size and spacing.
Add backgrounds or borders carefully. Keep the mirror look subtle to avoid glare. Test different styles to find the best visual balance for your smart mirror.
Integrating Voice Control
Integrating voice control into your Raspberry Pi 3 smart mirror enhances its usability. It lets you interact with the mirror without touching it. This feature makes the smart mirror more modern and fun to use. You can get weather updates, news, or control smart home devices using just your voice.
Setting Up Microphone
First, connect a USB microphone or a sound card with a microphone. Check if the Raspberry Pi recognizes the device using the terminal. Use simple commands like arecord -l to list recording devices. Adjust the microphone settings for clear sound input. Test the mic by recording and playing back your voice.
Voice Recognition Apis
Choose a voice recognition API to process your commands. Google Speech-to-Text and Mozilla DeepSpeech are good options. Google’s API requires internet but offers high accuracy. DeepSpeech works offline and is open source. Set up API keys and install necessary libraries for your choice.
Voice Command Implementation
Write code to capture audio and send it to the API. Parse the response to understand user commands. Create functions for each command, like showing weather or time. Use Python scripts to link voice input with smart mirror features. Test voice commands in different noise conditions for best results.

Credit: www.instructables.com
Incorporating Sensors
Sensors make your Raspberry Pi 3 smart mirror more useful and interactive. They collect real-world data and help the mirror respond. This section explains how to add sensors to your smart mirror.
Motion Detection Setup
Motion sensors detect when someone is near the mirror. Use a PIR sensor for this task. Connect the sensor to the Raspberry Pi’s GPIO pins. Write Python code to read sensor signals. Turn the mirror display on when motion is detected. Save energy by turning it off after no movement.
Ambient Light Adjustment
Light sensors measure room brightness. Use a photoresistor or light sensor module. Connect it to the Raspberry Pi’s ADC or GPIO pins. Write code to read light levels continuously. Adjust the mirror’s screen brightness based on ambient light. This makes the display easy on the eyes day and night.
Temperature And Weather Integration
Add a temperature sensor to show indoor climate data. The DHT11 or DHT22 sensor works well. Connect it to the Raspberry Pi’s GPIO pins. Use Python libraries to read temperature and humidity. Display real-time weather info on your mirror. You can also fetch outdoor weather using APIs for complete updates.
Assembly And Installation
Assembly and installation are key steps to bring your Raspberry Pi 3 smart mirror to life. Proper setup ensures your mirror works well and looks great. This part guides you through mounting the display, managing cables, and performing final tests.
Mounting The Display And Mirror
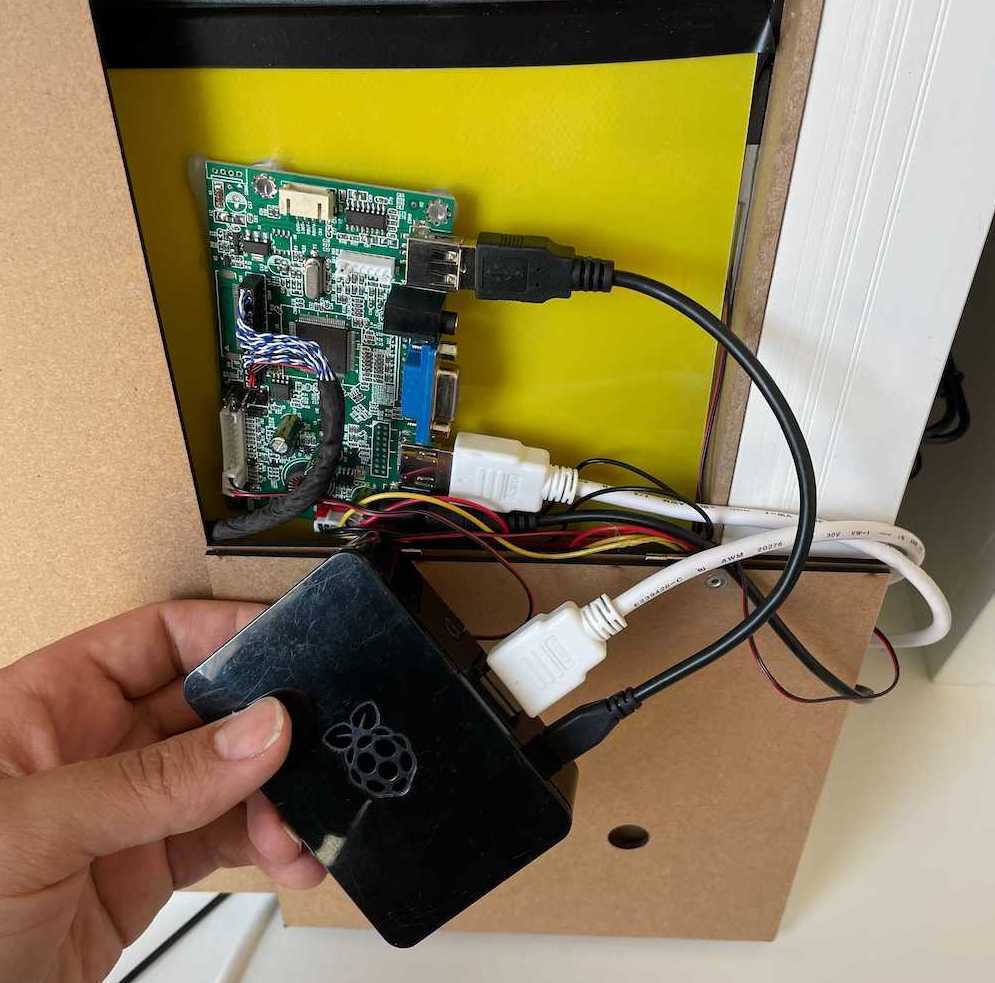
Start by placing the display behind the two-way mirror. Use a secure frame or bracket for stability. Align the screen so the image shows clearly through the glass. Fix the mirror and display firmly to avoid movement. Check that the mirror surface is clean and scratch-free before mounting.
Cable Management
Organize the cables neatly to prevent clutter. Use cable ties or clips to hold wires along the frame. Keep power and data cables separate to reduce interference. Make sure cables reach the Raspberry Pi without tension. Proper cable management improves both safety and appearance.
Final Testing
Power on the Raspberry Pi and check the display. Confirm the smart mirror shows the correct information. Test touch or voice features if your setup includes them. Look for any loose connections or flickering screens. Adjust settings and placement until everything works smoothly.
Credit: learn.sparkfun.com
Troubleshooting Tips
Troubleshooting your Raspberry Pi 3 smart mirror is key for smooth operation. Small problems can stop it from working well. This section covers simple tips to fix issues, improve speed, and keep software updated. Follow these steps to keep your smart mirror running without trouble.
Common Issues And Fixes
Sometimes the screen stays blank or flickers. Check the power supply and cable connections first. Loose cables cause many problems. The Raspberry Pi may not boot if the SD card is corrupted. Try re-imaging the card with the correct software. If the smart mirror shows wrong time or weather, check your internet connection and API keys. Restart the device to refresh settings.
Performance Optimization
Slow loading can hurt user experience. Disable unused modules in your smart mirror software. Clear cache regularly to free up space. Use a lightweight operating system like Raspbian Lite for better speed. Overclock the Raspberry Pi carefully to gain extra performance. Monitor CPU temperature to avoid overheating. Close background apps that use too much memory.
Updating Software
Keep your software up to date for best results. Run “sudo apt-get update” and “sudo apt-get upgrade” in the terminal. Update your smart mirror modules from their official sources. New updates fix bugs and add features. Back up your settings before updating to avoid data loss. Restart the Raspberry Pi after updates to apply changes fully.
Enhancing Your Smart Mirror
Enhancing your Raspberry Pi 3 smart mirror can make it more useful and fun. You can add features that fit your daily needs. Small upgrades help your mirror grow with your lifestyle. Let’s explore ways to improve your smart mirror step by step.
Adding New Features
Start by adding simple widgets like weather updates or news feeds. Use Python or JavaScript to create these features. Display calendar events to keep track of your schedule. Voice control is another option to try. It makes the mirror interactive and hands-free. Experiment with different apps to find what suits you best.
Integrating With Smart Home Devices
Connect your mirror to smart home gadgets like lights or thermostats. Use protocols like MQTT or REST APIs for communication. Control devices through the mirror’s touchscreen or voice commands. This integration saves time and adds convenience. It also gives your mirror a central role in your home setup.
Future Upgrades
Plan upgrades such as better display screens or faster processors. Update your software regularly to fix bugs and add features. Explore AI tools for facial recognition or personalized greetings. Keep your mirror secure with strong passwords and encrypted connections. Regular improvements keep your smart mirror fresh and reliable.
Frequently Asked Questions
What Programming Languages Are Best For Raspberry Pi 3 Smart Mirror?
Python and JavaScript are popular for Raspberry Pi 3 smart mirrors. Python offers easy hardware control. JavaScript enables dynamic user interfaces. Both support libraries for display and sensors, making development efficient and versatile.
How Do I Connect Raspberry Pi 3 To Smart Mirror Display?
Use an HDMI cable to connect Raspberry Pi 3 to the smart mirror screen. Ensure the display supports HDMI input. Power on both devices and configure the Raspberry Pi’s display settings for optimal resolution.
Can I Add Voice Control To My Raspberry Pi Smart Mirror?
Yes, voice control can be added using software like Google Assistant or Amazon Alexa SDKs. A microphone and speaker are required. Integration allows hands-free operation and enhances user interaction with the smart mirror.
What Sensors Improve Raspberry Pi 3 Smart Mirror Functionality?
Common sensors include motion detectors, light sensors, and temperature sensors. Motion sensors trigger the display on approach. Light sensors adjust brightness automatically. Temperature sensors provide real-time weather updates on the mirror.
Conclusion
Building a Raspberry Pi 3 smart mirror can be simple and fun. Follow the steps carefully and take your time. You will create a useful device for your home. Coding lets you add personal touches and useful features. Keep experimenting to improve your smart mirror’s performance.
Enjoy the process and learn something new each day. Your smart mirror will show more than just your reflection. Start small, stay patient, and you will succeed.