

Installing your Ring Video Doorbell 2 on a brick wall might sound tricky, but it doesn’t have to be. If you want clear video, quick alerts, and a safer home, this guide is made just for you.
You’ll learn simple steps to mount your doorbell securely on brick, even if you’ve never done it before. Keep reading, and by the end, you’ll have your Ring Doorbell working perfectly—protecting your home and giving you peace of mind.
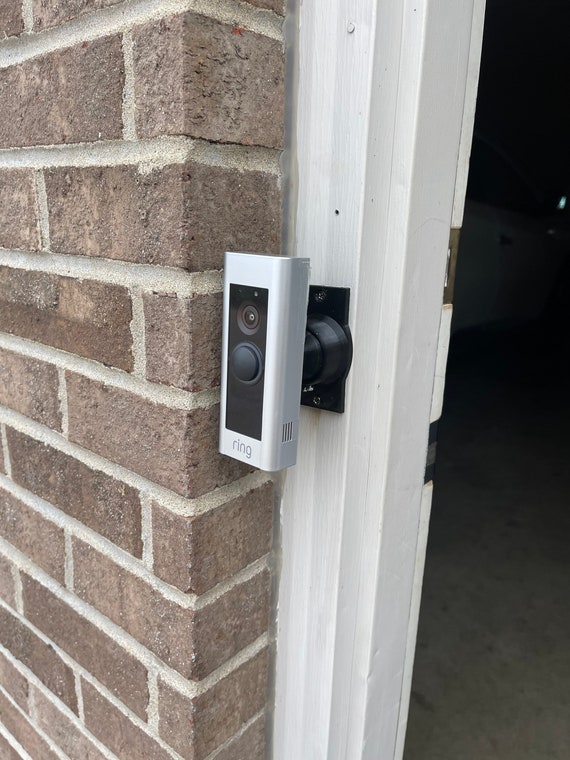
Credit: kdfoundation.org
Tools And Materials Needed
Installing a Ring Video Doorbell 2 on brick needs some specific tools and materials. Having the right items makes the job easier and safer. Preparing everything before starting saves time and avoids frustration.
Ring Video Doorbell 2
The main device you will install is the Ring Video Doorbell 2. This model has all the features for security and convenience. Make sure the package includes the doorbell, battery, and installation kit.
Mounting Bracket And Screws
The mounting bracket holds the doorbell on the wall. It comes with screws to attach it firmly. Use the screws that fit the bracket and the surface you are working on.
Drill And Masonry Bits
A drill is needed to make holes in the brick wall. Use masonry bits designed for hard surfaces like brick and stone. These bits help to drill clean holes without cracking the brick.
Screwdriver And Level
A screwdriver secures the screws into the wall and bracket. A level helps keep the doorbell straight. A crooked doorbell can affect its performance and look.
Anchors For Brick
Anchors are important for fixing screws in brick walls. They give extra grip and prevent screws from coming loose. Choose anchors that fit your screw size and wall type.
Safety Gear
Wear safety glasses to protect your eyes from dust and debris. Gloves protect your hands from sharp edges and rough surfaces. Use ear protection if the drill is loud.
Preparing The Installation Site
Preparing the installation site is the first step to install your Ring Video Doorbell 2 on brick. This step ensures the doorbell works properly and stays secure on your wall.
Take time to find the best spot and check the area carefully. A good setup helps the doorbell capture clear video and stay connected to your Wi-Fi.
Choosing The Best Location
Select a spot near your main door where visitors usually stand. The doorbell should be at about chest height for best video angles. Avoid places that get direct sunlight or heavy rain. Pick a flat area on the brick to keep the doorbell steady.
Checking Wi-fi Signal Strength
Test the Wi-Fi signal at the chosen spot. Use your phone to check connection speed and strength. The doorbell needs a strong Wi-Fi signal to stream video without lag. If the signal is weak, move closer to the router or add a Wi-Fi extender.
Marking Drill Holes On Brick
Hold the mounting bracket against the brick wall. Use a pencil to mark the hole positions through the bracket. Double-check the marks to ensure they are level. This step helps you drill in the right spots without mistakes. Use a level tool if available for accuracy.
Drilling Into Brick
Drilling into brick can feel tricky, but it is essential for installing your Ring Video Doorbell 2 securely. Brick is hard and needs the right tools and careful steps. Taking your time will help avoid cracks and make sure your doorbell stays in place.
Selecting The Right Drill Bit
Choose a masonry drill bit for brick. These bits have a strong tip made for hard surfaces. Pick a size that fits the wall anchors in your doorbell kit. Using the correct bit prevents damage and makes drilling easier.
Drilling Pilot Holes
Mark the spots for your screws on the brick. Start drilling slowly at first to avoid slipping. Keep the drill straight and steady. Drill holes about two inches deep to fit the anchors completely.
Inserting Anchors Securely
Push the wall anchors into the holes firmly. Tap gently with a hammer if needed. The anchors hold screws tightly in the brick. This step keeps your doorbell stable and safe from falling.
Mounting The Bracket
Mounting the bracket is the first key step for installing your Ring Video Doorbell 2 on a brick wall. This bracket holds the doorbell firmly in place and ensures it works well.
Take your time to mount it properly. A well-mounted bracket keeps your doorbell steady and safe from damage. Follow the steps carefully to get the best result.
Aligning The Bracket
Start by holding the bracket against the brick wall. Check the spot where you want to install the doorbell. Make sure it is near your door and easy to reach.
Use a pencil to mark the holes on the brick through the bracket. These marks guide where to drill. Keep the bracket steady while marking.
Securing Bracket With Screws
Drill holes into the brick on the pencil marks. Use a drill bit made for masonry to avoid cracks. Insert the wall anchors into the holes.
Place the bracket on the wall and line up the holes. Screw the bracket tightly using the screws from the package. The bracket should feel strong and not move.
Ensuring Level Placement
Use a small level tool to check the bracket’s position. Place it on top of the bracket to see if it is straight. Adjust if needed before tightening screws fully.
A level bracket means the doorbell camera will work better. It also looks neat and professional on your wall.
Attaching The Doorbell
Attaching the Ring Video Doorbell 2 to a brick wall requires careful steps. This ensures the doorbell stays secure and works well. Follow each step to attach the device properly.
Connecting The Doorbell To The Bracket
First, align the doorbell with the mounting bracket. The bottom of the doorbell hooks onto the bracket’s lower edge. Then, push the top part of the doorbell until it clicks in place. This click confirms the doorbell is firmly attached.
Securing With Security Screws
Use the included security screws to lock the doorbell to the bracket. These screws prevent theft and keep the device stable. Insert the screws into the holes at the bottom of the doorbell. Tighten them with a screwdriver, but do not over-tighten.
Testing Doorbell Stability
Gently shake the doorbell to test its stability. It should not move or feel loose. Check that the screws hold the device tightly against the brick surface. A secure doorbell will function better and last longer.
Setting Up The Device
Setting up the Ring Video Doorbell 2 on brick is simple and quick. This section guides you through the key steps to get your device ready. Follow each step carefully to enjoy full features of your doorbell.
Downloading The Ring App
Start by downloading the Ring app on your smartphone. Find it in the Apple App Store or Google Play Store. The app is free and easy to install. Once downloaded, open the app and create an account. This account helps you manage your device and view alerts.
Connecting To Wi-fi
Next, connect your Ring Video Doorbell 2 to your home Wi-Fi. In the app, select “Set Up a Device” and choose your doorbell model. Follow the on-screen instructions to link the doorbell to your Wi-Fi network. Make sure your Wi-Fi signal is strong near the doorbell location. A stable connection ensures smooth video streaming and alerts.
Configuring Notifications
After connecting to Wi-Fi, customize your notification settings. The app lets you decide when and how you receive alerts. Choose to get notifications on your phone for motion or doorbell rings. Adjust settings to avoid too many alerts. Proper notification setup keeps you informed without interruptions.
Troubleshooting Common Issues
Troubleshooting common issues during the installation of the Ring Video Doorbell 2 on brick can save time and frustration. Many problems are easy to fix with simple steps. This section covers common issues and quick solutions.
Weak Wi-fi Signal Solutions
A weak Wi-Fi signal can stop the doorbell from working well. Place your router closer to the doorbell if possible. Use a Wi-Fi extender to boost the signal strength near your door. Check for walls or metal objects blocking the signal. Restart your router to refresh the connection. Confirm your Wi-Fi network supports 2.4 GHz, as Ring devices often need it.
Doorbell Not Powering On
Power issues are common during installation. Verify the doorbell’s battery is charged or connected to power. Use the Ring app to check battery level. Ensure the wiring is correct and secure if using existing doorbell wires. Test the doorbell button to confirm it clicks properly. Reset the device by holding the setup button for 20 seconds to fix power glitches.
Mounting Bracket Stability Problems
Mounting on brick can be tricky. Use a drill with a masonry bit to make holes for anchors. Insert the anchors tightly before screwing in the bracket. Avoid overtightening screws to prevent cracking the brick. Check the bracket is level before final tightening. Use weatherproof sealant around screw holes to keep the bracket secure and safe from rain.

Credit: www.liftingitalia.com
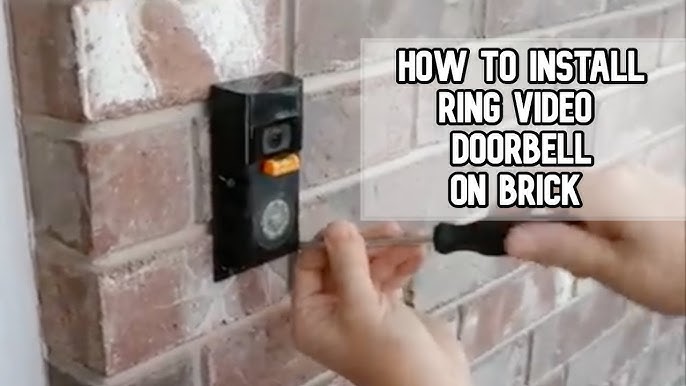
Credit: www.youtube.com
Frequently Asked Questions
How Do I Mount Ring Video Doorbell 2 On Brick?
Use a masonry drill bit to create holes in the brick. Insert anchors and secure the mounting bracket with screws before attaching the doorbell.
What Tools Are Needed For Brick Installation?
You need a drill with a masonry bit, anchors, screws, a screwdriver, and a level for accurate placement.
Can I Install Ring Doorbell 2 Without Wiring?
Yes, you can use the rechargeable battery option for a wire-free installation on brick surfaces.
How Do I Ensure A Secure Fit On Brick Walls?
Use proper anchors designed for masonry and tighten screws firmly to prevent the doorbell from loosening.
Conclusion
Installing the Ring Video Doorbell 2 on brick is simple. Follow the steps carefully for a secure fit. Use the right tools and anchors to avoid damage. Double-check the connections before finishing the setup. Enjoy better home security with your new doorbell.
Stay safe and keep an eye on visitors anytime. This guide helps you do it right, fast, and easy. Now, your home feels more protected and connected.

