
Installing your Video Doorbell V5 might seem tricky at first, but with the right steps, you can do it quickly and easily. Imagine knowing exactly who’s at your door without leaving your couch.
You’re just a few simple moves away from adding that extra layer of security and convenience to your home. In this guide, you’ll find clear, step-by-step instructions that make the whole process straightforward—even if you’re not tech-savvy. Ready to get started and make your home smarter?
Let’s dive in!
Preparing For Installation
Preparing your Video Doorbell V5 for installation is an important first step. This process ensures a smooth setup and proper function. Taking time now helps avoid issues later.
Follow these simple steps to get ready. They cover tools, compatibility, and charging. Each step is easy and clear.
Gathering Required Tools
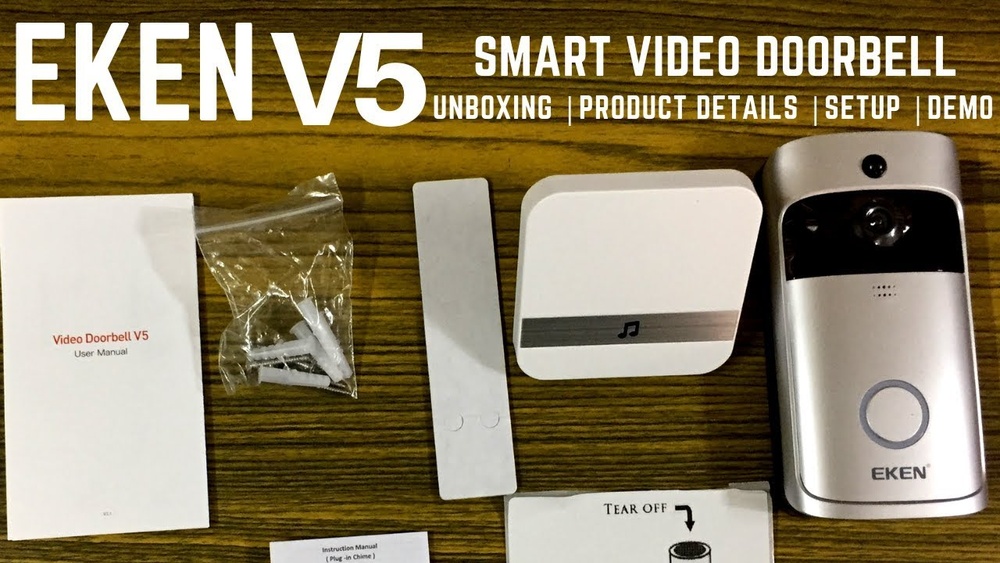
Collect all tools before starting your installation. Typical tools include a drill, screwdriver, and level. A pencil helps mark the mounting spots.
Check the doorbell package for included items. You may also need anchors or screws for your wall type. Having all tools ready saves time.
Checking Compatibility
Make sure your doorbell works with your home system. Check Wi-Fi signal strength near your door. Weak signals can cause connection problems.
Verify the doorbell fits your existing door frame or mounting area. Confirm power source requirements. Some models need wiring, others use batteries.
Charging The Doorbell
Charge the doorbell fully before installation. A full battery ensures smooth initial setup. Use the provided charging cable and follow instructions.
Charging usually takes a few hours. Avoid starting installation with a low battery. This step prevents interruptions during setup.

Credit: www.esseg.eu
Removing The Old Doorbell
Removing the old doorbell is the first step to install your new Video Doorbell V5. This process ensures safety and prepares your door for the new device. Follow these simple steps to remove the old doorbell correctly.
Turning Off Power
Start by turning off the power to your doorbell. Find the circuit breaker that controls the doorbell. Switch it off to avoid electric shock. Double-check by pressing the doorbell button. If it does not ring, the power is off.
Detaching Existing Doorbell
Use a screwdriver to remove the screws holding the old doorbell. Carefully pull the doorbell away from the wall. Do not force it. Some doorbells might have clips; gently release these. Keep the screws for later use.
Inspecting Wiring
Look at the wires attached to the old doorbell. Check for damage or corrosion. Wires should be clean and solid. If wires are twisted or loose, straighten and tighten them. This step ensures a good connection for your new doorbell.
Mounting The Video Doorbell V5
Mounting the Video Doorbell V5 is a key step to ensure it works properly. A well-mounted doorbell gives a clear view of your front door. It also makes the device stable and secure. Follow these steps for a smooth installation.
Choosing The Mounting Location
Pick a spot near your front door, about 4 feet high. This height helps the camera catch faces clearly. Avoid direct sunlight or areas with strong glare. Check the Wi-Fi signal strength at the spot. A strong signal ensures good video quality. Keep the doorbell away from heavy rain or direct water flow.
Attaching The Mounting Bracket
Use the included screws and anchors for a tight fit. Hold the bracket against the wall. Mark the drill holes with a pencil. Drill holes using the right drill bit size. Insert wall anchors for added support. Screw the bracket firmly to the wall. Make sure it does not move or wobble.
Securing The Doorbell
Align the doorbell with the mounting bracket. Slide or snap it into place as shown in the manual. Check if it locks securely on the bracket. Tighten any screws to prevent theft or movement. Test the doorbell by pressing the button. The device should stay firmly attached without shifting.

Credit: www.amazon.com.be
Connecting The Wiring
Connecting the wiring is a key step in installing the Video Doorbell V5. This part ensures the device gets power and can communicate with your home system. Taking time to connect the wires correctly will help the doorbell work smoothly and avoid issues later.
Identifying Wires
First, find the wires from your existing doorbell system. Usually, two wires carry power to the doorbell. Check their colors and labels. Common colors include red, white, or black. Use a voltage tester to confirm if wires have power. Mark the wires clearly before proceeding.
Connecting Wires To Terminals
Next, connect each wire to the correct terminal on the Video Doorbell V5. The device has labeled terminals, usually marked “Trans” or “Front.” Loosen the screws on the terminals. Insert the wire end fully and tighten the screws. Make sure wires are secure and do not touch each other.
Testing The Connection
After wiring, test the doorbell connection. Press the doorbell button and listen for the chime. Check the video feed on your phone or app. If the doorbell does not work, turn off power and check the wire connections again. Confirm all wires are tight and correctly placed.
Setting Up The Device
Setting up the Video Doorbell V5 is simple and fast. Follow the steps carefully to get your device ready for use. This process involves three main parts: downloading the app, pairing the doorbell, and configuring settings. Each step helps you connect the doorbell to your smartphone and customize it for your needs.
Downloading The App
Start by downloading the official Video Doorbell V5 app. Visit your phone’s app store, either Google Play or Apple App Store. Search for “Video Doorbell V5” and tap the download button. The app is free and small in size. After downloading, open the app and allow the necessary permissions. These permissions help the app access your phone’s camera and microphone.
Pairing The Doorbell
Turn on your Video Doorbell V5 by pressing the power button. Make sure your phone’s Bluetooth and Wi-Fi are active. Open the app and select “Add New Device.” Follow the on-screen instructions to put the doorbell into pairing mode. The app will search for the doorbell nearby. Once found, tap on the device name to connect. The app may ask for your Wi-Fi password to complete the pairing.
Configuring Settings
After pairing, customize your doorbell settings. Set your preferred alert tones and volume. Choose motion detection zones to avoid false alarms. You can also adjust video quality based on your internet speed. Enable or disable night vision according to your needs. Save your settings to apply the changes. This step ensures your doorbell works exactly how you want.
Troubleshooting Common Issues
Troubleshooting common issues helps keep your Video Doorbell V5 working well. Problems may happen during or after installation. Knowing simple fixes saves time and stress.
Try these easy steps to solve the most frequent problems. Follow each guide carefully for best results.
No Power To Doorbell
Check the circuit breaker first. Make sure the power is on for the doorbell circuit. Look at the doorbell wires for loose connections or damage. Tighten any loose wires carefully. Use a voltage tester to confirm power at the doorbell. If no power, the transformer might be faulty. Replace it with one that matches your doorbell’s needs. Sometimes, the doorbell button itself can cause issues. Test the button with a multimeter and replace it if needed.
Wi-fi Connectivity Problems
Place the doorbell near your router during setup. Weak signals cause connection failures. Restart your router to refresh the network. Enter your Wi-Fi password carefully to avoid errors. Check if your network uses 2.4 GHz, as some doorbells don’t support 5 GHz. Use a Wi-Fi extender to boost signal range if needed. Remove obstacles like thick walls that block signals. Confirm your router allows new devices to connect. Update the doorbell’s firmware via the app for better compatibility.
Video Or Audio Issues
Clean the camera lens gently with a soft cloth. Dirt or smudges lower video quality. Adjust the doorbell angle to get a clear view of your door. Check app settings to ensure video and audio are enabled. Restart the doorbell to fix temporary glitches. Test the speaker and microphone by making a call through the app. Lower background noise near the doorbell to improve audio clarity. Update the app and doorbell firmware regularly to fix bugs. If issues continue, contact support for help.
Maintaining Your Video Doorbell
Maintaining your Video Doorbell V5 is key to its long-lasting performance. Cleanliness, software, and power play a big role. Small efforts keep your device working smoothly and reliably. Here are simple steps to help you maintain your video doorbell effectively.
Regular Cleaning
Dust, dirt, and spider webs can block the camera lens. Wipe the lens gently with a soft cloth. Avoid using harsh chemicals or water directly on the device. Clean the button area to keep it responsive. Regular cleaning prevents blurry video and missed visitors.
Firmware Updates
Firmware updates improve security and add features. Check the app for update notifications. Install updates promptly to keep your device secure. Updated firmware also fixes bugs and improves performance. Never skip updating your video doorbell’s software.
Battery Maintenance
The battery needs regular attention for longer life. Charge the battery fully before first use. Monitor battery levels in the app. Recharge when the battery is low to avoid interruptions. Remove the battery during extreme cold or hot weather for protection.
Credit: lulyagroup.com
Frequently Asked Questions
How Do I Mount The Video Doorbell V5 Correctly?
To mount the Video Doorbell V5, choose a location near your main door. Use the included screws and anchors to secure the bracket. Make sure it is at eye level for optimal camera view and motion detection.
What Tools Are Needed To Install Video Doorbell V5?
You will need a drill, screwdriver, level, and possibly a voltage tester. These tools help mount the doorbell securely and ensure safe electrical connections.
How Do I Connect Video Doorbell V5 To Wi-fi?
After mounting, power on the device and open the companion app. Follow the in-app instructions to select your Wi-Fi network and enter the password. The doorbell will connect within minutes.
Can I Install Video Doorbell V5 Myself Easily?
Yes, the Video Doorbell V5 is designed for DIY installation. Clear instructions and minimal tools make it simple for most homeowners to install in under an hour.
Conclusion
Installing the Video Doorbell V5 is simple and quick. Follow each step carefully for best results. Test the doorbell to ensure it works well. Enjoy better home security with clear video and sound. Stay safe and connected with this easy-to-use device.
Remember, taking your time helps avoid mistakes. Now, your home is smarter and more secure.