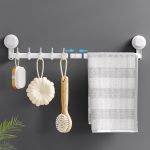
Are you tired of towels cluttering your bathroom or kitchen? Creating your own towel rack is easier than you think, and it can add a stylish, personal touch to your space.
Imagine having a neat, organized spot where your towels hang perfectly every time. In this guide, you’ll discover simple steps to build a towel rack that fits your needs and style. Stick with me, and by the end, you’ll have a practical, attractive solution that saves space and keeps your towels within easy reach.
Ready to transform your space? Let’s get started!
Credit: www.woodshopdiaries.com
Choosing The Right Materials
Choosing the right materials is the first step in making a strong towel rack. The materials affect how long the rack lasts and how it looks. Pick materials that suit your bathroom style and resist moisture well. This helps avoid damage from water and steam.
Wood Options For Durability
Wood gives a warm and natural look to a towel rack. Hardwoods like oak, maple, or teak are very strong. They resist water better than softwoods. Treat wood with a sealant to protect it from moisture. This keeps the wood from warping or rotting over time.
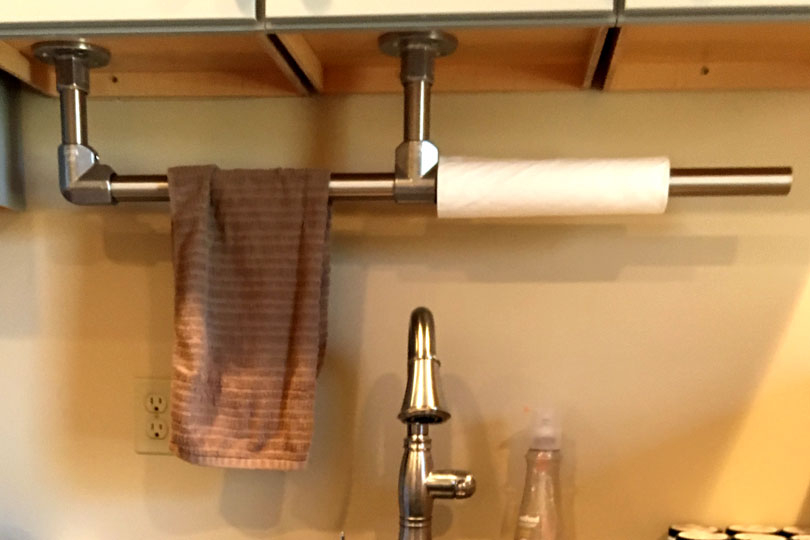
Metal And Pipe Alternatives
Metal racks offer a modern and sleek design. Stainless steel and aluminum do not rust easily. Pipe racks, made from galvanized or black steel pipes, add an industrial touch. These materials hold heavy towels without bending or breaking. They need little maintenance and clean easily.
Necessary Tools And Hardware
Gather the right tools before starting your project. You will need a drill, screws, anchors, a level, and a screwdriver. Choose screws and anchors that fit your wall type. Good hardware keeps the rack steady and safe. Use a level to make sure the rack hangs straight.
Credit: www.homedepot.com
Planning Your Towel Rack Design
Planning your towel rack design is the first step to a successful project. It helps you use your space well and get the look you want. Careful planning makes sure your towel rack fits perfectly and works for your needs.
Consider your space and style before starting. Think about where the rack will go and how much room you have. This stage saves time and effort later.
Measuring Your Space
Measure the wall or area where you want the towel rack. Use a tape measure for accuracy. Note the width, height, and depth available. Check for any obstacles like switches or shelves. Write down your measurements clearly.
Selecting The Style And Size
Pick a style that matches your bathroom decor. Choose between simple bars, hooks, or shelves. Decide how many towels you need to hang. Match the rack size to your space and towel quantity. Think about material, such as wood or metal, for durability.
Sketching Your Layout
Draw a simple sketch of your towel rack design. Include the measurements and style details. Mark where each part will go on the wall. This visual plan helps you see the final result. It guides you during installation for better accuracy.
Preparing Your Workspace
Preparing your workspace is an important first step in creating a towel rack. A clean and organized area helps you work better and faster. It also keeps you safe while handling tools and materials. Taking time to set up properly makes the whole project smoother and more enjoyable.
Gathering Supplies
Start by collecting all materials and tools you need. Typical supplies include screws, brackets, a drill, measuring tape, and the towel rack itself. Check each item to ensure it is in good condition. Having everything ready saves time and avoids interruptions during the project. Put the supplies in one spot for easy access.
Setting Up A Safe Work Area
Choose a well-lit and spacious place to work. Clear the floor of any clutter to avoid tripping. Use a sturdy table or workbench to hold your materials. Keep children and pets away from the area. Wear safety glasses and gloves to protect your eyes and hands. Safety first for a successful towel rack installation.
Credit: www.simplifiedbuilding.com
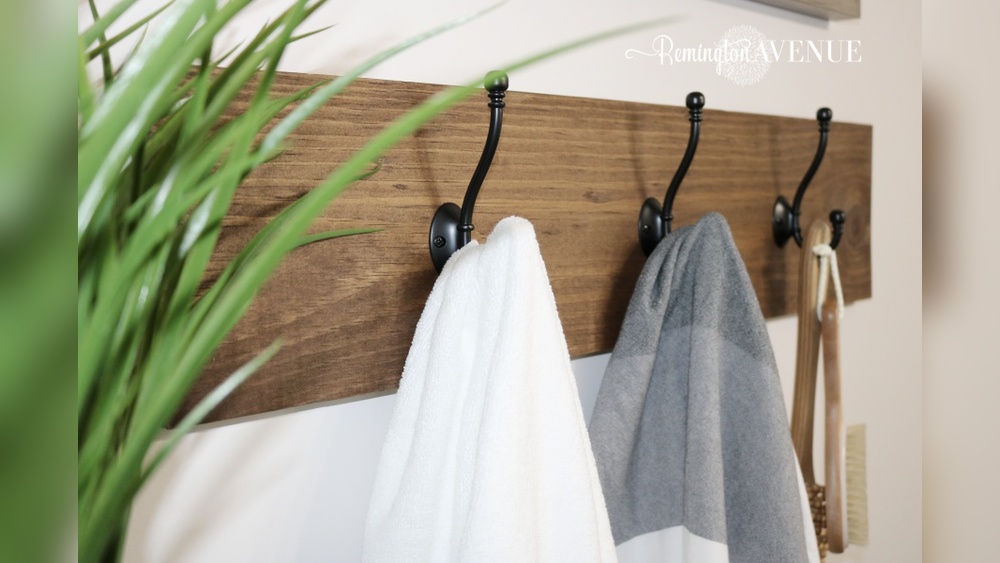
Cutting And Assembling Parts
Cutting and assembling parts is a key step in building a towel rack. It shapes the project and ensures the rack will be strong. Accurate cuts and solid joins make the rack both useful and nice to look at.
Take your time with each step. Carefully measure, cut, sand, and join pieces to create a sturdy towel rack. This section guides you through these tasks with clear instructions.
Measuring And Cutting Wood Or Pipes
Start by measuring the wood or pipes with a tape measure. Mark the exact length needed for each part. Use a pencil to make clear, straight lines.
Cut along the lines using a saw or pipe cutter. Keep your cuts straight and clean for the best fit. Check the pieces after cutting to ensure they match your plan.
Sanding And Smoothing Surfaces
Sand the edges and surfaces of each piece with sandpaper. Smooth surfaces prevent splinters and rough spots. It also helps paint or finish stick better.
Use fine-grit sandpaper for a smooth finish. Wipe off dust with a cloth before moving to assembly.
Joining Pieces Securely
Join the parts using screws, nails, or brackets. Make sure each connection is tight and strong. Loose joints can cause the rack to wobble or break.
Pre-drill holes to avoid splitting the wood. Use a level to keep the rack straight during assembly. Double-check each join before tightening fully.
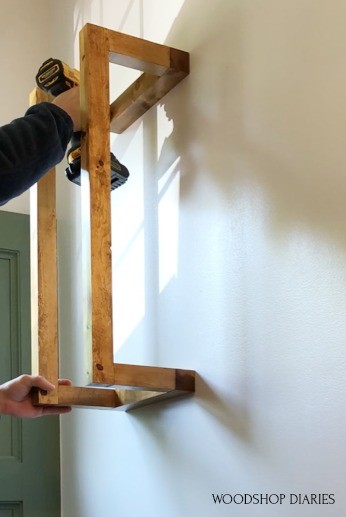
Finishing And Installing The Rack
Finishing and installing your towel rack is the final step. This step makes your rack look great and work well. A good finish protects the wood and matches your room’s style. Proper installation keeps the rack safe and sturdy.
Painting Or Staining For Style
Choose paint or stain to match your bathroom decor. Paint adds color and hides wood grain. Stain shows the natural wood beauty with a tint. Apply thin, even coats for the best result. Let each coat dry completely before adding the next. Use a clear sealant to protect the finish from moisture.
Mounting On Walls
Find the best place for your rack on the wall. Use a level to keep the rack straight. Mark the spots for screws carefully. Drill holes in the wall to fit anchors if needed. Anchors hold the rack firmly, especially on drywall. Screw the rack into the wall securely. Double-check the rack is tight and does not move.
Ensuring Stability And Safety
Test the rack by gently pulling on it. Make sure it holds weight without wobbling. Use strong screws and anchors designed for your wall type. Avoid thin or weak materials that can break easily. Check all parts for sharp edges or splinters. Sand rough spots smooth to prevent injury. A stable and safe rack lasts longer and protects your towels well.
Creative Variations And Tips
Creating a towel rack offers many chances to add your own style. Small changes can make your towel rack unique and practical. Simple ideas can turn a plain rack into something special. Use these tips to make your towel rack fit your space and needs.
Adding Hooks Or Shelves
Hooks add more spots to hang towels or robes. Place hooks under the rack or on the sides. Shelves give space for extra towels or bathroom items. Use small wooden or metal shelves for a neat look. These additions make your towel rack more useful.
Using Recycled Materials
Old wood, metal pipes, or even ladders can become towel racks. Recycled materials save money and help the environment. Sand and paint old wood to refresh it. Metal pipes give a modern, industrial feel. Creativity with these materials leads to unique designs.
Maintenance And Cleaning Advice
Keep your towel rack clean to avoid dust and mildew. Wipe it down weekly with a damp cloth. Use mild soap for sticky spots or stains. Check for loose screws or parts often. Proper care helps your towel rack last longer and look good.
Frequently Asked Questions
What Materials Are Best For Making A Towel Rack?
Wood, metal, and plastic are popular materials for towel racks. Wood offers a classic look, metal ensures durability, and plastic is lightweight and affordable. Choose based on your bathroom style and moisture levels for long-lasting use.
How Do I Mount A Towel Rack On Drywall?
Use wall anchors or toggle bolts to securely mount a towel rack on drywall. Locate studs for added strength. Mark drill points, drill holes, insert anchors, and screw the rack in place carefully to avoid damage.
Can I Create A Towel Rack Without Tools?
Yes, you can make a towel rack using adhesive hooks or tension rods. These options require no drilling or screws, making installation quick and damage-free. They work best for lightweight towels and temporary setups.
How High Should A Towel Rack Be Installed?
Install a towel rack about 48 inches from the floor for easy reach. This height suits most adults and allows towels to hang freely without touching the floor, promoting better drying and cleanliness.
Conclusion
Creating a towel rack is simple and useful. You can save space and keep towels neat. Choose the right spot and tools before starting. Follow the steps carefully to avoid mistakes. A homemade towel rack adds a personal touch to your home.
It also helps keep your bathroom organized. Try making one today and enjoy the benefits. Small projects like this make a big difference. Easy, quick, and practical. Why wait?