Are you ready to boost your home’s security with a Ring Video Doorbell but don’t know where to start? Mounting your Ring Doorbell might seem tricky, but with the right steps, you can have it up and running in no time.
Imagine being able to see who’s at your door from anywhere, giving you peace of mind and control. In this guide, you’ll get clear, simple instructions that anyone can follow. Keep reading, and you’ll learn exactly how to mount your Ring Video Doorbell quickly and securely—no hassle, no confusion.
Tools And Materials Needed
Gathering the right tools and materials makes mounting your Ring Video Doorbell easier. Prepare everything before starting. This saves time and avoids frustration. The parts and tools are simple and easy to find. Safety gear protects you during the process.
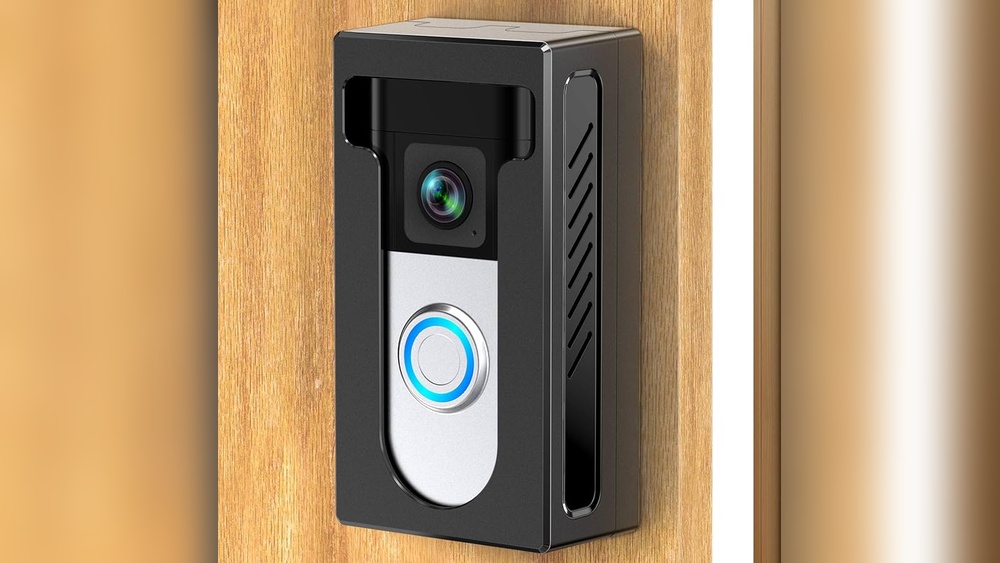
Ring Video Doorbell Components
Your Ring Video Doorbell box includes the doorbell unit itself. It has a built-in camera and a button. You will also find a mounting bracket. Screws and anchors come with the package. A screwdriver bit for your drill is often included. Some models have a rechargeable battery inside.
Installation Tools
You need a power drill or screwdriver. A drill helps with harder walls. A level tool ensures your doorbell mounts straight. A pencil marks where to drill holes. A tape measure helps position the doorbell properly. A small wrench or Allen key may be needed for some screws. Have a ladder ready if mounting high.
Safety Gear
Wear safety glasses to protect your eyes from dust. Gloves protect your hands while drilling. Use ear protection if your drill is loud. Ensure stable footing with non-slip shoes. Keep your work area clear of obstacles. Safety first keeps the job smooth and injury-free.
Credit: ring.com
Choosing The Best Location
Choosing the best location for your Ring Video Doorbell is key to getting clear video and good performance. The right spot helps you see visitors clearly and keeps the device working well. Think about height, angle, Wi-Fi signal, and any objects that might block the view. These factors make a big difference in your doorbell’s effectiveness.
Optimal Height And Angle
Mount the doorbell at eye level for clear faces. Usually, 48 inches from the ground works well. Aim the camera slightly downward to catch visitors’ faces and packages on the ground. Avoid placing it too high or too low. This ensures the best view and helps the motion sensor work correctly.
Wi-fi Signal Considerations
Check the Wi-Fi signal strength at your chosen spot. A strong signal means smooth live video and quick alerts. Avoid thick walls or metal that can weaken the signal. Use a Wi-Fi extender if needed. Good connection keeps your doorbell reliable and responsive.
Avoiding Obstructions
Clear the area around the doorbell from plants, decorations, or furniture. Obstructions can block the camera’s view or motion detection. Make sure the doorbell has a clear line of sight to your porch or entryway. This helps capture all activity and avoids false alerts.
Preparing The Mounting Surface
Preparing the mounting surface is a key step before installing your Ring Video Doorbell. A clean, well-marked surface ensures a secure and stable installation. This section guides you through essential tasks for a smooth setup.
Cleaning The Area
Start by clearing the area where you will mount the doorbell. Remove dirt, dust, and debris using a damp cloth. A clean surface helps the mounting bracket stick better. Let the area dry completely before moving on.
Marking Drill Points
Next, find the exact spots to drill holes. Hold the mounting bracket against the wall. Use a pencil to mark the holes through the bracket’s slots. Accurate marks make drilling easier and prevent mistakes.
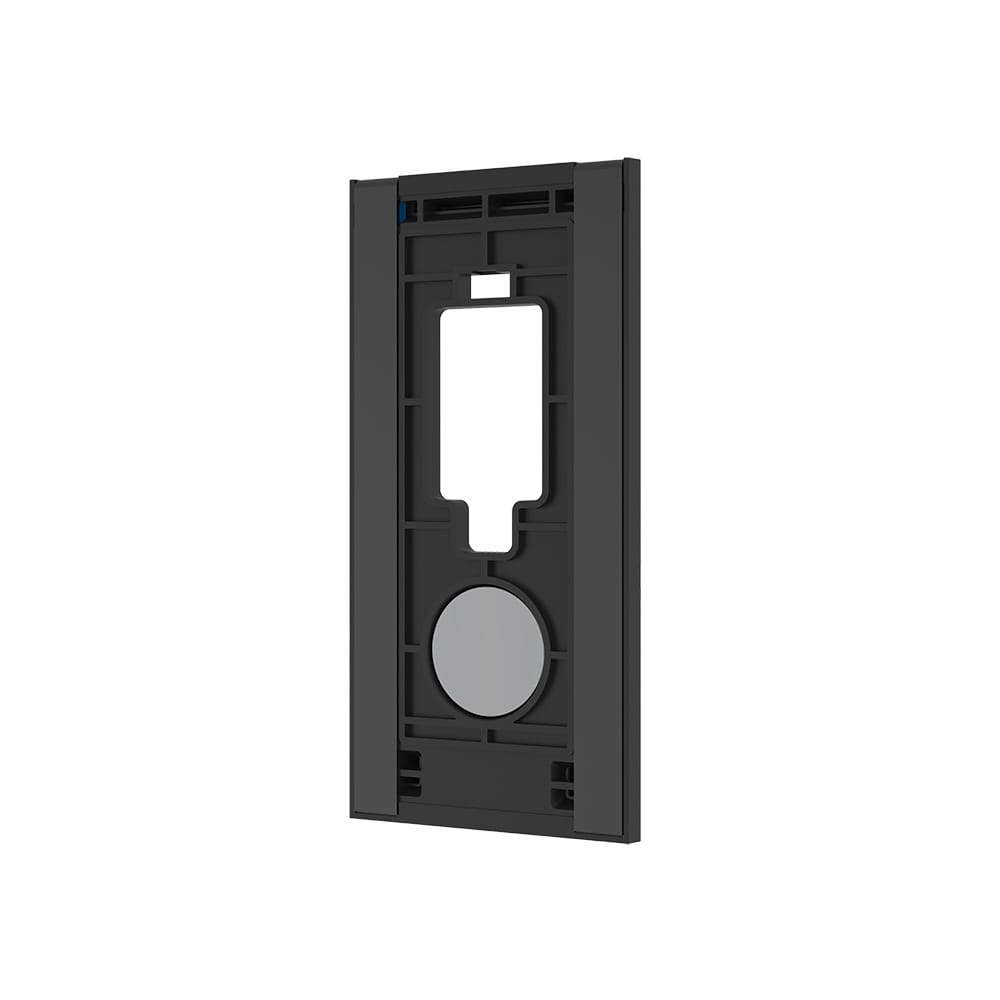
Using The Mounting Template
Many Ring Video Doorbells come with a mounting template. Tape this paper to the surface where you want the doorbell. The template shows where to drill and place screws. Follow the guide carefully for perfect alignment.
:strip_icc()/BHG-how-to-install-video-doorbell-6833360-part-01-step-05_30445-c97141832b6541158a12194e97fccded.jpg)
Credit: www.esseg.eu
Installing The Mounting Bracket
Installing the mounting bracket is the first step to secure your Ring Video Doorbell. It holds the device firmly in place. Proper installation ensures the doorbell works well and stays safe from damage.
Follow these simple steps to install the bracket correctly. Use the right tools and take your time for the best results.
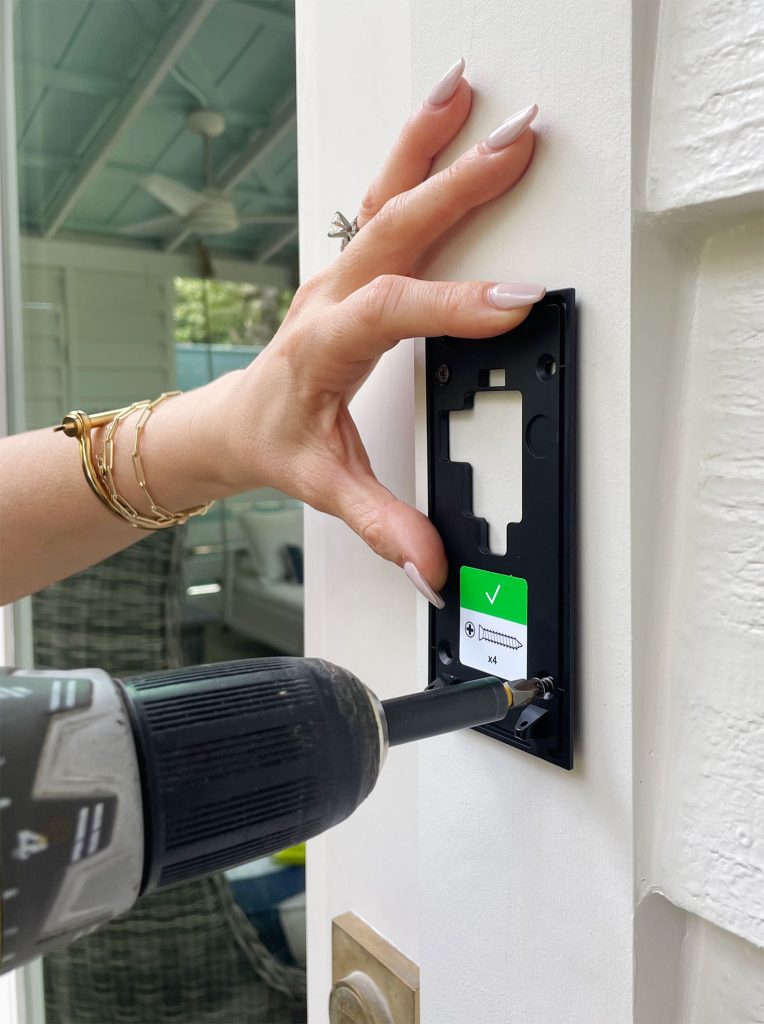
Drilling Holes
Mark the spots where you want to place the bracket. Use a pencil or marker. Use a drill with the correct bit size for the holes. Drill straight holes into the wall or door frame. Make sure the holes match the bracket’s screw holes.
Inserting Anchors
Push plastic anchors into the drilled holes. Tap them gently with a hammer if needed. Anchors hold screws tightly in drywall or brick. Without anchors, screws may not stay secure. Choose anchors based on your wall type.
Securing The Bracket
Place the bracket over the holes. Insert screws through the bracket into the anchors. Tighten screws using a screwdriver. Check the bracket is firm and does not move. A secure bracket keeps your Ring doorbell stable.
Attaching The Doorbell
Attaching your Ring Video Doorbell is a simple step that completes your setup. This part ensures your device works correctly and stays safe. Follow each step carefully for the best results. Proper attachment helps your doorbell capture video clearly and stay secure against weather and theft.
Connecting The Doorbell
Start by connecting the doorbell to its mounting bracket. Align the metal contacts on the back of the doorbell with those on the bracket. This connection powers the device and allows it to communicate with your app. Press the doorbell firmly until you hear a click sound. This confirms the connection is secure and ready to use.
Aligning And Securing
Next, check the alignment of your doorbell. Make sure it faces the area you want to monitor. Adjust the angle slightly if needed for a clear view. Use the included screws to fix the bracket to the wall. Tighten the screws with a screwdriver until the bracket feels stable. Avoid overtightening, which can damage the mounting surface.
Locking The Device
Finally, lock your Ring Video Doorbell in place. Some models have a small security screw at the bottom. Insert the special screwdriver that came with your device. Turn the screw until the doorbell locks securely onto the bracket. This step protects the doorbell from theft or accidental removal. Your device is now ready to use and stay safe outdoors.
Configuring The Device
Configuring your Ring Video Doorbell is the next step after mounting. This process lets the device connect with your phone and home network. Proper setup ensures you receive alerts and can view live video anytime. Follow these simple steps to get your doorbell ready.
Downloading The App
Start by downloading the Ring app on your smartphone. The app is available for free on both iOS and Android stores. Open the app and create an account or log in if you already have one. The app guides you through the setup process, making it easy to follow.
Connecting To Wi-fi
Connect your Ring Doorbell to your home Wi-Fi network. The app will prompt you to select your Wi-Fi and enter the password. Make sure your phone stays close to the doorbell during this step. A strong Wi-Fi signal is important for smooth video and notifications.
Testing Functionality
After connecting, test the doorbell to check its functions. Press the button to see if your phone receives an alert. Try the live video feature in the app to ensure the camera works. Adjust settings like motion sensitivity and notification preferences for best results.
Troubleshooting Common Issues
Troubleshooting common issues with your Ring Video Doorbell helps keep it working smoothly. Problems like weak Wi-Fi, battery drain, or wrong camera angle can reduce performance. Fixing these quickly improves your doorbell’s reliability and your home security.
Wi-fi Connectivity Problems
Weak Wi-Fi causes delays and missed alerts. Check your router distance from the doorbell. Move it closer if the signal is weak. Restart your router to refresh the connection. Use the Ring app to run a speed test. Aim for at least 2 Mbps upload speed.
Power And Battery Tips
Low battery affects video quality and notifications. Charge the battery fully before mounting. Remove the doorbell to recharge when the app shows low power. Use the optional wired connection if possible. It keeps the battery charged and the doorbell running nonstop.
Adjusting Camera Angle
Wrong angle limits the doorbell’s view. Loosen the screws and tilt the camera up or down. Aim to cover your doorstep clearly. Test the live view in the app after adjusting. Secure the screws once you find the best view.
Credit: www.younghouselove.com
Frequently Asked Questions
How Do I Mount A Ring Video Doorbell Securely?
To mount your Ring Video Doorbell securely, use the provided screws and anchors. Choose a solid surface near your door. Ensure the device is level and firmly attached to avoid movement or damage.
What Tools Are Needed To Install A Ring Doorbell?
You need a drill, screwdriver, level, and the mounting kit included with your Ring Doorbell. A pencil for marking holes and a ladder may also be useful if mounting high.
Can I Mount Ring Doorbell On Brick Or Stucco?
Yes, use a masonry drill bit and anchors to mount on brick or stucco. This ensures a strong hold and prevents damage to the surface or your doorbell.
How High Should I Install A Ring Video Doorbell?
Install your Ring Doorbell about 48 inches from the ground. This height captures clear facial recognition and covers most entryway activity effectively.
Conclusion
Mounting a Ring Video Doorbell is simple with the right steps. Choose a good spot near your door. Use the tools and screws that come with the device. Make sure the doorbell is level and tight. Connect it to your Wi-Fi for smooth use.
Test the doorbell to check the video and sound. Enjoy better home security and easy visitor alerts. Taking a little time now saves hassle later. Your front door gets safer and smarter. Easy setup. Clear steps. Peace of mind.