Are you tired of constantly opening the door for your furry friend? Imagine giving your pet the freedom to come and go as they please, without any hassle for you.
Making a pet door flap is easier than you think, and it can save you time and effort every day. In this guide, you’ll discover simple steps to create a durable, functional pet door flap that fits your home perfectly.
Keep reading, and you’ll have your pet enjoying their new independence in no time!

Credit: www.reddit.com
Choosing The Right Pet Door
Choosing the right pet door is the first step to making a perfect pet door flap. A well-chosen door fits your pet comfortably and keeps your home safe. It also makes sure your pet can go in and out easily. Think about your pet’s size, habits, and the place where you will install the door.
Measuring Your Pet
Measure your pet’s height from the floor to its shoulders. Also, measure the width across the widest part of your pet’s body. Add a few inches to these numbers. This extra space helps your pet move through the door without squeezing. Accurate measurements make the pet door flap comfortable and safe.
Selecting Materials
Choose materials that are strong and weather-resistant. Plastic flaps are light and easy to clean. Vinyl flaps offer flexibility and good insulation. For colder places, consider insulated flaps that keep out cold air. The frame should be durable to last a long time. Pick materials that suit your climate and your pet’s needs.
Types Of Pet Doors
There are several types of pet doors. Simple flap doors swing open when your pet pushes them. Magnetic or weighted flaps close quietly and prevent drafts. Electronic pet doors open only for your pet’s collar tag or microchip. Sliding doors fit into glass door tracks. Each type has benefits depending on your pet and your home setup.

Credit: hp-clinics.com
Gathering Tools And Supplies
Before starting to make a pet door flap, gather all tools and supplies. This step saves time and keeps the project smooth. Having everything ready helps avoid interruptions. It also ensures accuracy and safety during work.
Essential Tools
Prepare basic tools for cutting and measuring. A drill is necessary to make holes for screws. Use a jigsaw or handsaw to cut the door or wall. A screwdriver helps attach the flap frame securely. A tape measure or ruler ensures precise measurements. Pencil or marker is useful to mark cutting lines.
Safety Gear
Protect yourself during the project. Wear safety glasses to shield eyes from dust and debris. Use work gloves to protect hands from sharp edges. A dust mask prevents inhaling particles while cutting. Ear protection is important if using loud power tools. Safety gear keeps you safe and comfortable.
Materials Checklist
Collect materials needed for the pet door flap. Get a pet door flap kit or make your own from plastic or vinyl. Screws or nails are required to fix the flap in place. Weatherstripping helps seal the edges for better insulation. Sandpaper smooths rough edges after cutting. Having all materials ready makes the process faster and easier.
Preparing The Door Or Wall
Preparing the door or wall is the first step to install a pet door flap. This phase needs careful attention to make sure the flap fits well. It also keeps the door or wall safe during the process. Taking time here helps avoid mistakes later.
Marking The Cut Area
Start by measuring your pet’s size. Use these measurements to mark the cut area on the door or wall. Draw clear lines with a pencil. Double-check the size before cutting. Correct markings guide you to a perfect fit.
Checking For Obstructions
Look inside the door or wall for wires, pipes, or studs. Use a stud finder or a small drill to check. Avoid cutting through anything important. This step protects your home from damage and keeps you safe.
Protecting Surrounding Surfaces
Cover the areas around the cut with painter’s tape. This prevents scratches and paint chips. Use a drop cloth to catch dust and debris. Protecting surfaces keeps your space clean and neat.
Cutting The Opening
Cutting the opening for a pet door flap is a key step in the project. It needs care and precision. The size must fit your pet perfectly. A neat cut makes the door look good and work well. Follow the right steps for clean, safe cutting.
Using The Right Saw
Choose a saw that fits the material you cut. A jigsaw works well for wood and plastic. It cuts curves and straight lines easily. For metal doors, use a metal-cutting blade. Always check the blade is sharp before starting.
Cutting Techniques
Mark the area clearly with a pencil or tape. Cut slowly along the line to keep it straight. Hold the saw firmly for control. Take breaks if the blade gets hot. Do not force the saw; let it do the work.
Smoothing Edges
After cutting, smooth the edges with sandpaper or a file. This stops splinters and sharp spots. Smooth edges protect your pet from cuts. Check the opening again for size and shape. Make small adjustments if needed.
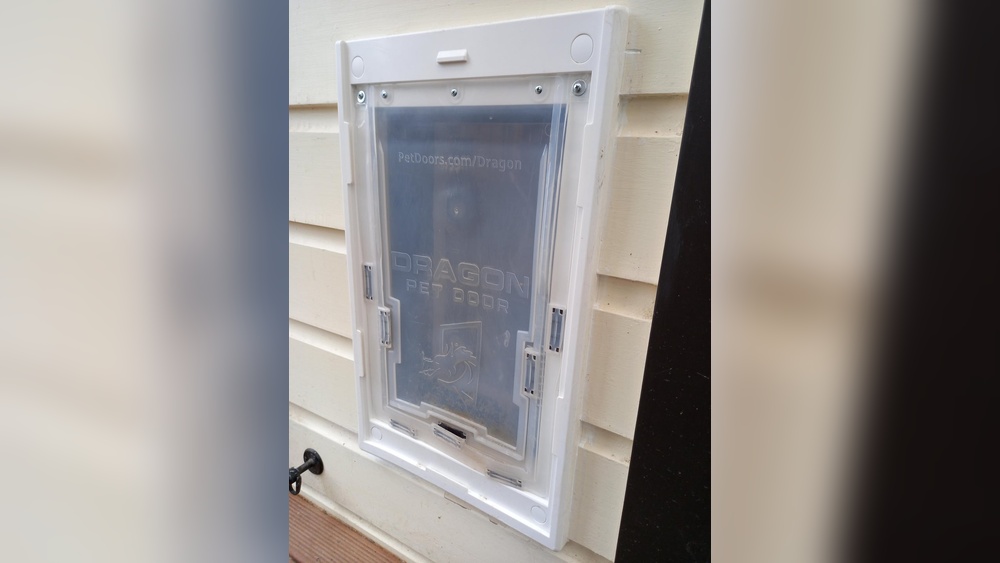
Installing The Pet Door Flap
Installing the pet door flap is a key step to let your pet come and go easily. Proper installation ensures the door works well and stays secure. Follow simple steps to fit the frame, attach the flap, and seal the edges.
Fitting The Frame
Start by placing the frame in the hole cut for the door. Check it fits snugly without gaps. Hold the frame steady and use screws to fix it in place. Make sure the frame is straight and level. This keeps the flap working smoothly.
Securing The Flap
Next, attach the flap to the frame. Align it carefully so it swings freely. Use the screws or clips that come with the door kit. Test the flap by pushing it to see it opens easily. Tighten screws if the flap feels loose or stiff.
Sealing And Weatherproofing
Seal around the frame edges with weatherproof tape or silicone. This stops drafts, rain, and bugs from entering. Check that the flap seals well when closed. Proper sealing keeps your home comfortable and protects the door frame.
Testing And Adjustments
After installing your pet door flap, testing and making adjustments is key. This step ensures your pet can use the door comfortably and safely. It also helps fix any issues before regular use. Watch your pet interact with the flap closely. Notice any hesitation or difficulty. This information guides your next actions to improve the door’s function.
Encouraging Your Pet To Use The Door
Help your pet get used to the door flap with patience. Use treats near the flap to attract them. Gently push the flap open for them the first few times. Praise your pet every time they try. Practice short sessions daily to build confidence. Never force your pet through the door. Let them explore the flap at their own speed.
Making Size Adjustments
Check if the flap size fits your pet well. It should be large enough for easy passing. Too small causes discomfort or refusal to use. Too large may let in cold air or pests. Measure your pet’s width and height carefully. Trim the flap edges or adjust the frame if needed. Make small changes, then test again. Repeat until the size feels right for your pet.
Troubleshooting Common Issues
Notice problems like the flap sticking or not swinging freely. Clean the hinges and check for obstructions. Tighten loose screws or replace damaged parts. If your pet seems scared, slow down the training. Check for drafts or noise that might scare your pet. Use soft padding around the door frame if needed. Keep testing and adjusting until the flap works smoothly.
Maintaining Your Pet Door
Maintaining your pet door flap keeps it working well for a long time. Dirt, weather, and pet use cause wear. Regular care stops small problems from growing. Simple steps help your pet door last and stay safe.
Cleaning Tips
Clean the flap often to remove dirt and dust. Use a soft cloth and mild soap. Wipe both sides gently. Avoid harsh chemicals that can damage the flap material. Check the frame and hinges for stuck debris. Clean around the edges to keep the flap moving freely.
Repairing Wear And Tear
Look for cracks or holes in the flap. Small tears can be fixed with strong tape or patch kits. Tighten loose screws on the frame and hinges. Replace worn-out parts to avoid bigger damage. Fixing problems early keeps the door safe for pets.
Seasonal Care
Check your pet door before winter and summer. Cold weather can make the flap stiff. Use a silicone spray to keep it flexible. In hot months, watch for sun damage and fading. Cover the door during storms to protect it from rain and wind. Seasonal care keeps the flap working well year-round.

Credit: propheticimagination.org
Frequently Asked Questions
How Do I Measure My Pet For A Door Flap?
Measure your pet’s height, width, and shoulder width. Add extra space for comfortable movement. Accurate measurements ensure a perfect flap size for your pet’s safety and ease of use.
What Materials Are Best For A Pet Door Flap?
Use durable, weather-resistant materials like flexible vinyl or heavy-duty plastic. These protect against weather and wear. Choose materials easy to clean and maintain for long-lasting use.
Can I Install A Pet Door Flap In Any Door?
Most doors can accommodate a pet flap, including wood, metal, and glass. Ensure your door thickness suits the flap size. Some doors may require special tools or professional help for installation.
How Do I Secure A Pet Door Flap Against Weather?
Add weatherstripping or seals around the flap edges. This prevents drafts, rain, and insects from entering. Proper sealing improves energy efficiency and keeps your home comfortable.
Conclusion
Making a pet door flap is easier than it seems. With basic tools and steps, you can do it yourself. This project saves money and gives your pet more freedom. Always measure carefully and choose the right materials. Your pet will enjoy going in and out easily.
Try this simple DIY and see the difference today. Small efforts bring big comfort for your furry friend.