Are you tired of cluttered bathrooms and towels that never seem to dry properly? Imagine having a stylish, space-saving towel rack that not only keeps your towels organized but also adds a touch of Japanese simplicity to your home.
Making your own Japanese towel rack is easier than you think, and it can transform your daily routine. In this guide, you’ll discover simple steps to create a beautiful, functional towel rack that fits your space perfectly. Keep reading, and by the end, you’ll have a project that saves you money and brings calm, clean design to your bathroom.

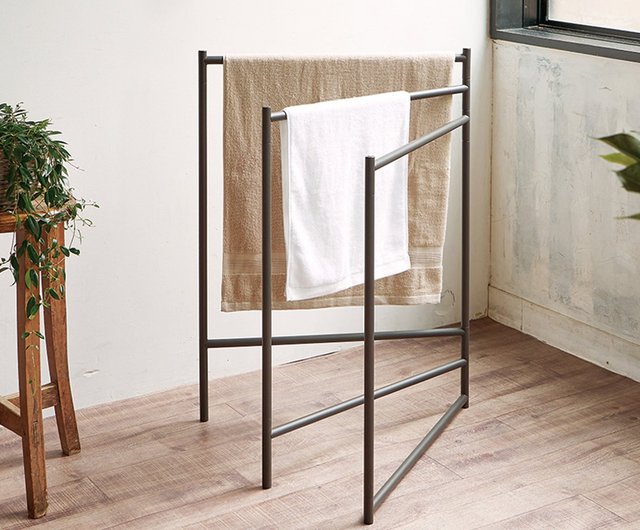
Credit: www.amazon.com
Choosing The Right Materials
Choosing the right materials is a key step in making a Japanese towel rack. Good materials ensure your towel rack is strong and lasts a long time. The wood should be sturdy but also look nice. The tools must be easy to use and safe. This section helps you pick the best wood and tools for your project.
Selecting Wood Types
Choose wood that resists moisture well. Cedar and cypress are popular choices. They are light and have a nice smell. These woods also resist decay and insects. Pine can work but may need extra treatment. Avoid soft woods that break easily. Hardwood like oak offers strength but is heavy. Pick wood that fits your style and budget.
Essential Tools Needed
Start with basic woodworking tools. A saw is necessary to cut wood pieces. Use a drill to make holes for screws. Sandpaper smooths rough edges for a clean finish. A screwdriver helps attach parts securely. Clamps hold pieces while gluing or screwing. Safety gear like gloves and goggles protects you. Having the right tools makes building easier and safer.
Designing Your Towel Rack
Designing your Japanese towel rack is the first step to creating a practical and beautiful piece. This design phase sets the tone for the entire project. Focus on size, shape, and style to ensure the rack fits your space and taste.
A well-planned design helps you build a towel rack that feels balanced and easy to use. Think about how much space you have and the kind of towels you want to hang. The design should blend function with elegance.
Deciding On Size And Shape
Start by measuring the wall or area where the towel rack will go. Choose a size that fits well but does not crowd the space. Too big or too small can look odd and be less useful.
Select a shape that matches your room’s style. Simple rectangles or gentle curves work well. The shape should allow towels to hang freely without touching the floor.
Incorporating Japanese Aesthetics
Japanese design focuses on simplicity and natural beauty. Use clean lines and avoid extra decorations. Let the natural wood grain or texture stand out.
Choose neutral colors like soft browns or light beiges. These colors bring calm and warmth to the room. Use materials like bamboo or light wood to keep the look authentic.
Preparing The Wood
Preparing the wood is a crucial step in making a Japanese towel rack. It ensures the wood fits perfectly and looks great. Proper preparation also makes the wood safe to handle and more durable.
Start with careful measuring and cutting. Then, smooth the surface by sanding. These steps help create a sturdy and beautiful towel rack.
Measuring And Cutting
Measure the wood pieces according to your design. Use a tape measure and mark the exact lengths. Double-check each measurement before cutting.
Cut the wood with a saw, following the marks closely. Straight cuts make assembly easier. Clean, accurate cuts improve the rack’s look and strength.
Sanding For Smoothness
Use sandpaper to smooth all surfaces and edges of the wood. Start with coarse sandpaper to remove rough spots.
Then, use finer sandpaper to make the wood soft to touch. Smooth wood prevents splinters and helps the finish stick better. Take your time sanding every piece evenly.
Assembling The Rack
Assembling the Japanese towel rack is a straightforward process. It involves connecting the parts carefully. This step shapes the rack’s strength and appearance. Taking time here ensures a sturdy and neat rack.
Joining Techniques
Start by aligning the wooden pieces precisely. Use wood glue on the edges for a strong bond. Clamp the pieces together and let the glue dry fully. For extra strength, add small finishing nails or screws. Countersink screws to keep the surface smooth. Sand the joints lightly after the glue dries.
Adding Support Bars
Support bars keep the rack stable and balanced. Measure the width between the side frames first. Cut the bars to fit snugly between the sides. Attach them using wood glue and screws for a firm hold. Place bars evenly to distribute weight well. This step prevents wobbling and increases durability.
Finishing Touches
Finishing touches give your Japanese towel rack a polished, beautiful look. They protect the wood and make the rack last longer. Taking time here shows in the final product.
Applying Stain Or Paint
Choose a stain or paint that matches your style. Stains highlight the wood grain and add color. Paint offers bright, solid colors for a bold look. Use a brush or cloth to apply evenly. Let the first coat dry before adding a second. Thin coats prevent drips and uneven spots. Always work in a well-ventilated area.
Sealing For Durability
Sealing protects the towel rack from moisture and wear. Use a clear polyurethane or varnish for strong protection. Apply thin layers with a clean brush. Allow each layer to dry fully before the next. Sand lightly between coats for a smooth finish. Sealing keeps your rack looking fresh and sturdy for years.
Mounting And Placement Tips
Mounting and placing your Japanese towel rack correctly ensures it works well and looks great. Proper placement keeps towels dry and easy to reach. Secure mounting makes the rack safe and sturdy. Follow these simple tips for best results.
Wall Mounting Options
Choose the right wall for strong support. Drywall alone may not hold heavy towels. Use wall studs for better strength. Use a stud finder to locate them easily. If studs are unavailable, use heavy-duty anchors. Screw the rack tightly to avoid wobbling. Mount the rack at a height that suits all users. Use a level tool to keep it straight. This prevents towels from sliding off. Always check the rack after installation for safety.
Ideal Locations For Use
Place the towel rack near the shower or bath. This helps towels dry quickly after use. Avoid spots with direct water spray to prevent damage. A spot near the sink is good for hand towels. Keep the rack away from heat sources. Heat can weaken the wood or material. Choose a place with good air flow. This reduces dampness and mold growth. Make sure the rack does not block doors or walkways. Easy access improves daily convenience and use.
Maintenance And Care
Maintaining your Japanese towel rack keeps it looking good and working well for years. Simple care routines protect the wood and metal parts from damage. Clean racks last longer and stay safe to use.
Cleaning Techniques
Wipe the rack with a soft, dry cloth to remove dust. Use a damp cloth with mild soap for tougher dirt. Avoid harsh chemicals that can harm wood or metal finishes. Dry the rack completely after cleaning to stop moisture damage.
Extending Rack Longevity
Keep the rack away from direct sunlight and damp places. Check screws and joints regularly and tighten them if loose. Apply a light wood oil or wax to wooden parts once a year. Avoid hanging heavy or wet towels for long periods. These steps help your rack stay strong and beautiful.
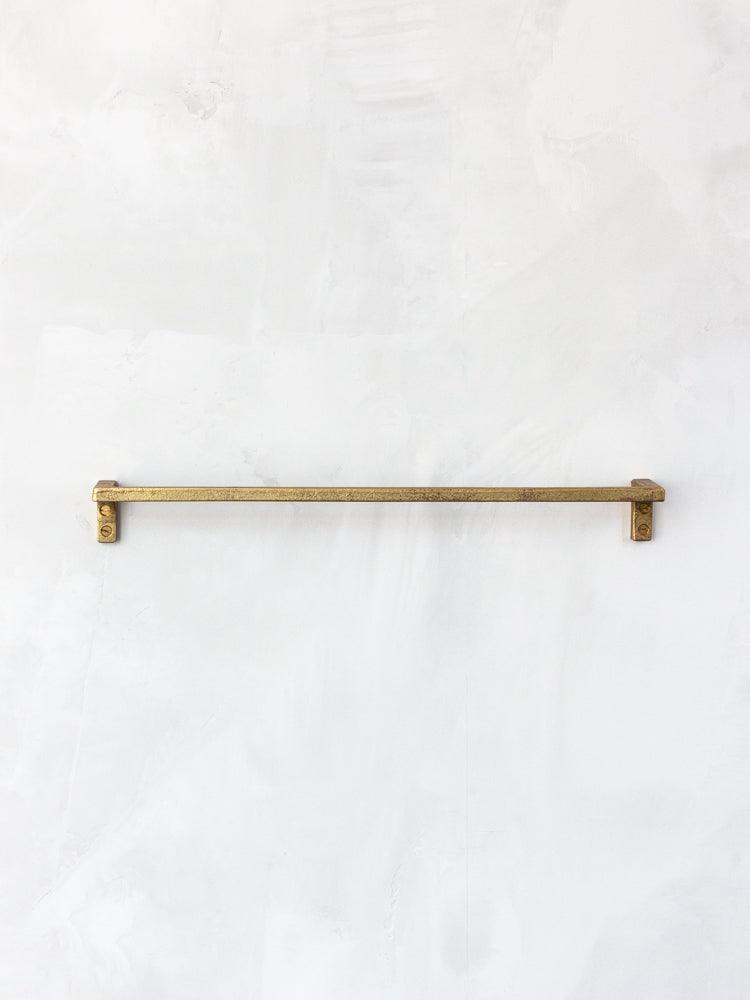
Credit: www.liftingitalia.com
Credit: rikumo.com
Frequently Asked Questions
What Materials Are Needed For A Japanese Towel Rack?
You need wood planks, screws, sandpaper, wood glue, and a drill. Choose smooth, durable wood like cedar or pine. These materials ensure a sturdy, long-lasting towel rack with a natural Japanese aesthetic.
How Do I Assemble A Japanese Towel Rack?
Start by cutting wood to size, then sand all edges. Attach horizontal slats to vertical supports using screws and wood glue. Ensure even spacing for towels to dry properly. Finish by sanding and applying a protective finish.
Can I Customize The Size Of The Towel Rack?
Yes, adjust the length and height based on your space. Measure the wall area before building. Custom sizes help fit different bathroom layouts while maintaining the rack’s functionality and style.
How Do I Maintain A Wooden Japanese Towel Rack?
Regularly dust and wipe the rack with a damp cloth. Avoid excess moisture to prevent wood damage. Apply wood oil or varnish annually to keep it smooth and protected from wear.
Conclusion
Building a Japanese towel rack adds style to any bathroom. It uses simple tools and easy steps anyone can follow. This project saves money and gives a personal touch. You can choose wood that fits your space and taste. Hang towels neatly and keep your bathroom tidy.
Try making one today and enjoy a fresh look. Small changes make a big difference. Your new towel rack will be both useful and beautiful.