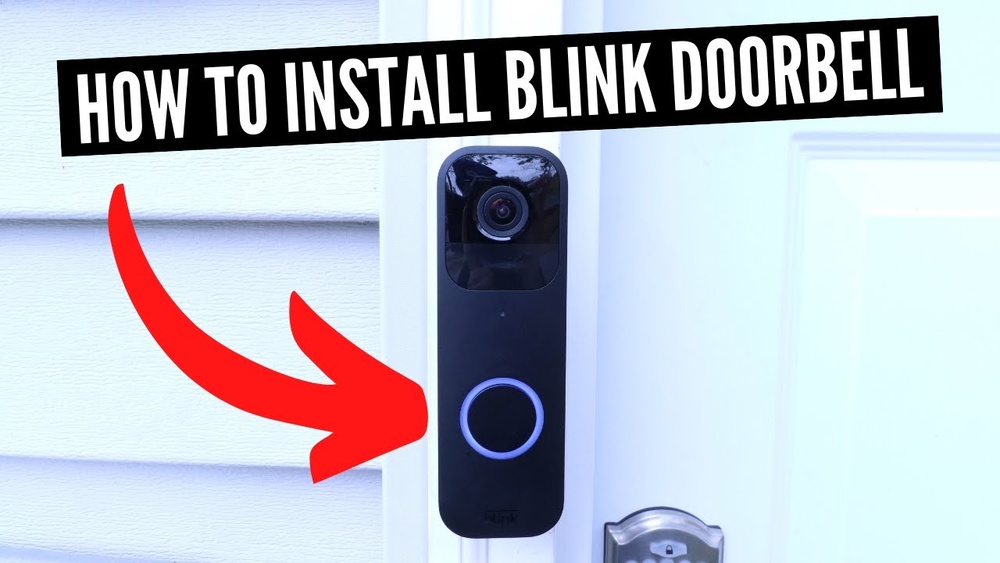
Installing a Blink Video Doorbell might seem tricky at first, but you’re closer to making your home smarter and safer than you think. Imagine knowing who’s at your door without getting up or even when you’re away.
This step-by-step guide will walk you through the entire process quickly and easily. By the end, you’ll have your doorbell set up and ready to protect your home. Ready to take control of your doorstep? Let’s get started!
Credit: support.blinkforhome.com
Preparing For Installation
Preparing for installation ensures a smooth setup of your Blink Video Doorbell. This step helps avoid delays and problems later. Proper preparation saves time and effort.
Begin by gathering all necessary tools and materials. Confirm the doorbell’s compatibility with your home setup. Lastly, charge the doorbell battery fully before starting installation.
Gathering Required Tools
Collect all tools before you start. Common tools include a drill, screwdriver, and level. You may also need screws and anchors, which come with the doorbell. Having everything ready avoids interruptions during installation.
Checking Doorbell Compatibility
Verify your existing doorbell system works with Blink. Check if your home has a wired doorbell or not. Blink Video Doorbell supports both wired and wireless setups. Confirm your Wi-Fi strength near the doorbell location for good connection.
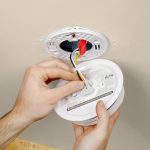
Charging The Doorbell Battery
Remove the battery from the doorbell unit carefully. Use the included USB cable to charge the battery fully. A full charge ensures the doorbell operates correctly during setup. Charging may take a few hours, so plan accordingly.

Credit: www.youtube.com
Setting Up The Blink App
Setting up the Blink app is the first step to use your new video doorbell. The app controls your doorbell and shows live video. It also sends alerts when someone is at your door. Follow these steps to get started quickly and easily.
Downloading The App
Open the App Store on your phone. For iPhones, use the Apple App Store. For Android phones, use Google Play Store. Search for “Blink Home Monitor.” Tap the install button. Wait a few moments for the app to download and install.
Creating An Account
Open the Blink app after installation. Tap “Create Account” on the welcome screen. Enter your email address and choose a strong password. Confirm your password by typing it again. Read and accept the terms and privacy policy. Tap “Sign Up” to finish account creation.
Connecting To Wi-fi
Log in to the Blink app using your new account. The app will ask to connect your doorbell to Wi-Fi. Choose your home Wi-Fi network from the list. Enter your Wi-Fi password carefully. Tap “Connect” to link your doorbell. Wait for the app to confirm connection.
Mounting The Video Doorbell
Mounting the Blink Video Doorbell is a key step in setting up your smart security. This process ensures your device works correctly and captures clear video. The right mounting helps with motion detection and video quality. Follow these steps carefully for a strong and accurate installation.
Choosing The Installation Spot
Pick a location near your main door at eye level. The ideal height is about 48 inches from the ground. Avoid areas with direct sunlight or strong shadows. Make sure the doorbell can see the whole entry area. Check for a nearby power source if your model needs wiring.
Marking Drill Points
Hold the mounting plate against the wall at the chosen spot. Use a pencil to mark the holes through the plate. Double-check the marks to ensure they are level. This step helps prevent crooked installation. Use a level tool for best accuracy.
Installing The Mounting Plate
Drill holes at the marked points using a drill bit suitable for your wall type. Insert wall anchors if mounting on drywall or masonry. Secure the mounting plate with screws tightly. Ensure the plate feels stable and does not wiggle. This base will hold your Blink Video Doorbell firmly.
Connecting The Doorbell
Connecting the Blink Video Doorbell is a key step in setting up your device. This part involves attaching the doorbell to its mount, securing it firmly, and testing the connection. Each step ensures your doorbell works smoothly and keeps your home safe.
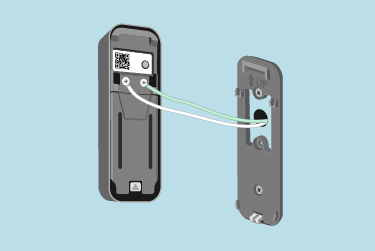
Attaching The Doorbell To The Mount
Start by aligning the doorbell with the mount on your wall or doorframe. Make sure the device fits snugly against the mount. Press gently until you hear a click or feel it lock into place. This ensures the doorbell stays secure during use.
Securing With Screws
Next, use the screws provided to fasten the mount to the wall. Insert the screws into the holes on the mount. Tighten them with a screwdriver until the mount feels stable. This step prevents the doorbell from moving or falling off.
Testing The Connection
After securing the doorbell, test the connection to the app. Open the Blink app on your phone. Press the doorbell button or check the live video feed. Confirm the device sends alerts and streams video properly. This step confirms the doorbell works as expected.
Customizing Doorbell Settings
Customizing your Blink Video Doorbell settings helps you get the best use from your device. Adjusting these options fits the doorbell to your needs. You control how it reacts and what alerts you receive.
Fine-tuning settings improves security and saves battery life. It also reduces unnecessary alerts. Spend a few minutes to set up the doorbell just right.
Adjusting Motion Sensitivity
Open the Blink app and select your doorbell. Find the motion settings section. Slide the sensitivity bar to choose how easily the doorbell detects movement. Lower sensitivity means fewer alerts. Higher sensitivity catches more motion but may cause false alerts.
Test different levels to match your home’s activity. Adjust sensitivity based on your environment and preferences.
Setting Notification Preferences
Notifications tell you about visitors and motion events. In the app, choose which alerts you want. Turn on notifications for doorbell presses and motion detection. You can also set quiet hours to stop alerts at night.
Customize notifications by selecting sound, vibration, or both. This helps you stay informed without constant interruptions.
Enabling Video Recording
Video recording keeps a record of activity at your door. Enable this feature in the app’s settings. Choose how long to save videos based on your Blink subscription plan.
Set recording to start automatically on motion detection or doorbell press. This captures important moments and helps review events later.
Troubleshooting Common Issues
Installing a Blink Video Doorbell is simple, but some issues may arise. Troubleshooting common problems helps keep your doorbell working well. This section covers key fixes for common concerns. Follow these tips to solve issues quickly and enjoy smooth operation.
Fixing Wi-fi Connectivity Problems
Strong Wi-Fi is essential for your Blink Doorbell. Check if your router is on and working. Move the doorbell closer to the router to improve signal. Restart your router to refresh the connection. Make sure your network password is correct. Avoid Wi-Fi interference from other devices. Use a 2.4 GHz network, as Blink does not support 5 GHz.
Resolving App Sync Errors
App sync errors can stop your doorbell from working. Close and reopen the Blink app. Log out and log back in to refresh your account. Check for app updates and install the latest version. Restart your phone to clear temporary glitches. Ensure your phone has a stable internet connection. Remove and re-add the doorbell in the app if errors continue.
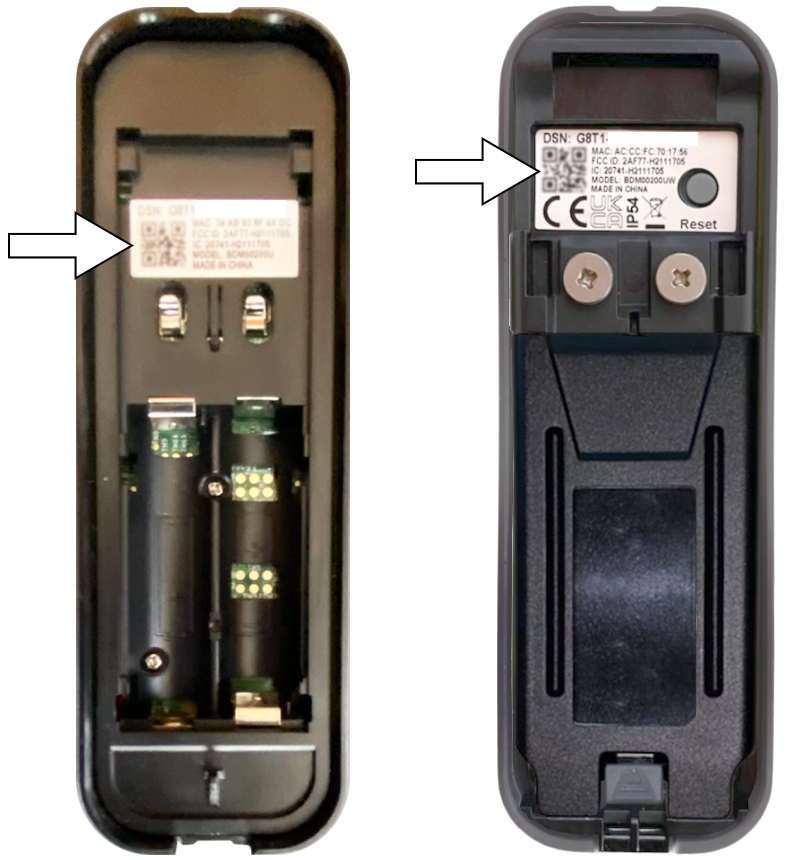
Battery And Power Tips
Battery issues cause many doorbell problems. Use fresh batteries for longer life. Insert batteries correctly, matching the polarity signs. Avoid mixing old and new batteries. Keep your doorbell away from extreme heat or cold. Check battery level in the app regularly. Replace batteries promptly to prevent interruptions.
Credit: support.blinkforhome.com
Frequently Asked Questions
How Do I Install A Blink Video Doorbell?
To install a Blink Video Doorbell, first mount the bracket near your door. Then, connect the doorbell to Wi-Fi using the Blink app. Finally, attach the doorbell unit to the bracket and test the video and audio functions for proper setup.
What Tools Are Needed For Blink Doorbell Installation?
You will need a screwdriver, drill, level, and screws provided in the package. A smartphone with the Blink app is essential for setup. Having a ladder may help if your doorbell is mounted high. Always follow safety guidelines during installation.
Can I Install Blink Doorbell Without Professional Help?
Yes, Blink doorbells are designed for easy DIY installation. The step-by-step instructions in the app guide you through mounting and setup. Basic tools and a stable Wi-Fi connection are sufficient for successful installation at home.
How Do I Connect Blink Doorbell To Wi-fi?
Open the Blink app and follow prompts to add a new device. Select your Wi-Fi network and enter the password. The doorbell connects automatically; ensure the signal is strong for optimal performance.
Conclusion
Installing a Blink Video Doorbell is simple and quick. Follow each step carefully to ensure proper setup. This device helps you see visitors anytime, keeping your home safe. You can easily check videos on your phone from anywhere. Regularly update the app for the best performance.
Enjoy the convenience and peace of mind it brings. Start your installation today and improve home security with ease.