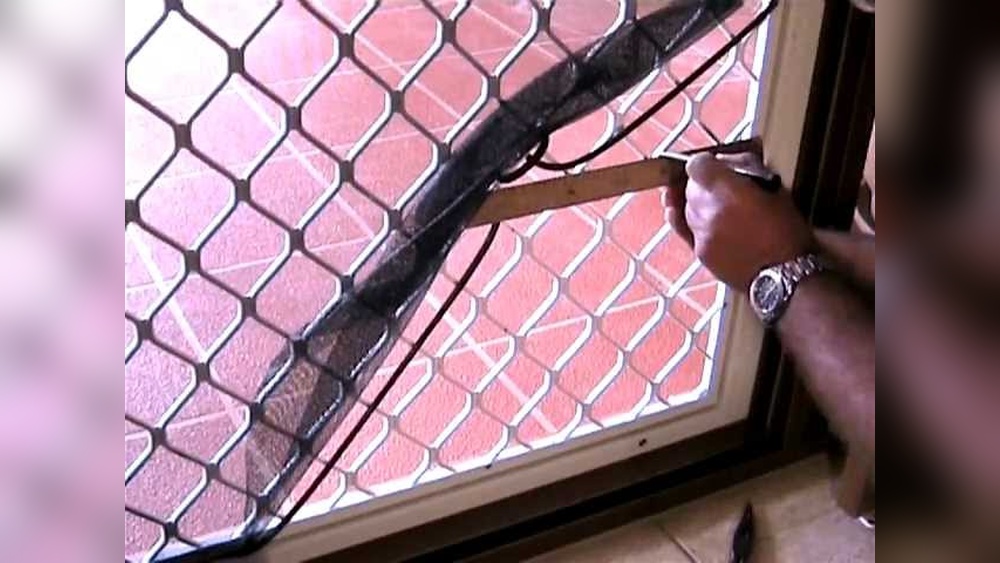

Are you tired of constantly opening your door for your pet? Installing a pet door into your security screen can give your furry friend the freedom to come and go as they please—without compromising your home’s safety.
You might think it’s a complicated job, but with the right steps, you can do it yourself quickly and confidently. In this guide, you’ll discover exactly how to install a pet door into your security screen, saving time, money, and hassle.
Ready to make life easier for both you and your pet? Keep reading, and let’s get started!

Credit: kdfoundation.org
Choosing The Right Pet Door
Choosing the right pet door is key for a smooth installation into your security screen. A good pet door suits your pet’s size and your screen’s material. It also keeps your home safe and comfortable. Consider all these factors before buying.
Types Of Pet Doors
There are several pet door types. Flap doors are common and easy to use. Magnetic flaps close tightly to keep bugs out. Electronic doors open only for your pet using a collar sensor. Sliding panel doors fit into door tracks. Pick a type that fits your security screen and your pet’s habits.
Measuring Your Pet
Measure your pet carefully. Height and width are important. Measure your pet’s widest part, usually the shoulders or hips. Add a few inches to allow easy passage. A door too small will block your pet. A door too big can let in drafts or insects.
Material Considerations
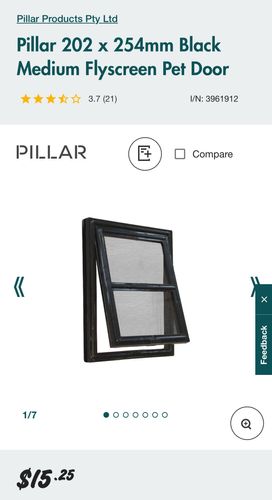
Security screens need durable pet doors. Look for strong frames made of metal or heavy plastic. The flap should be weather-resistant and tough. Transparent flaps help your pet see outside. Ensure the door’s edges won’t damage your screen mesh. Choose a door that blends well with your screen’s material for long-lasting use.
Tools And Materials Needed
Installing a pet door into a security screen requires careful preparation. Having the right tools and materials makes the process easier. It also helps ensure a clean and secure fit. Below is a list of items needed before you start the installation.
Essential Tools
- Measuring tape – for precise measurements
- Marker or pencil – to mark cutting lines
- Power drill – to make holes for screws
- Jigsaw or metal cutting saw – to cut the screen
- Screwdriver – to fix screws securely
- Safety gloves – to protect your hands
- Safety goggles – to protect your eyes
Additional Supplies
- Pet door kit – includes the door and frame
- Replacement screen mesh – in case of damage
- Weather stripping – to seal gaps around the door
- Screws and fasteners – usually come with the pet door
- Adhesive tape – for extra reinforcement
- Sandpaper – to smooth rough edges after cutting
Preparing The Security Screen
Preparing the security screen is the first step to a smooth pet door installation. This step ensures a perfect fit and keeps your screen intact. Careful preparation avoids damage and helps the pet door work well.
Take your time during this phase. It sets the foundation for the rest of the project. Let’s explore how to prepare the security screen properly.
Selecting The Installation Spot
Choose a spot on the screen where your pet can easily reach. The spot should be low enough for your pet to use without trouble. Also, check that the screen frame can support the pet door.
Avoid spots near hinges or locks. These areas might weaken the screen or interfere with the door’s function. Pick a flat, stable section of the screen for best results.
Marking The Cutout Area
Use the pet door template to mark the cutout on the screen. Hold the template steady and trace around it with a pencil. Make sure the markings are clear and accurate.
Double-check the measurements before cutting. An accurate cut ensures the pet door fits snugly. Marking carefully saves time and prevents mistakes.
Credit: albanycomicbookshow.com
Cutting The Screen
Cutting the security screen is a key step when installing a pet door. It requires care and precision to avoid damage. This part of the process needs the right tools and a steady hand. Following clear steps will help you make a clean cut. This section explains how to cut the screen safely and effectively.
Safety Precautions
Wear safety gloves to protect your hands from sharp edges. Use eye protection to avoid debris in your eyes. Work in a well-lit area for better visibility. Keep children and pets away from the workspace. Handle tools carefully to prevent accidents. Take your time and do not rush the cutting process.
Cutting Techniques
Measure the pet door opening accurately before cutting. Mark the outline clearly on the screen with a pencil. Use a sharp utility knife or tin snips for cutting. Cut slowly along the marked lines to ensure precision. Remove the cut screen piece gently to avoid tearing. Smooth any rough edges with sandpaper or a file.
Installing The Pet Door Frame
Installing the pet door frame is a key step in fitting a pet door into a security screen. The frame holds the door in place and ensures your pet can move safely between spaces. Careful alignment and secure fixing of the frame help keep the screen strong and stable. Follow these steps to install the frame correctly.
Aligning The Frame
Start by placing the pet door frame against the screen. Check that the frame lines up with the cut-out hole. The edges should fit snugly without gaps. Make sure the flap hangs freely and swings easily. Double-check the position before moving to the next step. Proper alignment prevents drafts and keeps your pet safe.
Securing The Frame
Use screws or clips to attach the frame firmly to the screen. Tighten each fastener evenly to avoid bending the frame. Avoid over-tightening, which can damage the screen or frame. Check that the frame stays flush against the screen. Give the flap a final test to confirm smooth movement. A secure frame keeps the pet door durable and functional.
Attaching The Flap And Seals
Attaching the flap and seals is a key step in installing a pet door into a security screen. This part ensures your pet can enter and exit freely while keeping your home secure and weather-tight. Proper attachment prevents drafts, keeps insects out, and helps maintain the screen’s strength.
Installing The Flap
Start by aligning the flap with the opening in the screen. Hold it firmly in place. Use screws or adhesive strips provided in the kit. Attach the flap frame evenly on all sides. Check that the flap swings smoothly. It should close tightly without gaps. Adjust the flap if needed for easy pet access.
Ensuring Proper Sealing
Seals protect against air, rain, and bugs. Place the weather seals around the flap edges. Press them firmly to stick well. Use extra seal strips if gaps appear. Check the flap’s movement after sealing. Make sure the flap still opens and closes freely. Proper seals keep your home comfortable and secure.
Testing And Adjustments
After installing the pet door into the security screen, testing and adjustments are essential. This step ensures the door works smoothly and fits well. Proper testing avoids problems later, such as the door sticking or not closing properly. Take your time to check every function carefully.
Checking Door Operation
Start by opening and closing the pet door several times. Watch how it moves. The flap should swing freely without catching or dragging. Check if the flap seals tightly when closed. The door must prevent drafts and insects from entering. Observe your pet using the door to see if it is easy to push open. Make sure the pet can move through without trouble.
Making Necessary Adjustments
If the door sticks or does not close fully, adjustments are needed. Tighten or loosen screws that hold the frame. Adjust the flap’s position by moving it slightly up or down. Use a level to keep the door straight. If the flap is too stiff, gently bend it to improve movement. Check the seal around the door and add weatherstripping if gaps appear. Repeat testing after each adjustment to ensure proper function.
Maintenance Tips
Maintaining your pet door in the security screen keeps it working well. Regular care helps avoid damage and keeps pets safe. Simple maintenance steps extend the door’s life and improve performance.
Cleaning The Pet Door
Clean the pet door often to remove dirt and dust. Use a soft cloth with mild soap and water. Avoid harsh cleaners that can damage the screen or door. Wipe both sides gently to keep the flap smooth. Dry the area completely before letting your pet use it again.
Inspecting For Wear
Check the pet door for signs of wear regularly. Look for cracks, tears, or loose parts. Make sure the flap opens and closes easily without sticking. Tighten any loose screws or fasteners to keep it secure. Replace damaged parts quickly to avoid bigger problems later.

Credit: www.spscreens.com.au
Frequently Asked Questions
How Do I Measure For A Pet Door On A Security Screen?
Measure your pet’s height and width at shoulder level. Mark the dimensions on the security screen accurately before cutting. Ensure the door size fits your pet comfortably for easy access.
What Tools Are Needed To Install A Pet Door?
You need a drill, screwdriver, measuring tape, marker, and a jigsaw or metal-cutting tool. Safety gloves and goggles are also recommended for protection during installation.
Can I Install A Pet Door Without Damaging The Security Screen?
Yes, with careful measuring and cutting, damage is minimal. Use precise tools and follow instructions to maintain screen strength and security after installation.
How Do I Secure The Pet Door To The Screen Frame?
Use screws provided with the pet door kit to attach it firmly. Ensure the frame is tight and sealed to prevent drafts or security issues.
Conclusion
Installing a pet door in a security screen is simple with the right steps. Measure carefully and choose the right door size for your pet. Use the proper tools to avoid damage and ensure a secure fit. Take your time to follow each step closely.
Your pet will enjoy easy outdoor access while your home stays safe. This small change makes life easier for both you and your pet. Try it yourself and see how convenient it can be.
