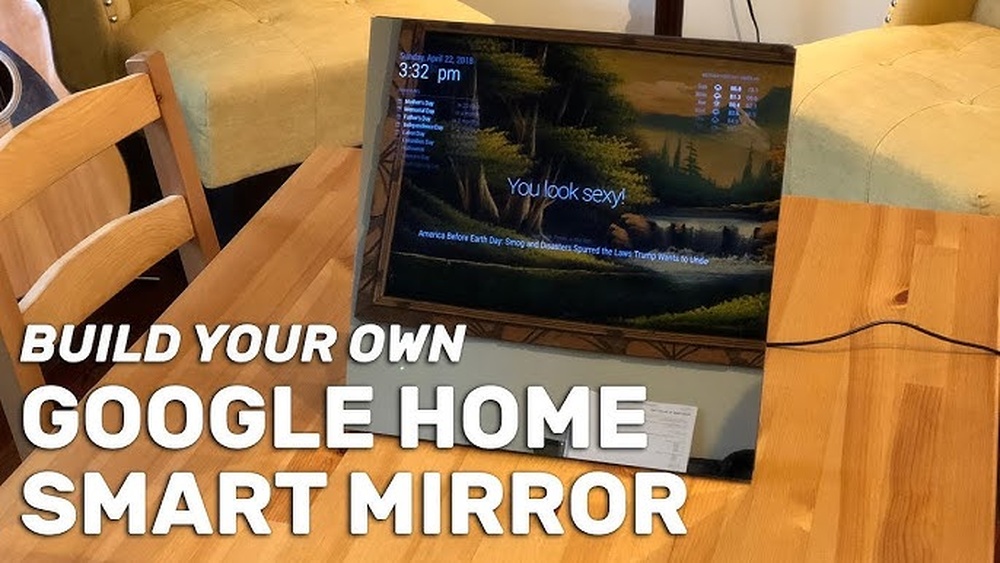

Imagine starting your day with a mirror that not only shows your reflection but also tells you the weather, your schedule, and even plays your favorite music. What if you could build this smart mirror yourself, powered by Google Home?
You’re about to discover how to create a stylish, functional device that fits perfectly into your daily routine. This guide will walk you through each simple step, making it easy for you to bring smart technology right into your home.
Ready to transform your mirror into a smart assistant? Let’s dive in and make it happen.

Credit: www.youtube.com
Choosing The Right Materials
Choosing the right materials is a key step in building your Google Home smart mirror. The quality and type of materials affect how well the mirror works and how long it lasts. Picking good parts helps the mirror look nice and function smoothly. Below are the main materials you need to consider.
Selecting The Mirror
Pick a two-way glass or acrylic mirror. This mirror lets light pass through from the screen behind. It shows your reflection and the display at the same time. Choose a size that fits your space. Thicker mirrors are stronger but heavier. Thin mirrors are easier to work with but can break easily.
Picking The Display Screen
Use an LCD or LED screen for clear images. A monitor or tablet screen works well. Check the screen size matches the mirror size. Smaller screens may not show all information clearly. Screens with higher brightness work better in bright rooms. Make sure the screen has HDMI or USB connections for easy setup.
Essential Electronics
You need a small computer like a Raspberry Pi to run the smart mirror software. It connects the screen and voice assistant. Add a power supply that fits your devices. Use a microphone to hear your voice commands. A speaker is needed to play responses. Keep all wires organized for safety and neatness.

Credit: www.instructables.com
Setting Up The Hardware
Setting up the hardware is the first step to create your Google Home Smart Mirror. It involves putting together the frame, attaching the display, and connecting all electronic parts. Careful assembly ensures the mirror works smoothly and looks neat.
Assembling The Frame
Start with a wooden or metal frame that fits your display size. Cut the materials to the right dimensions. Use screws or glue to join the pieces. Make sure the frame is strong and stable. Sand the edges for a smooth finish. Paint or stain the frame if you want a polished look.
Mounting The Display
Place the LCD or LED screen behind the two-way mirror. Secure the display firmly inside the frame. Use brackets or adhesive strips for support. Align the screen so it shows clearly through the mirror. Avoid blocking any part of the display. Double-check the screen’s position before moving on.
Wiring Components
Connect the display to the power supply and the main computer board. Use proper cables to link sensors and speakers. Organize wires neatly with cable ties or clips. Ensure all connections are tight and safe. Test the wiring to confirm everything works. Proper wiring prevents shorts and helps the mirror last longer.
Installing Software
Installing software is a key step in building your Google Home smart mirror. This process turns your mirror into a smart device. The software controls everything you see and hear. It helps the mirror respond to your voice and display useful information.
Choosing the right software makes the smart mirror work smoothly. You will set up voice commands and add apps. These steps create a personalized smart mirror experience.
Choosing The Operating System
Pick an operating system that supports Google Assistant and smart mirror apps. Raspberry Pi OS is a popular choice. It is light and easy to use. Other options include Ubuntu or Debian.
Make sure the OS you select can run voice assistant software. It should also allow easy installation of smart mirror apps. Download the OS image and flash it to your device’s SD card. Boot your device and follow the setup instructions.
Configuring Google Assistant
Google Assistant brings voice control to your smart mirror. Start by enabling the Google Assistant API in the Google Cloud Console. Create credentials and download the configuration file.
Install the Google Assistant SDK on your device. Use the configuration file to link your mirror to your Google account. Test the assistant by speaking simple commands. Adjust settings to improve response and accuracy.
Integrating Smart Mirror Apps
Smart mirror apps add useful features to your device. Weather, news, calendar, and reminders are common choices. Install these apps using the package manager or manual download.
Configure each app to show the information you want. Arrange the app layout on the mirror display. Test each app to ensure it works correctly. This step makes your smart mirror truly functional.

Credit: www.reddit.com
Customizing Features
Customizing your Google Home smart mirror lets you make it truly yours. You can change how it works and what it shows. This helps the mirror fit your daily needs perfectly. Small tweaks can make a big difference in your experience.
Adding Voice Commands
Voice commands let you control the mirror hands-free. You can ask it to show weather, news, or play music. Set up commands using Google Assistant tools. This adds convenience and saves time every day.
Personalizing Display Widgets
Choose which widgets appear on your mirror’s screen. You might want a clock, calendar, or news feed. Pick widgets that help with your routine. Change their size and position for easy viewing.
Setting Up Notifications
Notifications keep you updated without checking your phone. Set alerts for emails, messages, or reminders. Customize which notifications show up and when. This keeps you informed while staying hands-free.
Troubleshooting Common Issues
Building your own Google Home smart mirror is exciting. Yet, some common issues might appear during setup or daily use. Troubleshooting these problems helps keep your smart mirror running smoothly. This section covers simple fixes for frequent issues.
Connectivity Problems
Smart mirrors need a stable internet connection to work well. Check your Wi-Fi signal strength near the mirror. Move your router closer if the signal is weak. Restart your router and smart mirror to refresh the connection. Make sure your device firmware is up to date. Use a wired connection if Wi-Fi is unreliable.
Display Calibration
A clear display makes your smart mirror easy to read. Adjust the brightness to suit your room’s light. Use the mirror’s settings menu to change screen contrast. Clean the mirror surface to avoid smudges or dust. Check the screen resolution matches your device’s specifications. Recalibrate if the text or images look blurry.
Voice Recognition Tips
Voice control is key for hands-free use. Speak clearly and at a moderate pace. Reduce background noise by closing windows or doors. Place the microphone away from loud appliances. Train the voice assistant with your voice if possible. Restart the device if it does not respond well to commands.
Enhancing Your Smart Mirror
Enhancing your smart mirror takes it beyond a simple display. It adds comfort, convenience, and style to your daily routine. Small changes create a big impact. Sensors, smart home links, and design choices help your mirror fit your needs perfectly.
Adding Sensors
Sensors make your smart mirror more interactive. Motion sensors turn the display on when you approach. Light sensors adjust brightness based on room lighting. Temperature sensors show the current weather or room temperature. These features save energy and improve usability.
Smart Home Integration
Connecting your smart mirror to your home system makes life easier. Link it to devices like lights, thermostats, and speakers. Control these gadgets through the mirror’s screen or voice commands. It keeps your home connected and responsive to your needs.
Design And Aesthetic Tips
Design shapes how your smart mirror fits into your space. Choose a frame that matches your room style. Use clean lines and neutral colors for a modern look. Keep cables hidden for a tidy appearance. Soft backlighting adds a cozy feel without glare.
Frequently Asked Questions
What Materials Do I Need For A Google Home Smart Mirror?
You need a two-way mirror, a display monitor, a Raspberry Pi, and Google Home device. Additional materials include a frame, power supply, and cables for connectivity.
How Do I Connect Google Home To The Smart Mirror?
Connect the Google Home device to the same Wi-Fi network as the Raspberry Pi. Use the Google Assistant API to integrate voice commands with the mirror’s display.
Can I Customize The Smart Mirror Interface?
Yes, you can customize the interface using various open-source software like MagicMirror². It allows widgets for weather, news, calendar, and Google Assistant integration.
Is Coding Experience Required To Build This Smart Mirror?
Basic coding knowledge helps but is not mandatory. Many tutorials and pre-built software modules make the setup easier for beginners.
Conclusion
Building your own Google Home smart mirror is fun and rewarding. It lets you add useful features to your home. You control what it shows and how it works. Start with simple steps and keep learning as you go. This project helps you understand technology better.
Plus, it saves money compared to buying ready-made versions. Enjoy customizing your smart mirror to fit your style. Keep experimenting and improving over time. Your smart mirror will make daily routines easier and more fun. Give it a try and see the results yourself.