Looking for a unique way to add charm and function to your bathroom or entryway? Making your own antler towel rack is easier than you think—and it gives your space a rustic, natural touch that stands out.
Imagine having a stylish rack that not only holds your towels but also sparks conversations. In this guide, you’ll discover simple steps to create your own antler towel rack, even if you’re new to DIY projects. Ready to transform your home with a one-of-a-kind piece you’ll be proud of?
Let’s get started!
Choosing The Right Antlers
Choosing the right antlers is the first step to making a beautiful towel rack. Antlers come in many shapes and sizes. Picking the right ones affects the look and strength of your rack. Good antlers fit your space and style.
Types Of Antlers To Use
Deer antlers are popular for towel racks. They have smooth curves and many branches. Elk antlers are larger and strong. They give a bold look. Moose antlers are wide and flat. They create a unique style. Choose antlers that suit your room size and design.
Sourcing Ethical Antlers
Use shed antlers found naturally outside. This avoids harm to animals. Many hunters share antlers after the season. Some stores sell antlers from ethical sources. Avoid buying antlers taken from living animals. Ethical sourcing protects wildlife and nature.
Preparing Antlers For Crafting
Clean antlers with warm water and soap. Remove dirt and debris carefully. Dry them completely to avoid mold. Sand rough spots for a smooth finish. You can apply a clear coat for shine. Proper preparation makes your rack safe and nice.

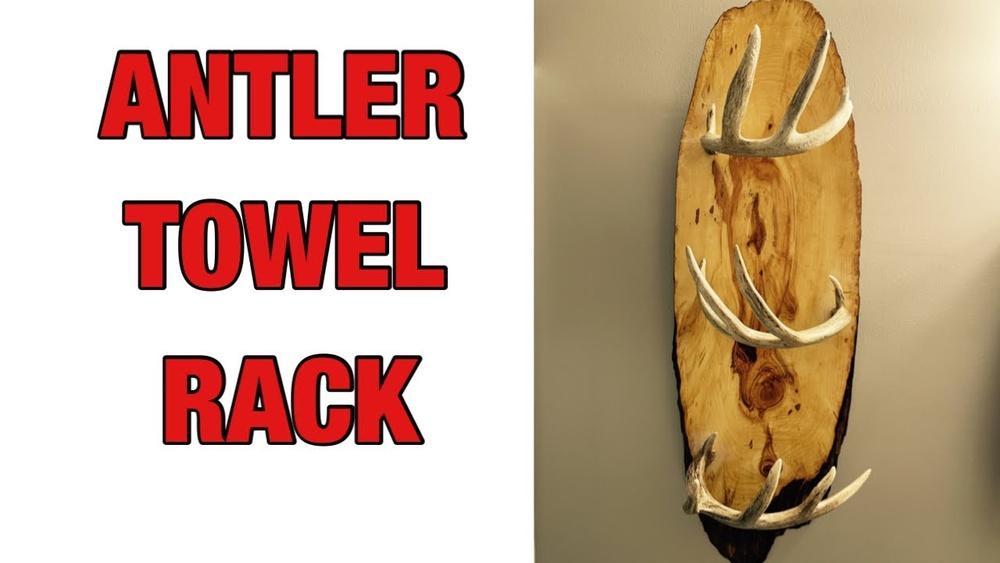
Credit: www.youtube.com
Gathering Materials And Tools
Gathering the right materials and tools is the first step to make an antler towel rack. Having everything ready saves time and helps the project go smoothly. It also ensures safety and accuracy in your work.
This section lists all you need. Follow it carefully to prepare well before starting the build.
Essential Tools Checklist
- Power drill with drill bits
- Screwdriver set
- Measuring tape
- Level tool
- Pencil for marking
- Safety goggles
- Work gloves
- Sandpaper or sanding block
Additional Materials Needed
- Real or faux antlers
- Wooden board or plank
- Mounting screws and anchors
- Wood stain or paint (optional)
- Clear sealant for finishing
- Wall hooks or brackets
Safety Precautions
Wear safety goggles to protect your eyes from dust and debris. Gloves prevent cuts and splinters. Work in a well-ventilated area, especially if using paint or sealant. Keep tools away from children. Handle antlers carefully to avoid sharp points. Double-check measurements before drilling. Follow all instructions for your tools.
Designing Your Towel Rack
Designing your antler towel rack is the first step to creating a unique, rustic piece. It sets the tone for your whole project and helps you visualize the final look. A good design balances function and style, making sure the rack is both sturdy and attractive.
Start by thinking about where you will place the rack. Consider the size of your space and how many towels you want to hang. This planning phase will guide your choices and make the building process smoother.
Planning The Layout
Sketch the layout on paper or use a simple drawing app. Arrange the antlers to create a natural, balanced look. Think about how the antlers will hold towels without slipping. Space them evenly to avoid overcrowding.
Decide if you want a horizontal or vertical rack. Horizontal racks hold more towels, while vertical ones save wall space. Plan the distance between each antler to fit your towel sizes.
Measuring For Balance
Measure the length and width of your chosen antlers. Use a ruler or tape measure for accuracy. Balance is key. Ensure the rack looks even and stable on the wall.
Check the weight distribution too. Heavy antlers need strong support. Mark the points where screws or hooks will go. This helps keep the rack secure and reliable.
Customizing Rustic Elements
Add personal touches to make the rack truly yours. Sand the antlers to smooth rough edges. You can paint or stain them for a vintage or natural look. Attach small metal hooks or leather straps for extra flair.
Use natural wood for the base to enhance the rustic feel. Choose wood with interesting grain or knots. This adds character and charm to your towel rack.
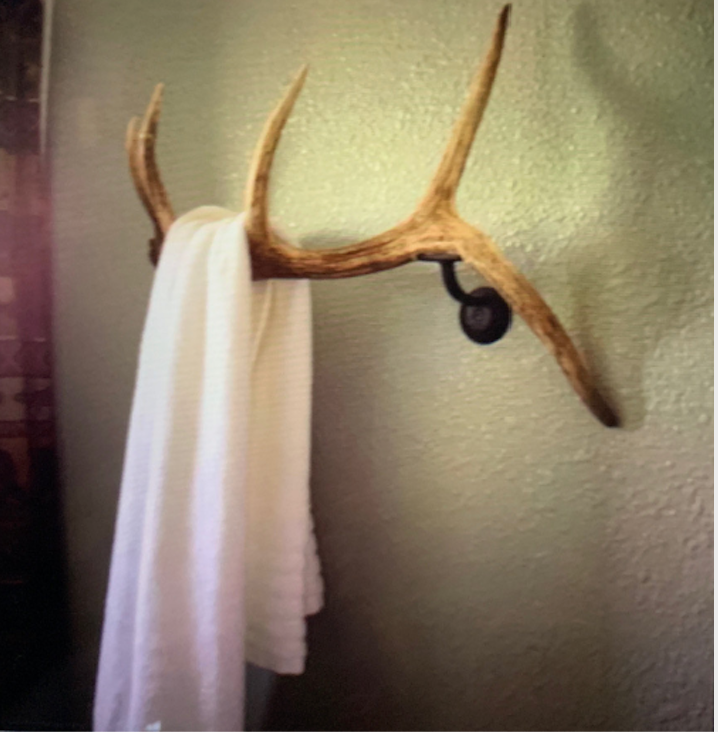
Credit: www.sietesetenta.com.ar
Assembling The Rack
Assembling the antler towel rack is a fun and rewarding step. It brings all parts together to create a unique piece. This process requires care and patience to ensure a sturdy result. Follow these steps for a smooth assembly.
Attaching Antlers To The Base
Start by placing the antlers on the base. Arrange them so they look balanced and natural. Mark the spots where each antler will sit. Drill small pilot holes to prevent splitting the wood. Use wood glue on the base for extra hold. Press the antlers firmly in place and let the glue dry.
Securing With Hardware
Use screws or bolts to secure the antlers to the base. Choose hardware that fits well and will hold tight. Insert screws through the pilot holes carefully. Tighten them just enough to avoid cracking the antlers. Check that all antlers are firmly attached before moving on.
Ensuring Stability
Check the rack’s stability by placing it on a flat surface. It should not wobble or tip easily. Add felt pads under the base to protect floors and improve grip. If needed, reinforce joints with extra screws or brackets. A stable rack will hold towels safely and last longer.
Finishing Touches
Finishing touches give your antler towel rack a polished, durable look. These steps protect the wood and enhance its natural beauty. Small details make a big difference. Follow these tips to complete your project with care.
Sanding And Smoothing
Start by sanding the antlers and wood base. Use medium-grit sandpaper to remove rough spots. Then, switch to fine-grit for a smooth finish. Sand all surfaces evenly. This prevents splinters and prepares the wood for coating. Wipe away dust with a clean cloth.
Applying Protective Coating
Choose a clear varnish or polyurethane to protect the wood. Apply thin, even coats with a brush. Let each coat dry completely before adding another. This shield guards against moisture and wear. It also brings out the wood’s natural color and grain.
Adding Decorative Accents
Enhance the rack with simple decorations. Wrap leather strips around the antlers for a rustic look. Attach small metal hooks for extra towel hanging space. Use natural twine to tie decorative knots. Keep accents minimal to highlight the antlers’ charm.
Mounting The Towel Rack
Mounting the antler towel rack is a key step to complete your project. Proper placement and secure attachment ensure the rack is both functional and safe. Follow these tips to mount it correctly and keep it sturdy for daily use.
Choosing The Perfect Spot
Select a spot near your shower or sink for easy towel access. The wall should be flat and strong enough to hold the rack’s weight. Avoid areas with high moisture or direct sunlight to protect the antlers. Consider the height so everyone can reach the towels comfortably.
Wall-mounting Techniques
Use a stud finder to locate wall studs for strong support. Mark the drill points on the wall matching the rack’s mounting holes. Drill pilot holes carefully to avoid cracking the wall. Use screws and wall anchors suitable for your wall type. Attach the rack tightly, but do not over-tighten and damage the antlers.
Maintenance Tips
Check the screws regularly to keep the rack secure. Wipe the antlers with a dry cloth to remove dust. Avoid using water or harsh cleaners on the antlers. Tighten any loose parts immediately to prevent damage. Keep the rack dry to maintain its natural look and strength.
Troubleshooting Common Issues
Building an antler towel rack can be fun and rewarding. Some problems may come up during or after the build. Knowing how to fix these common issues helps keep your rack strong and useful. This section covers simple solutions for common troubles.
Fixing Loose Antlers
Loose antlers can make your rack unstable. Tighten screws or bolts holding the antlers. Use wood glue for extra hold if the antlers attach to wood. Clamp the parts until the glue dries. Check connections regularly to avoid wobbling.
Dealing With Uneven Surfaces
Uneven surfaces cause your rack to tilt or wobble. Use a level tool to check flatness. Sand or trim the base to make it even. Add small rubber pads under the rack’s feet for balance. This prevents slipping and protects floors.
Enhancing Durability
Durability keeps your towel rack lasting longer. Apply a clear sealant to protect antlers from moisture. Use screws made of stainless steel to stop rusting. Avoid placing the rack in direct sunlight. Clean it gently with a damp cloth to keep it looking new.

Credit: sloneczne-elfy.pl
Frequently Asked Questions
What Materials Are Needed For An Antler Towel Rack?
You need antlers, a wooden board, screws, sandpaper, and wall anchors. Choose sturdy antlers and quality wood for durability. These materials ensure a rustic, functional towel rack.
How Do You Attach Antlers To The Wooden Board?
Drill pilot holes in both the antlers and board. Use screws to securely fasten the antlers. Ensure they are evenly spaced and stable for holding towels safely.
Can I Use Faux Antlers For This Towel Rack?
Yes, faux antlers work well for a lightweight, animal-friendly option. They are easier to find and often less expensive. Ensure they are sturdy enough to hold towels.
What Tools Are Required To Build The Antler Towel Rack?
You need a drill, screwdriver, measuring tape, and sandpaper. These tools help with assembly and finishing touches. Proper tools ensure a safe and professional-looking rack.
Conclusion
Creating an antler towel rack adds charm to any room. It’s a fun project anyone can try at home. Choose sturdy antlers and simple tools for best results. Personalize your rack to fit your style and space. This DIY project saves money and looks unique.
Enjoy the pride that comes with making something yourself. Give your bathroom a rustic, natural touch today.