Are you looking for a simple way to keep your pet safe and comfortable? Making your own pet kennel gate could be the perfect solution.
Not only will it give you control over your pet’s space, but it can also save you money and add a personal touch to your home. You’ll discover easy steps to build a sturdy and stylish kennel gate that fits your needs.
Keep reading, and you’ll soon have a gate that both you and your pet will love.
Choosing Materials
Choosing the right materials is key to building strong pet kennel gates. The materials affect the gate’s durability, safety, and look. Select materials that hold up well outdoors and keep your pet safe. Consider how much time you want to spend on maintenance too.
Types Of Wood
Wood is a popular choice for pet kennel gates. Cedar and redwood resist rot and insects. Pine is cheaper but needs sealing to last longer. Choose smooth wood to avoid splinters. Wooden gates feel warm and natural. They also can be painted or stained to match your space.
Metal Options
Metal gates offer strong, long-lasting protection. Steel and aluminum are common metals for gates. Steel is very sturdy but may rust without paint. Aluminum is lighter and resists rust well. Metal gates often have a modern look. They require less maintenance than wood but can be more expensive.
Hardware Essentials
Good hardware keeps your gate secure and easy to use. Look for rust-proof hinges and latches. Stainless steel is a strong, weatherproof choice. Choose latches that your pet cannot open. Smooth hinges help gates swing easily. Proper hardware extends the life of your gate.
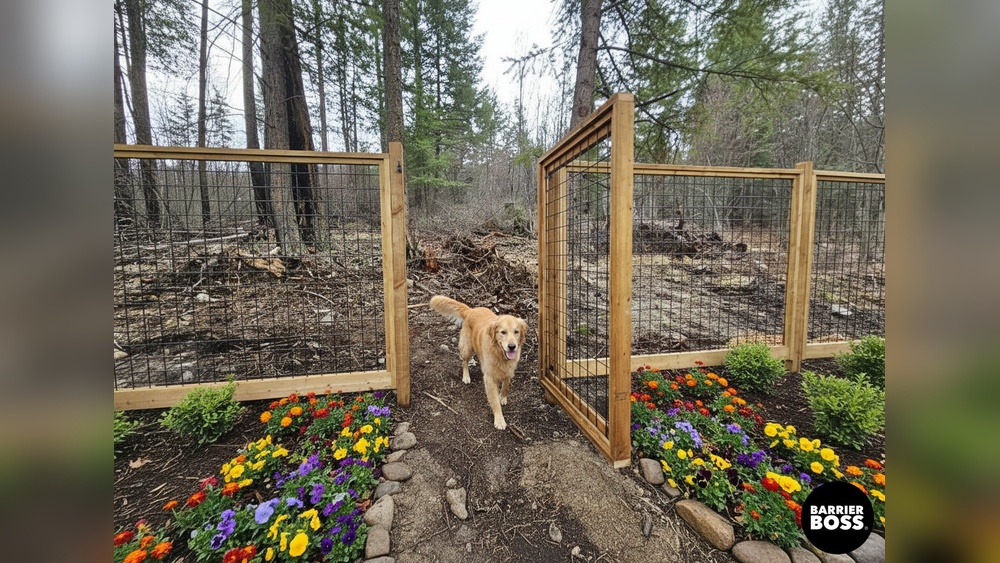
Credit: myfuse.education
Measuring And Planning
Measuring and planning are the first steps in making pet kennel gates. These steps help ensure the gate fits well and works safely. Careful measurement avoids mistakes and saves time. Planning the design lets you create a strong, functional gate.
Determining Gate Size
Start by measuring the width of the kennel opening. Measure from one side to the other across the top, middle, and bottom. Use the smallest measurement to ensure the gate fits. Next, measure the height from the ground to the top of the opening. Add a little extra height for clearance. Make sure the gate is wide and tall enough for your pet to pass easily.
Sketching Your Design
Draw a simple sketch of the gate on paper. Mark the measured width and height clearly. Plan where the hinges and latch will go. Think about the materials you will use, such as wood or metal. A clear sketch helps guide your work and avoids errors.
Safety Considerations
Check for gaps where your pet could get stuck. The gate should be strong enough to hold your pet safely. Avoid sharp edges or points that might hurt your pet. Use pet-safe paint or finish to prevent harm. Safety is key to a good kennel gate.
Cutting And Preparing Components
Cutting and preparing components is an important step in making pet kennel gates. This stage ensures that all parts fit well and are safe for pets. Proper preparation makes assembly easier and results in a strong, durable gate.
Choosing the right materials and cutting them accurately helps create a neat and functional gate. Attention to detail during this phase prevents problems later in the building process.
Cutting Wood Or Metal
Start by measuring each piece carefully. Use a saw suitable for the material. For wood, a handsaw or power saw works well. For metal, use a hacksaw or metal cutting saw. Cut slowly and follow the marked lines. Keep cuts straight for a better fit.
Sanding And Smoothing Edges
After cutting, sand all edges. Use sandpaper or a sanding block. This step removes rough spots and splinters. Smooth edges prevent injuries to pets and people. Take your time and check each piece thoroughly.
Pre-drilling Holes
Mark holes before drilling to avoid mistakes. Use a drill bit smaller than the screw size. Pre-drilling helps prevent wood or metal from splitting. It also makes screwing easier and faster. Align holes carefully for perfect assembly.
Assembling The Frame
Assembling the frame is a key step in making pet kennel gates. It sets the base for the entire gate structure. A strong frame keeps the gate stable and safe for pets. Careful assembly ensures durability and easy use. Follow clear steps to join parts, attach hinges, and reinforce corners. This creates a sturdy frame that lasts.
Joining Techniques
Start by choosing the right joining method. Screws and nails work well for wood frames. Use a drill to make pilot holes. This prevents wood from splitting. For metal frames, welding or bolts provide strong joins. Apply wood glue for extra hold with wooden parts. Keep joints tight and flush for a clean fit. Check alignment often to keep the frame square.
Using Hinges
Select hinges that suit your gate size and weight. Attach hinges to one side of the frame first. Use screws that fit the hinge holes well. Place hinges evenly to balance the gate’s swing. Make sure the hinge pins are secure but allow smooth movement. Test the gate by opening and closing it a few times. Adjust screws if the gate feels loose or stiff.
Reinforcing Corners
Strong corners prevent the frame from wobbling. Use metal corner brackets or wooden braces inside each corner. Secure brackets with screws for extra strength. Check corners for any gaps or weak spots. Add extra screws if needed. Reinforced corners improve the gate’s stability and safety. This step helps the gate hold up to pet activity and weather.
Adding Latches And Locks
Adding latches and locks to your pet kennel gate is very important. They keep your pet safe and stop them from escaping. Good latches also make it easy for you to open and close the gate without trouble. Choose the right latch to fit your pet’s size and strength. This step helps make your kennel strong and secure.
Latch Types
Slide bolt latches are simple and strong. You move a metal bar to lock or unlock the gate. Spring-loaded latches close automatically and are easy to use. They keep the gate closed tightly. Padlocks offer extra security but need a key or combination. Magnetic latches work quietly but suit smaller pets better.
Placement Tips
Place the latch at your waist height for easy reach. Make sure it is out of your pet’s reach to stop them from opening it. Attach the latch on a sturdy part of the gate frame. Check that the latch works smoothly before final fixing. Position the lock so it does not block the gate’s movement.
Ensuring Security
Test the latch several times after installing it. The gate should close firmly and not open with a push. Use screws and bolts that hold well and do not loosen. Check the latch often for wear or damage. Replace any weak or broken parts quickly to keep your pet safe.
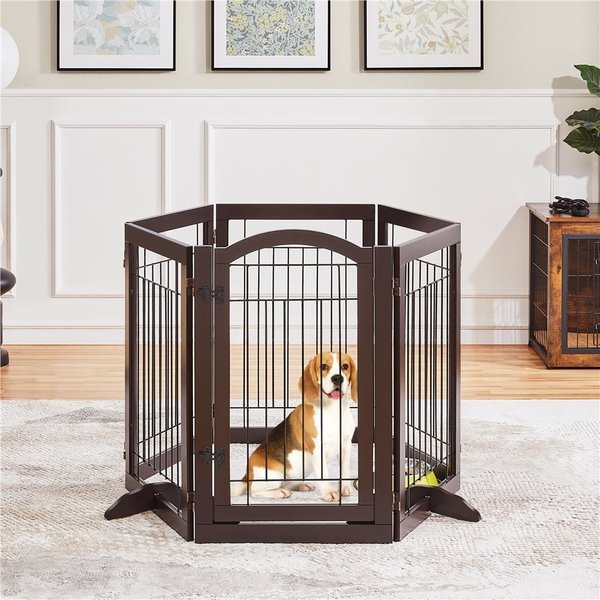
Credit: maiamidwifery.com
Finishing Touches
Finishing touches give your pet kennel gate a polished, long-lasting look. These steps protect the wood and keep the gate functional. Simple efforts can extend the life of your gate. Focus on painting, sealing, weatherproofing, and regular upkeep.
Painting And Sealing
Choose a paint made for outdoor wood. It stops water and sun damage. Apply two coats for strong protection. Let each coat dry fully. Use a clear sealant after painting. It adds extra defense against scratches and moisture.
Weatherproofing
Use weatherproof materials around hinges and joints. Rubber strips or caulk prevent water from entering. Check the gate edges and bottom for gaps. Fill them to keep rain and snow out. This prevents wood warping and rust on metal parts.
Maintenance Tips
Inspect the gate every few months. Look for chipped paint, loose screws, or cracks. Tighten hardware and touch up paint as needed. Clean the gate with mild soap and water. Avoid harsh chemicals that damage wood or finish.
Installing The Gate
Installing the gate on your pet kennel is an important step. It ensures safety and easy access for your pet. Proper installation helps the gate work well and last longer. Follow simple steps to mount, align, and test the gate correctly.
Mounting On Kennel
First, choose the right spot for the gate on the kennel frame. Use strong hinges to attach the gate securely. Make sure the screws are tight. The gate should open and close smoothly without wobbling.
Adjusting Alignment
Check if the gate lines up with the kennel walls. Adjust the hinges to fix any gaps or uneven edges. The gate should fit snugly to prevent pets from slipping through. Tighten all screws after adjustment.
Testing Functionality
Open and close the gate several times to test its movement. Check the latch to ensure it locks properly. Make sure the gate stays closed when pushed. This step keeps your pet safe inside the kennel.

Credit: barrierbossusa.com
Frequently Asked Questions
What Materials Are Best For Pet Kennel Gates?
Wood and metal are top materials for pet kennel gates. Wood offers durability and a natural look. Metal provides strength and easy maintenance. Both materials ensure safety and comfort for pets in kennels.
How Do I Measure For A Pet Kennel Gate?
Measure the width of the kennel opening first. Then, measure the height from floor to top frame. Add a few extra inches for fitting ease. Accurate measurements ensure a secure and well-fitting gate.
Can I Build A Pet Kennel Gate Without Special Tools?
Yes, basic tools like a saw, drill, and screwdriver are enough. You don’t need specialized equipment. Simple hand tools can help you cut, assemble, and secure the gate properly.
How Do I Ensure My Pet Gate Is Safe?
Use smooth edges and secure latches to prevent injury. Check for gaps that pets might squeeze through. Regularly inspect the gate for wear and stability. Safety is crucial to protect your pet.
Conclusion
Making pet kennel gates can be simple and rewarding. Use strong materials to keep pets safe. Measure carefully to fit the space well. Secure hinges and latches help the gate stay closed. Personal touches add charm and function. With patience and care, your gate will last long.
Enjoy the peace of mind it brings for your pet. A well-made gate makes both pets and owners happy. Try building one yourself and see the difference.