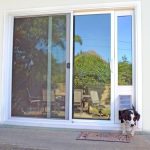
If you need to take apart your Carlson Pet Door, you might wonder where to start or how to avoid damaging it. You’re in the right place.
This guide will walk you through each simple step, helping you disassemble your pet door quickly and safely. Whether you’re fixing, cleaning, or replacing parts, knowing exactly what to do will save you time and frustration. Keep reading, and you’ll gain the confidence to handle your Carlson Pet Door like a pro.

Credit: carlsonpetproducts.com
Tools Needed
Before starting to disassemble your Carlson pet door, gather the right tools. Having proper tools makes the process faster and easier. It also helps avoid damage to the door or frame.
Most Carlson pet doors are designed for simple installation and removal. You need only basic tools for disassembly. These tools are common and easy to find in any home toolbox.
Phillips Screwdriver
A Phillips screwdriver is essential for removing screws. Carlson pet doors usually have Phillips-head screws. Use a screwdriver that fits the screw head well. This prevents stripping the screws.
Flathead Screwdriver
A flathead screwdriver helps to pry apart parts gently. It can also assist in removing snap-in panels or covers. Use it carefully to avoid scratching the door.
Utility Knife
A utility knife is useful for cutting any sealant or caulking. Some pet doors have silicone or adhesive around the edges. Cut through these materials to separate the door from the frame.
Putty Knife
A putty knife helps to loosen glued parts or lift panels. Its flat, thin edge slides under trim or seals easily. This tool reduces the chance of damage during removal.
Measuring Tape
Measuring tape is handy for noting dimensions before disassembly. It helps when you plan to reinstall or replace the door. Measure the height, width, and thickness of the pet door.
Credit: carlsonpetproducts.com
Prepare The Door
Preparing the door is the first step to disassemble the Carlson pet door safely. It helps protect the door and makes the process smoother.
Clear the area around the door. Remove any rugs or obstacles that block your work space. This gives you enough room to move freely.
Gather all the tools you need. Common tools include a screwdriver, a utility knife, and pliers. Having tools ready saves time.
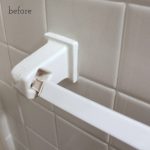
Remove The Pet Door Flap
Start by taking off the pet door flap. This part swings open and closed for your pet. Carefully unscrew or unclip it from the frame. Set it aside in a safe place.
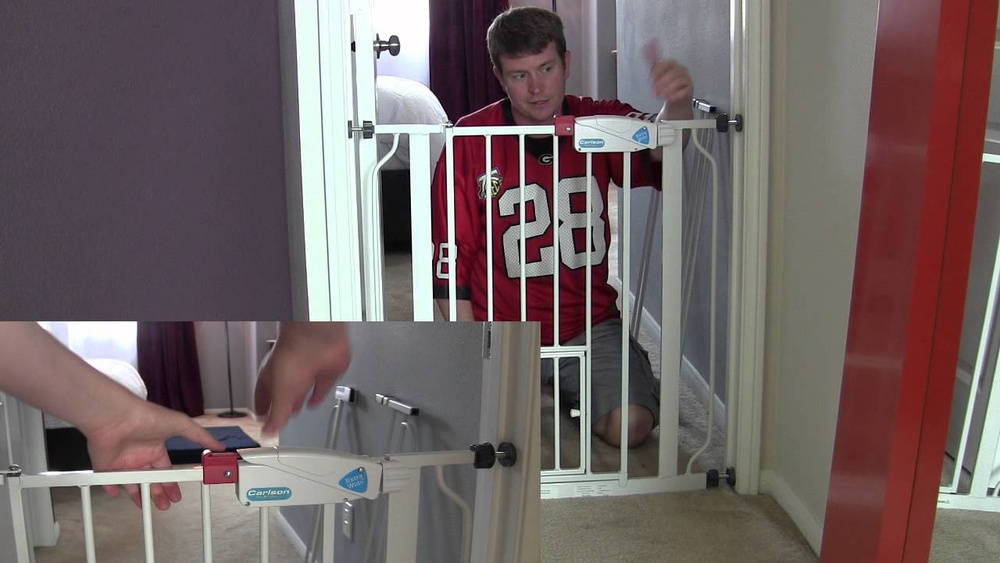
Unscrew The Frame
Look for screws along the pet door frame. Use the screwdriver to loosen and remove them. Keep the screws together to avoid losing any. The frame will become loose after this step.
Protect The Door Surface
Use painter’s tape around the pet door edges. This prevents scratches or damage during removal. The tape acts as a cushion between tools and the door.
Remove The Flap
Removing the flap of a Carlson pet door is a simple step in disassembly. The flap is the part your pet pushes open to go outside. Taking it off helps with cleaning or replacement.
Follow these clear steps to remove the flap safely and quickly. Use basic tools and a bit of care to avoid damage.
Locate The Flap Frame
First, find the flap frame. It holds the flap in place on the door. Look for the plastic or metal edges around the flap.
Unscrew The Frame Screws
Use a screwdriver to remove the screws on the flap frame. Turn each screw counterclockwise. Keep the screws safe for reassembly.
Gently Pull Out The Flap
After unscrewing, gently pull the flap away from the frame. The flap should come out easily. Avoid forcing it to prevent damage.
Check For Magnets Or Fasteners
Some Carlson pet doors use magnets or clips to hold the flap. Carefully unhook these before fully removing the flap. This step ensures smooth removal.
Detach The Frame
Detaching the frame is the first key step in disassembling your Carlson pet door. This process helps you access the inner parts and clean or repair them. Take your time to avoid damage to the frame or door.
Keep tools ready and work on a flat surface. Clear space makes the task easier and safer. Now, let’s break down the frame removal into simple actions.
Unscrew The Frame
Start by locating all screws holding the frame. These are usually at the corners and edges. Use a screwdriver that fits well to avoid stripping the screws. Turn each screw counterclockwise to loosen it. Keep all screws in a small container so they do not get lost. Once all screws are removed, gently try to lift the frame away from the door.
Separate Frame Parts
The frame often comes apart in sections. Carefully pull each part apart without forcing. If the parts feel stuck, check for hidden clips or extra screws. Separate the outer frame from the inner frame slowly. This makes cleaning or repairs much easier. Lay out all frame parts on your work surface to keep track of them.
Remove The Locking Mechanism
Removing the locking mechanism is an important step in disassembling a Carlson pet door. This part keeps the door secure and controls your pet’s access. Taking it out carefully helps avoid damage and makes repairs easier.
Follow simple steps to remove the lock safely. Use the right tools and work slowly. This ensures the door stays in good condition for future use.
Locate The Locking Mechanism
First, find the lock on your Carlson pet door. It usually sits at the bottom or side of the door frame. Check both sides to spot any screws or clips holding it in place.
Unscrew The Lock
Use a screwdriver that fits the screws perfectly. Turn the screws counterclockwise to loosen them. Keep the screws safe for reassembly later. Avoid forcing the screws to prevent stripping them.
Detach The Lock From The Frame
After removing the screws, gently pull the lock away from the frame. Wiggle it slightly if it feels stuck. Do not use too much force to avoid breaking the lock or frame.
Remove Locking Rods Or Pins
Some Carlson pet doors have rods or pins inside the lock. Slide these out carefully. Use pliers if needed, but handle the parts gently to prevent bending or damage.
Clean And Inspect Parts
Cleaning and inspecting the parts of your Carlson pet door is a key step after disassembly. It keeps the door working well and safe for your pet. Dirt, dust, and damage can stop the door from closing or opening smoothly. This section guides you through cleaning and checking each part carefully.
Cleaning The Frame And Flap
Start by wiping the frame with a soft cloth. Use mild soap and water to remove dirt. Avoid harsh chemicals that can damage the material. Clean the flap gently to keep it flexible. Check the edges for any stuck debris that may block movement.
Inspecting The Locking Mechanism
Look closely at the locking parts. Make sure they move freely without sticking. Check for rust or wear that can cause failure. Clean small areas with a brush to remove dust. Lubricate lightly if the lock feels stiff.
Checking The Screws And Hinges
Examine all screws and hinges for tightness. Loose screws can cause the door to wobble. Replace any rusty or stripped screws. Hinges should turn smoothly without noise. Clean around hinges to avoid build-up that hinders motion.
Assessing The Weather Stripping
Weather stripping keeps cold air out and pets comfortable. Look for cracks, tears, or worn spots. Replace damaged strips to maintain a tight seal. Clean the strips with a damp cloth to keep them soft and effective.
Tips For Reassembly
Reassembling your Carlson pet door carefully helps it work smoothly again. Taking time and following clear steps avoids damage and fits all parts right. Keep tools and parts close to save time. Stay patient and check each step to ensure correct assembly.
Keep Track Of All Parts
Organize screws and small pieces in a container. This stops losing anything important. Lay parts out in the order you removed them. It makes putting the door back easier and faster.
Follow The Reverse Order
Put parts back in the opposite order of removal. Start with the frame, then add the flap and other pieces. This method helps avoid mistakes and fits all parts properly.
Use The Right Tools
Use the same tools you used to disassemble the door. A screwdriver and pliers work well for most parts. Using correct tools prevents damage and speeds up the process.
Check The Flap Movement
After reassembly, test the flap to ensure it swings smoothly. Adjust screws or alignment if it sticks or feels tight. A well-moving flap keeps your pet happy and safe.

Credit: www.youtube.com
Frequently Asked Questions
How Do I Remove The Carlson Pet Door Flap?
To remove the flap, open it fully and gently lift it from the hinges. Detach the flap carefully to avoid damage. This allows for easy cleaning or replacement.
What Tools Are Needed To Disassemble Carlson Pet Door?
You typically need a screwdriver, usually a Phillips head, to remove screws. A utility knife may help to cut sealant or caulking if necessary.
Can I Disassemble Carlson Pet Door Without Damaging It?
Yes, by carefully unscrewing and gently detaching parts, you avoid damage. Follow instructions closely and handle components with care.
How Long Does Disassembling A Carlson Pet Door Take?
Disassembly usually takes about 10 to 20 minutes. Time varies based on experience and door model.
Conclusion
Disassembling a Carlson pet door is simple with the right steps. Take your time and follow each part carefully. Keep track of screws and pieces to avoid losing them. Cleaning or fixing the door becomes easier once it is taken apart.
You can now repair or replace any worn parts. This guide helps you handle the task without stress. Enjoy a well-maintained pet door that works smoothly again.